
Vue 登录/登出以及JWT认证
1. 后端代码概览
server/router/index.js
请求
router.get('/getUserInfo', function (req, res, next) { // 登录请求

  res.send('success')

})

router.get('/authorization', (req, res, next) => { //  获取验证请求

  const userName = req.userName // 从app.js中拿到userName

  res.send({

    code: 200,

    mes: 'success',

    data: {

      token: jwt.sign({

        name: userName

      }, 'abcd', { // 重新生成一个新的Token, 返回给前端

        expiresIn: '1d'

      }),

      rules: {

        page: {

          home: true,

          home_index: true,

          about: true,

          argu: true,

          count_to: true,

          menu_page: true,

          upload: true,

          form: true,

          folder_tree: true,

          table_page: true,

          render_page: true,

          split_pane: true,

          parent: true,

          child: true,

          named_view: true,

          store: true,

          main: true

        },

        component: {

          edit_button: true,

          publish_button: false

        }

      }

    }

  })

})
server/router/index.js
登录接口
const getPasswordByName = (name) => {

  return { password: '123' }

}

router.post('/login', function (req, res, next) {

  const { userName, password } = req.body

  if (userName) {

    const userInfo = password ? getPasswordByName(userName) : ''

    if (!userInfo || !password || userInfo.password !== password) {

      res.status(401).send({

        code: 401,

        mes: 'user name or password is wrong',

        data: {}

      })

    } else {

      res.send({

        code: 200,

        mes: 'success',

        data: {

          token: jwt.sign({ name: userName }, 'abcd', { // jwt--jsonwebtoken第三方库生成Token

            expiresIn: '1d' // 过期时间 1day/H 60 ; 一天/小时 60秒

          })

        }

      })

    }

  } else {

    res.status(401).send({

      code: 401,

      mes: 'user name is empty',

      data: {}

    })

  }

})
server/views/app.js
Token校验
const whiteListUrl = { // 白名单 不需要做校验的接口

  get: [],

  post: [

    '/index/login'

  ]

}

const hasOneOf = (str, arr) => {

  return arr.some(item => item.includes(str))

}

app.all('*', (req, res, next) => {

  let method = req.method.toLowerCase() // 获取当前请求方式

  let path = req.path // 获取当前请求路径

  if (whiteListUrl[method] && hasOneOf(path, whiteListUrl[method])) next() // 过滤 有些接口不需要做Token校验

  else { // 需要校验的接口

    const token = req.headers.authorization // 取到请求头中Token

    if (!token) res.status(401).send('there is no token, please login')

    else {

      jwt.verify(token, 'abcd', (error, decode) => { // jsonwebtoken第三方库校验Token

        if (error) {

          res.send({

            code: 401,

            mes: 'token error',

            data: {}

          })

        } else {

          req.userName = decode.name

          next()

        }

      })

    }

  }

})
2. 登录以及Token处理
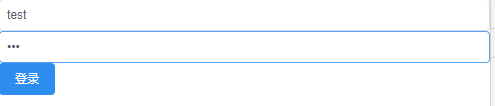
npm i js-cookie md5 -Ssrc/views/login.vue
<template>

  <div>

    <Input v-model="userName" placeholder="账号"></Input>

    <Input v-model="password" type="password" placeholder="密码"></Input>

    <Button type="primary" @click="handleSubmit">登录</Button>

  </div>

</template>

<script>

import { mapActions } from 'vuex'

export default {

  name: 'login_page',

  data () {

    return {

      userName: '',

      password: ''

    }

  },

  methods: {

    ...mapActions(['login']),

    handleSubmit () {

      this.login({

        userName: this.userName,

        password: this.password

      })

    }

  }

}

</script>
src/api/user.js
export const login = ({ userName, password }) => {

  return axios.request({

    url: '/index/login',

    method: 'post',

    data: {

      userName,

      password

    }

  })

}

export const authorization = () => {

  return axios.request({

    url: '/users/authorization',

    method: 'get'

  })

}
src/store/module/user.js
import {

  login

} from '@/api/user'

const actions = {

  login ({

    commit

  }, {

    userName,

    password

  }) {

    login({

      userName,

      password

    }).then(res => {

      console.log(res) // {code: 200, mes: "success", data: {token: "eyJhbGciOiJIUz"}}

    }).catch(error => {

      console.log(error)

    })

  }

}
点击提交成功返回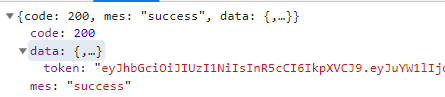
密码错误返回:

src/lib/util.js
import Cookies from 'js-cookie'

// 将Token放在haeder中, 每次发送请求都带有Token

export const setToken = (token, tokenName = 'token') => {

  Cookies.set(tokenName, token) // 往cookie中存值

}

export const getToken = (tokenName = 'token') => { // 获取Token

  return Cookies.get(tokenName)

}
store/module/user.js
const actions = {

  login({

    commit

  }, {

    userName,

    password

  }) {

    return new Promise(resolve, reject) => {

      login({

        userName,

        password

      }).then(res => {

        // console.log(res) // {code: 200, mes: "success", data: {token: "eyJhbGciOiJIUz"}}

        if (res.code === 200 && res.data.token) {

          setToken(res.data.token)

          resolve()

        } else {

          reject(new Error('错误'))

        }

      }).catch(error => {

        reject(error)

      })

    }

  }

}
- login.vue
    handleSubmit () {

      this.login({

        userName: this.userName,

        password: this.password

      }).then(res => {

        this.$router.push({

          name: 'home'

        })

      }).catch(error => {

        console.log(error)

      })

    }

  }
src/router/index.js
路由导航守卫
router.beforeEach((to, from, next) => {

 const token = getToken()

 if (token) {

   // 验证token是有效的

 } else {

   if (to.name === 'login') next()

   else next({ name: 'login' })

 }

})
传Token到服务端
api/user.js
export const authorization = () => {

  return axios.request({

    url: '/users/authorization',

    method: 'get'

  })

}
lib/axios.js
传入token
import { getToken } from '@/lib/util'

// 全局响应拦截器

  interceptors (instance, url) {

    instance.interceptors.request.use(config => { // 请求拦截器

      // 添加全局的loading...

      // Spin.show() ---遮罩组件

      // 队列中有请求时 显示loadong界面, 反之同理

      if (!Object.keys(this.queue).length) {

        // Spin.show()

      }

      this.queue[url] = true

      config.headers['Authorization'] = getToken() // 传入token

      return config

    }, error => {

      return Promise.reject(error)

    })
获取Token
store/module/user.js
import {

  login,

  authorization

} from '@/api/user'

  authorization({

    commit

  }, token) {

    return new Promise((resolve, reject) => {

      authorization().then(res => {

        if(parseInt(res.code) === 401){

          reject(new Error('token error'))

        } else {

          resolve()

        }

      }).catch(error =>{

        reject(error)

      })

    })

  }

}
router/index.js
import store from '@/store'

import {

  getToken,

  setToken

} from '@/lib/util'

// 导航守卫

router.beforeEach((to, from, next) => {

  const token = getToken()

  if (token) {

    // 验证token是有效的

    store.dispatch('authorization', token).then(() => {

      if (to.name === 'login') {

        next({

          name: 'home'

        })

      } else next()

    }).catch(() => {

      setToken('')

      next({

        name: 'login'

      })

    })

  } else {

    if (to.name === 'login') next()

    else {

      next({

        name: 'login'

      })

    }

  }

})
3. Token过期处理
api/user.js
authorization ({

    commit

  }, token) {

    return new Promise((resolve, reject) => {

      authorization().then(res => {

        if (parseInt(res.code) === 401) {

          reject(new Error('token error'))

        } else {

          setToken(res.data.token) // 重置token 即重置过期时间

          resolve()

        }

      }).catch(error => {

        reject(error)

      })

    })

  }
4. 退出登录
api/user.js
  logout () {

    setToken('')

  }
- 调用登出接口
import { mapActions } from 'vuex'

export default {

  methods: {

    ...map(['logout']),

    handleLogout() {

      this.logout()

    }

  }

}
Vue 登录/登出以及JWT认证的更多相关文章
- Vue登录登出以及JWT认证
数据模型 主要用户名,密码,邮箱,头像,身份 const mongoose = require('mongoose') const schema = new mongoose.Schema({ use ...
- 利用Vue.js实现登录/登出以及JWT认证
JSON Web Token 入门教程:http://www.ruanyifeng.com/blog/2018/07/json_web_token-tutorial.html 后端代码地址:https ...
- flask 实现登录 登出 检查登录状态 的两种方法的总结
这里我是根据两个项目的实际情况做的总结,方法一(来自项目一)的登录用的是用户名(字符串)和密码,前后端不分离,用form表单传递数据:方法二用的是手机号和密码登录,前后端分离,以json格式传递数据, ...
- SpringBoot登录登出切面开发
阅读本文约“2.5分钟” 本文开发环境是SpringBoot2.X版本. 对于系统而言(这里多指管理系统或部分具备登录登出功能的系统),登录登出是一个类权限验证的过程,现在一般是以token进行校验, ...
- Struts2学习第六课 实现登录登出功能
关于Struts2请求的扩展名问题: 1).org.apache.struts2包下的default.properties中配置了struts2应用的一些常量 2).struts.action.ext ...
- ThinkPHP---案例1登录登出和添加部门
配置文件分3类:系统配置文件,分组配置文件,应用配置文件 ①系统配置文件ThinkPHP/Conf/convention.php: ②分组 / 模块 /平台配置文件Home/Conf/config.p ...
- ASP.NET Core 登录登出 - ASP.NET Core 基础教程 - 简单教程,简单编程
原文:ASP.NET Core 登录登出 - ASP.NET Core 基础教程 - 简单教程,简单编程 ASP.NET Core 登录登出 上一章节我们总算完善了注册的功能,而且也添加了一个用户,现 ...
- Django项目: 4.用户登录登出功能
用户登录登出功能 一.功能需求分析 1. 登录退出功能分析 流程图 功能 登录页面 登录功能 退出功能 二.登录页面 1. 接口设计 接口说明 类目 说明 请求方法 GET url定义 /user/l ...
- jquery ajax常用的登录登出
整理jquery+ajax的登录登出方法. //登录 var currentUserId = -1; $(function() { var timestamp = (new Date()).value ...
随机推荐
- 根据字典内的键值修改另一个字典的value
需求:根据传入字典的key1,将value1循环替换到已知字典内相同key的value def dispose_dict(input_parameter,fixed_parameter): for i ...
- Android java.lang.SecurityException: Permission Denial
报错: java.lang.SecurityException: Permission Denial: starting Intent { act=android.media.action.IMAGE ...
- 朋友国企干了5年java,居然不知道Dubbo是做什么呢?我真信了
点赞再看,养成习惯,微信搜一搜[三太子敖丙]关注这个喜欢写情怀的程序员. 本文 GitHub https://github.com/JavaFamily 已收录,有一线大厂面试完整考点.资料以及我的系 ...
- Eclipse中构建maven项目的两种方式
Eclipse中构建maven项目的两种方式 方式一: 1.构建maven项目 1.1 新建meven项目,可在Other中找到maven文件夹 1.2 进入maven项目后,点击next 1.3 在 ...
- 贫血模型和DDD模型
贫血模型和DDD模型 1.贫血模型 1.1 概念 常见的mvc三层架构 简单.没有行为 2.领域驱动设计 2.1 概念(2004年提出的) Domain Driven Design 简称 DDD DD ...
- html的JavaScript的简单输入验证
<!DOCTYPE html> <html lang="en"> <head> <meta charset="UTF-8&quo ...
- JavaScript的数据类型判断学习理解和数据处理
<!DOCTYPE html> <html lang="en"> <head> <meta charset="UTF-8&quo ...
- Hadoop上小文件如何存储?
Block是文件块,HDFS中是以Block为单位进行文件的管理的,一个文件可能有多个块,每个块默认是3个副本,这些块分别存储在不同机器上.块与文件之前的映射关系会定时上报Namenode.HDFS中 ...
- 有了MDL锁视图,业务死锁从此一目了然
摘要:MDL锁视图让一线运维人员清晰地查看数据库各session持有和等待的元数据锁信息,从而找出数据库MDL锁等待的根因,准确地进行下一步决策. 当多用户共同存取数据时,数据库中就会产生多个事务同时 ...
- ACboy needs your help (动态规划背包)
ACboy has N courses this term, and he plans to spend at most M days on study.Of course,the profit he ...