nginx配置及使用
偶尔会用到nginx部署项目,记录nginx配置备忘。主要有端口、地址及别名,代理转发和https配置。
配置文件为nginx.conf。
部署http项目:
1.找到http下的server配置项
端口和servername配置,即访问地址中http://localhost:9003
 listen       9003;

 server_name  localhost;
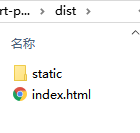
2.配置项目
项目结构如下
nginx增加location配置项:
         location /dist {

             root E:/code/02project/rt-poc;  # root 时 root路径+location路径映射到服务器文件

             index index.html;

         }
访问地址为:http://localhost:9003/dist/index.html
         # alias 时 location代替root路径映射到服务器文件上

         location /webapp {

             alias E:/code/02project/rt-poc/dist;

             index index.html;

         }
访问地址为:http://localhost:9003/webapp/index.html
可以浏览文件
         #autoindex 开启后可以显示目录

         location /images {

             root   E:/code/00test/picture;

             autoindex on;

         }
         # 代理转发

         location /my-web {

             proxy_pass  http://localhost:9003/dist;

         }
访问 http://localhost:9003/my-web/index.html 即跳转为 http://localhost:9003/dist/index.html
部署https项目:
1.找到https下的server配置项,设置默认的443端口及ssl证书地址,location配置和http一样,这里也可以转发http下的server,使其能以https的方式访问
        listen       443 ssl;

        server_name  localhost;

        ssl_certificate      E:/code/03server/nginx-1.16.0/ssl/nginx_https.crt;

        ssl_certificate_key  E:/code/03server/nginx-1.16.0/ssl/nginx_https.key;
转发http服务
 # 转发http服务,变为https

  location /tour {

      proxy_pass  http://localhost:9003/webapp;

 }
nginx相关命令:
 // window下 进入nginx目录,启动cmd

 start nginx               -- 启动

 nginx -s reload           -- 重载配置

 nginx -s quit             --退出

 nginx -s stop
nginx.conf文件完整内容,可参考进行配置。
 #user  nobody;

 worker_processes  1;

 #error_log  logs/error.log;

 #error_log  logs/error.log  notice;

 #error_log  logs/error.log  info;

 #pid        logs/nginx.pid;

 events {

     worker_connections  1024;

 }

 http {

     include       mime.types;

     default_type  application/octet-stream;

     #log_format  main  '$remote_addr - $remote_user [$time_local] "$request" '

     #                  '$status $body_bytes_sent "$http_referer" '

     #                  '"$http_user_agent" "$http_x_forwarded_for"';

     #access_log  logs/access.log  main;

     sendfile        on;

     #tcp_nopush     on;

     #keepalive_timeout  0;

     keepalive_timeout  65;

     #gzip  on;

     server {

         listen       9003;

         server_name  localhost;

         #charset koi8-r;

         #access_log  logs/host.access.log  main;

         # location / {

         #     root   html;

         #     index  index.html;

         # }

         #autoindex 开启后可以显示目录

         location /images {

             root   E:/code/00test/picture;

             autoindex on;

         }

         # alias 时 location代替root路径映射到服务器文件上

         location /tour {

             alias E:/code/02project/ni-tour/ni-tour-web/dist;

             index index.html;

         }

         # root 时 root路径+location路径映射到服务器文件上

         location /dist {

             root E:/code/02project/smrt-poc/smrt-poc-tbox-html;

             index index.html;

         }

         # 代理转发

         location /smrt {

             proxy_pass  http://localhost:9003/dist;

         }

         location / {

             root   E:/code/00test/picture;

             autoindex on;

         }

         #error_page  404              /404.html;

         # redirect server error pages to the static page /50x.html

         #

         error_page   500 502 503 504  /50x.html;

         location = /50x.html {

             root   html;

         }

         # proxy the PHP scripts to Apache listening on 127.0.0.1:80

         #

         #location ~ \.php$ {

         #    proxy_pass   http://127.0.0.1;

         #}

         # pass the PHP scripts to FastCGI server listening on 127.0.0.1:9000

         #

         #location ~ \.php$ {

         #    root           html;

         #    fastcgi_pass   127.0.0.1:9000;

         #    fastcgi_index  index.php;

         #    fastcgi_param  SCRIPT_FILENAME  /scripts$fastcgi_script_name;

         #    include        fastcgi_params;

         #}

         # deny access to .htaccess files, if Apache's document root

         # concurs with nginx's one

         #

         #location ~ /\.ht {

         #    deny  all;

         #}

     }

     # another virtual host using mix of IP-, name-, and port-based configuration

     # 可以监听不同的端口

     server {

        listen       9005;

        server_name  localhost;

        location /smrt {

             alias E:/code/02project/smrt-poc/smrt-poc-tbox-html/dist;

             index index.html;

         }

     }

     #HTTPS server

     server {

        listen       443 ssl;

        server_name  localhost;

        ssl_certificate      E:/code/03server/nginx-1.16.0/ssl/nginx_https.crt;

        ssl_certificate_key  E:/code/03server/nginx-1.16.0/ssl/nginx_https.key;

        ssl_session_cache    shared:SSL:1m;

        ssl_session_timeout  5m;

        ssl_ciphers  HIGH:!aNULL:!MD5;

        ssl_prefer_server_ciphers  on;

        location /images {

            root   E:/code/00test/picture;

            autoindex on;

        }

        location /smrt {

             alias E:/code/02project/smrt-poc/smrt-poc-tbox-html/dist;

             index index.html;

         }

         # 转发http服务,变为https

         location /tour {

             proxy_pass  http://localhost:9003/tour;

         }

     }

 }
配置https需要的ssl证书地址 可参考https://blog.csdn.net/sunroyfcb/article/details/83592553

缓存配置
server前添加如下配置项:
proxy_cache_path /opt/map-web-model/map-web-buildings-cache levels=: keys_zone=buildingscache:10m max_size=10g inactive=300m use_temp_path=off;
相关配置说明如下:
- /path/to/cache 本地路径,用来设置Nginx缓存资源的存放地址
- levels 默认所有缓存文件都放在同一个/path/to/cache下,但是会影响缓存的性能,因此通常会在/path/to/cache下面建立子目录用来分别存放不同的文件。假设levels=1:2,Nginx为将要缓存的资源生成的key为f4cd0fbc769e94925ec5540b6a4136d0,那么key的最后一位0,以及倒数第2-3位6d作为两级的子目录,也就是该资源最终会被缓存到/path/to/cache/0/6d目录中
- key_zone 在共享内存中设置一块存储区域来存放缓存的key和metadata(类似使用次数),这样nginx可以快速判断一个request是否命中或者未命中缓存,1m可以存储8000个key,10m可以存储80000个key
- max_size 最大cache空间,如果不指定,会使用掉所有disk space,当达到配额后,会删除最少使用的cache文件
- inactive 未被访问文件在缓存中保留时间,本配置中如果60分钟未被访问则不论状态是否为expired,缓存控制程序会删掉文件。inactive默认是10分钟。需要注意的是,inactive和expired配置项的含义是不同的,expired只是缓存过期,但不会被删除,inactive是删除指定时间内未被访问的缓存文件
- use_temp_path 如果为off,则nginx会将缓存文件直接写入指定的cache文件中,而不是使用temp_path存储,official建议为off,避免文件在不同文件系统中不必要的拷贝
- proxy_cache 启用proxy cache,并指定key_zone。另外,如果proxy_cache off表示关闭掉缓存。
使用:
 location /buildings {

         proxy_cache buildingscache;
         alias /opt/map-web-model/buildings;
         autoindex off;
 }
常见错误
1.访问服务出现以下错误:
The 'Access-Control-Allow-Origin' header contains multiple values '*, *', but only one is allowed.
这种问题常见于nginx做代理,设置了add_header 'Access-Control-Allow-Origin' '*';
而被代理的服务本身已经设置了'Access-Control-Allow-Origin' '*';  会出现了header重复,删掉代理的即可。
nginx配置及使用的更多相关文章
- nginx配置反向代理或跳转出现400问题处理记录
午休完上班后,同事说测试站点访问接口出现400 Bad Request Request Header Or Cookie Too Large提示,心想还好是测试服务器出现问题,影响不大,不过也赶紧上 ...
- Windos环境用Nginx配置反向代理和负载均衡
Windos环境用Nginx配置反向代理和负载均衡 引言:在前后端分离架构下,难免会遇到跨域问题.目前的解决方案大致有JSONP,反向代理,CORS这三种方式.JSONP兼容性良好,最大的缺点是只支持 ...
- Windows下Nginx配置SSL实现Https访问(包含证书生成)
Vincent.李 Windows下Nginx配置SSL实现Https访问(包含证书生成) Windows下Nginx配置SSL实现Https访问(包含证书生成) 首先要说明为什么要实现https ...
- Nginx 配置简述
不论是本地开发,还是远程到 Server 开发,还是给提供 demo 给人看效果,我们时常需要对 Nginx 做配置,Nginx 的配置项相当多,如果考虑性能配置起来会比较麻烦.不过,我们往往只是需要 ...
- Nginx配置详解
序言 Nginx是lgor Sysoev为俄罗斯访问量第二的rambler.ru站点设计开发的.从2004年发布至今,凭借开源的力量,已经接近成熟与完善. Nginx功能丰富,可作为HTTP服务器,也 ...
- Nginx配置Https
1.申请证书: https://console.qcloud.com/ssl?utm_source=yingyongbao&utm_medium=ssl&utm_campaign=qc ...
- nginx配置为windows服务中的坑
网上搜索“nginx 配置为windows服务”,很容易搜索到使用windows server warpper来配置,于是按照网上的方法我从github上的链接下载了1.17版本,前面都很顺利,很容易 ...
- 【nginx配置】nginx做非80端口转发
一个场景 最近在使用PHP重写一个使用JAVA写的项目,因为需要查看之前的项目,所以要在本地搭建一个Tomcat来跑JAVA的项目.搭建成功后,因为Tomcat监听的端口是8080,因此,访问的URL ...
- Apache、nginx配置的网站127.0.0.1可以正常访问,内外网的ip地址无法访问,谁的锅?
最近做开发,发现一个比较尴尬的问题.因为我是一个web开发者,经常要用到Apache或者nginx等服务器软件,经过我测试发现,只要我打开了adsafe,我便不能通过ip地址访问我本地的网站了,比如我 ...
- nginx配置301重定向
1. 简介 301重定向可以传递权重,相比其他重定向,只有301是最正式的,不会被搜索引擎判断为作弊 2. 栗子 savokiss.com 301到 savokiss.me 3. nginx默认配置方 ...
随机推荐
- [转帖]CentOS 8 正式发布
CentOS 8 正式发布 终于发布了.. https://news.cnblogs.com/n/640416/ 前几天刚弄完centos7.7 的环境. CentOS 8 官方正式发布了!!!C ...
- Win10 改为用 Ctrl+Shift 切换中英输入语言而不是 Win+空格
是切换中英输入语言,而不是切换输入法,如图: 步骤: 设置 > 设备 > 输入 > 高级键盘设置 > 语言栏选项 > 高级键盘设置 > 更改按键顺序 > 切换 ...
- PAT甲级 图的遍历 相关题_C++题解
图的遍历 PAT (Advanced Level) Practice 图的遍历 相关题 目录 <算法笔记>重点摘要 1021 Deepest Root (25) 1076 Forwards ...
- Mish:一个新的SOTA激活函数,ReLU的继任者
Mish:一个新的SOTA激活函数,ReLU的继任者 CVer 昨天 以下文章来源于AI公园 ,作者ronghuaiyang AI公园 专注分享干货的AI公众号,图像处理,NLP,深度学习,机器学 ...
- 夯实基础:彻底搞清楚Cookie 和 Session 关系和区别(转)
原文地址:http://www.sohu.com/a/281228178_120047080 网络请求中的cookie与set-Cookie的交互模式和作用:https://my.oschina.ne ...
- Spring Boot 全局Exception处理
一.代码如下 package com.zxguan; import org.springframework.web.bind.annotation.ControllerAdvice; import o ...
- [JZOJ5897]密匙--哈希骚操作
[JZOJ5897]密匙--哈希骚操作 题目链接 太懒了自行Google 前置技能 二分/倍增求LCP e.g TJOI2017DNA 分析 这题看了样例解释才知道什么意思 本以为自己身为mo法师蛤希 ...
- Apache Flink 任意jar包上传漏洞
目前受影响版本:version 1.9.1(最新),官方未发布补丁. Apache Flink仪表板- >上传恶意的JAR- >提交新工作- >getshell 生成jar包,用nc ...
- springboot启动流程(四)application配置文件加载过程
所有文章 https://www.cnblogs.com/lay2017/p/11478237.html 触发监听器加载配置文件 在上一篇文章中,我们看到了Environment对象的创建方法.同时也 ...
- python日志实时分析
python随着人工智能的发展,越来越火热.但其实python在运维测试方面,也是一把利器. 最近就碰到了个需求,就顺手写了个python程序.用惯了go,不过发现python好像更简单点 :-) 涉 ...