
Jetty使用教程(四:21-22)—Jetty开发指南
二十一、嵌入式开发
21.1 Jetty嵌入式开发HelloWorld
本章节将提供一些教程,通过Jetty API快速开发嵌入式代码
21.1.1 下载Jetty的jar包
Jetty目前已经把所有功能分解成小的jar包,用户可以根据需要选择合适的jar包,来实现需要的功能。通常建议用户使用maven等管理工具来管理jar包,然而本教程使用一个包含所有功能的合集jar包来演示,用户可以使用curl或者浏览器下载jetty-all.jar包。
jetty-all.jar下载地址:http://central.maven.org/maven2/org/eclipse/jetty/aggregate/jetty-all/9.3.11.v20160721/jetty-all-9.3.11.v20160721-uber.jar
注意:
Maven中央仓库已经开始拒绝使用wget命令获得资源(因为一些工具的滥用),所以Maven中央仓库建议使用curl命令来获得jar包。
使用curl 命令如下(Windows用户可以将上面的地址复制到浏览器来下载):
> mkdir Demo

> cd Demo

> curl -o jetty-all-uber.jar http://central.maven.org/maven2/org/eclipse/jetty/aggregate/jetty-all/9.3.11.v20160721/jetty-all-9.3.11.v20160721-uber.jar
21.1.2 写一个HelloWorld例子
这个Jetty嵌入式教程章节包含很多通过Jetty API的例子,这个教程在main方法里运行一个Helloworld的handler来实现一个服务,可以自己写或者复制以下代码:
import java.io.IOException;

import javax.servlet.ServletException;

import javax.servlet.http.HttpServletRequest;

import javax.servlet.http.HttpServletResponse;

import org.eclipse.jetty.server.Request;

import org.eclipse.jetty.server.Server;

import org.eclipse.jetty.server.handler.AbstractHandler;

public class HelloWorld extends AbstractHandler {

    @Override

    public void handle(String target, Request baseRequest, HttpServletRequest request, HttpServletResponse response)

            throws IOException, ServletException {

        // 声明response的编码和文件类型

        response.setContentType("text/html; charset=utf-8");

        // 声明返回状态码

        response.setStatus(HttpServletResponse.SC_OK);

        // 请求的返回值

        response.getWriter().println("<h1>Hello World</h1>");

        // 通知Jettyrequest使用此处理器处理请求

        baseRequest.setHandled(true);

    }

    public static void main(String[] args) throws Exception {

        //创建一个应用服务监听8080端口

        Server server = new Server(8080);

        server.setHandler(new HelloWorld());

        //启动应用服务并等待请求

        server.start();

        server.join();

    }

}
21.1.3 编译helloworld例子
使用如下命令编译生成class文件
> mkdir classes

> javac -d classes -cp jetty-all-uber.jar HelloWorld.java
21.1.4 运行服务
使用如下命令运行服务,启动服务器。(建议使用开发工具进行学习,如eclipse)
> java -cp classes:jetty-all-uber.jar org.eclipse.jetty.embedded.HelloWorld
运行成功后会输出如下内容:
2016-09-02 11:44:48.851:INFO::main: Logging initialized @214ms

2016-09-02 11:44:48.915:INFO:oejs.Server:main: jetty-9.3.z-SNAPSHOT

2016-09-02 11:44:49.049:INFO:oejs.AbstractConnector:main: Started ServerConnector@5436b246{HTTP/1.1,[http/1.1]}{0.0.0.0:8080}

2016-09-02 11:44:49.050:INFO:oejs.Server:main: Started @417ms
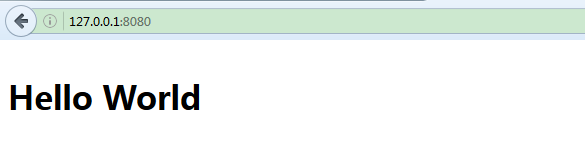
此时可以访问http://localhost:8080 ,查看结果:
21.1.5 后续步骤
为了更好的学习Jetty,可以按如下步骤进行:
- 跟着例子学习嵌入式Jetty开发比直接看Jetty API要好
- 把Jetty javadoc完全看一遍
- 使用Maven来管理所有jar包和依赖
21.2 Jetty的嵌入式开发
Jetty有一个口号:不要把应用部署到Jetty上,要把Jetty部署到你的应用里。这句话的意思是把应用打成一个war包部署到Jetty上,不如将Jetty作为应用的一个组件,它可以实例化并像POJO一样。换种说法,在嵌入式模块中运行Jetty意味着把HTTP模块放到你的应用里,这种方法比把你的应用放到一个HTTP服务器里要好。
这个教程将一步一步的教你如何通过简单的Jetty服务运行多个web应用。大多数例子的源代码都是Jetty项目的一部分。
21.2.1 概述
本教程中嵌入一个Jetty的典型步骤如下:
- 创建一个server实例
- 新增/配置连接
- 新增/配置处理程序,或者Contexts,或者Servlets
- 启动Server
- 等待连接或者在当前线程上做一些其他的事
21.2.2 创建一个server实例
下面的代码实例化并运行了一个Jetty Server
import org.eclipse.jetty.server.Server;

/**

 * The simplest possible Jetty server.

 */

public class SimplestServer

{

    public static void main( String[] args ) throws Exception

    {

        Server server = new Server(8080);

        server.start();

        server.dumpStdErr();

        server.join();

    }

}
在8080端口运行了一个HTTP服务,因为没有处理程序,所以这不是一个有效的server,所有请求将会返回404错误信息。
21.2.3 使用处理器处理请求
为了针对请求产生一个相应,Jetty要求用户为服务创建一个处理请求的处理器,一个处理器可以做的工作有:
- 检测或修改一个请求
- 一个完整的HTTP响应
- 处理转发(详见:HandlerWrapper)
- 处理转发到多个其它处理器上(详见:HandlerCollection)
21.2.3.1 处理器的HelloWorld
接下来的代码HelloHandler.java,表示一个简单的处理程序
//

//  ========================================================================

//  Copyright (c) 1995-2016 Mort Bay Consulting Pty. Ltd.

//  ------------------------------------------------------------------------

//  All rights reserved. This program and the accompanying materials

//  are made available under the terms of the Eclipse Public License v1.0

//  and Apache License v2.0 which accompanies this distribution.

//

//      The Eclipse Public License is available at

//      http://www.eclipse.org/legal/epl-v10.html

//

//      The Apache License v2.0 is available at

//      http://www.opensource.org/licenses/apache2.0.php

//

//  You may elect to redistribute this code under either of these licenses.

//  ========================================================================

//

package org.eclipse.jetty.embedded;

import java.io.IOException;

import java.io.PrintWriter;

import javax.servlet.ServletException;

import javax.servlet.http.HttpServletRequest;

import javax.servlet.http.HttpServletResponse;

import org.eclipse.jetty.server.Request;

import org.eclipse.jetty.server.handler.AbstractHandler;

public class HelloHandler extends AbstractHandler

{

    final String greeting;

    final String body;

    public HelloHandler()

    {

        this("Hello World");

    }

    public HelloHandler( String greeting )

    {

        this(greeting, null);

    }

    public HelloHandler( String greeting, String body )

    {

        this.greeting = greeting;

        this.body = body;

    }

    public void handle( String target,

                        Request baseRequest,

                        HttpServletRequest request,

                        HttpServletResponse response ) throws IOException,

                                                      ServletException

    {

        response.setContentType("text/html; charset=utf-8");

        response.setStatus(HttpServletResponse.SC_OK);

        PrintWriter out = response.getWriter();

        out.println("<h1>" + greeting + "</h1>");

        if (body != null)

        {

            out.println(body);

        }

        baseRequest.setHandled(true);

    }

}
传入到处理程序方法handle的参数有:
- target - 目标请求,可以是一个URI或者是一个转发到这的处理器的名字
- baseRequest - Jetty自己的没有被包装的请求,一个可变的Jetty请求对象
- request - 被filter或者servlet包装的请求,一个不可变的Jetty请求对象
- response - 响应,可能被filter或者servlet包装过
处理程序会设置状态码,content-type,并调用write向response输出内容。
21.2.3.2 运行HelloWorldHandler
为了让处理器处理HTTP请求,你必须将处理程序添加到server实例上,接下来的代码OneHandler.java展示了一个serve实例如何调用处理出现来处理请求:
//

//  ========================================================================

//  Copyright (c) 1995-2016 Mort Bay Consulting Pty. Ltd.

//  ------------------------------------------------------------------------

//  All rights reserved. This program and the accompanying materials

//  are made available under the terms of the Eclipse Public License v1.0

//  and Apache License v2.0 which accompanies this distribution.

//

//      The Eclipse Public License is available at

//      http://www.eclipse.org/legal/epl-v10.html

//

//      The Apache License v2.0 is available at

//      http://www.opensource.org/licenses/apache2.0.php

//

//  You may elect to redistribute this code under either of these licenses.

//  ========================================================================

//

package org.eclipse.jetty.embedded;

import org.eclipse.jetty.server.HttpConnectionFactory;

import org.eclipse.jetty.server.Server;

public class OneHandler

{

    public static void main( String[] args ) throws Exception

    {

        Server server = new Server(8080);

        server.setHandler(new HelloHandler());

        server.start();

        server.join();

    }

}
一个或多个处理器将处理Jetty所有的请求。一些处理器会转发请求到其他处理器(例如: ContextHandlerCollection 会根据路径选择匹配的ContextHandler),另一些将根据逻辑判断来生成相应的响应(例如:ServletHandler 将把request转发到servlet),还有的处理器将处理和请求无关的操作(例如:RequestLogHandler 或者StatisticsHandler)。
后面的章节将介绍如何在切面调用一个处理器,你可以到org.eclipse.jetty.server.handler 包下看看当前可用的处理器。
21.2.3.3 处理器的集合及封装
复杂的请求可以由多个处理器来完成,你可以通过不同的方式把它们结合起来,Jetty有几个HandlerContainer接口的实现:
HandlerCollection:
一个包含多个处理器的集合,按照顺序依次处理。这在响应请求的同时进行统计和日志记录特别有用。
HandlerList:
一个包含多个处理器的集合,按照顺序处理,与HandlerCollection不同的是,当处理器出现异常或者响应被提交或者request.isHandled()方法返回true时,后续将不再被调用。一般用来匹配不同的主机,用来进行不同的处理。
HandlerWrapper:
一个处理器的基类用来进行切面编程。例如,一个标准的web应用会由context,session,安全和servlet处理器构成。
ContextHandlerCollection:
一个特殊的HandlerCollection,使用完整的URI前缀来选择匹配的ContextHandler对请求进行处理。
21.2.3.4 处理器的作用域
在Jetty中,很多标准的服务器会继承HandlerWrappers,用来进行链式处理,比如从请求从ContextHandler 到SessionHandler ,再到SecurityHandler 最后到ServletHandler。然而,因为servlet规范的性质,外部处理器不能在没有调用内部处理器的时候得知内部处理器的信息,例如:ContextHandler调用应用监听请求的context时,它必须已经知道ServletHandler将要转发请求到哪个servlet,以确保servletPath方法返回正确的值。
ScopedHandler是HandlerWrapper 一个抽象实现类,用来提供链式调用时作用域的支持。例如:一个ServletHandler内嵌在一个ContextHandler中,方法嵌套调用的顺序为:
Server.handle(...)
ContextHandler.doScope(...)
ServletHandler.doScope(...)
ContextHandler.doHandle(...)
ServletHandler.doHandle(...)
SomeServlet.service(...)
因此ContextHandler处理请求时,它内嵌的ServletHandler已经建立了。
21.2.3.5 资源处理器
下面这个FileServer例子,展示了你可以使用ResourceHandler 来处理当前工作路径下的静态资源。
import org.eclipse.jetty.server.Handler;

import org.eclipse.jetty.server.Server;

import org.eclipse.jetty.server.handler.DefaultHandler;

import org.eclipse.jetty.server.handler.HandlerList;

import org.eclipse.jetty.server.handler.ResourceHandler;

import org.eclipse.jetty.server.handler.gzip.GzipHandler;

public class FileServer {

    public static void main(String[] args) throws Exception {

        //创建一个基础的Jetty服务监听8080端口

        //若设置端口为0,则随机一个可用的端口,端口信息可以从日志中获取也可以写测试方法获取

        Server server = new Server(8080);

        //创建一个ResourceHandler,它处理请求的方式是提供一个资源文件

        //这是一个Jetty内置的处理器,所以它非常适合与其他处理器构成一个处理链

        ResourceHandler resource_handler = new ResourceHandler();

        //配置ResourceHandler,设置哪个文件应该被提供给请求方

        //这个例子里,配置的是当前路径下的文件,但是实际上可以配置长任何jvm能访问到的地方

        resource_handler.setDirectoriesListed(true);

        resource_handler.setWelcomeFiles(new String[] { "index.html" });

        resource_handler.setResourceBase(".");

        // 将resource_handler添加到GzipHandler中,然后将GzipHandler提供给Server

        GzipHandler gzip = new GzipHandler();

        server.setHandler(gzip);

        HandlerList handlers = new HandlerList();

        handlers.setHandlers(new Handler[] { resource_handler, new DefaultHandler() });

        gzip.setHandler(handlers);

        server.start();

        server.join();

    }

}
请注意,例子中的HandlerList 包含ResourceHandler 和DefaultHandler,DefaultHandler 将会为不能匹配到资源的生成一个格式良好的404回应。
21.2.4 嵌入式的连接
在前面的例子中,通过在Server实例通过传入一个端口号,让Server创建一个默认的连接来监听指定的端口。然而,通常编写嵌入式代码希望显式的配置一个或者多个连接器。
21.2.4.1 一个连接
下面的例子, OneConnector.java,实例化、配置、新增一个HTTP连接到server上
import org.eclipse.jetty.server.Server;

import org.eclipse.jetty.server.ServerConnector;

/**

 * 有一个连接的Server

 */

public class OneConnector {

    public static void main(String[] args) throws Exception {

        Server server = new Server();

        // 创建一个HTTP的连接,配置监听主机,端口,以及超时时间

        ServerConnector http = new ServerConnector(server);

        http.setHost("localhost");

        http.setPort(8080);

        http.setIdleTimeout(30000);

        // 将此连接添加到Server

        server.addConnector(http);

        // 设置一个处理器

        server.setHandler(new HelloHandler());

        // 启动Server

        server.start();

        server.join();

    }

}
在这个例子中,连接将处理http的请求,这个也是默认的ServerConnector连接类。
21.2.4.2 多个连接
当配置多个连接(例如:HTTP和HTTPS),它们可能是共同分享HTTP设置的参数。为了显式的配置ServerConnector 需要使用ConnectionFactory ,并提供一个常用的HTTP配置。
下面这个 ManyConnectors例子,给一个Server配置了两个ServerConnector ,http连接有一个HTTPConnectionFactory 实例,https连接有一个SslConnectionFactory 实例在HttpConnectionFactory里面。两个HttpConnectionFactory 都是基于同一个HttpConfiguration实例,然而https使用包装过的配置信息,因此SecureRequestCustomizer 可以被添加进去。
import java.io.File;

import java.io.FileNotFoundException;

import org.eclipse.jetty.http.HttpVersion;

import org.eclipse.jetty.server.Connector;

import org.eclipse.jetty.server.HttpConfiguration;

import org.eclipse.jetty.server.HttpConnectionFactory;

import org.eclipse.jetty.server.SecureRequestCustomizer;

import org.eclipse.jetty.server.Server;

import org.eclipse.jetty.server.ServerConnector;

import org.eclipse.jetty.server.SslConnectionFactory;

import org.eclipse.jetty.util.ssl.SslContextFactory;

/**

 * 一个有多个连接的Jetty例子

 */

public class ManyConnectors {

    public static void main(String[] args) throws Exception {

        //这个例子会展示如何配置SSL,我们需要一个秘钥库,会在jetty.home下面找

        String jettyDistKeystore = "../../jetty-distribution/target/distribution/demo-base/etc/keystore";

        String keystorePath = System.getProperty("example.keystore", jettyDistKeystore);

        File keystoreFile = new File(keystorePath);

        if (!keystoreFile.exists()) {

            throw new FileNotFoundException(keystoreFile.getAbsolutePath());

        }

        //创建一个不指定端口的Server,随后将直接配置连接和端口

        Server server = new Server();

        //HTTP配置

        //HttpConfiguration是一个配置http和https属性的集合,默认的配置是http的

        //带secured的ui配置https的,

        HttpConfiguration http_config = new HttpConfiguration();

        http_config.setSecureScheme("https");

        http_config.setSecurePort(8443);

        http_config.setOutputBufferSize(32768);

        //HTTP连接

        //第一个创建的连接是http连接,传入刚才创建的配置信息,也可以重新设置新的配置,如端口,超时等

        ServerConnector http = new ServerConnector(server, new HttpConnectionFactory(http_config));

        http.setPort(8080);

        http.setIdleTimeout(30000);

        //使用SslContextFactory来创建http

        //SSL需要一个证书,所以我们配置一个工厂来获得需要的东西

        SslContextFactory sslContextFactory = new SslContextFactory();

        sslContextFactory.setKeyStorePath(keystoreFile.getAbsolutePath());

        sslContextFactory.setKeyStorePassword("OBF:1vny1zlo1x8e1vnw1vn61x8g1zlu1vn4");

        sslContextFactory.setKeyManagerPassword("OBF:1u2u1wml1z7s1z7a1wnl1u2g");

        //HTTPS的配置类

        HttpConfiguration https_config = new HttpConfiguration(http_config);

        SecureRequestCustomizer src = new SecureRequestCustomizer();

        src.setStsMaxAge(2000);

        src.setStsIncludeSubDomains(true);

        https_config.addCustomizer(src);

        //HTTPS连接

        //创建第二个连接,

        ServerConnector https = new ServerConnector(server,

                new SslConnectionFactory(sslContextFactory, HttpVersion.HTTP_1_1.asString()),

                new HttpConnectionFactory(https_config));

        https.setPort(8443);

        https.setIdleTimeout(500000);

        // 设置一个连接的集合

        server.setConnectors(new Connector[] { http, https });

        // 设置一个处理器

        server.setHandler(new HelloHandler());

        // 启动服务

        server.start();

        server.join();

    }

}
21.2.5 嵌入式的Servlets
Servlets是处理逻辑和HTTP请求的标准方式。Servlets 类似于Jetty的处理器,request对象不可变且不能被修改。在Jetty中servlet将有ServletHandler进行负责调用。它使用标准的路径匹配一个请求到servlet,设置请求的路径和请求内容,将请求传递到servlet,或者通过过滤器产生一个响应。
下面这个MinimalServlets例子,创建一个ServletHandler 实例,并配置一个简单的servlet
import java.io.IOException;

import javax.servlet.ServletException;

import javax.servlet.http.HttpServlet;

import javax.servlet.http.HttpServletRequest;

import javax.servlet.http.HttpServletResponse;

import org.eclipse.jetty.server.Server;

import org.eclipse.jetty.servlet.ServletHandler;

public class MinimalServlets {

    public static void main(String[] args) throws Exception {

        Server server = new Server(8080);

        //ServletHandler通过一个servlet创建了一个非常简单的context处理器

        //这个处理器需要在Server上注册

        ServletHandler handler = new ServletHandler();

        server.setHandler(handler);

        //传入能匹配到这个servlet的路径

        //提示:这是一个未经处理的servlet,没有通过web.xml或@WebServlet注解或其他方式配置

        handler.addServletWithMapping(HelloServlet.class, "/*");

        server.start();

        server.join();

    }

    @SuppressWarnings("serial")

    public static class HelloServlet extends HttpServlet {

        @Override

        protected void doGet(HttpServletRequest request, HttpServletResponse response)

                throws ServletException, IOException {

            response.setContentType("text/html");

            response.setStatus(HttpServletResponse.SC_OK);

            response.getWriter().println("<h1>Hello from HelloServlet</h1>");

        }

    }

}
21.2.6 嵌入式Context
ContextHandler是一种ScopedHandler,只用来响应配匹配指定URI前缀的请求,
- 一个Classloader 当在一个请求作用域里的时候处理当前线程的请求
- 一个ServletContext有小属性的集合
- 通过ServletContext获得的初始化参数的集合
- 通过ServletContext 获得的基础资源的集合
- 一个虚拟主机名称的集合
下面这个OneContext例子,包含一个HelloHandler处理器,用来处理指定路径下的请求
import org.eclipse.jetty.server.Server;

import org.eclipse.jetty.server.handler.ContextHandler;

public class OneContext {

    public static void main(String[] args) throws Exception {

        Server server = new Server(8080);

        //在/hello路径上增加一个处理器

        ContextHandler context = new ContextHandler();

        context.setContextPath("/hello");

        context.setHandler(new HelloHandler());

        //可以通过http://localhost:8080/hello访问

        server.setHandler(context);

        server.start();

        server.join();

    }

}
当有很多有效的contexts 时,可以创建一个ContextHandlerCollection 集合存储这些处理器,下面的这个ManyContexts例子展示多个context的使用:
import org.eclipse.jetty.server.Handler;

import org.eclipse.jetty.server.Server;

import org.eclipse.jetty.server.handler.ContextHandler;

import org.eclipse.jetty.server.handler.ContextHandlerCollection;

public class ManyContexts

{

    public static void main( String[] args ) throws Exception

    {

        Server server = new Server(8080);

        ContextHandler context = new ContextHandler("/");

        context.setContextPath("/");

        context.setHandler(new HelloHandler("Root Hello"));

        ContextHandler contextFR = new ContextHandler("/fr");

        contextFR.setHandler(new HelloHandler("Bonjoir"));

        ContextHandler contextIT = new ContextHandler("/it");

        contextIT.setHandler(new HelloHandler("Bongiorno"));

        ContextHandler contextV = new ContextHandler("/");

        contextV.setVirtualHosts(new String[] { "127.0.0.2" });

        contextV.setHandler(new HelloHandler("Virtual Hello"));

        ContextHandlerCollection contexts = new ContextHandlerCollection();

        contexts.setHandlers(new Handler[] { context, contextFR, contextIT,

                contextV });

        server.setHandler(contexts);

        server.start();

        server.join();

    }

}
21.2.7 嵌入式ServletContexts
ServletContextHandler是一种特殊的ContextHandler,它可以支持标准的sessions 和Servlets。下面例子的OneServletContext 实例化了一个 DefaultServlet为/tmp/ 和DumpServlet 提供静态资源服务,DumpServlet 创建session并且应答请求信息
import org.eclipse.jetty.server.Server;

import org.eclipse.jetty.servlet.DefaultServlet;

import org.eclipse.jetty.servlet.ServletContextHandler;

public class OneServletContext {

    public static void main(String[] args) throws Exception {

        Server server = new Server(8080);

        ServletContextHandler context = new ServletContextHandler(ServletContextHandler.SESSIONS);

        context.setContextPath("/");

        context.setResourceBase(System.getProperty("java.io.tmpdir"));

        server.setHandler(context);

        // 增加一个 dump servlet

        context.addServlet(DumpServlet.class, "/dump/*");

        // 增加一个默认的servlet

        context.addServlet(DefaultServlet.class, "/");

        server.start();

        server.join();

    }

}
21.2.8 嵌入一个web应用
WebAppContext是ServletContextHandler 的扩展,使用标准的web应用组件和web.xml,通过web.xml和注解配置servlet,filter和其它特性。下面这个OneWebApp例子部署了一个简单的web应用。Web应用程序可以使用容器提供的资源,在这种情况下需要一个LoginService并配置:
import java.io.File;

import java.lang.management.ManagementFactory;

import org.eclipse.jetty.jmx.MBeanContainer;

import org.eclipse.jetty.server.Server;

import org.eclipse.jetty.server.handler.AllowSymLinkAliasChecker;

import org.eclipse.jetty.webapp.WebAppContext;

public class OneWebApp {

    public static void main(String[] args) throws Exception {

        Server server = new Server(8080);

        // 设置 JMX

        MBeanContainer mbContainer = new MBeanContainer(ManagementFactory.getPlatformMBeanServer());

        server.addBean(mbContainer);

        //下面这个web应用是一个完整的web应用,在这个例子里设置/为根路径,web应用所有的配置都是有效的,

        WebAppContext webapp = new WebAppContext();

        webapp.setContextPath("/");

        File warFile = new File("../../jetty-distribution/target/distribution/test/webapps/test/");

        webapp.setWar(warFile.getAbsolutePath());

        webapp.addAliasCheck(new AllowSymLinkAliasChecker());

        //将web应用设置到server里

        server.setHandler(webapp);

        server.start();

        server.join();

    }

}
21.2.9 使用Jetty XML配置
通常配置Jetty实例是通过配置jetty.xml和其它关联的配置文件,然而Jetty 配置信息都可以用简单的代码进行配置,下面的例子将从配置文件中获得相关信息:
- jetty.xml
- jetty-jmx.xml
- jetty-http.xml
- jetty-https.xml
- jetty-deploy.xml
- jetty-stats.xml
- jetty-requestlog.xml
- jetty-lowresources.xml
- test-realm.xml
import java.io.File;

import java.io.FileNotFoundException;

import java.lang.management.ManagementFactory;

import org.eclipse.jetty.deploy.DeploymentManager;

import org.eclipse.jetty.deploy.PropertiesConfigurationManager;

import org.eclipse.jetty.deploy.bindings.DebugListenerBinding;

import org.eclipse.jetty.deploy.providers.WebAppProvider;

import org.eclipse.jetty.http.HttpVersion;

import org.eclipse.jetty.jmx.MBeanContainer;

import org.eclipse.jetty.rewrite.handler.CompactPathRule;

import org.eclipse.jetty.rewrite.handler.RewriteHandler;

import org.eclipse.jetty.security.HashLoginService;

import org.eclipse.jetty.server.ConnectorStatistics;

import org.eclipse.jetty.server.DebugListener;

import org.eclipse.jetty.server.Handler;

import org.eclipse.jetty.server.HttpConfiguration;

import org.eclipse.jetty.server.HttpConnectionFactory;

import org.eclipse.jetty.server.LowResourceMonitor;

import org.eclipse.jetty.server.NCSARequestLog;

import org.eclipse.jetty.server.SecureRequestCustomizer;

import org.eclipse.jetty.server.Server;

import org.eclipse.jetty.server.ServerConnector;

import org.eclipse.jetty.server.SslConnectionFactory;

import org.eclipse.jetty.server.handler.ContextHandlerCollection;

import org.eclipse.jetty.server.handler.DefaultHandler;

import org.eclipse.jetty.server.handler.HandlerCollection;

import org.eclipse.jetty.server.handler.RequestLogHandler;

import org.eclipse.jetty.server.handler.StatisticsHandler;

import org.eclipse.jetty.util.ssl.SslContextFactory;

import org.eclipse.jetty.util.thread.QueuedThreadPool;

import org.eclipse.jetty.util.thread.ScheduledExecutorScheduler;

import org.eclipse.jetty.webapp.Configuration;

/**

 * Starts the Jetty Distribution's demo-base directory using entirely

 * embedded jetty techniques.

 */

public class LikeJettyXml

{

    public static void main( String[] args ) throws Exception

    {

        // Path to as-built jetty-distribution directory

        String jettyHomeBuild = "../../jetty-distribution/target/distribution";

        // Find jetty home and base directories

        String homePath = System.getProperty("jetty.home", jettyHomeBuild);

        File start_jar = new File(homePath,"start.jar");

        if (!start_jar.exists())

        {

            homePath = jettyHomeBuild = "jetty-distribution/target/distribution";

            start_jar = new File(homePath,"start.jar");

            if (!start_jar.exists())

                throw new FileNotFoundException(start_jar.toString());

        }

        File homeDir = new File(homePath);

        String basePath = System.getProperty("jetty.base", homeDir + "/demo-base");

        File baseDir = new File(basePath);

        if(!baseDir.exists())

        {

            throw new FileNotFoundException(baseDir.getAbsolutePath());

        }

        // Configure jetty.home and jetty.base system properties

        String jetty_home = homeDir.getAbsolutePath();

        String jetty_base = baseDir.getAbsolutePath();

        System.setProperty("jetty.home", jetty_home);

        System.setProperty("jetty.base", jetty_base);

        // === jetty.xml ===

        // Setup Threadpool

        QueuedThreadPool threadPool = new QueuedThreadPool();

        threadPool.setMaxThreads(500);

        // Server

        Server server = new Server(threadPool);

        // Scheduler

        server.addBean(new ScheduledExecutorScheduler());

        // HTTP Configuration

        HttpConfiguration http_config = new HttpConfiguration();

        http_config.setSecureScheme("https");

        http_config.setSecurePort(8443);

        http_config.setOutputBufferSize(32768);

        http_config.setRequestHeaderSize(8192);

        http_config.setResponseHeaderSize(8192);

        http_config.setSendServerVersion(true);

        http_config.setSendDateHeader(false);

        // httpConfig.addCustomizer(new ForwardedRequestCustomizer());

        // Handler Structure

        HandlerCollection handlers = new HandlerCollection();

        ContextHandlerCollection contexts = new ContextHandlerCollection();

        handlers.setHandlers(new Handler[] { contexts, new DefaultHandler() });

        server.setHandler(handlers);

        // Extra options

        server.setDumpAfterStart(false);

        server.setDumpBeforeStop(false);

        server.setStopAtShutdown(true);

        // === jetty-jmx.xml ===

        MBeanContainer mbContainer = new MBeanContainer(

                ManagementFactory.getPlatformMBeanServer());

        server.addBean(mbContainer);

        // === jetty-http.xml ===

        ServerConnector http = new ServerConnector(server,

                new HttpConnectionFactory(http_config));

        http.setPort(8080);

        http.setIdleTimeout(30000);

        server.addConnector(http);

        // === jetty-https.xml ===

        // SSL Context Factory

        SslContextFactory sslContextFactory = new SslContextFactory();

        sslContextFactory.setKeyStorePath(jetty_home + "/../../../jetty-server/src/test/config/etc/keystore");

        sslContextFactory.setKeyStorePassword("OBF:1vny1zlo1x8e1vnw1vn61x8g1zlu1vn4");

        sslContextFactory.setKeyManagerPassword("OBF:1u2u1wml1z7s1z7a1wnl1u2g");

        sslContextFactory.setTrustStorePath(jetty_home + "/../../../jetty-server/src/test/config/etc/keystore");

        sslContextFactory.setTrustStorePassword("OBF:1vny1zlo1x8e1vnw1vn61x8g1zlu1vn4");

        sslContextFactory.setExcludeCipherSuites("SSL_RSA_WITH_DES_CBC_SHA",

                "SSL_DHE_RSA_WITH_DES_CBC_SHA", "SSL_DHE_DSS_WITH_DES_CBC_SHA",

                "SSL_RSA_EXPORT_WITH_RC4_40_MD5",

                "SSL_RSA_EXPORT_WITH_DES40_CBC_SHA",

                "SSL_DHE_RSA_EXPORT_WITH_DES40_CBC_SHA",

                "SSL_DHE_DSS_EXPORT_WITH_DES40_CBC_SHA");

        // SSL HTTP Configuration

        HttpConfiguration https_config = new HttpConfiguration(http_config);

        https_config.addCustomizer(new SecureRequestCustomizer());

        // SSL Connector

        ServerConnector sslConnector = new ServerConnector(server,

            new SslConnectionFactory(sslContextFactory,HttpVersion.HTTP_1_1.asString()),

            new HttpConnectionFactory(https_config));

        sslConnector.setPort(8443);

        server.addConnector(sslConnector);

        // === jetty-deploy.xml ===

        DeploymentManager deployer = new DeploymentManager();

        DebugListener debug = new DebugListener(System.out,true,true,true);

        server.addBean(debug);

        deployer.addLifeCycleBinding(new DebugListenerBinding(debug));

        deployer.setContexts(contexts);

        deployer.setContextAttribute(

                "org.eclipse.jetty.server.webapp.ContainerIncludeJarPattern",

                ".*/servlet-api-[^/]*\\.jar$");

        WebAppProvider webapp_provider = new WebAppProvider();

        webapp_provider.setMonitoredDirName(jetty_base + "/webapps");

        webapp_provider.setDefaultsDescriptor(jetty_home + "/etc/webdefault.xml");

        webapp_provider.setScanInterval(1);

        webapp_provider.setExtractWars(true);

        webapp_provider.setConfigurationManager(new PropertiesConfigurationManager());

        deployer.addAppProvider(webapp_provider);

        server.addBean(deployer);

        // === setup jetty plus ==

        Configuration.ClassList.setServerDefault(server).addAfter(

                "org.eclipse.jetty.webapp.FragmentConfiguration",

                "org.eclipse.jetty.plus.webapp.EnvConfiguration",

                "org.eclipse.jetty.plus.webapp.PlusConfiguration");

        // === jetty-stats.xml ===

        StatisticsHandler stats = new StatisticsHandler();

        stats.setHandler(server.getHandler());

        server.setHandler(stats);

        ConnectorStatistics.addToAllConnectors(server);

        // === Rewrite Handler

        RewriteHandler rewrite = new RewriteHandler();

        rewrite.setHandler(server.getHandler());

        server.setHandler(rewrite);

        // === jetty-requestlog.xml ===

        NCSARequestLog requestLog = new NCSARequestLog();

        requestLog.setFilename(jetty_home + "/logs/yyyy_mm_dd.request.log");

        requestLog.setFilenameDateFormat("yyyy_MM_dd");

        requestLog.setRetainDays(90);

        requestLog.setAppend(true);

        requestLog.setExtended(true);

        requestLog.setLogCookies(false);

        requestLog.setLogTimeZone("GMT");

        RequestLogHandler requestLogHandler = new RequestLogHandler();

        requestLogHandler.setRequestLog(requestLog);

        handlers.addHandler(requestLogHandler);

        // === jetty-lowresources.xml ===

        LowResourceMonitor lowResourcesMonitor=new LowResourceMonitor(server);

        lowResourcesMonitor.setPeriod(1000);

        lowResourcesMonitor.setLowResourcesIdleTimeout(200);

        lowResourcesMonitor.setMonitorThreads(true);

        lowResourcesMonitor.setMaxConnections(0);

        lowResourcesMonitor.setMaxMemory(0);

        lowResourcesMonitor.setMaxLowResourcesTime(5000);

        server.addBean(lowResourcesMonitor);

        // === test-realm.xml ===

        HashLoginService login = new HashLoginService();

        login.setName("Test Realm");

        login.setConfig(jetty_base + "/etc/realm.properties");

        login.setHotReload(false);

        server.addBean(login);

        // Start the server

        server.start();

        server.join();

    }

}
21.3 嵌入式的例子
Jetty在被嵌入到各种应用程序方面有丰富的历史,在本节,将带着你通过几个简单的例子理解我们在git仓库的embedded-jetty-examples项目。
重要:
这是文件是直接在git仓库里面获取的,如果行号不能正确的匹配git仓库上的请通知我们。
21.3.1 文件服务器
这个例子展示了如何创建一个简单的文件服务器Jetty。是完全适合测试用于,需要一个实际的web服务器来获取文件,它可以很容易地配置到src/test/resources目录下。注意,这个没有任何形式的缓存,在服务器或设置适当的响应标头。通过简单的几行就可以提供一些文件:
import org.eclipse.jetty.server.Handler;

import org.eclipse.jetty.server.Server;

import org.eclipse.jetty.server.handler.DefaultHandler;

import org.eclipse.jetty.server.handler.HandlerList;

import org.eclipse.jetty.server.handler.ResourceHandler;

import org.eclipse.jetty.server.handler.gzip.GzipHandler;

/**

 * Simple Jetty FileServer.

 * This is a simple example of Jetty configured as a FileServer.

 */

public class FileServer

{

    public static void main(String[] args) throws Exception

    {

        // Create a basic Jetty server object that will listen on port 8080.  Note that if you set this to port 0

        // then a randomly available port will be assigned that you can either look in the logs for the port,

        // or programmatically obtain it for use in test cases.

        Server server = new Server(8080);

        // Create the ResourceHandler. It is the object that will actually handle the request for a given file. It is

        // a Jetty Handler object so it is suitable for chaining with other handlers as you will see in other examples.

        ResourceHandler resource_handler = new ResourceHandler();

        // Configure the ResourceHandler. Setting the resource base indicates where the files should be served out of.

        // In this example it is the current directory but it can be configured to anything that the jvm has access to.

        resource_handler.setDirectoriesListed(true);

        resource_handler.setWelcomeFiles(new String[]{ "index.html" });

        resource_handler.setResourceBase(".");

        // Add the ResourceHandler to the server.

        GzipHandler gzip = new GzipHandler();

        server.setHandler(gzip);

        HandlerList handlers = new HandlerList();

        handlers.setHandlers(new Handler[] { resource_handler, new DefaultHandler() });

        gzip.setHandler(handlers);

        // Start things up! By using the server.join() the server thread will join with the current thread.

        // See "http://docs.oracle.com/javase/1.5.0/docs/api/java/lang/Thread.html#join()" for more details.

        server.start();

        server.join();

    }

}
21.3.1.1 运行程序
运行后通过访问 http://localhost:8080/index.html,即可查看到想要的结果。
21.3.1.2 Maven坐标
为了成功运行上面的例子,项目需要增加以下依赖:
<dependency>

  <groupId>org.eclipse.jetty</groupId>

  <artifactId>jetty-server</artifactId>

  <version>${project.version}</version>

</dependency>
21.3.2 多重文件提供
这个例子展示了通过多重资源处理器提供资源,通过访问同一个路径会按顺兴调用ResourceHandlers 获得资源:
import java.io.File;

import org.eclipse.jetty.server.Connector;

import org.eclipse.jetty.server.Handler;

import org.eclipse.jetty.server.Server;

import org.eclipse.jetty.server.ServerConnector;

import org.eclipse.jetty.server.handler.ContextHandler;

import org.eclipse.jetty.server.handler.ContextHandlerCollection;

import org.eclipse.jetty.server.handler.ResourceHandler;

import org.eclipse.jetty.toolchain.test.MavenTestingUtils;

import org.eclipse.jetty.util.resource.Resource;

public class SplitFileServer {

    public static void main(String[] args) throws Exception {

        Server server = new Server();

        ServerConnector connector = new ServerConnector(server);

        connector.setPort(8090);

        server.setConnectors(new Connector[] { connector });

        //创建一个资源处理器,设置"/"根路径,

        ResourceHandler rh0 = new ResourceHandler();

        ContextHandler context0 = new ContextHandler();

        context0.setContextPath("/");

        File dir0 = MavenTestingUtils.getTestResourceDir("dir0");

        context0.setBaseResource(Resource.newResource(dir0));

        context0.setHandler(rh0);

        //创建另一个资源处理器,指定另一个文件夹

        ResourceHandler rh1 = new ResourceHandler();

        ContextHandler context1 = new ContextHandler();

        context1.setContextPath("/");

        File dir1 = MavenTestingUtils.getTestResourceDir("dir1");

        context1.setBaseResource(Resource.newResource(dir1));

        context1.setHandler(rh1);

        //创建一个ContextHandlerCollection集合来包含所有资源处理器,若都匹配则按顺序来

        ContextHandlerCollection contexts = new ContextHandlerCollection();

        contexts.setHandlers(new Handler[] { context0, context1 });

        server.setHandler(contexts);

        server.start();

        // 输出server状态

        System.out.println(server.dump());

        server.join();

    }

}
21.3.2.1 运行程序
启动程序后访问http://localhost:8090/index.html ,若第一个匹配路径下没有找到相应的资源,则在第二个路径下继续寻找,以此类推。
21.3.2.2 Maven坐标
为了能正确的运行需要添加以下依赖
<dependency>

  <groupId>org.eclipse.jetty</groupId>

  <artifactId>jetty-server</artifactId>

  <version>${project.version}</version>

</dependency>

<dependency>

  <groupId>org.eclipse.jetty.toolchain</groupId>

  <artifactId>jetty-test-helper</artifactId>

  <version>2.2</version>

</dependency>
21.3.3 多重连接
这个例子展示了如何配置多重连接,主要是同时配置http和https两种,两种配置都使用了HelloHandler (此例子上面已有不再翻译):
//

//  ========================================================================

//  Copyright (c) 1995-2016 Mort Bay Consulting Pty. Ltd.

//  ------------------------------------------------------------------------

//  All rights reserved. This program and the accompanying materials

//  are made available under the terms of the Eclipse Public License v1.0

//  and Apache License v2.0 which accompanies this distribution.

//

//      The Eclipse Public License is available at

//      http://www.eclipse.org/legal/epl-v10.html

//

//      The Apache License v2.0 is available at

//      http://www.opensource.org/licenses/apache2.0.php

//

//  You may elect to redistribute this code under either of these licenses.

//  ========================================================================

//

package org.eclipse.jetty.embedded;

import java.io.File;

import java.io.FileNotFoundException;

import org.eclipse.jetty.http.HttpVersion;

import org.eclipse.jetty.server.Connector;

import org.eclipse.jetty.server.HttpConfiguration;

import org.eclipse.jetty.server.HttpConnectionFactory;

import org.eclipse.jetty.server.SecureRequestCustomizer;

import org.eclipse.jetty.server.Server;

import org.eclipse.jetty.server.ServerConnector;

import org.eclipse.jetty.server.SslConnectionFactory;

import org.eclipse.jetty.util.ssl.SslContextFactory;

/**

 * A Jetty server with multiple connectors.

 */

public class ManyConnectors

{

    public static void main( String[] args ) throws Exception

    {

        // Since this example shows off SSL configuration, we need a keystore

        // with the appropriate key. These lookup of jetty.home is purely a hack

        // to get access to a keystore that we use in many unit tests and should

        // probably be a direct path to your own keystore.

        String jettyDistKeystore = "../../jetty-distribution/target/distribution/demo-base/etc/keystore";

        String keystorePath = System.getProperty(

                "example.keystore", jettyDistKeystore);

        File keystoreFile = new File(keystorePath);

        if (!keystoreFile.exists())

        {

            throw new FileNotFoundException(keystoreFile.getAbsolutePath());

        }

        // Create a basic jetty server object without declaring the port. Since

        // we are configuring connectors directly we'll be setting ports on

        // those connectors.

        Server server = new Server();

        // HTTP Configuration

        // HttpConfiguration is a collection of configuration information

        // appropriate for http and https. The default scheme for http is

        // <code>http</code> of course, as the default for secured http is

        // <code>https</code> but we show setting the scheme to show it can be

        // done. The port for secured communication is also set here.

        HttpConfiguration http_config = new HttpConfiguration();

        http_config.setSecureScheme("https");

        http_config.setSecurePort(8443);

        http_config.setOutputBufferSize(32768);

        // HTTP connector

        // The first server connector we create is the one for http, passing in

        // the http configuration we configured above so it can get things like

        // the output buffer size, etc. We also set the port (8080) and

        // configure an idle timeout.

        ServerConnector http = new ServerConnector(server,

                new HttpConnectionFactory(http_config));

        http.setPort(8080);

        http.setIdleTimeout(30000);

        // SSL Context Factory for HTTPS

        // SSL requires a certificate so we configure a factory for ssl contents

        // with information pointing to what keystore the ssl connection needs

        // to know about. Much more configuration is available the ssl context,

        // including things like choosing the particular certificate out of a

        // keystore to be used.

        SslContextFactory sslContextFactory = new SslContextFactory();

        sslContextFactory.setKeyStorePath(keystoreFile.getAbsolutePath());

        sslContextFactory.setKeyStorePassword("OBF:1vny1zlo1x8e1vnw1vn61x8g1zlu1vn4");

        sslContextFactory.setKeyManagerPassword("OBF:1u2u1wml1z7s1z7a1wnl1u2g");

        // HTTPS Configuration

        // A new HttpConfiguration object is needed for the next connector and

        // you can pass the old one as an argument to effectively clone the

        // contents. On this HttpConfiguration object we add a

        // SecureRequestCustomizer which is how a new connector is able to

        // resolve the https connection before handing control over to the Jetty

        // Server.

        HttpConfiguration https_config = new HttpConfiguration(http_config);

        SecureRequestCustomizer src = new SecureRequestCustomizer();

        src.setStsMaxAge(2000);

        src.setStsIncludeSubDomains(true);

        https_config.addCustomizer(src);

        // HTTPS connector

        // We create a second ServerConnector, passing in the http configuration

        // we just made along with the previously created ssl context factory.

        // Next we set the port and a longer idle timeout.

        ServerConnector https = new ServerConnector(server,

            new SslConnectionFactory(sslContextFactory,HttpVersion.HTTP_1_1.asString()),

                new HttpConnectionFactory(https_config));

        https.setPort(8443);

        https.setIdleTimeout(500000);

        // Here you see the server having multiple connectors registered with

        // it, now requests can flow into the server from both http and https

        // urls to their respective ports and be processed accordingly by jetty.

        // A simple handler is also registered with the server so the example

        // has something to pass requests off to.

        // Set the connectors

        server.setConnectors(new Connector[] { http, https });

        // Set a handler

        server.setHandler(new HelloHandler());

        // Start the server

        server.start();

        server.join();

    }

}
添加maven依赖如下:
<dependency>

  <groupId>org.eclipse.jetty</groupId>

  <artifactId>jetty-server</artifactId>

  <version>${project.version}</version>

</dependency>

<dependency>

  <groupId>org.eclipse.jetty</groupId>

  <artifactId>jetty-security</artifactId>

  <version>${project.version}</version>

</dependency>
21.3.4 登录校验示例
这个例子展示了如何通过一个安全管理器来封装一个普通管理器,我们有一个简单的Hello处理程序返回一个问候,但增加了一个限制就是得到这个问候你必须进行身份验证。另外需要注意的是这个例子使用了支持map校验的ConstraintSecurityHandler,这样比较容易展示SecurityHandler 的使用方法,如果不需要可以简单的实现SecurityHandler:
//

//  ========================================================================

//  Copyright (c) 1995-2016 Mort Bay Consulting Pty. Ltd.

//  ------------------------------------------------------------------------

//  All rights reserved. This program and the accompanying materials

//  are made available under the terms of the Eclipse Public License v1.0

//  and Apache License v2.0 which accompanies this distribution.

//

//      The Eclipse Public License is available at

//      http://www.eclipse.org/legal/epl-v10.html

//

//      The Apache License v2.0 is available at

//      http://www.opensource.org/licenses/apache2.0.php

//

//  You may elect to redistribute this code under either of these licenses.

//  ========================================================================

//

package org.eclipse.jetty.embedded;

import java.util.Collections;

import org.eclipse.jetty.security.ConstraintMapping;

import org.eclipse.jetty.security.ConstraintSecurityHandler;

import org.eclipse.jetty.security.HashLoginService;

import org.eclipse.jetty.security.LoginService;

import org.eclipse.jetty.security.authentication.BasicAuthenticator;

import org.eclipse.jetty.server.Server;

import org.eclipse.jetty.util.security.Constraint;

public class SecuredHelloHandler

{

    public static void main( String[] args ) throws Exception

    {

        // Create a basic jetty server object that will listen on port 8080.

        // Note that if you set this to port 0 then a randomly available port

        // will be assigned that you can either look in the logs for the port,

        // or programmatically obtain it for use in test cases.

        Server server = new Server(8080);

        // Since this example is for our test webapp, we need to setup a

        // LoginService so this shows how to create a very simple hashmap based

        // one. The name of the LoginService needs to correspond to what is

        // configured a webapp's web.xml and since it has a lifecycle of its own

        // we register it as a bean with the Jetty server object so it can be

        // started and stopped according to the lifecycle of the server itself.

        // In this example the name can be whatever you like since we are not

        // dealing with webapp realms.

        LoginService loginService = new HashLoginService("MyRealm",

                "src/test/resources/realm.properties");

        server.addBean(loginService);

        // A security handler is a jetty handler that secures content behind a

        // particular portion of a url space. The ConstraintSecurityHandler is a

        // more specialized handler that allows matching of urls to different

        // constraints. The server sets this as the first handler in the chain,

        // effectively applying these constraints to all subsequent handlers in

        // the chain.

        ConstraintSecurityHandler security = new ConstraintSecurityHandler();

        server.setHandler(security);

        // This constraint requires authentication and in addition that an

        // authenticated user be a member of a given set of roles for

        // authorization purposes.

        Constraint constraint = new Constraint();

        constraint.setName("auth");

        constraint.setAuthenticate(true);

        constraint.setRoles(new String[] { "user", "admin" });

        // Binds a url pattern with the previously created constraint. The roles

        // for this constraing mapping are mined from the Constraint itself

        // although methods exist to declare and bind roles separately as well.

        ConstraintMapping mapping = new ConstraintMapping();

        mapping.setPathSpec("/*");

        mapping.setConstraint(constraint);

        // First you see the constraint mapping being applied to the handler as

        // a singleton list, however you can passing in as many security

        // constraint mappings as you like so long as they follow the mapping

        // requirements of the servlet api. Next we set a BasicAuthenticator

        // instance which is the object that actually checks the credentials

        // followed by the LoginService which is the store of known users, etc.

        security.setConstraintMappings(Collections.singletonList(mapping));

        security.setAuthenticator(new BasicAuthenticator());

        security.setLoginService(loginService);

        // The Hello Handler is the handler we are securing so we create one,

        // and then set it as the handler on the

        // security handler to complain the simple handler chain.

        HelloHandler hh = new HelloHandler();

        // chain the hello handler into the security handler

        security.setHandler(hh);

        // Start things up!

        server.start();

        // The use of server.join() the will make the current thread join and

        // wait until the server is done executing.

        // See

        // http://docs.oracle.com/javase/7/docs/api/java/lang/Thread.html#join()

        server.join();

    }

}
21.3.4.1 运行程序
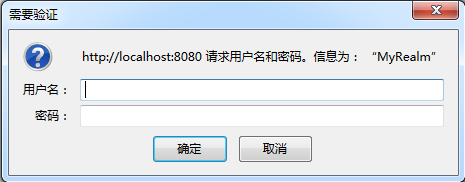
运行程序后,输入路径http://localhost:8080/index.html ,会提示输入用户名和密码,如下图:
21.3.4.2 realm.properties文件内容
#

# This file defines users passwords and roles for a HashUserRealm

#

# The format is

#  <username>: <password>[,<rolename> ...]

#

# Passwords may be clear text, obfuscated or checksummed.  The class

# org.eclipse.util.Password should be used to generate obfuscated

# passwords or password checksums

#

# If DIGEST Authentication is used, the password must be in a recoverable

# format, either plain text or OBF:.

#

jetty: MD5:164c88b302622e17050af52c89945d44,user

admin: CRYPT:adpexzg3FUZAk,server-administrator,content-administrator,admin,user

other: OBF:1xmk1w261u9r1w1c1xmq,user

plain: plain,user

user: password,user

# This entry is for digest auth.  The credential is a MD5 hash of username:realmname:password

digest: MD5:6e120743ad67abfbc385bc2bb754e297,user
21.3.4.3 Maven坐标
<dependency>

  <groupId>org.eclipse.jetty</groupId>

  <artifactId>jetty-server</artifactId>

  <version>${project.version}</version>

</dependency>
21.3.5 最简单Servlet
这个例子展示了如何部署一个最简单的servlet到Jetty,这是一个严格意义上的servlet而不是一个web应用的servlet。这个例子非常适合有一个用来测试一个简单的servlet。
//

//  ========================================================================

//  Copyright (c) 1995-2016 Mort Bay Consulting Pty. Ltd.

//  ------------------------------------------------------------------------

//  All rights reserved. This program and the accompanying materials

//  are made available under the terms of the Eclipse Public License v1.0

//  and Apache License v2.0 which accompanies this distribution.

//

//      The Eclipse Public License is available at

//      http://www.eclipse.org/legal/epl-v10.html

//

//      The Apache License v2.0 is available at

//      http://www.opensource.org/licenses/apache2.0.php

//

//  You may elect to redistribute this code under either of these licenses.

//  ========================================================================

//

package org.eclipse.jetty.embedded;

import java.io.IOException;

import javax.servlet.ServletException;

import javax.servlet.http.HttpServlet;

import javax.servlet.http.HttpServletRequest;

import javax.servlet.http.HttpServletResponse;

import org.eclipse.jetty.server.Server;

import org.eclipse.jetty.servlet.ServletHandler;

public class MinimalServlets

{

    public static void main( String[] args ) throws Exception

    {

        // Create a basic jetty server object that will listen on port 8080.

        // Note that if you set this to port 0 then a randomly available port

        // will be assigned that you can either look in the logs for the port,

        // or programmatically obtain it for use in test cases.

        Server server = new Server(8080);

        // The ServletHandler is a dead simple way to create a context handler

        // that is backed by an instance of a Servlet.

        // This handler then needs to be registered with the Server object.

        ServletHandler handler = new ServletHandler();

        server.setHandler(handler);

        // Passing in the class for the Servlet allows jetty to instantiate an

        // instance of that Servlet and mount it on a given context path.

        // IMPORTANT:

        // This is a raw Servlet, not a Servlet that has been configured

        // through a web.xml @WebServlet annotation, or anything similar.

        handler.addServletWithMapping(HelloServlet.class, "/*");

        // Start things up!

        server.start();

        // The use of server.join() the will make the current thread join and

        // wait until the server is done executing.

        // See

        // http://docs.oracle.com/javase/7/docs/api/java/lang/Thread.html#join()

        server.join();

    }

    @SuppressWarnings("serial")

    public static class HelloServlet extends HttpServlet

    {

        @Override

        protected void doGet( HttpServletRequest request,

                              HttpServletResponse response ) throws ServletException,

                                                            IOException

        {

            response.setContentType("text/html");

            response.setStatus(HttpServletResponse.SC_OK);

            response.getWriter().println("<h1>Hello from HelloServlet</h1>");

        }

    }

}
Maven依赖:
<dependency>

  <groupId>org.eclipse.jetty</groupId>

  <artifactId>jetty-servlet</artifactId>

  <version>${project.version}</version>

</dependency>
21.3.6 Web应用
这个例子展示如何部署一个简单的web应用到一个嵌入式的Jetty上。这种方式非常适合你用编程的方式管理一个服务的生命周期:
//

//  ========================================================================

//  Copyright (c) 1995-2016 Mort Bay Consulting Pty. Ltd.

//  ------------------------------------------------------------------------

//  All rights reserved. This program and the accompanying materials

//  are made available under the terms of the Eclipse Public License v1.0

//  and Apache License v2.0 which accompanies this distribution.

//

//      The Eclipse Public License is available at

//      http://www.eclipse.org/legal/epl-v10.html

//

//      The Apache License v2.0 is available at

//      http://www.opensource.org/licenses/apache2.0.php

//

//  You may elect to redistribute this code under either of these licenses.

//  ========================================================================

//

package org.eclipse.jetty.embedded;

import java.io.File;

import java.lang.management.ManagementFactory;

import org.eclipse.jetty.jmx.MBeanContainer;

import org.eclipse.jetty.security.HashLoginService;

import org.eclipse.jetty.server.Server;

import org.eclipse.jetty.server.handler.AllowSymLinkAliasChecker;

import org.eclipse.jetty.webapp.WebAppContext;

public class OneWebApp

{

    public static void main( String[] args ) throws Exception

    {

        // Create a basic jetty server object that will listen on port 8080.

        // Note that if you set this to port 0 then a randomly available port

        // will be assigned that you can either look in the logs for the port,

        // or programmatically obtain it for use in test cases.

        Server server = new Server(8080);

        // Setup JMX

        MBeanContainer mbContainer = new MBeanContainer(

                ManagementFactory.getPlatformMBeanServer());

        server.addBean(mbContainer);

        // The WebAppContext is the entity that controls the environment in

        // which a web application lives and breathes. In this example the

        // context path is being set to "/" so it is suitable for serving root

        // context requests and then we see it setting the location of the war.

        // A whole host of other configurations are available, ranging from

        // configuring to support annotation scanning in the webapp (through

        // PlusConfiguration) to choosing where the webapp will unpack itself.

        WebAppContext webapp = new WebAppContext();

        webapp.setContextPath("/");

        File warFile = new File(

                "../../jetty-distribution/target/distribution/test/webapps/test/");

        webapp.setWar(warFile.getAbsolutePath());

        webapp.addAliasCheck(new AllowSymLinkAliasChecker());

        // A WebAppContext is a ContextHandler as well so it needs to be set to

        // the server so it is aware of where to send the appropriate requests.

        server.setHandler(webapp);

        // Start things up!

        server.start();

        // The use of server.join() the will make the current thread join and

        // wait until the server is done executing.

        // See http://docs.oracle.com/javase/7/docs/api/java/lang/Thread.html#join()

        server.join();

    }

}
Maven依赖:
<dependency>

  <groupId>org.eclipse.jetty</groupId>

  <artifactId>jetty-webapp</artifactId>

  <version>${project.version}</version>

</dependency>
21.3.7 包含JSP的web应用
这个例子和前一节的例子非常相似,尽管它使嵌入式的Jetty支持了JSP。Jetty9.2以后,使用了来自Apache的jsp引擎,它依赖servlet3.1规范以及ServletContainerInitializer 初始化。为了使其在Jetty中正常工作,你需要像下面例子一样使之支持注解:
//

//  ========================================================================

//  Copyright (c) 1995-2016 Mort Bay Consulting Pty. Ltd.

//  ------------------------------------------------------------------------

//  All rights reserved. This program and the accompanying materials

//  are made available under the terms of the Eclipse Public License v1.0

//  and Apache License v2.0 which accompanies this distribution.

//

//      The Eclipse Public License is available at

//      http://www.eclipse.org/legal/epl-v10.html

//

//      The Apache License v2.0 is available at

//      http://www.opensource.org/licenses/apache2.0.php

//

//  You may elect to redistribute this code under either of these licenses.

//  ========================================================================

//

package org.eclipse.jetty.embedded;

import java.io.File;

import java.lang.management.ManagementFactory;

import org.eclipse.jetty.jmx.MBeanContainer;

import org.eclipse.jetty.security.HashLoginService;

import org.eclipse.jetty.server.Server;

import org.eclipse.jetty.webapp.Configuration;

import org.eclipse.jetty.webapp.WebAppContext;

public class OneWebAppWithJsp

{

    public static void main( String[] args ) throws Exception

    {

        // Create a basic jetty server object that will listen on port 8080.

        // Note that if you set this to port 0 then

        // a randomly available port will be assigned that you can either look

        // in the logs for the port,

        // or programmatically obtain it for use in test cases.

        Server server = new Server( 8080 );

        // Setup JMX

        MBeanContainer mbContainer = new MBeanContainer(

                ManagementFactory.getPlatformMBeanServer() );

        server.addBean( mbContainer );

        // The WebAppContext is the entity that controls the environment in

        // which a web application lives and

        // breathes. In this example the context path is being set to "/" so it

        // is suitable for serving root context

        // requests and then we see it setting the location of the war. A whole

        // host of other configurations are

        // available, ranging from configuring to support annotation scanning in

        // the webapp (through

        // PlusConfiguration) to choosing where the webapp will unpack itself.

        WebAppContext webapp = new WebAppContext();

        webapp.setContextPath( "/" );

        File warFile = new File(

                "../../jetty-distribution/target/distribution/demo-base/webapps/test.war" );

        if (!warFile.exists())

        {

            throw new RuntimeException( "Unable to find WAR File: "

                    + warFile.getAbsolutePath() );

        }

        webapp.setWar( warFile.getAbsolutePath() );

        // This webapp will use jsps and jstl. We need to enable the

        // AnnotationConfiguration in order to correctly

        // set up the jsp container

        Configuration.ClassList classlist = Configuration.ClassList

                .setServerDefault( server );

        classlist.addBefore(

                "org.eclipse.jetty.webapp.JettyWebXmlConfiguration",

                "org.eclipse.jetty.annotations.AnnotationConfiguration" );

        // Set the ContainerIncludeJarPattern so that jetty examines these

        // container-path jars for tlds, web-fragments etc.

        // If you omit the jar that contains the jstl .tlds, the jsp engine will

        // scan for them instead.

        webapp.setAttribute(

                "org.eclipse.jetty.server.webapp.ContainerIncludeJarPattern",

                ".*/[^/]*servlet-api-[^/]*\\.jar$|.*/javax.servlet.jsp.jstl-.*\\.jar$|.*/[^/]*taglibs.*\\.jar$" );

        // A WebAppContext is a ContextHandler as well so it needs to be set to

        // the server so it is aware of where to

        // send the appropriate requests.

        server.setHandler( webapp );

        // Configure a LoginService.

        // Since this example is for our test webapp, we need to setup a

        // LoginService so this shows how to create a very simple hashmap based

        // one. The name of the LoginService needs to correspond to what is

        // configured in the webapp's web.xml and since it has a lifecycle of

        // its own we register it as a bean with the Jetty server object so it

        // can be started and stopped according to the lifecycle of the server

        // itself.

        HashLoginService loginService = new HashLoginService();

        loginService.setName( "Test Realm" );

        loginService.setConfig( "src/test/resources/realm.properties" );

        server.addBean( loginService );

        // Start things up!

        server.start();

        // The use of server.join() the will make the current thread join and

        // wait until the server is done executing.

        // See http://docs.oracle.com/javase/7/docs/api/java/lang/Thread.html#join()

        server.join();

    }

}
Maven依赖
<dependency>

  <groupId>org.eclipse.jetty</groupId>

  <artifactId>jetty-annotations</artifactId>

  <version>${project.version}</version>

</dependency>

<dependency>

  <groupId>org.eclipse.jetty</groupId>

  <artifactId>apache-jsp</artifactId>

  <version>${project.version}</version>

</dependency>

<dependency>

  <groupId>org.eclipse.jetty</groupId>

  <artifactId>apache-jstl</artifactId>

  <version>${project.version}</version>

</dependency>
二十二、HTTP客户端
22.1 简介
Jetty的HTTP模块提供简单易用的APIs和工具来处理HTTP(HTTPS)请求。Jetty的HTTP客户端是不封闭和异步的。它提供一个从不会堵塞I/O的异步的API,提高线程利用率,适合高性能场景如负载测试或并行计算。然而,如果你所有的请求都是使用GET方式来获得一个响应,Jetty的HTTP客户端还提供了一个同步API,这是一个编程接口,线程从发出请求直到请求/响应对话完成才释放。Jetty的HTTP客户端支持不同的协议,如HTTP/1.1, FastCGI 和 HTTP/2。这样HTTP请求可以以不同的方式获得资源,最常用的事HTTP/1.1。
FastCGI传输过程中大量使用Jetty FastCGI的支持,允许Jetty作为反向代理PHP(Apache或Nginx做完全一样),因此能够服务—例如WordPress网站。
简单易用的特性会让你得到这样的HTTP客户端:
- 重定向支持:像302,303重定向码是自动支持的
- Cookies支持:Cookies会自动发送到匹配的地址上
- 认证支持:HTTP的Basic和Digest认证是原始支持的,其他认证方法需要插件
- 请求代理支持:HTTP代理和SOCKS4 代理支持
22.1.1 开始使用HttpClient
主要的方法是org.eclipse.jetty.client.HttpClient,你可以把HttpClient 实例做为一个浏览器实例,像浏览器一样,它可以把请求发到不同的作用域上,管理重定向、Cookies、认证,你可以为它配置一个代理,它会提供你想要的请求和相应。
为了使用HttpClient,你必须首先实例它,然后配置它,最后启动它:
// 实例化一个HttpClient

HttpClient httpClient = new HttpClient();

// 对HttpClient进行配置

httpClient.setFollowRedirects(false);

// 启动HttpClient

httpClient.start();
你可以启动多个HttpClient,但通常一个web应用启动一个HttpClient就足够了,启动多个HttpClient实例的原因要么是想要不同配置的HttpClient(例如:一个HttpClient使用代理,另一个不用),要么是你想有两个不同的浏览器,为了不同的cookies,不同的认证,还有就是你想有两个不同的传输。
当你使用无参构造方法实例化一个HttpClient时,你只能响应简单的HTTP请求,而不能响应HTTPS请求。
为了支持HTTPS请求,你首先应该创建一个SslContextFactory,配置它并将它传递给HttpClient的构造方法。当你创建SslContextFactory后,HttpClient即可在所有作用域里支持HTTP和HTTPS请求。
//创建并配置SslContextFactory

SslContextFactory sslContextFactory = new SslContextFactory();

//通过 SslContextFactory创建HttpClient

HttpClient httpClient = new HttpClient(sslContextFactory);

//配置HttpClient

httpClient.setFollowRedirects(false);

//启动HttpClient

httpClient.start();
22.1.2 终止HttpClient
当你应用停止时,建议你调用以下方法来终止一个HttpClient
httpClient.stop();
终止httpClien能确保,httpClient持有的资源(例如:认证证书,cookies等)被释放掉,线程和调度任务被适当的停止,并让被httpCLient使用的线程全部退出。
22.2 API使用
22.2.1 阻塞式APIs
解析一个http请求的最简单方法如下:
ContentResponse response = httpClient.GET("http://domain.com/path?query");
方法 HttpClient.GET(...)用来通过给定的URI来获得一个HTTP的GET请求,并且当成功响应后返回一个ContentResponse 。
ContentResponse 包含一个HTTP的相应信息:状态码、响应头、响应内容。内容大小被限制在2M内,为了获得更大的内容详见相应内容处理器。
如果你想订做请求信息,例如,使用请求头,请求方式或者浏览器版本,做法如下:
ContentResponse response = httpClient.newRequest("http://domain.com/path?query")

        .method(HttpMethod.HEAD)

        .agent("Mozilla/5.0 (X11; Ubuntu; Linux x86_64; rv:17.0) Gecko/20100101 Firefox/17.0")

        .send();
上面代码时下面代码的简写形式:
Request request = httpClient.newRequest("http://domain.com/path?query");

request.method(HttpMethod.HEAD);

request.agent("Mozilla/5.0 (X11; Ubuntu; Linux x86_64; rv:17.0) Gecko/20100101 Firefox/17.0");

ContentResponse response = request.send();
你第一次通过httpClient.newRequest(...)方式创建一个Request对象,然后使用APIs来定制它(可以使用链式调用)。当Request请求被定制完成,你可以调用Request.send()方法来获得成功访问后的ContentResponse 对象。
简单的POST请求如下:
ContentResponse response = httpClient.POST("http://domain.com/entity/1")

        .param("p", "value")

        .send();
POST方式的参数通过 param() 方法,并自动进行URL编码。
Jetty的客户端会自动重定向,可以自动处理典型的WEB模式如, POST/Redirect/GET,随后的重定向可以被单独禁用或者全局禁用。
文件上传仅仅需要简单的一行,确保使用JDK7及以上版本用于支持java.nio.file类:
ContentResponse response = httpClient.newRequest("http://domain.com/upload")

        .method(HttpMethod.POST)

        .file(Paths.get("file_to_upload.txt"), "text/plain")

        .send();
也可以通过如下方式来规定请求超时时间:
ContentResponse response = httpClient.newRequest("http://domain.com/path?query")

        .timeout(5, TimeUnit.SECONDS)

        .send();
在上面的那个例子中,当5秒过后没有响应时,会抛出一个java.util.concurrent.TimeoutException异常。
22.2.2 非堵塞式APIs
到目前,我们已经展示了如何使用阻塞方式的Jetty HTTP客户端,线程需要等到请求/响应完成后才能结束。
这一章节,我们将着眼于非阻塞式、异步的Jetty HTTP客户端使用方法,这种方法非常适合大文件下载、并行处理,在这些情况下,性能和高效的线程性和资源利用率是一个关键因素。
异步APIs的实现依靠请求和响应各阶段的监听。这些监听器所实现的应用可以有各种类型的逻辑,监听器的实现在同一个线程中来完成请求或响应。所以如果在监听器内的应用程序代码需要较长的执行时间,那么请求或者响应将会等待直到监听器返回结果。
如果你要在监听器内执行一个需要很长时间的代码,你必须创建自己的线程,并且深度拷贝你需要的监听器的任何数据,因为当监听器返回数据后,监听器内的数据有可能会被回收、清除、销毁。
请求和响应将会被两个不同的线程处理也有可能同步进行,一个并发处理典型的例子是一个大文件上传可能与大大文件下载并发进行。符代替性下,响应的处理有可能会在请求没有结束前就已经完成了,典型的例子是一个大文件上传会立即触发一个响应回复如服务器返回的错误信息,响应完成了,但是上传文件依然在继续。
应用程序的线程调用Request.send(Response.CompleteListener)方法来对请求进行处理,直到请求被处理完或者阻塞I/O,那么它将返回(没有阻塞),如果它将阻塞I/O,那么这个线程会要求I/O系统提供一个I/O可以开始的事件,并返回,当这个事件被触发的时候,在HttpClient线程池中的线程将返回来继续处理请求。
响应会在可以有字节进行读的这一条件触发下执行,响应会一直执行知道响应完全执行完成或者将要堵塞I/O。如果它将堵塞I/O,那么线程会要求I/O系统提供一个I/O可以使用的触发事件,然后线程返回。当这个事件被触发的时候,在HttpClient线程池中的线程将返回来继续处理响应。
一个简单的异步GET方式的例子:
httpClient.newRequest("http://domain.com/path")

        .send(new Response.CompleteListener()

        {

            @Override

            public void onComplete(Result result)

            {

                // Your logic here

            }

        });
方法Request.send(Response.CompleteListener)没有返回值并且不阻塞,Response.CompleteListener作为一个参数被提供用来提醒当请求/响应会话完成的时候Result 参数会允许你调用响应体。
你也可以用JDK8的lambda表达式来书写同样的代码:
httpClient.newRequest("http://domain.com/path")

        .send(result -> { /* Your logic here */ });
你也可以使用同步的方式设置超时时间:
Request request = httpClient.newRequest("http://domain.com/path")

        .timeout(3, TimeUnit.SECONDS)

        .send(result -> { /* Your logic here */ });
HTTP客户端的APIs使用监听器来监听请求和响应的各种事件,使用JDK8的lambda表达式会更简单:
httpClient.newRequest("http://domain.com/path")

        // Add request hooks

        .onRequestQueued(request -> { ... })

        .onRequestBegin(request -> { ... })

        ... // More request hooks available

        // Add response hooks

        .onResponseBegin(response -> { ... })

        .onResponseHeaders(response -> { ... })

        .onResponseContent((response, buffer) -> { ... })

        ... // More response hooks available

        .send(result -> { ... });
这让Jetty的HTTP 客户端非常适合测试,因为你可以精确的控制请求/响应的每一步的时间(从来知道请求和响应的时间的花在哪了)。
request的各种事件有:
- onBegin:请求开始
- onHeaders:Headers准备完毕可以发送
- onCommit:Headers已发送,等待进一步确认
- onContent:内容已发送
- onSuccess:成功
- onFailure:失败
response的各种事件有:
- onBegin:可以解析HTTP版本,HTTP状态码并可以解析收到的原因
- onHeader:接收到header ,不论是否被处理都要返回
- onHeaders:header 被接收并处理完成后
- onContent:org.eclipse.jetty.client.api.Response.ContentListener的方法,当响应的内容被接收到,可能会被执行多次,这个方法返回前缓冲区的内容必须被刷新。
- onContent:org.eclipse.jetty.client.api.Response.AsyncContentListener的方法
- onSuccess:异步回调方法调用时的响应内容已经收到
- onFailure:失败
- onComplete:当请求和响应都完毕吗,不管成不成功
22.2.3 内容处理器
22.2.3.1 请求的内容处理器
Jetty的http客户端提供很多工具类用来处理请求内容。
你可以把String、byte[]、ByteBuffer、java.nio.file.Path、InputStream或者你自己实现ContentProvider的类提供给request,这里有一个使用java.nio.file.Paths的例子:
ContentResponse response = httpClient.newRequest("http://domain.com/upload")

        .method(HttpMethod.POST)

        .file(Paths.get("file_to_upload.txt"), "text/plain")

        .send();
上面的例子等同于使用PathContentProvider 工具类:
ContentResponse response = httpClient.newRequest("http://domain.com/upload")

        .method(HttpMethod.POST)

        .content(new PathContentProvider(Paths.get("file_to_upload.txt")), "text/plain")

        .send();
同样,用户也可以通过InputStreamContentProvider工具类来使用FileInputStream:
ContentResponse response = httpClient.newRequest("http://domain.com/upload")

        .method(HttpMethod.POST)

        .content(new InputStreamContentProvider(new FileInputStream("file_to_upload.txt")), "text/plain")

        .send();
当InputStream 被阻塞了,因为输入的阻塞request也将会被堵塞,为了防止这种情况的发生可以使用HttpClient 异步的APIs。
如果你已经将内容读取内存中了,那么可以将内容做为一个byte[]提供给 BytesContentProvider工具类:
byte[] bytes = ...;

ContentResponse response = httpClient.newRequest("http://domain.com/upload")

        .method(HttpMethod.POST)

        .content(new BytesContentProvider(bytes), "text/plain")

        .send();
如果request需要的内容不能立即准备好,那么你的应用程序会注意到什么时候会发送,DeferredContentProvider 会这么用:
DeferredContentProvider content = new DeferredContentProvider();

httpClient.newRequest("http://domain.com/upload")

        .method(HttpMethod.POST)

        .content(content)

        .send(new Response.CompleteListener()

        {

            @Override

            public void onComplete(Result result)

            {

                // 程序的逻辑

            }

        });

// 内容还没有准备好

...

// 一个事件发生了,内容已经准备好了,提供给context

byte[] bytes = ...;

content.offer(ByteBuffer.wrap(bytes));

...

// 所有内容完毕后,关闭content

content.close();
当一个请求因为客户端上传而等待时,服务器可以异步完成相应(至少响应头可以)。在这种情况下Response.Listener会在请求完全发送完后被调用。这样可以允许我们精确的控制请求/响应的会话:例如,服务器通过向客户端发送一个响应来拒绝客户端上传太大的文件到服务器中。
另一种方法提供请求内容的是OutputStreamContentProvider,这可以允许用户使用OutputStreamContentProvider提供的OutputStream,来等待有内容可以写入的时候:
OutputStreamContentProvider content = new OutputStreamContentProvider();

//使用try-with-resources方法在context写完后关闭OutputStream

try (OutputStream output = content.getOutputStream())

{

 client.newRequest("localhost", 8080)

         .method(HttpMethod.POST)

         .content(content)

         .send(new Response.CompleteListener()

         {

             @Override

             public void onComplete(Result result)

             {

                 // 你的逻辑

             }

         });

 ...

 // 写内容

 writeContent(output);

}

//try-with-resource的结束,output.close()会在写完后自动调用
22.2.3.2 响应内容的处理
Jetty客户端允许程序通过不同的方式处理响应内容。
第一种方法是将响应内容缓存到内存中;一般用在阻塞式调用以及内容小于2M的时候。
如果你想控制响应内容的大小(例如限制响应内容的大小低于标准的2M),那么你可以使用org.eclipse.jetty.client.util.FutureResponseListener来处理:
Request request = httpClient.newRequest("http://domain.com/path");

//限制大小512KB

FutureResponseListener listener = new FutureResponseListener(request, 512 * 1024);

request.send(listener);

ContentResponse response = listener.get(5, TimeUnit.SECONDS);
如果响应内容超过指定大小,那么响应将被中断,一个异常将从get()方法内抛出。
如果你是用异步apis(非阻塞的方式),你可以使用BufferingResponseListener 工具类:
httpClient.newRequest("http://domain.com/path")

        // 限制大小8M

        .send(new BufferingResponseListener(8 * 1024 * 1024)

        {

            @Override

            public void onComplete(Result result)

            {

                if (!result.isFailed())

                {

                    byte[] responseContent = getContent();

                    // 你自己的逻辑

                }

            }

        });
第二种方法是最有效的(因为避免了内容的复制)并且允许你指定Response.ContentListener或者它的子类来处理即将到来的内容。在下面的这个例子中,Response.Listener.Adapter是一个同时实现了Response.ContentListener和Response.CompleteListener的可以传入到Request.send()中的类。Jetty的HTTP客户端将会执行onContent()方法0次或者多次(一有内容就会执行),并且最终会执行onComplete()方法。
ContentResponse response = httpClient

        .newRequest("http://domain.com/path")

        .send(new Response.Listener.Adapter()

        {

            @Override

            public void onContent(Response response, ByteBuffer buffer)

            {

                // 你的程序逻辑

            }

        });
第三种方法允许你使用InputStreamResponseListener 工具类来等待response 的内容流:
InputStreamResponseListener listener = new InputStreamResponseListener();

httpClient.newRequest("http://domain.com/path")

        .send(listener);

// 等待response头信息到来

Response response = listener.get(5, TimeUnit.SECONDS);

// 核实response

if (response.getStatus() == HttpStatus.OK_200)

{

    // 使用try-with-resources来关闭资源

    try (InputStream responseContent = listener.getInputStream())

    {

        // 你自己的逻辑

    }

}
22.3 cookies支持
Jetty HTTP客户端很容易支持cookies。HttpClient 实例将从HTTP响应中接收cookies并把它们存在java.net.CookieStore中,这个class是JDK的一个类。当有新的请求时,如果有匹配的cookies(简单来说,cookies不能过期并要匹配请求的路径),那么cookies将会被添加到请求中。
应用程序可以以编程的方式访问cookies并进行设置:
CookieStore cookieStore = httpClient.getCookieStore();

List<HttpCookie> cookies = cookieStore.get(URI.create("http://domain.com/path"));
应用程序也可以使用编程的方式来设置cookies是否它们将从一个响应中返回:
CookieStore cookieStore = httpClient.getCookieStore();

HttpCookie cookie = new HttpCookie("foo", "bar");

cookie.setDomain("domain.com");

cookie.setPath("/");

cookie.setMaxAge(TimeUnit.DAYS.toSeconds(1));

cookieStore.add(URI.create("http://domain.com"), cookie);
cookies可以被添加到指定的请求中:
ContentResponse response = httpClient.newRequest("http://domain.com/path")

        .cookie(new HttpCookie("foo", "bar"))

        .send();
如果你不愿意在接下来的请求中使用cookies你也可以移除它:
CookieStore cookieStore = httpClient.getCookieStore();

URI uri = URI.create("http://domain.com");

List<HttpCookie> cookies = cookieStore.get(uri);

for (HttpCookie cookie : cookies)

    cookieStore.remove(uri, cookie);
如果你想完全禁止使用cookies,那么你可以安装一个HttpCookieStore.Empty 实例这个方法来实现:
httpClient.setCookieStore(new HttpCookieStore.Empty());
你也可以实现一个cookies存储器来过滤cookies,用这种方法可以根据登录来过滤:
httpClient.setCookieStore(new GoogleOnlyCookieStore());

public class GoogleOnlyCookieStore extends HttpCookieStore

{

    @Override

    public void add(URI uri, HttpCookie cookie)

    {

        if (uri.getHost().endsWith("google.com"))

            super.add(uri, cookie);

    }

}
上面的例子将会只保留来自 google.com 或其子域的cookies。
22.4 证书支持
Jetty的客户端程序支持由 RFC 7235定义的 "Basic" 和"Digest"两种身份验证机制。
你可以在http客户端实例中配置身份验证如下:
URI uri = new URI("http://domain.com/secure");

String realm = "MyRealm";

String user = "username";

String pass = "password";

// 添加身份验证凭证

AuthenticationStore auth = httpClient.getAuthenticationStore();

auth.addAuthentication(new BasicAuthentication(uri, realm, user, pass));

ContentResponse response = httpClient

        .newRequest(uri)

        .send()

        .get(5, TimeUnit.SECONDS);
Jetty的http客户端会自动发送匹配的验证信息到服务器进行身份验证,如果验证成功后,那么将会把结果进行缓存,以后相同的域名或匹配的URI将不会再校验。
一个成功校验的HTTP会话如下:
Application  HttpClient                     Server

     |           |                             |

     |--- GET ---|------------ GET ----------->|

     |           |                             |

     |           |<-- 401 + WWW-Authenticate --|

     |           |                             |

     |           |--- GET + Authentication --->|

     |           |                             |

     |<-- 200 ---|------------ 200 ------------|
当应用程序接收到401状态码时,不会响应这个事件,它将会在HttpClient 内部进行处理,会产生一个简单的携带校验信息头的请求到原地址,然后传递带有200状态码的响应到应用程序。
成功校验的结果会被缓存,但是也可以被清除,通常为了再次强制校验一遍:
httpClient.getAuthenticationStore().clearAuthenticationResults();
认证有可能会被提前,避免往返服务时间的资源的消耗:
AuthenticationStore auth = httpClient.getAuthenticationStore();

URI uri = URI.create("http://domain.com/secure");

auth.addAuthenticationResult(new BasicAuthentication.BasicResult(uri, "username", "password"));
在这种方式中,原始请求会有HttpClient 携带一个验证的头信息,并且服务端应该返回200,这种方式比返回401要更有挑战性(因为要保证验证信息的准确性)。
22.5 代理支持
Jetty的http客户端支持以代理的方式来访问目标地址。
有两种简单的方式来使用代理:一种是HTTP代理(由org.eclipse.jetty.client.HttpProxy类提供),另一种是SOCKS 4代理(由org.eclipse.jetty.client.Socks4Proxy类提供),还可以自己写一个roxyConfiguration.Proxy.的子类来实现代理。
一个典型的配置如下:
ProxyConfiguration proxyConfig = httpClient.getProxyConfiguration();

HttpProxy proxy = new HttpProxy("proxyHost", proxyPort);

// 不使用代理访问 localhost:8080

proxy.getExcludedAddresses().add("localhost:8080");

// 添加新的代理

proxyConfig.getProxies().add(proxy);

ContentResponse response = httpClient.GET(uri);
你可以指定代理的地址和端口,也可以有选择的指定某些地址不是用代理,并将代理配置添加到ProxyConfiguration 实例中。
如果以这种方式,httpclient建立请求到http代理(纯文本请求)或者建立一个隧道连接通过http连接(为了加密HTTPS的请求)。
22.5.1 代理认证支持
Jetty的http客户端支持代理身份认证,同样的它也支持服务端身份认证。
下面的例子,代理需要一个Basic 身份认证,但是服务器需要Digest 认证,如下:
URI proxyURI = new URI("http://proxy.net:8080");

URI serverURI = new URI("http://domain.com/secure");

AuthenticationStore auth = httpClient.getAuthenticationStore();

// 代理认证.

auth.addAuthentication(new BasicAuthentication(proxyURI, "ProxyRealm", "proxyUser", "proxyPass"));

// 服务端认证

auth.addAuthentication(new DigestAuthentication(serverURI, "ServerRealm", "serverUser", "serverPass"));

// 代理配置

ProxyConfiguration proxyConfig = httpClient.getProxyConfiguration();

HttpProxy proxy = new HttpProxy("proxy.net", 8080);

proxyConfig.getProxies().add(proxy);

ContentResponse response = httpClient.newRequest(serverURI)

        .send()

        .get(5, TimeUnit.SECONDS);
若HTTP会话成功认证且代理也成功认证的会话过程如下:
Application  HttpClient                         Proxy                    Server

     |           |                                |                         |

     |--- GET -->|------------- GET ------------->|                         |

     |           |                                |                         |

     |           |<----- 407 + Proxy-Authn -------|                         |

     |           |                                |                         |

     |           |------ GET + Proxy-Authz ------>|                         |

     |           |                                |                         |

     |           |                                |---------- GET --------->|

     |           |                                |                         |

     |           |                                |<--- 401 + WWW-Authn ----|

     |           |                                |                         |

     |           |<------ 401 + WWW-Authn --------|                         |

     |           |                                |                         |

     |           |-- GET + Proxy-Authz + Authz -->|                         |

     |           |                                |                         |

     |           |                                |------ GET + Authz ----->|

     |           |                                |                         |

     |<-- 200 ---|<------------ 200 --------------|<--------- 200 ----------|
应用程序不会接收到407或401状态码因为处理全部在httpclient内部完成。
同样的验证,代理和服务端的验证可能被避免,特别当407和401循环返回时。
22.6 可选择式传输
Jetty HTTP客户端可以被配置为使用不同的传输进行HTTP请求和响应。这意味着客户端使用GET方式获取资源/index.html时,可以使用不同的格式。程序并不会察觉到它们实际应用的协议。用户可以使用高级语言的API来编写逻辑隐藏具体的传输细节。
最常用的协议是HTTP/1.1,基于文件的以分割线 \r\n分割的:
GET /index.html HTTP/1.1\r\n
Host: domain.com\r\n
...
\r\n
然而,相同的请求也可以使用一种二进制协议FastCGI:
  x01 x01 x00 x01 x00 x08 x00 x00

  x00 x01 x01 x00 x00 x00 x00 x00

  x01 x04 x00 x01 xLL xLL x00 x00

  x0C x0B  D   O   C   U   M   E

   N   T   _   U   R   I   /   i

   n   d   e   x   .   h   t   m

   l

  ...
同样,HTTP/2也是一种二进制协议,以不同的格式传输相同的信息。
22.6.1 HTTP/1.1传输协议
HTTP/1.1传输协议是默认的传输协议:
// 若没有指定,则默认使用它

HttpClient client = new HttpClient();
client.start();
如果你想定制HTTP/1.1协议,你可以配置用如下的方式配置HttpClient :
int selectors = 1;

HttpClientTransportOverHTTP transport = new HttpClientTransportOverHTTP(selectors);

HttpClient client = new HttpClient(transport, null);

client.start();
上面的例子允许你定制一定数量的NIO选择器给HttpClient 使用。
22.6.2 HTTP/2 传输协议
HTTP/2可以用如下的方式进行配置:
HTTP2Client h2Client = new HTTP2Client();

h2Client.setSelectors(1);

HttpClientTransportOverHTTP2 transport = new HttpClientTransportOverHTTP2(h2Client);

HttpClient client = new HttpClient(transport, null);

client.start();
HTTP2Client是低级别的客户端,它提供了一个API基于HTTP / 2,像session,strean和frames特定于HTTP / 2。HttpClientTransportOverHTTP2 使用HTTP2Client 来格式高级语义的HTTP请求("GET resource /index.html")。
22.6.3 FastCGI 传输协议
FastCGI 协议可以用如下的方式进行配置:
int selectors = 1;

String scriptRoot = "/var/www/wordpress";

HttpClientTransportOverFCGI transport = new HttpClientTransportOverFCGI(selectors, false, scriptRoot);

HttpClient client = new HttpClient(transport, null);

client.start();
为了确保请求使用FastCGI 协议,你需要有一个像 PHP-FPM 一样的FastCGI 服务器。
FastCGI 传输协议主要用于支持提供页面的PHP服务支持(例如:WordPress)。
附言:
翻译完第一部分(Jetty入门:http://www.cnblogs.com/yiwangzhibujian/p/5832597.html)后,我先跳过了第二部分(配置指南)和第三部分(管理指南),优先翻译第四部分(开发指南),因为我觉得大部分用户都是用来开发的。还有这一部分章节较多,打算分开翻译,这次翻译了21章节和22章节。
所有目录详见:http://www.cnblogs.com/yiwangzhibujian/p/5832294.html
Jetty使用教程(四:21-22)—Jetty开发指南的更多相关文章
- 关于《Swift开发指南》背后的那些事
时间轴(倒叙)2014年8月底在图灵出版社的大力支持下,全球第一本全面.系统.科学的,包含本人多年经验的呕心沥血之作<Swift开发指南>(配有同步视频课程和同步练习)全线重磅推出2014 ...
- Jetty使用教程(四:24-27)—Jetty开发指南
二十四.处理器(Handler ) 24.1 编写一个常用的Handler Jetty的Handler组件用来处理接收到的请求. 很多使用者不需要编写Jetty的Handler ,而是通过使用Serv ...
- Jetty使用教程(四:23)—Jetty开发指南
二十三.Maven和Jetty 这一章节将说明如何通过Maven管理Jetty和使用Jetty的Maven插件. 23.1 使用Maven Apache Maven是一个款软件项目管理工具.基于项目对 ...
- Jetty使用教程(四:28-30)—Jetty开发指南
二十八.延续机制支持 28.1 延续简介 延续是一种机制用来实现类似于Servlet 3.0异步功能的异步Servlet,但提供了一个简单易操作的接口. 28.1.1 为什么使用异步Servlets ...
- jetty使用教程(嵌入eclipse开发)
在eclipse下面建一个java project 建立目录结构如下: 二级目录: (备注jetty_test是工程的根目录,etc.lib.webRoot为其二级目录) 到jetty的官方网站(ht ...
- Jetty使用教程(一)——开始使用Jetty
一.Jetty简介 1.1 什么是Jetty Jetty是一个提供HHTP服务器.HTTP客户端和javax.servlet容器的开源项目. 这个入门教程分为五个部分: 第一部分部分重点介绍如何使 ...
- Jetty 开发指南: 嵌入式开发之HelloWorld
Jetty 嵌入式之 HelloWorld 本节提供一个教程,演示如何快速开发针对Jetty API的嵌入式代码. 1. 下载 Jar 包 Jetty被分解为许多jar和依赖项,通过选择最小的jar集 ...
- Jetty 开发指南:Jetty 内嵌开发
Jetty的口号是“不要在Jetty中部署你的应用程序,在你的应用程序中部署Jetty!” 这意味着,作为将应用程序捆绑为要部署在Jetty中的标准WAR的替代方案,Jetty旨在成为一个软件组件,可 ...
- C#微信公众号开发系列教程四(接收普通消息)
微信公众号开发系列教程一(调试环境部署) 微信公众号开发系列教程一(调试环境部署续:vs远程调试) C#微信公众号开发系列教程二(新手接入指南) C#微信公众号开发系列教程三(消息体签名及加解密) C ...
随机推荐
- Leetcode 254. Factor Combinations
Numbers can be regarded as product of its factors. For example, 8 = 2 x 2 x 2; = 2 x 4. Write a func ...
- System.Diagnostics.Process.Star的用法
System.Diagnostics.Process.Start(); 能做什么呢?它主要有以下几个功能: 1.打开某个链接网址(弹窗). 2.定位打开某个文件目录. 3.打开系统特殊文件夹,如“控制 ...
- Android内存优化-内存泄漏的几个场景以及解决方式
转自:http://blog.csdn.net/a910626/article/details/50849760 一.什么是内存泄漏 在Java程序中,如果一个对象没有利用价值了,正常情况下gc是会对 ...
- e-chart 本地加载中国地图
<%@ page language="java" contentType="text/html; charset=UTF-8" pageEncoding= ...
- ANDROID_HOME on Mac OS X
Where the Android-SDK is installed depends on how you installed it. If you downloaded the SDK throug ...
- 查看修改Linux时区和时间
查看/修改Linux时区和时间 一.时区 1. 查看当前时区 date -R 2. 修改设置时区 方法(1) tzselect 方法(2) 仅限于RedHat Linux 和 CentOS timec ...
- 【转载】借助GitHub托管你的项目代码
PS:自己关注博客园有2年之久了,不久前才申请注册账号.GitHub也差不多一年多了,因英语水平刚刚及格,所以去GitHub没有博客园多,也是几个月前才注册了账号,前几天休息时看到 EdisonCho ...
- Hadoop 2.6.0+ZooKeeper+Hive HA高可用集群安装
http://blog.csdn.net/totxian/article/details/45248399
- css 基础---选择器
1.css基础 selector {property: value} eg: h1 {color:red; font-size:14px;} p { text-align: center; color ...
- nginx:413 Request Entity Too Large 及 修改 PHP上传文件大小配置
开发环境:CentOS + Nginx + PHP + MySql + phpMyAdmin 在用 phpMyAdmin 进行 sql 数据库导入的时候,经常需要上传比较大的 sql 数据文件,而这时 ...