
camke使用例程
1 同文件夹直接编译
1 同文件夹直接编译

# cmake needs this line

cmake_minimum_required(VERSION 2.8)

# Define project name

project(pixel_Giga)

# Find OpenCV, you may need to set OpenCV_DIR variable

# to the absolute path to the directory containing OpenCVConfig.cmake file

# via the command line or GUI

find_package(OpenCV REQUIRED)

# If the package has been found, several variables will

# be set, you can find the full list with descriptions

# in the OpenCVConfig.cmake file.

# Print some message showing some of them

message(STATUS "OpenCV library status:")

message(STATUS "    version: ${OpenCV_VERSION}")

message(STATUS "    libraries: ${OpenCV_LIBS}")

message(STATUS "    include path: ${OpenCV_INCLUDE_DIRS}")

if(CMAKE_VERSION VERSION_LESS "2.8.11")

  # Add OpenCV headers location to your include paths

  include_directories(${OpenCV_INCLUDE_DIRS})

endif()

# Declare the executable target built from your sources

add_executable(camera1 camera1.cpp openShare.cpp openShare.hpp)

# Link your application with OpenCV libraries

target_link_libraries(camera1 ${OpenCV_LIBS})

# Declare the executable target built from your sources

add_executable(camera2 camera2.cpp openShare.cpp openShare.hpp)

# Link your application with OpenCV libraries

target_link_libraries(camera2 ${OpenCV_LIBS})

# Declare the executable target built from your sources

add_executable(camera3 camera3.cpp openShare.cpp openShare.hpp)

# Link your application with OpenCV libraries

target_link_libraries(camera3 ${OpenCV_LIBS})

# Declare the executable target built from your sources

add_executable(camera4 camera4.cpp openShare.cpp openShare.hpp)

# Link your application with OpenCV libraries

target_link_libraries(camera4 ${OpenCV_LIBS})

# Declare the executable target built from your sources

add_executable(camera5 camera5.cpp openShare.cpp openShare.hpp)

# Link your application with OpenCV libraries

target_link_libraries(camera5 ${OpenCV_LIBS})

# Declare the executable target built from your sources

add_executable(camera6 camera6.cpp openShare.cpp openShare.hpp)

# Link your application with OpenCV libraries

target_link_libraries(camera6 ${OpenCV_LIBS})

# Declare the executable target built from your sources

add_executable(camera7 camera7.cpp openShare.cpp openShare.hpp)

# Link your application with OpenCV libraries

target_link_libraries(camera7 ${OpenCV_LIBS})

# Declare the executable target built from your sources

add_executable(camera8 camera8.cpp openShare.cpp openShare.hpp)

# Link your application with OpenCV libraries

target_link_libraries(camera8 ${OpenCV_LIBS})

# Declare the executable target built from your sources

add_executable(camera9 camera9.cpp openShare.cpp openShare.hpp)

# Link your application with OpenCV libraries

target_link_libraries(camera9 ${OpenCV_LIBS})

# Declare the executable target built from your sources

add_executable(camera10 camera10.cpp openShare.cpp openShare.hpp)

# Link your application with OpenCV libraries

target_link_libraries(camera10 ${OpenCV_LIBS})

# Declare the executable target built from your sources

add_executable(camera11 camera11.cpp openShare.cpp openShare.hpp)

# Link your application with OpenCV libraries

target_link_libraries(camera11 ${OpenCV_LIBS})

# Declare the executable target built from your sources

add_executable(camera12 camera12.cpp openShare.cpp openShare.hpp)

# Link your application with OpenCV libraries

target_link_libraries(camera12 ${OpenCV_LIBS})

# Declare the executable target built from your sources

add_executable(dispose1 dispose1.cpp openShare.cpp openShare.hpp)

# Link your application with OpenCV libraries

target_link_libraries(dispose1 ${OpenCV_LIBS})
2 同文件夹多个编译
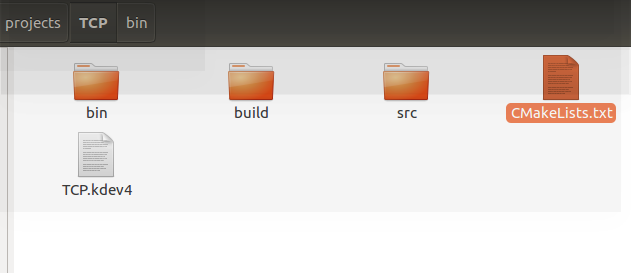
CMakeLists.txt
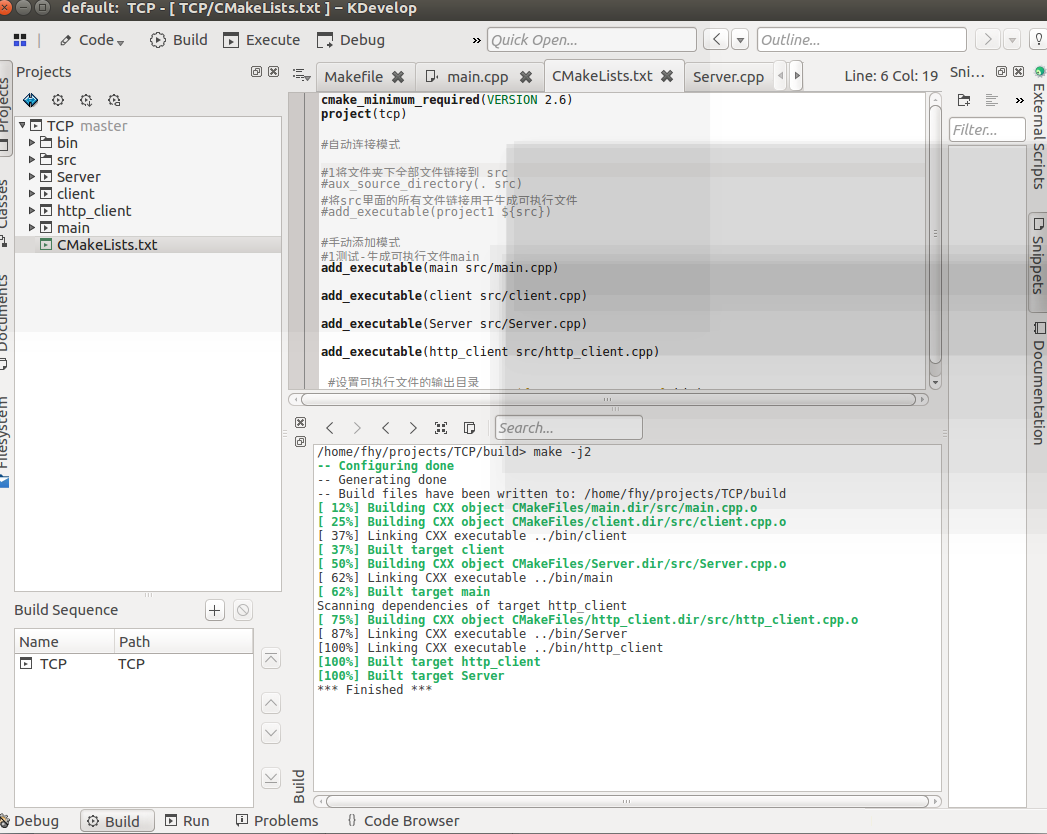
cmake_minimum_required(VERSION 2.6)

project(tcp)

#自动连接模式

#1将文件夹下全部文件链接到 src

#aux_source_directory(. src)

#将src里面的所有文件链接用于生成可执行文件

#add_executable(project1 ${src})

#手动添加模式

#1测试-生成可执行文件main

add_executable(main src/main.cpp)

add_executable(client src/client.cpp)

add_executable(Server src/Server.cpp)

add_executable(http_client src/http_client.cpp)

 #设置可执行文件的输出目录

SET(EXECUTABLE_OUTPUT_PATH ${PROJECT_SOURCE_DIR}/bin)
src源码地址

可执行文件夹

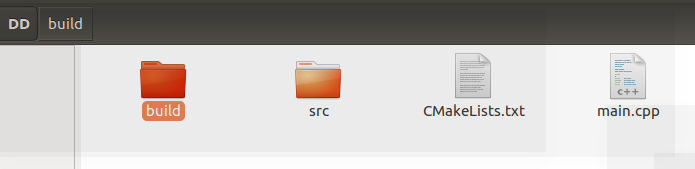
3 分文件夹间接编译
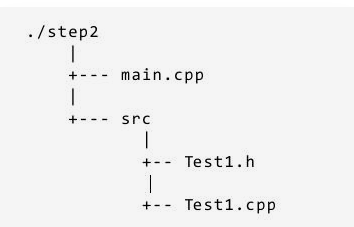
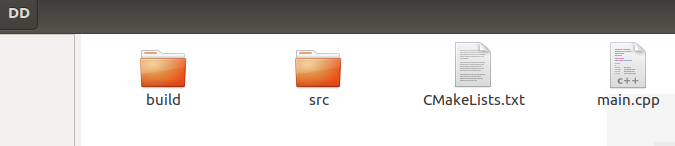
CMakeLists.txt
#1工程名字

PROJECT(main)

#2版本要求

CMAKE_MINIMUM_REQUIRED(VERSION 2.6)

#3-1该命令会把参数 <.当前文件夹> 中所有的源文件名称赋值给参数 <DIR_SRCS>

AUX_SOURCE_DIRECTORY(. DIR_SRCS)

#3-2包含src文件夹下的内容,会自动到该文件夹下寻找新的cmake

ADD_SUBDIRECTORY( src )

#0 指示变量 DIR_SRCS 中的源文件需要编译 成一个名称为 main 的可执行文件。

ADD_EXECUTABLE(main ${DIR_SRCS})

#-1 链接库

TARGET_LINK_LIBRARIES( main Test )
main.cpp
#include <iostream>

using namespace std;

#include "src/print_drc.cpp"

#include "src/print_src.cpp"

int main()

{

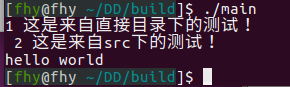
    print_drc();

    print_src();

    cout<<"hello world"<<endl;

    return 1;

}
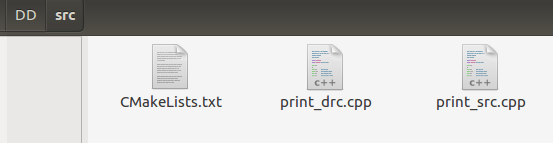
CMakeLists.txt
#3-1该命令会把参数 <.当前文件夹> 中所有的源文件名称赋值给参数 <DIR_TEST1_SRCS>

AUX_SOURCE_DIRECTORY(. DIR_TEST1_SRCS)

#0 指示变量 DIR_SRCS 中的源文件需要编译 成一个名称为 main 的可执行文件。

#ADD_EXECUTABLE(main ${DIR_SRCS})

#0 指示变量 DIR_TEST1_SRCS 中的源文件需要编译 成一个名称为 main 的库。

ADD_LIBRARY ( Test ${DIR_TEST1_SRCS})
print_drc.cpp
#include <iostream>

using namespace std;

int print_drc()

{

    cout<<"1 这是来自直接目录下的测试!"<<endl;

    return 1;

}
print_src.cpp
#include <iostream>

using namespace std;

int print_src()

{

    cout<<" 2 这是来自src下的测试!"<<endl;

    return 1;

}
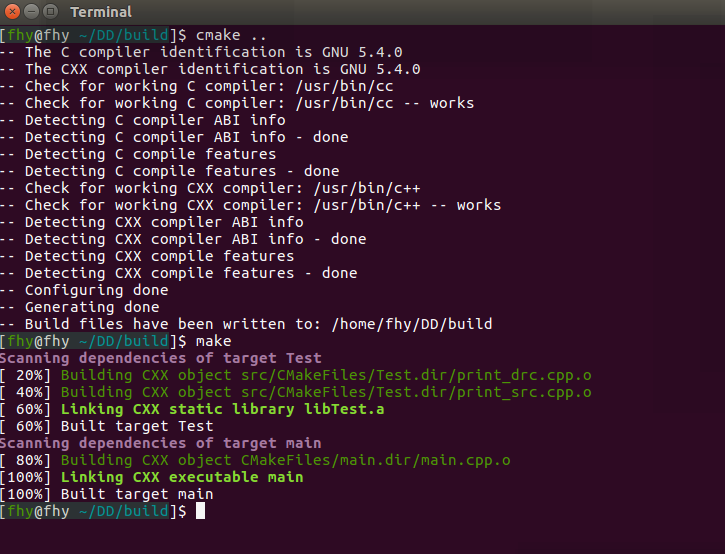
编译
cmake ..

make
运行
camke使用例程的更多相关文章
- (转)linux下和云端通讯的例程, ubuntu和openwrt实验成功(一)
一. HTTP请求的数据流总结#上传数据, yeelink的数据流如下POST /v1.0/device/4420/sensor/9089/datapoints HTTP/1.1Host: api. ...
- Socket编程实践(3) 多连接服务器实现与简单P2P聊天程序例程
SO_REUSEADDR选项 在上一篇文章的最后我们贴出了一个简单的C/S通信的例程.在该例程序中,使用"Ctrl+c"结束通信后,服务器是无法立即重启的,如果尝试重启服务器,将被 ...
- Socket编程实践(2) Socket API 与 简单例程
在本篇文章中,先介绍一下Socket编程的一些API,然后利用这些API实现一个客户端-服务器模型的一个简单通信例程.该例子中,服务器接收到客户端的信息后,将信息重新发送给客户端. socket()函 ...
- C#做有模和非模式化窗体 传值例程
有模窗体:指的是一定要在第二个窗体上操作之后 才能去操作前者窗体 :例如,如果一个对话框,在可以切换到其它窗体或对话框之前要求先单击"确定"或"取消",则它就是 ...
- Delphi容器类之---TList、TStringList、TObjectList,以及一个例程的代码分析
转载自:http://blog.csdn.net/jqandjq/article/details/5429137 看了这里标题,大家可能以为我会谈TListBox控件,那就错了.我要谈的是Delphi ...
- IRP完成例程返回值理解
第一,完成例程里面直接返回STATUS_SUCCESS,这时候IRP已经继续向上回卷,失去了对IRP的控制. 第二,完成例程里面返回STATUS_MORE_PROCESSING_REQUIRED,仍具 ...
- [汇编与C语言关系]2. main函数与启动例程
为什么汇编程序的入口是_start,而C程序的入口是main函数呢?以下就来解释这个问题 在<x86汇编程序基础(AT&T语法)>一文中我们汇编和链接的步骤是: $ as hell ...
- ORA-12523: TNS: 监听程序无法找到适用于客户机连接的例程
今天使用PL/SQL Developer连接到一台新的测试服务器时,遇到ORA错误:ORA-12523: TNS: 监听程序无法找到适用于客户机连接的例程.对应的监听日志文件里面错误为TNS-1252 ...
- Qt 之 入门例程 (一)
以 “Hello Qt” 为例,介绍如何建立一个 Qt 工程 . 1 QLabel 例程 QLabel 继承自 QFrame (继承自 QWidget),主要用来显示文本和图片. 1.1 Hell ...
随机推荐
- 洛谷P2000 拯救世界(生成函数)
题面 题目链接 Sol 生成函数入门题 至多为\(k\)就是\(\frac{1-x^{k+1}}{1-x}\) \(k\)的倍数就是\(\frac{1}{1-x^k}\) 化简完了就只剩下一个\(\f ...
- TS学习随笔(一)->安装和基本数据类型
去年学过一段时间的TS,但由于在工作中不常用.就生疏了,最近项目要求用TS,那我就再回去搞搞TS,写一篇记录一下自己学习TS的进度以及TS知识点 首先,关于TS的定义我就不在这描述了,想看百度一下你就 ...
- html 获取数据并发送给后端方式
一.方式一 使用ajax提交 function detailed() { var date = $("#asset_ip").text() $.ajax({ url: " ...
- Android为TV端助力 自定义view中findViewById为空的解决办法
网上说的都是在super(context, attrs);构造函数这里少加了一个字段, 其实根本不只这一个原因,属于view生命周期的应该知道,如果你在 自定义view的构造函数里面调用findVie ...
- git 入门教程之 git 私服搭建教程
git 私服搭建教程 前几节我们的远程仓库使用的是 github 网站,托管项目大多是公开的,如果不想让任何人都能看到就需要收费,而且 github 网站毕竟在国外,访问速度太慢,基于上述两点原因,我 ...
- [20181105]再论12c set feedback only.txt
[20181105]再论12c set feedback only.txt --//前一阵子的测试,链接:http://blog.itpub.net/267265/viewspace-2216290/ ...
- 如何解决远程连接mysql出现Can’t connect to MySQL server on (111 “Connection refused”)的问题
如何解决远程连接mysql出现Can’t connect to MySQL server on (111 “Connection refused”)的问题 开放Mysql的远程连接 在服务器上登录my ...
- TP中的图片水印
$img_dir = ROOT_PATH . 'public/upload/card/' . $data['jt_id']; //创建合成图片存放位置 //自动创建文件夹 if (!file_exis ...
- python中封装、继承、多态
又看到这个玩意,顺手写下来 面向对象三大特征: 封装:本质是将事物相关的属性和方法封装在一个类里面,我们调用类创建实例的时候,不用关心类内部的代码细节 继承:子类需要复用父类里面的属性或者方法,当然子 ...
- android调试工具adb命令大全
转载: 一.adb介绍SDK的Tools文件夹下包含着Android模拟器操作的重要命令adb,adb的全称为(Android Debug Bridge就是调试桥的作用.通过adb我们可以在Eclip ...