使用JFinal实现使用MVC获取表单中的数据并将提示信息返回给另一jsp页面。
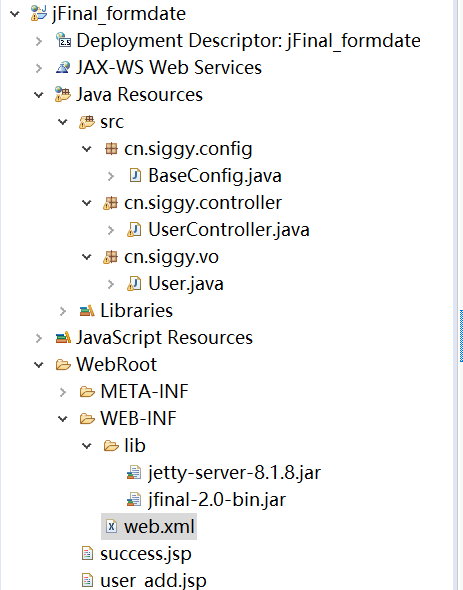
1.包结构
2.我们需要对web.xml进行配置:
<?xml version="1.0" encoding="UTF-8"?>

<web-app xmlns:xsi="http://www.w3.org/2001/XMLSchema-instance" xmlns="http://java.sun.com/xml/ns/javaee" xsi:schemaLocation="http://java.sun.com/xml/ns/javaee http://java.sun.com/xml/ns/javaee/web-app_2_5.xsd" id="WebApp_ID" version="2.5">

  <display-name>jFinal_formdate</display-name>

  <welcome-file-list>

    <welcome-file>index.html</welcome-file>

    <welcome-file>index.htm</welcome-file>

    <welcome-file>index.jsp</welcome-file>

    <welcome-file>default.html</welcome-file>

    <welcome-file>default.htm</welcome-file>

    <welcome-file>default.jsp</welcome-file>

  </welcome-file-list>

  <filter>

      <filter-name>jfinal</filter-name>

      <filter-class>com.jfinal.core.JFinalFilter</filter-class>

     <init-param>

         <param-name>configClass</param-name>

         <param-value>cn.siggy.config.BaseConfig</param-value>

     </init-param>

  </filter>

  <filter-mapping>

      <filter-name>jfinal</filter-name>

      <url-pattern>/*</url-pattern>

  </filter-mapping>

</web-app>
<init-param>标签中的value值根据自己创建的包名和类名而定。
3.在src包下创建cn.siggy.config包,在该包下创建BaseConfig类:
package cn.siggy.config;

import com.jfinal.config.Constants;

import com.jfinal.config.Handlers;

import com.jfinal.config.Interceptors;

import com.jfinal.config.JFinalConfig;

import com.jfinal.config.Plugins;

import com.jfinal.config.Routes;

import com.jfinal.render.ViewType;

import cn.siggy.controller.UserController;

public class BaseConfig extends JFinalConfig{

    @Override

    public void configConstant(Constants cnst) {

        //开发模式:可以自动启动

        cnst.setDevMode(true);

        //指定视图

        cnst.setViewType(ViewType.JSP);

    }

    @Override

    public void configHandler(Handlers arg0) {

        // TODO Auto-generated method stub

    }

    @Override

    public void configInterceptor(Interceptors arg0) {

        // TODO Auto-generated method stub

    }

    @Override

    public void configPlugin(Plugins arg0) {

        // TODO Auto-generated method stub

    }

    @Override

    public void configRoute(Routes route) {

        //1.通过路由进行映射,通过route与方法名进行映射,这里只用写/user不用写/add,因为add为映射的方法名。

        route.add("/user",UserController.class);

    }

}
通过路由进行映射,通过route与方法名进行映射,这里只用写/user不用写/add,因为add为映射的方法名。
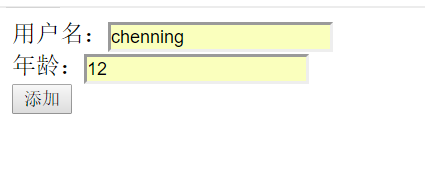
4.创建user_add.jsp页面,用户可以在该页面中输入姓名和年龄,并提交到后台进行获取:
<%@ page language="java" contentType="text/html; charset=utf-8" pageEncoding="utf-8"%>

<!DOCTYPE html PUBLIC "-//W3C//DTD HTML 4.01 Transitional//EN" "http://www.w3.org/TR/html4/loose.dtd">

<html>

<head>

<meta http-equiv="Content-Type" content="text/html; charset=utf-8">

<title>Insert title here</title>

</head>

<body>

<form action="user/add" method="post">

    用户名:<input type="text" name="name"/><br>

    年龄:<input type="text" name="age"/><br/>

    <input type="submit" value="添加"/>

</form>

</body>

</html>
form表单提交到user/add中进行处理,我们需要在BaseConfig中配置映射:在configRoute中配置路由,提交之后进入到BaseConfig中寻找路由,首先寻找到user对应的类(UserController),然后进入到该类中add函数进行处理。
5.创建UserController,获取表单数据:
package cn.siggy.controller;

import com.jfinal.core.Controller;

import com.jfinal.render.ViewType;

import cn.siggy.vo.User;

public class UserController extends Controller{

    public void add () {

        //2.获取表单的值:通过getPara来获取表单值

        String name=getPara("name");

        int age=getParaToInt("age");

        System.out.println("姓名:"+name+"\t年龄:"+age);

        //3.如何设置回变量值:通过setAttr。

        setAttr("msg", "添加成功!!!");

        //4.如何跳转页面进行渲染:通过render来指定跳转的页面.

        //首先我们应该在Config中的configConstant指定视图:cnst.setViewType(ViewType.JSP);

        render("/success.jsp");

    }

}
获取到表单数据后,将“添加成功”信息返回给success.jsp页面。
6.创建success.jsp页面:
<%@ page language="java" contentType="text/html; charset=UTF-8" pageEncoding="UTF-8"%>

<!DOCTYPE html PUBLIC "-//W3C//DTD HTML 4.01 Transitional//EN" "http://www.w3.org/TR/html4/loose.dtd">

<html>

<head>

<meta http-equiv="Content-Type" content="text/html; charset=UTF-8">

<title>Insert title here</title>

</head>

<body>

    ${msg }

</body>

</html>
这里通过el表达式获取参数的值.
7.运行:
启动项目,在浏览器中输入:http://localhost/user_add.jsp,进入到jsp页面,在这个页面中输入姓名和年龄:
点击提交,进入到success.jsp页面,显示:

8.我们总结一下MVC的四个步骤
(1)通过路由进行映射,通过route与方法名进行映射。也就是BaseConfig类中的这个方法;
@Override

    public void configRoute(Routes route) {

        //1.通过路由进行映射,通过route与方法名进行映射,这里只用写/user不用写/add,因为add为映射的方法名。

        route.add("/user",UserController.class);

    }
(2)获取表单的值:通过getPara来获取表单值。
String name=getPara("name");

int age=getParaToInt("age");
(3)如何设置回变量值:通过setAttr。
setAttr("msg", "添加成功!!!");
(4)如何跳转页面进行渲染:通过render来指定跳转的页面.首先我们应该在Config中的configConstant指定视图:cnst.setViewType(ViewType.JSP);
render("/success.jsp");
使用JFinal实现使用MVC获取表单中的数据并将提示信息返回给另一jsp页面。的更多相关文章
- jquery获取表单中的数据
<form> <input name="username" type="text"/&g ...
- 在Action中获取表单提交数据
-----------------siwuxie095 在 Action 中获取表单提交数据 1.之前的 Web 阶段是提交表单到 Servlet,在其中使用 Request 对象 的方法获取数据 2 ...
- 8.javascript获取表单中两个数字,并判断大小
获取表单数据的方式: 1.表单注意些id 2.使用document.getElementById("num").value 获取值 3.一定要注意现在得到是string类型,可以用 ...
- PHP 输入输出流 php://input 获取表单中2个重名name的值
PHP 输入输出流 php://input 获取表单中2个重名name的值 <?php // PHP有一种"所有IO都是流"的说法. // 压缩流参考 https://w ...
- 今天在研究jquery用ajax提交form表单中得数据时,学习到了一种新的提交方式
今天在研究jquery用ajax提交form表单中得数据时,学习到了一种新的提交方式 jquery中的serialize() 方法 该方法通过序列化表单值,创建 URL 编码文本字符串 序列化的值可在 ...
- DHTMLX 前端框架 建立你的一个应用程序 教程(十)--保存表单中的数据
保存表单中的数据 现在我们所要做的是 当用户点击提交按钮的时候 我们将表单中的数据进行保存操作. 我们可以使用dhtmlxDataProcessor. 来进行操作.它是一个数据组件,可以提供与服务器 ...
- Struts2_day02--Action获取表单提交数据
Action获取表单提交数据 1 之前web阶段,提交表单到servlet里面,在servlet里面使用request对象里面的方法获取,getParameter,getParameterMap 2 ...
- ASP.NET MVC 获取表单数据
public class Person { public string Name{get;set;} public string Phone{get;set;} } view层 @model Mode ...
- 在jsp中用EL 表达来获取表单中的参数
在一个JSP页面转到另一个JSP页面时,对表单中的参数用EL表达式提取为: <form action="sampleJsp.jsp" method="po ...
随机推荐
- Pronunciation – The Definitive Guide to the Top 100 Words in American English
Pronunciation – The Definitive Guide to the Top 100 Words in American English Share Tweet Share Tagg ...
- Learn English like a Baby – How to Sound Native
Learn English like a Baby – How to Sound Native Share Tweet Share Tagged With: tips & tricks Wha ...
- JAVA面试中的陷阱
第一,谈谈final, finally, finalize的区别.最常被问到. 第二,Anonymous Inner Class (匿名内部类) 是否可以extends(继承)其它类,是否可以impl ...
- js 乘法 4.39*100 出现值不对问题解决
https://www.jianshu.com/p/a026245661bb //除法函数,用来得到精确的除法结果 //说明:javascript的除法结果会有误差,在两个浮点数相除的时候会比较明显. ...
- SQL server 基本语法
文字摘自https://www.cnblogs.com/chaoa/articles/3894311.html 一.定义变量 --简单赋值 declare @a intset @a=5 print @ ...
- Linux下Shell命令加减乘除计算
使用 expr命令 (其中做乘的时候*号要用斜杠进行转义) 除以 [hadoop-user@hadoop1]$ echo `expr 9 / 3` 3加 [hadoop-use ...
- 2018面向对象程序设计(Java)第8周学习指导及要求
2018面向对象程序设计(Java)第8周学习指导及要求 (2018.10.18-2018.10.21) 学习目标 掌握接口定义方法: 掌握实现接口类的定义要求: 掌握实现了接口类的使用要求: 理 ...
- MySQL动态开启general_log
mysql下用以下命令查看general_log的开启状态. show global variables like '%general%'; 调整general_log位置,linux下一般是/tmp ...
- com.android.dx.command.Main with arguments
Error:Execution failed for task ':jingyeyun:transformClassesWithDexForDebug'.> com.android.build. ...
- shell脚本-删除当天日期前3个月的数据表
#!/bin/bash #author:skycheng #get current date string datestr=`date +'%Y-%m-%d'` start_time=`date +' ...