shell 脚本之一键部署安装 Nginx
今天咸鱼给大家分享个源码编译安装 Nginx 的 shell 脚本
这个 shell 脚本可重复执行
完整源码放在最后
定义一个变量来存放 nginx 版本号
version=1.15.4
nginx 下载地址:http://nginx.org/download/
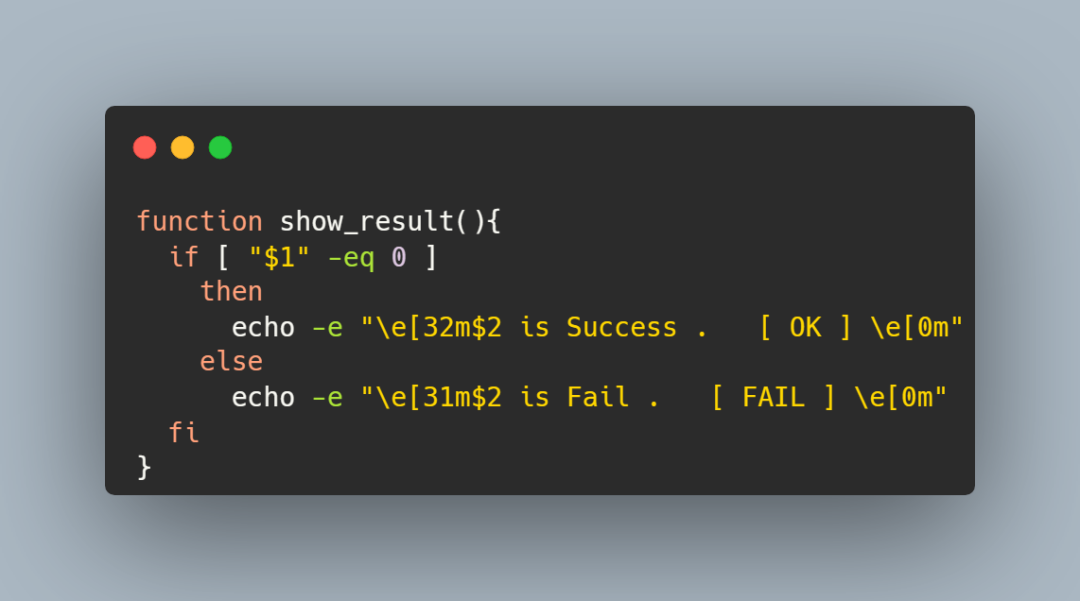
下列函数功能则是判断当前步骤是否执行成功,并将结果输出出来
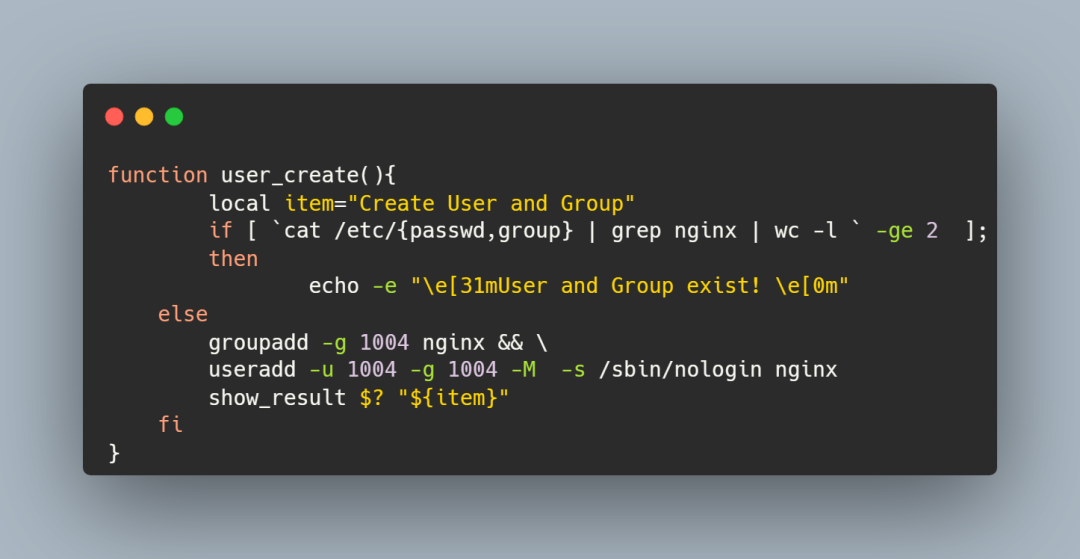
创建 nginx 用户和用户组
建议用大于 1000 的 GID 和 UID 号,表示普通用户
这段代码里我做了一个条件判断:
如果在 /etc/passwd 和 /etc/group 文件中过滤出 nginx,表示已经创建了 nginx 用户和 nginx 用户组,就不再创建了
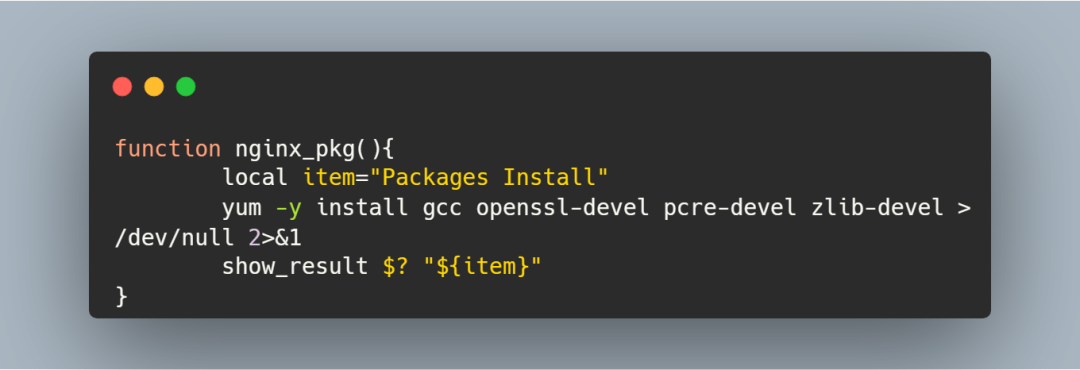
安装一些扩展包
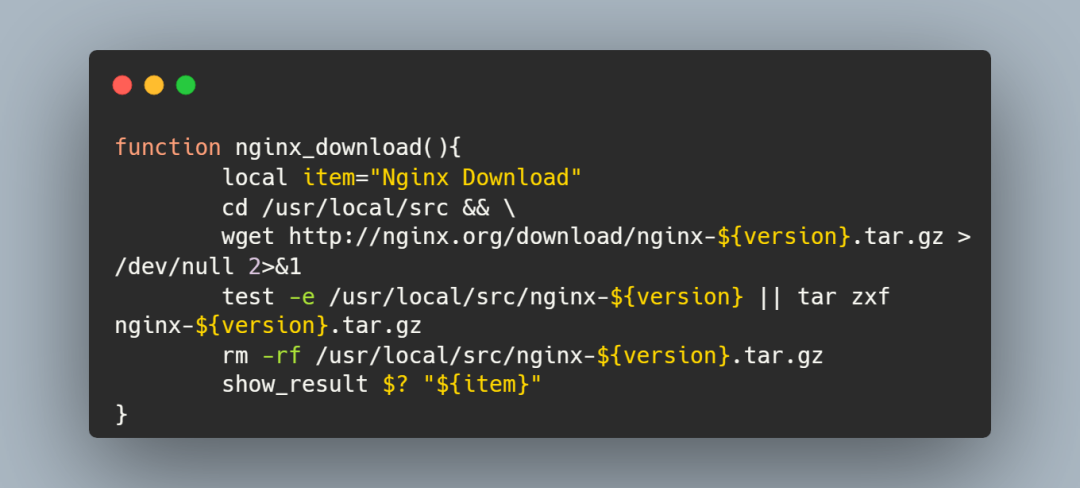
下载 Nginx 并解压缩
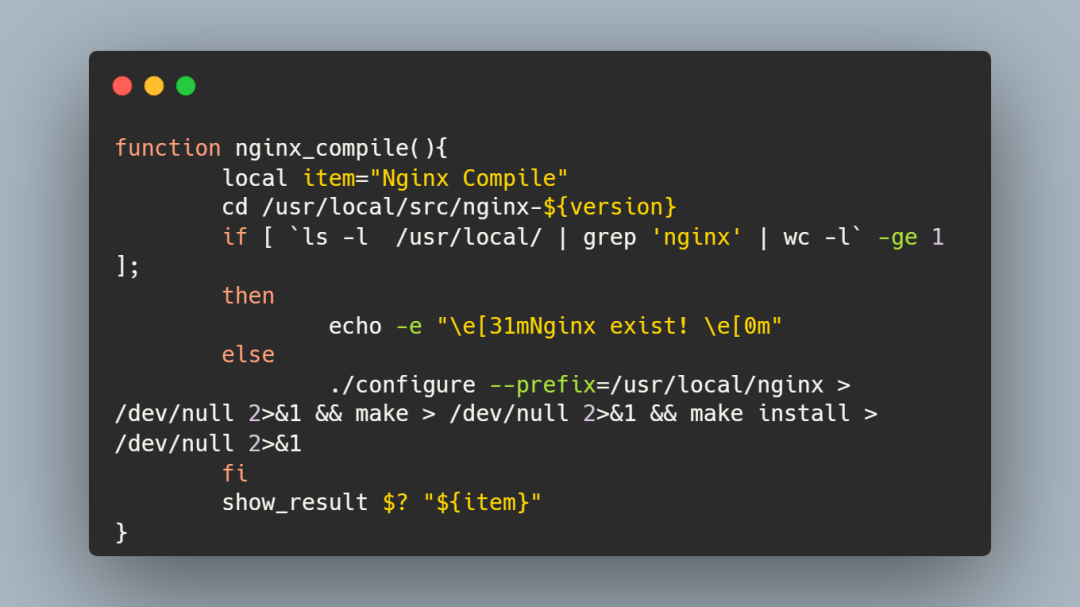
编译安装 Nginx
这里也做了一个条件判断:
如果 /usr/local/nginx 目录存在,则说明 nginx 已经成功安装好了
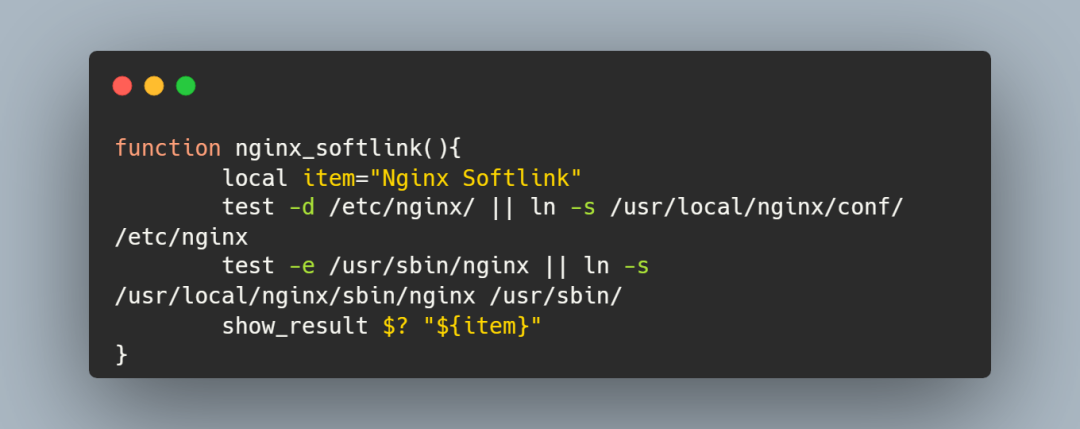
建立软连接
这一步看个人习惯可做可不做
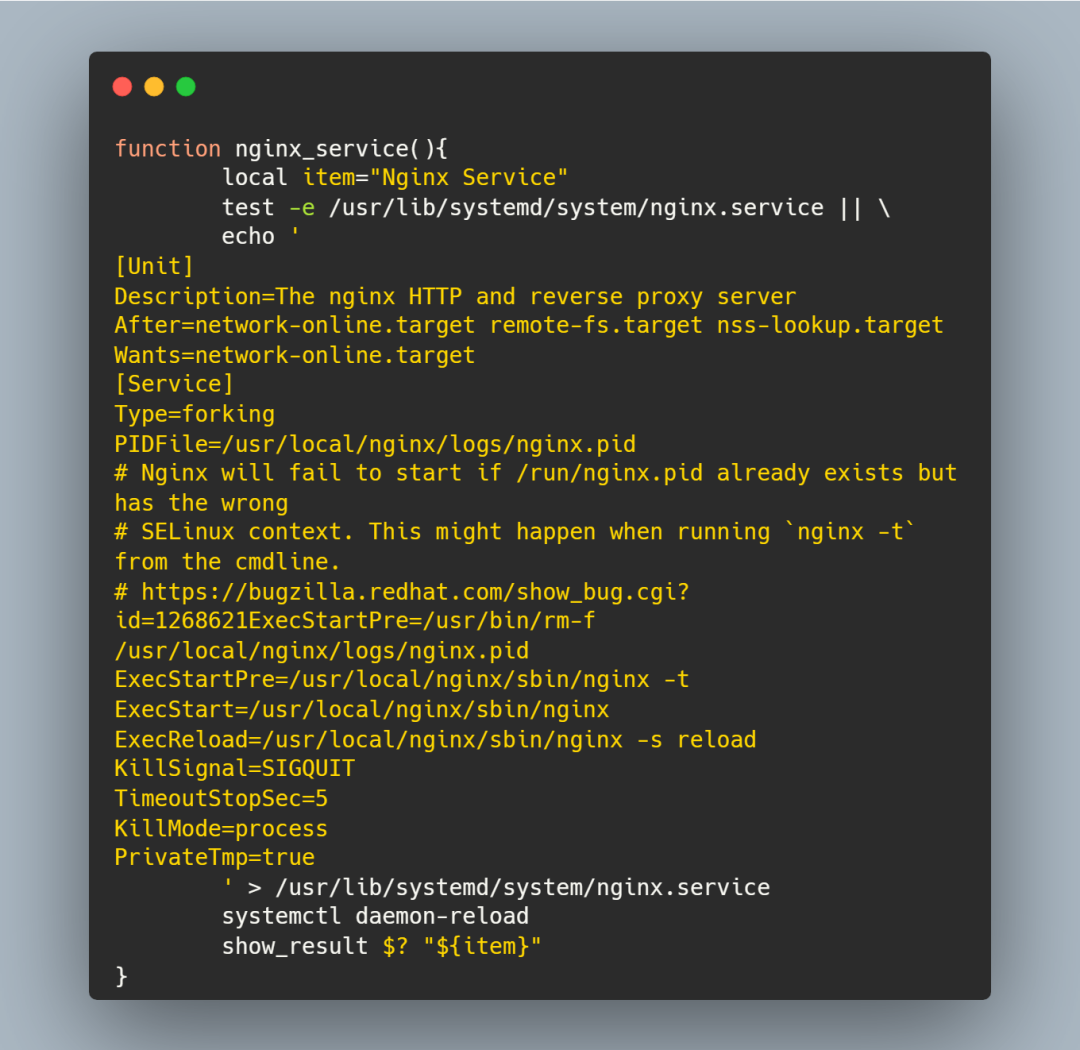
注册服务
将 nginx 注册成服务之后就可以使用 systemctl 控制它了
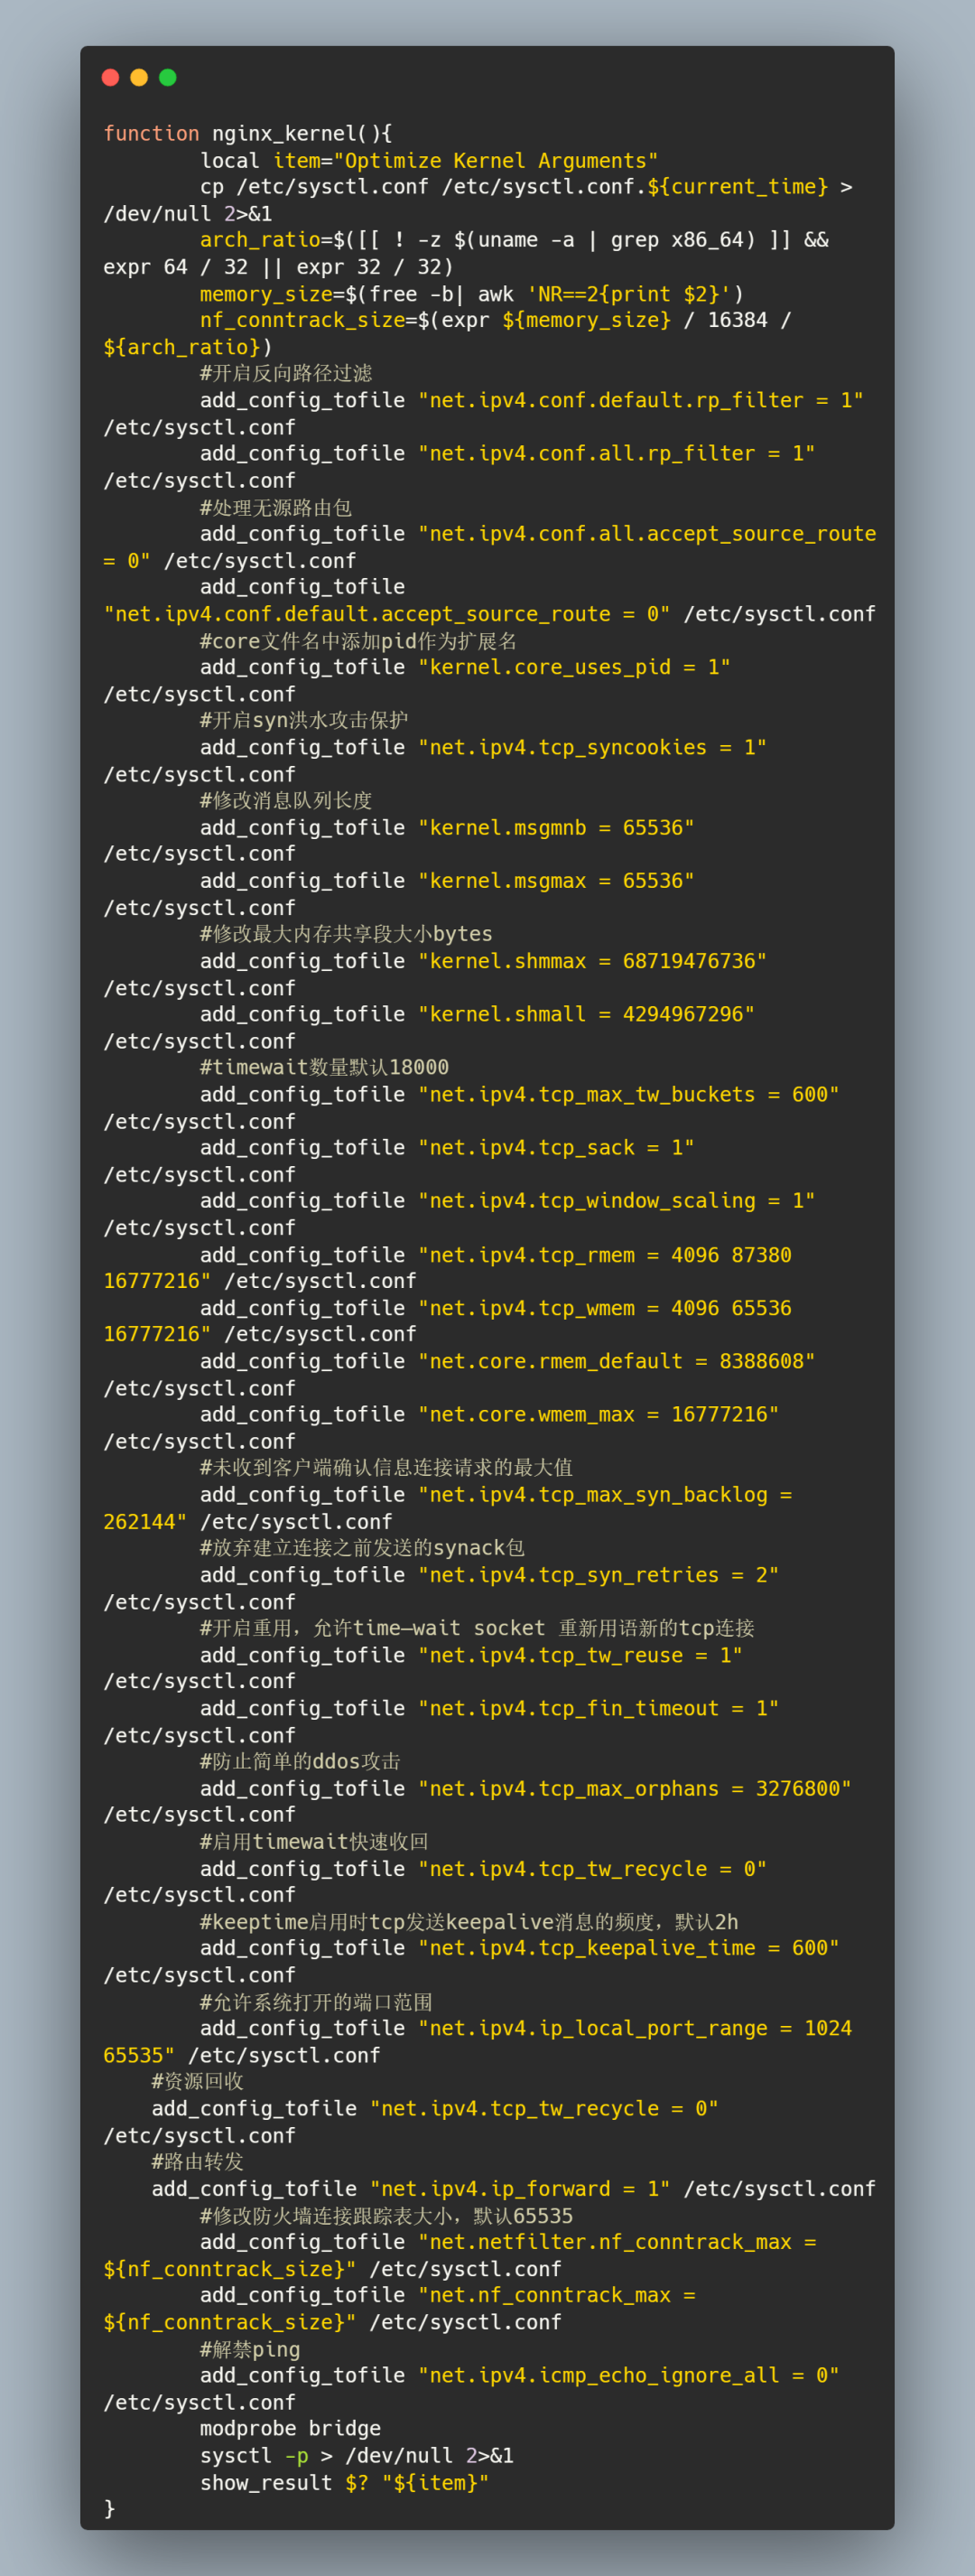
内核参数优化
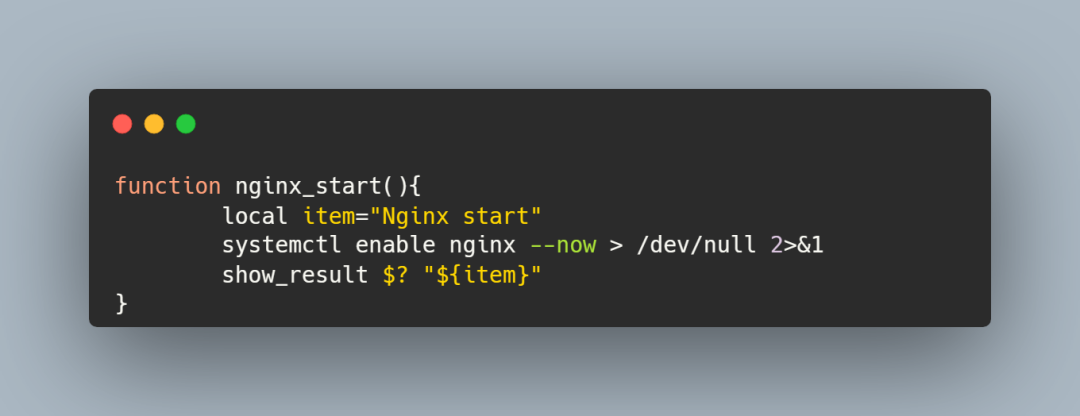
启动 nginx 并设置开机自启动
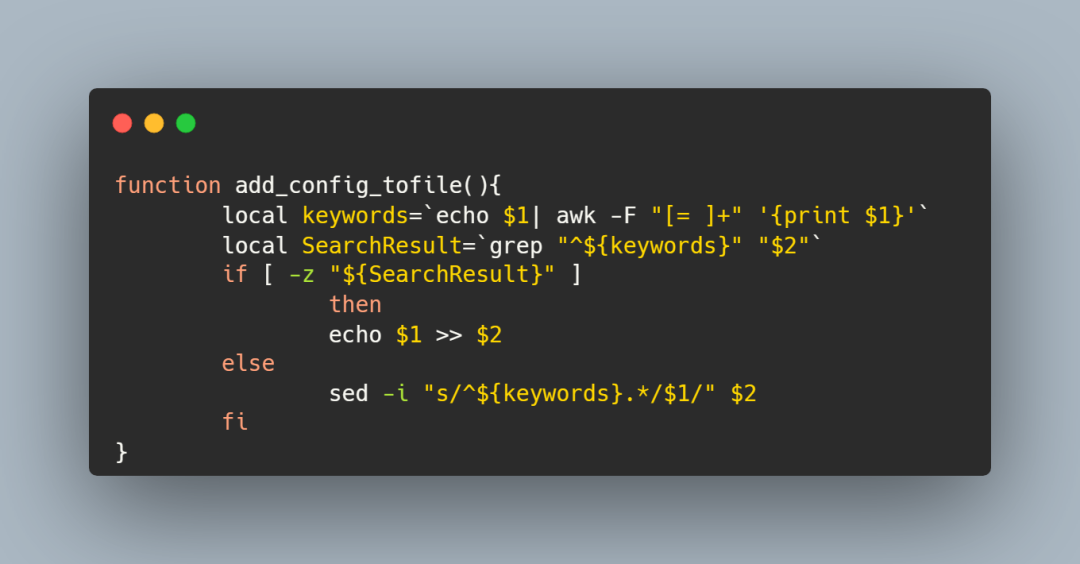
负责配置写入的函数
在上面的内核参数优化函数里面,我并没有使用 echo 将配置直接重定向到 /etc/sysctl.conf 文件里面
而是用了 add_config_tofile 函数,第一个参数是配置项,第二个参数是文件名
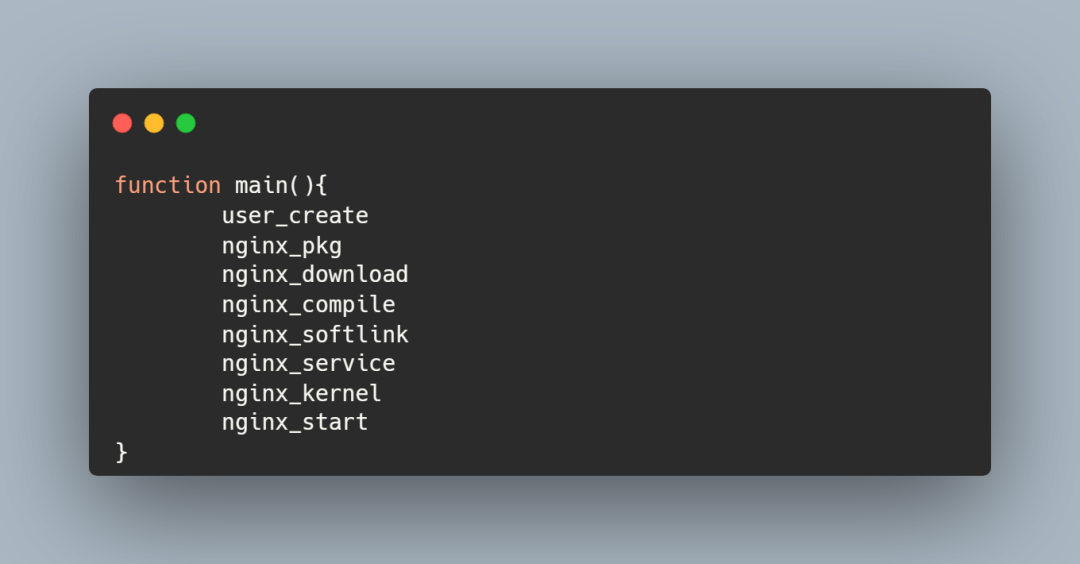
main 函数
完整代码
执行结果如下:

#! /bin/bash

version=1.15.4

#判断函数是否执行成功

function show_result(){

  if [ "$1" -eq 0 ]

    then

      echo -e "\e[32m$2 is Success .   [ OK ] \e[0m"

    else

      echo -e "\e[31m$2 is Fail .   [ FAIL ] \e[0m"

  fi

}

#创建 nginx 用户和用户组

function user_create(){

        local item="Create User and Group"

        if [ `cat /etc/{passwd,group} | grep nginx | wc -l ` -ge 2  ];

        then

                echo -e "\e[31mUser and Group exist! \e[0m"

    else

        groupadd -g 1004 nginx && \

        useradd -u 1004 -g 1004 -M  -s /sbin/nologin nginx

        show_result $? "${item}"

    fi

}

#下载一些拓展包

function nginx_pkg(){

        local item="Packages Install"

        yum -y install gcc openssl-devel pcre-devel zlib-devel > /dev/null 2>&1

        show_result $? "${item}"

}

#下载nginx

function nginx_download(){

        local item="Nginx Download"

        cd /usr/local/src && \

        wget http://nginx.org/download/nginx-${version}.tar.gz > /dev/null 2>&1

        test -e /usr/local/src/nginx-${version} || tar zxf nginx-${version}.tar.gz

        rm -rf /usr/local/src/nginx-${version}.tar.gz

        show_result $? "${item}"

}

#编译安装

function nginx_compile(){

        local item="Nginx Compile"

        cd /usr/local/src/nginx-${version}

        if [ `ls -l  /usr/local/ | grep 'nginx' | wc -l` -ge 1  ];

        then

                echo -e "\e[31mNginx exist! \e[0m"

        else

                ./configure --prefix=/usr/local/nginx > /dev/null 2>&1 && make > /dev/null 2>&1 && make install > /dev/null 2>&1

        fi

        show_result $? "${item}"

}

#软连接建立

function nginx_softlink(){

        local item="Nginx Softlink"

        test -d /etc/nginx/ || ln -s /usr/local/nginx/conf/ /etc/nginx

        test -e /usr/sbin/nginx || ln -s /usr/local/nginx/sbin/nginx /usr/sbin/

        show_result $? "${item}"

}

#注册服务

function nginx_service(){

        local item="Nginx Service"

        test -e /usr/lib/systemd/system/nginx.service || \

        echo '

[Unit]

Description=The nginx HTTP and reverse proxy server

After=network-online.target remote-fs.target nss-lookup.target

Wants=network-online.target

[Service]

Type=forking

PIDFile=/usr/local/nginx/logs/nginx.pid

# Nginx will fail to start if /run/nginx.pid already exists but has the wrong

# SELinux context. This might happen when running `nginx -t` from the cmdline.

# https://bugzilla.redhat.com/show_bug.cgi?id=1268621ExecStartPre=/usr/bin/rm-f /usr/local/nginx/logs/nginx.pid

ExecStartPre=/usr/local/nginx/sbin/nginx -t

ExecStart=/usr/local/nginx/sbin/nginx

ExecReload=/usr/local/nginx/sbin/nginx -s reload

KillSignal=SIGQUIT

TimeoutStopSec=5

KillMode=process

PrivateTmp=true

        ' > /usr/lib/systemd/system/nginx.service

        systemctl daemon-reload

        show_result $? "${item}"

}

#内核优化

function nginx_kernel(){

        local item="Optimize Kernel Arguments"

        cp /etc/sysctl.conf /etc/sysctl.conf.${current_time} > /dev/null 2>&1

        arch_ratio=$([[ ! -z $(uname -a | grep x86_64) ]] && expr 64 / 32 || expr 32 / 32)

        memory_size=$(free -b| awk 'NR==2{print $2}')

        nf_conntrack_size=$(expr ${memory_size} / 16384 / ${arch_ratio})

        #开启反向路径过滤

        add_config_tofile "net.ipv4.conf.default.rp_filter = 1" /etc/sysctl.conf

        add_config_tofile "net.ipv4.conf.all.rp_filter = 1" /etc/sysctl.conf

        #处理无源路由包

        add_config_tofile "net.ipv4.conf.all.accept_source_route = 0" /etc/sysctl.conf

        add_config_tofile "net.ipv4.conf.default.accept_source_route = 0" /etc/sysctl.conf

        #core文件名中添加pid作为扩展名

        add_config_tofile "kernel.core_uses_pid = 1" /etc/sysctl.conf

        #开启syn洪水攻击保护

        add_config_tofile "net.ipv4.tcp_syncookies = 1" /etc/sysctl.conf

        #修改消息队列长度

        add_config_tofile "kernel.msgmnb = 65536" /etc/sysctl.conf

        add_config_tofile "kernel.msgmax = 65536" /etc/sysctl.conf

        #修改最大内存共享段大小bytes

        add_config_tofile "kernel.shmmax = 68719476736" /etc/sysctl.conf

        add_config_tofile "kernel.shmall = 4294967296" /etc/sysctl.conf

        #timewait数量默认18000

        add_config_tofile "net.ipv4.tcp_max_tw_buckets = 600" /etc/sysctl.conf

        add_config_tofile "net.ipv4.tcp_sack = 1" /etc/sysctl.conf

        add_config_tofile "net.ipv4.tcp_window_scaling = 1" /etc/sysctl.conf

        add_config_tofile "net.ipv4.tcp_rmem = 4096 87380 16777216" /etc/sysctl.conf

        add_config_tofile "net.ipv4.tcp_wmem = 4096 65536 16777216" /etc/sysctl.conf

        add_config_tofile "net.core.rmem_default = 8388608" /etc/sysctl.conf

        add_config_tofile "net.core.wmem_max = 16777216" /etc/sysctl.conf

        #未收到客户端确认信息连接请求的最大值

        add_config_tofile "net.ipv4.tcp_max_syn_backlog = 262144" /etc/sysctl.conf

        #放弃建立连接之前发送的synack包

        add_config_tofile "net.ipv4.tcp_syn_retries = 2" /etc/sysctl.conf

        #开启重用,允许time—wait socket 重新用语新的tcp连接

        add_config_tofile "net.ipv4.tcp_tw_reuse = 1" /etc/sysctl.conf

        add_config_tofile "net.ipv4.tcp_fin_timeout = 1" /etc/sysctl.conf

        #防止简单的ddos攻击

        add_config_tofile "net.ipv4.tcp_max_orphans = 3276800" /etc/sysctl.conf

        #启用timewait快速收回

        add_config_tofile "net.ipv4.tcp_tw_recycle = 0" /etc/sysctl.conf

        #keeptime启用时tcp发送keepalive消息的频度,默认2h

        add_config_tofile "net.ipv4.tcp_keepalive_time = 600" /etc/sysctl.conf

        #允许系统打开的端口范围

        add_config_tofile "net.ipv4.ip_local_port_range = 1024 65535" /etc/sysctl.conf

    #资源回收

    add_config_tofile "net.ipv4.tcp_tw_recycle = 0" /etc/sysctl.conf

    #路由转发

    add_config_tofile "net.ipv4.ip_forward = 1" /etc/sysctl.conf

        #修改防火墙连接跟踪表大小,默认65535

        add_config_tofile "net.netfilter.nf_conntrack_max = ${nf_conntrack_size}" /etc/sysctl.conf

        add_config_tofile "net.nf_conntrack_max = ${nf_conntrack_size}" /etc/sysctl.conf

        #解禁ping

        add_config_tofile "net.ipv4.icmp_echo_ignore_all = 0" /etc/sysctl.conf

        modprobe bridge

        sysctl -p > /dev/null 2>&1

        show_result $? "${item}"

}

#启动 nginx

function nginx_start(){

        local item="Nginx start"

        systemctl enable nginx --now > /dev/null 2>&1

        show_result $? "${item}"

}

#负责写入配置的函数

function add_config_tofile(){

        local keywords=`echo $1| awk -F "[= ]+" '{print $1}'`

        local SearchResult=`grep "^${keywords}" "$2"`

        if [ -z "${SearchResult}" ]

                then

                echo $1 >> $2

        else

                sed -i "s/^${keywords}.*/$1/" $2

        fi

}

#主函数

function main(){

        user_create

        nginx_pkg

        nginx_download

        nginx_compile

        nginx_softlink

        nginx_service

        nginx_kernel

        nginx_start

}

main

shell 脚本之一键部署安装 Nginx的更多相关文章
- 自己开发shell脚本实现一键化安装。
一.说明在现实环境中可能需要批量部署服务器,那么在我们已经部署好一台服务以后如果实现剩下的服务批量安装呢: 使用shell能否实现功能: 假设我们要部署lamp或者是lnmp如何实现脚本部署? 使用以 ...
- 【shell脚本】一键部署LNMP===deploy.sh
一键部署mysql,php,nginx,通过源码安装部署 #!/bin/bash # 一键部署 LNMP(源码安装版本) menu() { clear echo " ############ ...
- shell脚本之一键部署openV~P~N
提前准备:/root目录下: checkpsw.sh ## 官方提供的自定义脚本,可在http://openvpn.se/files/other/checkpsw.sh下载 openvpn@.serv ...
- Dubbo入门到精通学习笔记(二):Dubbo管理控制台、使用Maven构建Dubbo的jar包、在Linux上部署Dubbo privider服务(shell脚本)、部署consumer服务
文章目录 Dubbo管理控制台 1.Dubbo管理控制台的主要作用: 2.管理控制台主要包含: 3.管理控制台版本: 安装 Dubbo 管理控制台 使用Maven构建Dubbo服务的可执行jar包 D ...
- 急速安装lnmp 编译版本-wiki-shell脚本实现一键部署
shell脚本lnmp.sh 环境:centos 6.5 .64位 #!/bin/bash yum install -y nano vim wget wget http://www.atomicorp ...
- shell脚本编写-自动部署及监控
1.编写脚本自动部署反向代理.web.nfs: I.部署nginx反向代理两个web服务,调度算法使用加权轮询 II.所有web服务使用共享存储nfs,保证所有web都对其有读写权限,保证数据一致性: ...
- 编写shell脚本实现一键创建KVM虚拟机
shell脚本一键创建虚拟机 代码如下: #!/bin/bashname=$1 #把位置变量$1重新定义为name(创建虚拟机的名字)path1=/var/lib/libvirt/images/ #i ...
- 写了shell脚本想一键启动三台虚拟机的Zookeeper,却不知道为啥总是启动不了
首先,一键启动的shell脚本是这样的 #! /bin/bash case $1 in "start"){ for i in node01 node02 node03 do ssh ...
- Ubuntu下快速部署安装 Nginx + PHP + MySQL 笔记
先更新软件库 sudo apt-get update 安装 MySQL sudo apt-get install mysql-server 安装 Nginx sudo apt-get inst ...
- 使用shell脚本完成自动化部署及秒级回滚
一.部署机代码目录结构 使用www用户进行代码部署,所有部署机上需要创建www用户,并赋予根目录权限,同时配置公私钥认证建立信任关系. [www@ansible-node1 deploy]$ tree ...
随机推荐
- 从一个 Demo 说起 Dubbo3
简介 2017年的9月份,阿里宣布重启Dubbo的开发维护,并且后续又将Dubbo捐献给了Apache,经过多年的发展已经发布到3.X版本了,Dubbo重启维护之后是否有值得我们期待的功能呢,下面就来 ...
- 金蝶云星空与吉客云电商ERP数据对接
01 系统说明: 吉客云 吉客云: 从业务数字化和组织数字化两个方向出发,以生成流程的闭环为依归,致力于为企业的数字化升级提供落地工具.销售订单层面,吉客云对接了国内外主流的销售平台,兼容了电商渠道. ...
- 我的PyCharm为什么在linux下打不开?
PyCharm打不开解决方案 本文基于Xrdp远程连接桌面环境,Unbutu Linux OS,解决办法仅供参考.应以实际情况为准. 问题产生的原因,Xrdp下GUI绘制依赖于Xrdp的渲染,当Xrd ...
- [洛谷P5368] [PKUSC2018] 真实排名
[PKUSC2018]真实排名 题目描述 小 C 是某知名比赛的组织者,该比赛一共有 \(n\) 名选手参加,每个选手的成绩是一个非负整数,定义一个选手的排名是:成绩不小于他的选手的数量(包括他自己) ...
- [ABC261A] Intersection
Problem Statement We have a number line. Takahashi painted some parts of this line, as follows: Firs ...
- 从零开始封装 vue 组件
对于学习 Vue 的同学来说,封装 vue 组件是实现代码复用的重要一环.在 Vue 官网中非常详细地介绍了 vue 组件的相关知识,我这里简单摘取使用最频繁的几个知识点,带大家快速入门 vue 组件 ...
- STM32CubeMX教程7 TIM 通用定时器 - 输入捕获
1.准备材料 开发板(STM32F407G-DISC1) ST-LINK/V2驱动 STM32CubeMX软件(Version 6.10.0) keil µVision5 IDE(MDK-Arm) X ...
- 如何找到 niche 出海细分市场的 IDEA
先说结论就是:看榜单 Why:为什么看榜单? 大家会问为什么?原因很简单: 熟读唐诗三百首,不会作诗也会吟 不天天看榜单上相关的优秀同行,你想干啥 心法就是下苦功夫坚持,量变引起质变,排行榜天天看 竞 ...
- grafana添加组件
###安装grafana插件需联网安装[root@zabbix grafana]# grafana-cli plugins list-remote #查询可用的插件id: abhisant-druid ...
- 通过JDK动态代理类实现一个类中多种方法的不同增强
1.为什么说JDK动态代理必须要实现当前父接口才能使用 JDK动态代理是基于接口的代理,它要求目标类(被代理的类)必须实现一个或多个接口.这是因为JDK动态代理是通过创建目标类的接口的代理对象来实现的 ...