Canvas如何绘制精美的图?
一.Canvas的基本使用
首先在使用Canvas一般先在<body>中添加:
<canvas id="Canvas" width="" height=""></canvas>
然后使用Js进行获取canvas和创建画笔:
 <script>

       var Canvas = document.getElementById("Canvas");

       var pen = Canvas.getContext("2d");

  </script>
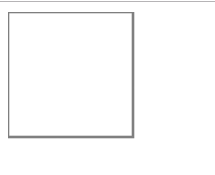
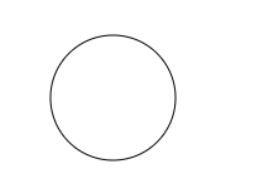
继续将创建的画笔绘制一个圆:
  <script>

       var Canvas = document.getElementById("Canvas");

       var pen = Canvas.getContext("2d");

       pen.fillStyle = "#3648DA";

       pen.beginPath()

       pen.arc(,,,,*Math.PI);

       pen.stroke()

  </script>

二.JS&Canvas的相关属性
1.颜色、样式和阴影
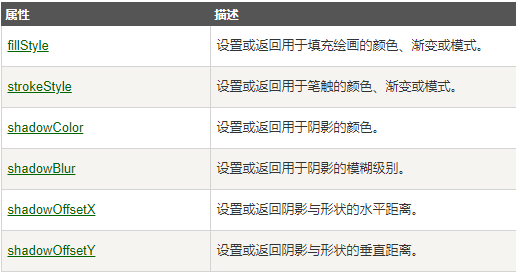
fillStyle  ------  设置或返回用于填充绘画的颜色、渐变或模式。
fillRect()
 <script>

       var Canvas = document.getElementById("Canvas");

       var pen = Canvas.getContext("2d");

       pen.fillStyle = "#3648DA";     //设置填充颜色

       pen.fillRect(,,,);

  </script>

strokeStyle  ------------  设置或返回用于笔触的颜色、渐变或模式。
strokeRect()
  <script>

       var Canvas = document.getElementById("Canvas");

       var pen = Canvas.getContext("2d");

       pen.strokeStyle = "blue";

       pen.fillRect(,,,);

  </script>
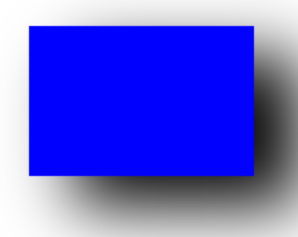
shadowColor  ---------  设置或返回用于阴影的颜色。
shadowBlur   --------- 设置或返回用于阴影的模糊级别。
<script>

       var Canvas = document.getElementById("Canvas");

       var pen = Canvas.getContext("2d");

       pen.shadowBlur = ;             //模糊度

       pen.shadowColor = "black";       //阴影颜色

       pen.fillStyle="blue";

       pen.fillRect(,,,);

  </script>

shadowOffsetX  --------  设置或返回阴影与形状的水平距离。

shadowOffsetY  --------  设置或返回阴影与形状的垂直距离。
 <script>

       var Canvas = document.getElementById("Canvas");

       var pen = Canvas.getContext("2d");

       pen.shadowBlur = ;

       pen.shadowColor = "black";

       pen.shadowOffsetX=;

       pen.shadowOffsetY=;

       pen.fillStyle="blue";

       pen.fillRect(,,,);

  </script>
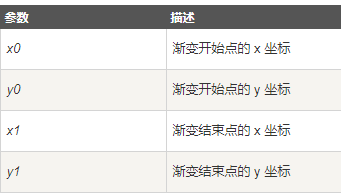
createLinearGradient() --------- 创建线性渐变(用在画布内容上)。
  <script>

       var c=document.getElementById("Canvas");  //获取画布

       var ctx=c.getContext("2d");              //创建2d画笔

       var grd=ctx.createLinearGradient(,,,);  //创建线性渐变

       grd.addColorStop(,"black");                  //起始位置

       grd.addColorStop(,"white");                  //结束位置

       ctx.fillStyle=grd;

       ctx.fillRect(,,,);

  </script>

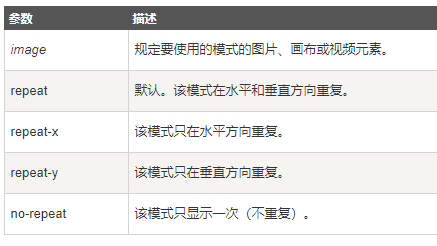
createPattern(object,model) ------- 在指定的方向上重复指定的元素。
  <script>

       var c=document.getElementById("Canvas");  //获取画布

       var ctx=c.getContext("2d");              //创建2d画笔

       ctx.clearRect(,,,);   //清除

       var earth = document.getElementById("earth"); //获取

       var pat=ctx.createPattern(earth,"repeat");   //创建模式

           ctx.rect(,,,);                 //

           ctx.fillStyle=pat;    //填充

           ctx.fill();

  </script>
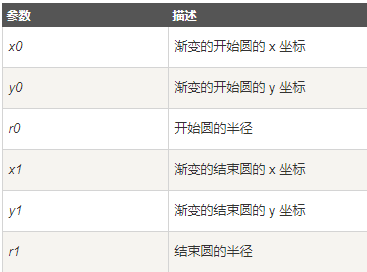
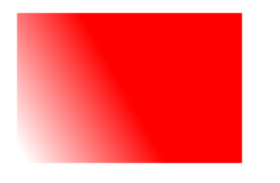
createRadialGradient ------ 创建放射状/环形的渐变(用在画布内容上)。
addColorStop() -------- 在指定的方向上重复指定的元素。
   <script>

     var canvas = document.getElementById("Canvas");

     var ctx = canvas.getContext("2d");

      var grd = ctx.createLinearGradient(,,,,,);

      grd.addColorStop(,"red");

      grd.addColorStop(,"white");

      ctx.fillStyle = grd;

      ctx.fillRect(,,,);

   </script>
2.线条样式
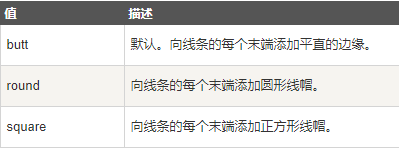
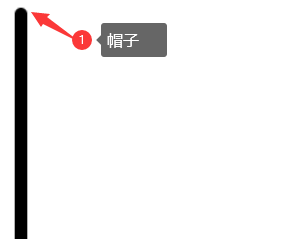
lineCap -------- 设置或返回线条的结束端点样式。
var canvas = document.getElementById("Canvas");

    var ctx = canvas.getContext("2d");

     var grd = ctx.createLinearGradient(,,,,,);

     ctx.beginPath();
     ctx.lineWidth=10;

     ctx.lineCap="round";   //线的结束线帽

     ctx.moveTo(,);

     ctx.lineTo(,);

     ctx.stroke();
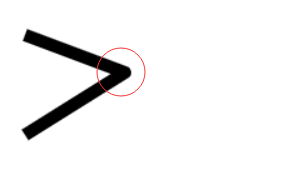
lineJoin --------- 设置或返回两条线相交时,所创建的拐角类型。
  <script>

    var canvas = document.getElementById("Canvas");

    var ctx = canvas.getContext("2d");

     ctx.beginPath();

     ctx.lineWidth =;

     ctx.lineJoin="round";

     ctx.moveTo(,);

     ctx.lineTo(,);

     ctx.lineTo(,);

     ctx.stroke();

  </script>
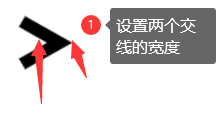
miterLimit ---------设置或返回最大斜接长度
  <script>

    var canvas = document.getElementById("Canvas");

    var ctx = canvas.getContext("2d");

    ctx.lineWidth=;

    ctx.lineJoin="miter";

    ctx.miterLimit=;

    ctx.moveTo(,);

    ctx.lineTo(,);

    ctx.lineTo(,);

    ctx.stroke();

  </script>
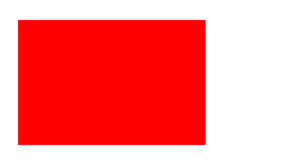
3.矩形
rect(x,y,width,height) ------- 创建矩形
<script>

    var canvas = document.getElementById("Canvas");

    var ctx = canvas.getContext("2d");

    ctx.rect(,,,);

    ctx.stroke();

  </script>
fillRect(x,y,w,h) ------- 绘制"被填充"的矩形。
 <script>

    var canvas = document.getElementById("Canvas");

    var ctx = canvas.getContext("2d");

    ctx.fillRect(,,,);

  </script>

strokeRect(x,y,w,h) --------- 绘制矩形(无填充)。
  <script>

    var canvas = document.getElementById("Canvas");

    var ctx = canvas.getContext("2d");

    ctx.strokeRect(,,,)

  </script>
clearRect() ------- 在给定的矩形内清除指定的像素。
 <script>

    var canvas = document.getElementById("Canvas");

    var ctx = canvas.getContext("2d");

    ctx.fillStyle="red";

    ctx.fillRect(,,,);

    ctx.clearRect(,,,);

  </script>
4.路径
fill ------- 填充当前绘图(路径)。
 <script>

    var canvas = document.getElementById("Canvas");

    var ctx = canvas.getContext("2d");

    ctx.rect(,,,);

    ctx.fillStyle="red";

    ctx.fill();     //当前路径填充

  </script>
stroke() -------- 绘制已定义的路径。
  <script>

    var canvas = document.getElementById("Canvas");

    var ctx = canvas.getContext("2d");

   ctx.beginPath();

   ctx.moveTo(,);

   ctx.lineTo(,);

   ctx.lineTo(,);

   ctx.strokeStyle="red";

   ctx.stroke();

  </script>
beginPath() --------- 起始一条路径,或重置当前路径。
  <script>

    var canvas = document.getElementById("Canvas");

    var ctx = canvas.getContext("2d");

ctx.beginPath();

ctx.lineWidth="";

ctx.strokeStyle="green"; // Green path

ctx.moveTo(,);

ctx.lineTo(,);

ctx.stroke(); // Draw it

ctx.beginPath();

ctx.strokeStyle="purple"; // Purple path

ctx.moveTo(,);

ctx.lineTo(,);

ctx.stroke(); // Draw it

  </script>
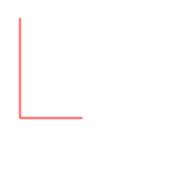
moveTo()   -------------- 把路径移动到画布中的指定点,不创建线条。
lineTo()   -------------- 添加一个新点,然后在画布中创建从该点到最后指定点的线条。
  <script>

    var canvas = document.getElementById("Canvas");

    var ctx = canvas.getContext("2d");

ctx.beginPath();

ctx.moveTo(,);

ctx.lineTo(,);

ctx.stroke();

  </script>

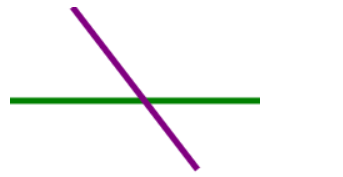
clothPath() --------- 创建从当前点回到起始点的路径
  <script>

    var canvas = document.getElementById("Canvas");

    var ctx = canvas.getContext("2d");

    ctx.beginPath();

    ctx.moveTo(,);

    ctx.lineTo(,);

    ctx.lineTo(,);

    ctx.closePath();

    ctx.stroke();

  </script>
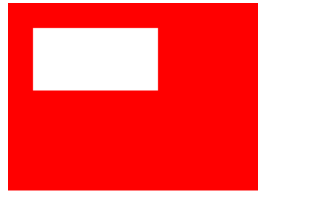
clip() ----- 从原始画布剪切任意形状和尺寸的区域。
  <script>

    var canvas = document.getElementById("Canvas");

    var ctx = canvas.getContext("2d");

    // Clip a rectangular area

    ctx.rect(,,,);      //

    ctx.stroke();

    ctx.clip();                  //用上面的框截取下面

    // Draw red rectangle after clip()

    ctx.fillStyle="red";

    ctx.fillRect(,,,);

  </script>

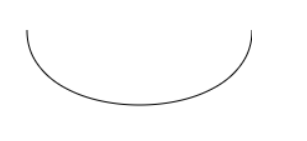
quadraticCurveTo() ---------- 创建二次贝塞尔曲线。
  <script>

    var canvas = document.getElementById("Canvas");

    var ctx = canvas.getContext("2d");

   ctx.beginPath();

   ctx.moveTo(,);

   ctx.quadraticCurveTo(,,,);

   ctx.stroke();

  </script>


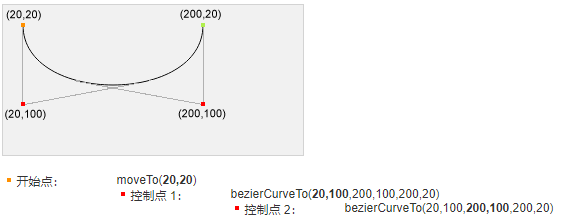
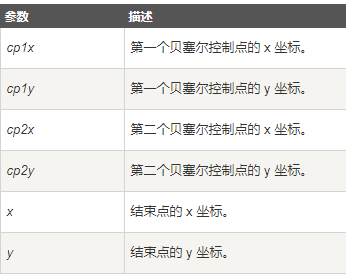
bezierCurveTo() ---------- 创建三次贝塞尔曲线。
 <script>

    var canvas = document.getElementById("Canvas");

    var ctx = canvas.getContext("2d");

      ctx.beginPath();

      ctx.moveTo(,);

      ctx.bezierCurveTo(,,,,,);    //贝塞尔

      ctx.stroke();

  </script>
arc() --------- 创建弧/曲线(用于创建圆形或部分圆)。
 <script>

    var canvas = document.getElementById("Canvas");

    var ctx = canvas.getContext("2d");

    ctx.beginPath();

    ctx.arc(,,,,*Math.PI);

    ctx.stroke();

  </script>

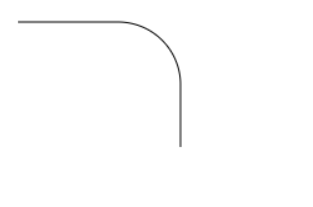
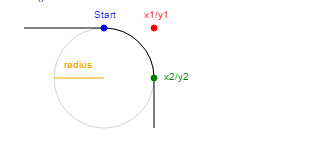
arcTo() -------- 创建两切线之间的弧/曲线。
<script>

    var canvas = document.getElementById("Canvas");

    var ctx = canvas.getContext("2d");

    ctx.beginPath();

    ctx.moveTo(,);           // 创建起始点

    ctx.lineTo(,);          // 创建水平线

    ctx.arcTo(,,,,); // 创建弧

    ctx.lineTo(,);         // 创建垂直线

    ctx.stroke();                // 画出来

  </script>
isPointlnPath() -------- 如果指定的点位于当前路径中,则返回 true,否则返回 false。
 <script>

    var canvas = document.getElementById("Canvas");

    var ctx = canvas.getContext("2d");

    ctx.rect(,,,);

    if (ctx.isPointInPath(,))  //如果路径经过(20,50)为True

       {

       ctx.stroke();     //绘制

       };

  </script>
5.转换
scale(x,y) -------- 缩放当前绘图至更大或更小。 1--100% 0.5---50%
<script>

    var canvas = document.getElementById("Canvas");

    var ctx = canvas.getContext("2d");

    ctx.strokeRect(,,,);

    ctx.scale(,);

    ctx.strokeRect(,,,);

  </script>

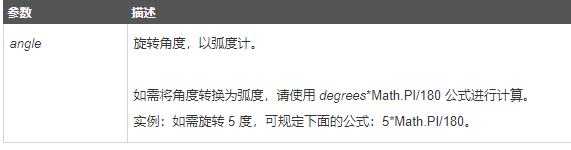
rotate() -------- 旋转当前绘图。
  <script>

    var canvas = document.getElementById("Canvas");

    var ctx = canvas.getContext("2d");

    ctx.rotate(*Math.PI/);

    ctx.fillRect(,,,);

  </script>

translate(x,y) -------- 替换绘图的当前转换矩阵。

 <script>

    var canvas = document.getElementById("Canvas");

    var ctx = canvas.getContext("2d");

    ctx.fillRect(,,,);

    ctx.translate(,);

    ctx.fillRect(,,,);

  </script>
setTransform ------ 将当前转换重置为单位矩阵。然后运行 transform()。
  <script>

    var canvas = document.getElementById("Canvas");

    var ctx = canvas.getContext("2d");

    ctx.fillStyle="yellow";

    ctx.fillRect(,,,)

    ctx.setTransform(,0.5,-0.5,,,);

    ctx.fillStyle="red";

    ctx.fillRect(,,,);

    ctx.setTransform(,0.5,-0.5,,,);

    ctx.fillStyle="blue";

    ctx.fillRect(,,,);

  </script>
6.文本
7.图像绘制
8.像素操作
9.合成
10.其他
三.精美的Canvas案例
<script>var canvas = document.getElementById("Canvas");var ctx = canvas.getContext("2d");// Clip a rectangular areactx.rect(50,20,200,120);ctx.stroke();ctx.clip();// Draw red rectangle after clip()ctx.fillStyle="red";ctx.fillRect(0,0,150,100); </script>
Canvas如何绘制精美的图?的更多相关文章
- 使用 HTML5 canvas 绘制精美的图形
HTML5 是一个新兴标准,它正在以越来越快的速度替代久经考验的 HTML4.HTML5 是一个 W3C “工作草案” — 意味着它仍然处于开发阶段 — 它包含丰富的元素和属性,它们都支持现行的 HT ...
- HTML5 canvas 绘制精美的图形
HTML5 是一个新兴标准,它正在以越来越快的速度替代久经考验的 HTML4.HTML5 是一个 W3C “工作草案” — 意味着它仍然处于开发阶段 — 它包含丰富的元素和属性,它们都支持现行的 HT ...
- 如何从零绘制k线图 -- 原生js canvas图表绘制
样式如下图 源码地址: https://github.com/sutianbinde/charts 编写这个需要具备canvas基础,如果没有canvas基础可以学习我前面的cnavas基础博客. 具 ...
- 【带着canvas去流浪(5)】绘制K线图
目录 一. 任务说明 二. 重点提示 三. 示例代码 示例代码托管在:http://www.github.com/dashnowords/blogs 博客园地址:<大史住在大前端>原创博文 ...
- 带着canvas去流浪系列之五 绘制K线图
[摘要] 用canvas原生API实现百度Echarts 示例代码托管在:http://www.github.com/dashnowords/blogs 一. 任务说明 使用原生canvasAPI绘制 ...
- Canvas上绘制几何图形
重要的类自定义View组件要重写View组件的onDraw(Canvase)方法,接下来是在该 Canvas上绘制大量的几何图形,点.直线.弧.圆.椭圆.文字.矩形.多边形.曲线.圆角矩形,等各种形状 ...
- 基于 HTML5 Canvas 的 3D 模型贴图问题
之前注意到的一个例子,但是一直没有沉下心来看这个例子到底有什么优点,总觉得就是一个 list 列表,也不知道右边的 3d 场景放两个节点是要干嘛,今天突然想起来就仔细地看了一下这个例子的代码,实际操作 ...
- openLayers 4 canvas图例绘制,canvas循环添加图片,解决图片闪烁问题
一.问题来源: 接触Openlayers 一段时间了,最近做了一个农业产业系统,项目中涉及到产业图例,最后考虑用canvas来绘制图例图像.当中带图片的图例移动时,图片会实现闪烁留白情况.闪烁是因为绘 ...
- canvas高效绘制10万图形,你必须知道的高效绘制技巧
最近的一个客户项目中,简化的需求是绘制按照行列绘制很多个圆圈.需求看起来不难,上手就可以做,写两个for循环. 原始绘制方法 首先定义了很多Circle对象,在遍历循环中调用该对象的draw方法.代码 ...
随机推荐
- 我一个二本大学是如何校招拿到阿里offer的
作者:薛勤,互联网从业者,编程爱好者. 本文首发自公众号:代码艺术(ID:onblog)未经许可,不可转载 01:终于步入大学 我既没有跨过山和大海,也没有穿过人山人海,我就是我,一个普通本科大学生. ...
- spark读取文件机制 源码剖析
Spark数据分区调研 Spark以textFile方式读取文件源码 textFile方法位于 spark-core_2.11/org.apache.spark.api.java/JavaSparkC ...
- AtCoder Beginner Contest 156
https://atcoder.jp/contests/abc156/tasks A - Beginner #include <bits/stdc++.h> #define ll long ...
- opencv简单实用(cv2)
一.介绍 安装:pip install opencv-python OpenCV是一个基于BSD许可(开源)发行的跨平台计算机视觉库,可以运行在Linux.Windows.Android和Mac OS ...
- Centos7 LVM扩容实例
Centos7 lvm 扩容与以往版本有所不同 1.插入硬盘,我是在虚拟机上做的测试 直接添加一块5G的硬盘 2.系统读取硬盘信息 # echo "- - -" ...
- bootstrap-table.js 自适应窗体设置
$(window).resize(function () { $('#dtOrder').bootstrapTable('resetView') })
- python+selenium自动化测试,浏览器最大化报错解决方法
此处以谷歌浏览器为例 [问题1]缺少chrome驱动,webdriver调用谷歌浏览器的时候就报错了,如下图: [原因分析]缺少谷歌驱动程序 [解决办法] 1.查看本地安装chrome浏览器版本 2. ...
- hive内置方法一览
引用 https://www.cnblogs.com/qingyunzong/p/8744593.html#_label0 官方文档 https://cwiki.apache.org/confluen ...
- windows本地安装Oracle数据库
一.下载Oracle 11g R2 for Windows. 官方网站: https://www.oracle.com/database/technologies/oracle-database-so ...
- Mac视频下载转换器MovieSherlock使用教程
MovieSherlock for Mac是什么软件?moviesherlock for Mac是运行在Mac平台上一款专业的视频下载转换工具,能快速的下载和转换YouTube电影,并保持原视频的质量 ...