centos6.8安装lnmp
一、配置CentOS 第三方yum源(CentOS默认的标准源里没有nginx软件包)
[root@localhost ~]# yum install wget  #安装下载工具wget
[root@localhost ~]#wget http://www.atomicorp.com/installers/atomic  #下载atomic yum源
[root@localhost ~]#sh ./atomic   #安装
[root@localhost ~]# yum check-update #更新yum软件包
二、安装开发包和库文件
[root@localhost ~]# yum -y install ntp make openssl openssl-devel pcre pcre-devel libpng libpng-devel libjpeg-6b libjpeg-devel-6b freetype freetype-devel gd gd-devel zlib zlib-devel gcc gcc-c++ libXpm libXpm-devel ncurses ncurses-devel libmcrypt libmcrypt-devel libxml2 libxml2-devel imake autoconf automake screen sysstat compat-libstdc++- curl curl-devel
三、卸载已安装的apache、mysql、php
[root@localhost ~]# yum remove httpd
[root@localhost ~]# yum remove mysql
[root@localhost ~]# yum remove php
四、安装nginx
[root@localhost ~]# yum install nginx -y
[root@localhost ~]# service nginx start
[root@localhost ~]# chkconfig --levels 235 nginx on  #设置2、3、5级别开机启动
五、安装mysql
[root@localhost ~]# yum install mysql mysql-server mysql-devel -y
[root@localhost ~]# service mysqld start
[root@localhost ~]#  chkconfig --levels 235 mysqld on

#为root账户设置密码
[root@localhost ~]#mysql_secure_installation  #初始化MySQL
Enter current password for root (enter for none):   <---输入现在的root密码,因为我们还没设置,直接回车
Set root password? [Y/n] Y                                    <---是否设定root密码,当然设置了,输入Y回车
New password:                                                      <---输入root密码,并回车,输入的过程中不会有任何显示
Re-enter new password:                                        <---再次输入root密码,并回车,输入的过程中不会有任何显示
Remove anonymous users? [Y/n] Y                      <---是否删除匿名用户,删除,输入Y回车
Disallow root login remotely? [Y/n] Y                     <---是否删禁止root用户远程登录,当然禁止,输入Y回车
Remove test database and access to it? [Y/n]      <---是否删除测试数据库test,看个人喜好
Reload privilege tables now? [Y/n] Y                    <---刷新权限,输入Y回车
最后出现:Thanks for using MySQL!
MySql密码设置完成,重新启动 MySQL:

[root@localhost ~]#/etc/init.d/mysqld start  #启动
[root@localhost ~]# /etc/init.d/mysqld status
[root@localhost ~]# chkconfig mysqld on
六、安装php
[root@localhost ~]# yum -y install php php-cli php-mysql php-gd php-imap php-ldap php-odbc php-pear php-xml php-xmlrpc php-mbstring php-mcrypt php-mssql php-snmp php-soap
安装php和所需组件使PHP支持MySQL、FastCGI模式
[root@localhost ~]# yum install  php-tidy php-common php-devel php-fpm php-mysql -y
[root@localhost ~]# service php-fpm start
Starting php-fpm:                                          [  OK  ]
[root@localhost ~]# chkconfig --levels 235 php-fpm on
七、配置nginx支持php
[root@localhost ~]# cp /etc/nginx/nginx.conf{,.bak}  #将配置文件改为备份文件

#修改nginx配置文件,添加fastcgi支持
vim /etc/nginx/nginx.conf  #编辑
user  nginx  nginx;  #修改nginx运行账号为:nginx组的nginx用户
:wq!    #保存退出

[root@localhost nginx]# cp /etc/nginx/conf.d/default.conf{,.bak}

[root@localhost nginx]# vim /etc/nginx/conf.d/default.conf

    location / {
        root   /usr/share/nginx/html;
        index  index.php index.html index.htm;   #增加index.php
    }
      location ~ \.php$ {
        root           /usr/share/nginx/html;
        fastcgi_pass   127.0.0.1:9000;
        fastcgi_index  index.php;
        fastcgi_param  SCRIPT_FILENAME  /usr/share/nginx/html$fastcgi_script_name;
        include        fastcgi_params;
    }
八、配置php
[root@localhost nginx]# cp /etc/php.ini{,.bak}
[root@localhost ~]# vim /etc/php.ini
expose_php = Off #禁止显示php版本的信息
九、重启nginx php-fpm
[root@localhost nginx]# service nginx restart

Stopping nginx:                                            [  OK  ]

Starting nginx:                                            [  OK  ]

[root@localhost nginx]# service php-fpm restart

Stopping php-fpm:                                          [  OK  ]

Starting php-fpm:
十、测试
[root@localhost ~]# cd /usr/share/nginx/html/

[root@localhost html]# vim  index.php

<?php

     phpinfo();

?>
[root@localhost html]# chown nginx.nginx /usr/share/nginx/html/ -R  #设置目录所有者

#配置防火墙,开启80端口、3306端口
[root@localhost ~]vi /etc/sysconfig/iptables
-A INPUT -m state --state NEW -m tcp -p tcp --dport 80 -j ACCEPT(允许80端口通过防火墙)
-A INPUT -m state --state NEW -m tcp -p tcp --dport 3306 -j ACCEPT(允许3306端口通过防火墙)
特别提示:很多网友把这两条规则添加到防火墙配置的最后一行,导致防火墙启动失败,正确的应该是添加到默认的22端口这条规则的下面
添加好之后防火墙规则如下所示:
#########################################################
# Firewall configuration written by system-config-firewall
# Manual customization of this file is not recommended.
*filter
:INPUT ACCEPT [0:0]
:FORWARD ACCEPT [0:0]
:OUTPUT ACCEPT [0:0]
-A INPUT -m state --state ESTABLISHED,RELATED -j ACCEPT
-A INPUT -p icmp -j ACCEPT
-A INPUT -i lo -j ACCEPT
-A INPUT -m state --state NEW -m tcp -p tcp --dport 22 -j ACCEPT
-A INPUT -mstate --state NEW -m tcp -p tcp --dport 80 -j ACCEPT
-A INPUT -mstate --state NEW -m tcp -p tcp --dport 3306 -j ACCEPT
-A INPUT -j REJECT --reject-with icmp-host-prohibited
-A FORWARD -j REJECT --reject-with icmp-host-prohibited
COMMIT
######
[root@localhost ~]/etc/init.d/iptables restart  #最后重启防火墙使配置生效
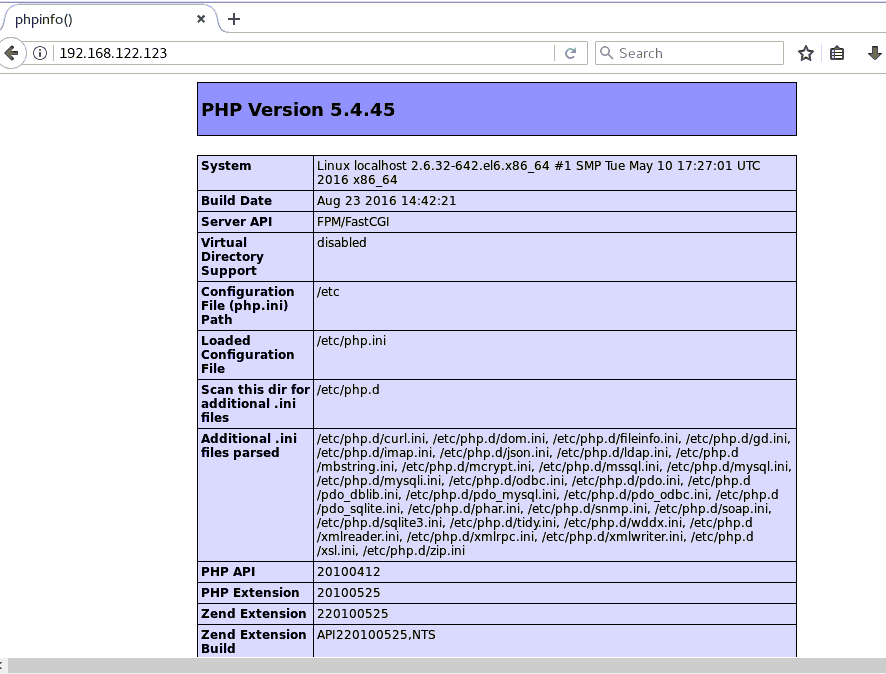
在客户端浏览器输入服务器IP地址,可以看到相关的配置信息!
#############################################################################
备注
nginx默认站点目录是:/usr/share/nginx/html/

权限设置:chown nginx.nginx/usr/share/nginx/html/ -R

MySQL数据库目录是:/var/lib/mysql

权限设置:chown mysql.mysql -R /var/lib/mysql
参考:
https://www.cnblogs.com/xiaoit/p/3991037.html
http://www.kuitao8.com/20150305/3571.shtml
centos6.8安装lnmp的更多相关文章
- centos6.5安装lnmp环境
1.安装nignx的源,默认cenots6没有的. rpm -ivh http://nginx.org/packages/centos/6/noarch/RPMS/nginx-release-cent ...
- Centos6.5 安装lnmp环境
最近项目要配置在nginx上,所以搜索了下具体nginx的安装,看到这篇文章简洁明了而且测试成功就借用了,作品出处:http://www.cnblogs.com/xiaoit/p/3991037.ht ...
- centos6.5下yum安装lnmp(适合刚入职的新手的方法)
新入职的员工,开始的时候都是让配环境,本地写代码用的wamp,在lnmp或lamp测试,除非有些土豪公司 用的是(果机). 另外安装时,把整个流程在脑子里先过一篇(记不全也没关系,一回生二回熟),重在 ...
- 阿里云centos6.5实践编译安装LNMP架构web环境
LNMP 代表的就是:Linux系统下Nginx+MySQL+PHP这种网站服务器架构. 本次测试需求: **实践centos6.5编译安装 LNMP生产环境 架构 web生产环境 使用 ngx_pa ...
- CENTOS6.5源码安装LNMP
CENTOS6.5源码安装LNMP 一.安装前准备 ########################################################################## ...
- linux--->阿里云centos6.9环境配置安装lnmp
阿里云centos6.9环境配置安装lnmp mysql安装 本人博客:http://www.cnblogs.com/frankltf/p/8615418.html PHP安装 1.安装依赖关系 yu ...
- CentOS-6 yum安装nginx php53 mysql55 搭建LNMP环境
1.导入外部软件库 01.rpm -Uvh http://dl.iuscommunity.org/pub/ius/stable/Redhat/6/x86_64/epel-release-6-5.noa ...
- Centos6.5中 一键安装LNMP 安装Yii2.0 手工配置
1.一键安装LNMP cd /usr wget -c http://soft.vpser.net/lnmp/lnmp1.2-full.tar.gz tar zxf lnmp1.-full.tar.gz ...
- 在centos6.7中lnmp环境下安装swoole插件和pthreads插件
1.首先在安装lnmp集成包之前,解压lnmp1.3-full.tar.gz,进入到lnmp1.3-full/include/目录下; 2.输入 vi php.sh;编辑php.sh文档.博主安的是p ...
随机推荐
- 洛谷$P3647\ [APIO2014]$连珠线 换根$dp$
正解:换根$dp$ 解题报告: 传送门! 谁能想到$9102$年了$gql$居然还没写过换根$dp$呢,,,$/kel$ 考虑固定了从哪个点开始之后,以这个点作为根,蓝线只可能是直上直下的,形如&qu ...
- Hadoop以及组件介绍
一.背景介绍 在接触过大数据相关项目的时候常常都会听到Hadoop这个东西,简单来说,他是一个用分布式计算来处理大数据的开源软件,下面包含了许多的组件和子项目,这篇文章将会介绍Hadoop的原理以及一 ...
- day5 函数和参数
函数就是最基本的一种代码抽象的方式 定义一个函数使用def语句 def my_abs(x): if x >= 0: return x else: return -x 定义一个什么事也不做的空函数 ...
- cogs 1361. 树 线段树
1361. 树 ★ 输入文件:treed.in 输出文件:treed.out 简单对比时间限制:1 s 内存限制:128 MB [问题描述] 在一个凉爽的夏夜,xth和rabbit来到 ...
- 《C# 爬虫 破境之道》:第一境 爬虫原理 — 第三节:WebResponse
第二节中,我们介绍了WebRequest,它可以帮助我们发送一个请求,不过正所谓“来而不往非礼也”,对方收到我们的请求,不给点回复,貌似不太合适(不过,还真有脸皮厚的:P). 接下来,就重点研究一下, ...
- Window初始化Git环境
安装Git 去到官网下载地址,找到自己电脑的对应版本,下载安装就好啦,这里就不一一说明了 https://git-scm.com/download/win 初始化Git环境 第一步:打开git-bas ...
- Android权限系统
Android系统为每个应用程序提供了一个安全的运行环境,不同程序间相互隔离,应用程序的数据等私有资源,外界无法访问.这个安全的运行环境由Android的权限系统(可称为沙箱系统)来提供.本文简单记录 ...
- 大厂面试中三次握手延伸出来n连发你受得了?
目录 一.这是一次有故事的对话 二.三次握手的客户端服务端状态 1 先画个图看看有哪些状态 2 tcp协议内容解析 3 通过工具wireshark来验证我们所述 三.说下Linux网络编程常用API ...
- Java中的equalsIgnoreCase()
在工作中偶然机会看到了equalsIgnoreCase()这个方法,相信大家和我一样equals()是再熟悉不过的了,但是对于equalsIgnoreCase()有点眼生(大神勿喷),所以写了这篇博客 ...
- 10.方法重写Override
方法重写:Override: 需要有继承关系,子类重写父类的方法! 方法名必须相同 参数列表必须相同 修饰符:范围可以扩大,但不能缩小:public>protected>defalut&g ...