IOS开关效果
有IOS的开关模拟,当然也有MIUI的开关模拟
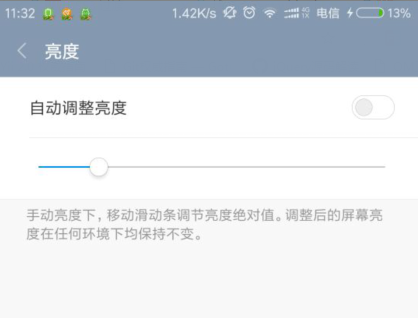
看到设置选项里面的开关样式,突发奇想地来试试

最终效果如图:

<!DOCTYPE html>

<html>

	<head>

		<meta charset="UTF-8">

		<title></title>

		<style>

			.switch-wrap {

				position: relative;

				margin: 50px auto;

				width: 120px;

				height: 40px;

				font: 14px/1.5 Arial, Sans-Serif;

			}

			.switch,

			.switch input,

			.switch input:before {

				width: 30px;

				height: 14px;

			}

			.switch input {

				position: absolute;

				right: 0;

			}

			.switch input:before {

				content: '';

				display: inline-block;

				position: relative;

				border-radius: 20px;

				border: 1px solid #ccccc6;

				box-shadow: 0 0 1px 1px #ececf3;

				background-color: #fff;

				cursor: pointer;

			}

			.switch input:after {

				content: '';

				position: absolute;

				width: 12px;

				height: 12px;

				top: 2px;

				left: 3px;

				border-radius: 50%;

				background-color: #ccccc6;

				transition: .2s left, .2s background-color;

			}

			.switch input:checked:after {

				left: 15px;

				background-color: #36a6fa;

				transition: .2s left, .2s background-color;

			}

		</style>

		<script src="jquery.js"></script>

		<script type="text/javascript">

			$('#switch').change(function() {

				$('.switch-action').text(this.checked ? '关闭' : '开启');

			});

		</script>

	</head>

	<body>

		<div class="switch-wrap">

			<span><span class="switch-action">开启</span>WLAN</span>

			<label class="switch">

            <input type="checkbox" name="switch" id="switch">

        </label>

		</div>

	</body>

</html>
实现过程
1. 选项框checkbox
模拟开关当然需要一个选项框,这里用到了复选框checkbox
2. 理解开关的过程
点击开关按钮,则开启或关闭。原生的checkbox无法做到图示的效果,所以就需要额外的元素来表示图中的开关
而我们又要使用到checkbox的点击效果以及点击后是否选中(checked)的效果,所以checkbox不能隐藏,但可以用覆盖的方式
为了减少多余标签的使用,可以使用伪元素:before、:after ,标签结构为
  <div class="switch-wrap">

        <span><span class="switch-action">开启</span>WLAN</span>

        <label class="switch">

            <input type="checkbox" name="switch" id="switch">

        </label>

    </div>
3. 开关的实现
用:before伪元素作为开关背景层,用:after伪元素作为开关项(即那个小圆圈)

        .switch input:before {

            content: '';

            display: inline-block;

            position: relative;

            border-radius: 20px;

            border: 1px solid #ccccc6;

            box-shadow: 0 0 1px 1px #ececf3;

            background-color: #fff;

            cursor: pointer;

        }
        .switch input:after {

            content: '';

            position: absolute;

            width: 12px;

            height: 12px;

            top: 2px;

            left: 3px;

            border-radius: 50%;

            background-color: #ccccc6;

            transition: .2s left, .2s background-color;

        }
初始小圆圈在左侧,当开关状态为开启时,右移,并更新开启状态的背景色
        .switch input:checked:after {

            left: 15px;

            background-color: #36a6fa;

            transition: .2s left, .2s background-color;

        }
以上就是关键的代码了,以下为完整的样式
 1 <style>

 2     .switch-wrap {

 3             position: relative;

 4             margin: 50px auto;

 5             width: 120px;

 6             height: 40px;

 7             font: 14px/1.5 Arial, Sans-Serif;

 8         }

 9

10         .switch,

11         .switch input,

12         .switch input:before {

13             width: 30px;

14             height: 14px;

15         }

16

17         .switch input {

18             position: absolute;

19             right: 0;

20         }

21

22         .switch input:before {

23             content: '';

24             display: inline-block;

25             position: relative;

26             border-radius: 20px;

27             border: 1px solid #ccccc6;

28             box-shadow: 0 0 1px 1px #ececf3;

29             background-color: #fff;

30             cursor: pointer;

31         }

32

33         .switch input:after {

34             content: '';

35             position: absolute;

36             width: 12px;

37             height: 12px;

38             top: 2px;

39             left: 3px;

40             border-radius: 50%;

41             background-color: #ccccc6;

42             transition: .2s left, .2s background-color;

43         }

44

45         .switch input:checked:after {

46             left: 15px;

47             background-color: #36a6fa;

48             transition: .2s left, .2s background-color;

49         }

50

51

52     </style>
4. 开关的测试
最后,可结合JS检测一下开关的状态变化
    <script src="jquery.js"></script>

    <script type="text/javascript">

        $('#switch').change(function() {

            $('.switch-action').text(this.checked ? '关闭' : '开启');

        });

    </script>
IOS开关效果的更多相关文章
- 自己定义控件:onDraw 方法实现仿 iOS 的开关效果
概述 本文主要解说怎样在 Android 下实现高仿 iOS 的开关按钮,并不是是在 Android 自带的 ToggleButton 上改动,而是使用 API 提供的 onDraw.onMeasur ...
- android 仿ios开关控件
ios一些控件还是挺美丽的,可是对android程序猿来说可能比較苦逼,由于ios一些看起来简单的效果对android来说可能就没那么简单了,可是没办法非常多产品都是拿ios的一些控件叫android ...
- 【转】提示框第三方库之MBProgressHUD iOS toast效果 动态提示框效果
原文网址:http://www.zhimengzhe.com/IOSkaifa/37910.html MBProgressHUD是一个开源项目,实现了很多种样式的提示框,使用上简单.方便,并且可以对显 ...
- Android仿IOS回弹效果 ScrollView回弹 总结
Android仿IOS回弹效果 ScrollView回弹 总结 应项目中的需求 须要仿IOS 下拉回弹的效果 , 我在网上搜了非常多 大多数都是拿scrollview 改吧改吧 试了一些 发现总 ...
- Android 实现高仿iOS桌面效果之可拖动的GridView(上)
转载请标明出处:http://blog.csdn.net/sk719887916/article/details/40074663,作者:skay 最近项目中遇到一个LIstview的拖动效 ...
- iOS 波浪效果的实现
iOS 波浪效果的实现 p.p1 { margin: 0.0px 0.0px 0.0px 0.0px; font: 14.0px Menlo; color: #4f8187; background-c ...
- 【iOS系列】- iOS吸附效果的实现 之 UICollectionView的使用全解
[iOS系列]- iOS吸附效果的实现 之 UICollectionView的使用全解 UICollectionView可以做很多的布局,在iOS开发中较为重要,所以这里就以实例来讲解UICollec ...
- iOS 复选框风格转换 Switchery 开关效果
Switchery 是个简单的 JavaScript 组件,只要几个简单的步骤就可以帮助用户把默认的 HTML 复选框转换成漂亮 iOS 7 样式风格.用户可以很方便的自定义这种转换,所以可以很好的配 ...
- js模仿ios select效果
github:https://github.com/zhoushengmufc/iosselect webapp模仿ios下拉菜单 html下拉菜单select在安卓和IOS下表现不一样,iossel ...
随机推荐
- C#串口serialPort操作
现在大多数硬件设备均采用串口技术与计算机相连,因此串口的应用程序开发越来越普遍.例如,在计算机没有安装网卡的情况下,将本机上的一些信息数据 传输到另一台计算机上,那么利用串口通信就可以实现.运行本程序 ...
- java基础2 判断语句:if ... else 语句和 switch 语句
一.if ... else 判断语句 1.if ... else 判断语句的格式 1.1.格式一 if(判断条件){ 执行不满足条件的语句 } 1.2.格式二 if(判断语句){ 满足条件的语句 }e ...
- ASPLOS'17论文导读——SC-DCNN: Highly-Scalable Deep Convolutional Neural Network using Stochastic Computing
今年去参加了ASPLOS 2017大会,这个会议总体来说我感觉偏系统和偏软一点,涉及硬件的相对少一些,对我这个喜欢算法以及硬件架构的菜鸟来说并不算非常契合.中间记录了几篇相对比较有趣的paper,今天 ...
- JavaScript 中typeof、instanceof 与 constructor 的区别?
typeof.instanceof 与 constructor 详解 typeof 一元运算符 返回一个表达式的数据类型的字符串,返回结果为js基本的数据类型,包括number,boolean,st ...
- 认识hasLayout——IE浏览器css bug的一大罪恶根源 (转)
认识hasLayout--IE浏览器css bug的一大罪恶根源 转 什么是hasLayout?hasLayout是IE特有的一个属性.很多的ie下的css bug都与其息息相关.在ie中,一个元素要 ...
- git的一些配置
git使用socks代理加速 原来git可以配置socks代理的,真好,从github上clone了opencv的代码,基本上是满速了. 首先需要配置shadowsocks,然后通过GUI客户端(或命 ...
- js中post中文参数转码和解码
作为基础知识和血淋林的教训,前端一定要记得post请求时将参数中带有中文的部分进行转码!! var str='宋宇·特弱夫斯基'; //转码: encodeURI(encodeURI(str)) ; ...
- 使用自己的域名解析 cnblogs 博客
使用自己的域名解析 cnblogs 博客(博客园) 1.实现原理 用户访问 -> 阿里云解析 -> github page 跳转 -> 真实的博客地址 2.创建 github pag ...
- jquery 美化弹出提示 漂亮的Dialog 对话框
三个不同的效果,分别是普通的警告,确认/取消,带一个输入框 本例用了jquery.alertify.js,请到演示页面查看 css文件也请到演示页面查看 JavaScript Code <scr ...
- Android之 内容提供器(1)——使用内容提供器访问其它程序共享的数据
(下面内容是阅读郭霖大神的<第一行代码>总结的) 1 概述 内容提供器是Android实现跨程序共享数据的标准方式. 内容提供器的的使用方法有两种, 一是使用已有的内容提供器对其他程序的数 ...