从零开始学android -- dialog
先看个效果图
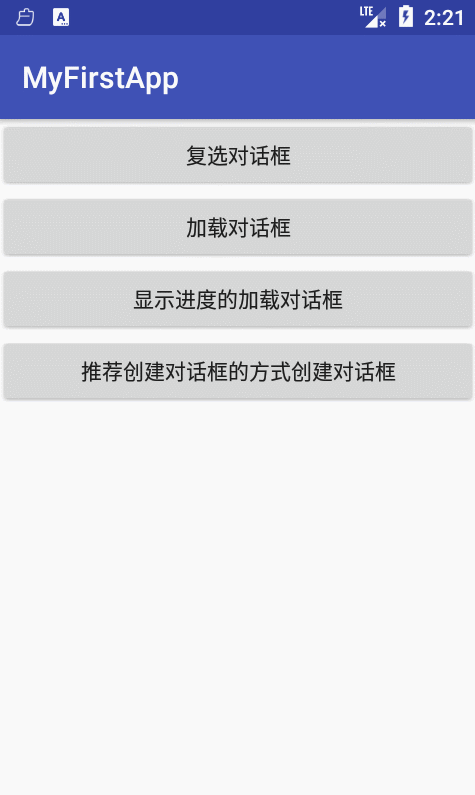
activity_main.xml
<?xml version="1.0" encoding="utf-8"?>

<LinearLayout xmlns:android="http://schemas.android.com/apk/res/android"

    android:layout_width="match_parent"

    android:layout_height="match_parent"

    android:orientation="vertical">

    <Button

        android:id="@+id/button1"

        android:layout_width="match_parent"

        android:layout_height="wrap_content"

        android:text="复选对话框"

         />

    <Button

        android:id="@+id/button2"

        android:layout_width="match_parent"

        android:layout_height="wrap_content"

        android:text="加载对话框"

         />

    <Button

        android:id="@+id/button3"

        android:layout_width="match_parent"

        android:layout_height="wrap_content"

        android:text="显示进度的加载对话框"

         />

    <Button

        android:id="@+id/button4"

        android:layout_width="match_parent"

        android:layout_height="wrap_content"

        android:text="推荐创建对话框的方式创建对话框"/>

</LinearLayout>
DialogActivity.class
package zou.study.com.myfirstapp;

import android.app.Dialog;

import android.app.ProgressDialog;

import android.content.DialogInterface;

import android.os.Bundle;

import android.os.SystemClock;

import android.support.v7.app.AlertDialog;

import android.support.v7.app.AppCompatActivity;

import android.view.View;

import android.widget.Toast;

import zou.study.com.fragment.EditNameDialogFragment;

public class DialogActivity extends AppCompatActivity implements View.OnClickListener{

    String[] items = {"Google","Apple","Microsoft"};

    boolean[] itemChecked = new boolean[items.length];

    ProgressDialog progressDialog;

    @Override

    protected void onCreate(Bundle savedInstanceState) {

        super.onCreate(savedInstanceState);

        setContentView(R.layout.activity_main);

        initView();

    }

    private void initView() {

        findViewById(R.id.button1).setOnClickListener(this);

        findViewById(R.id.button2).setOnClickListener(this);

        findViewById(R.id.button3).setOnClickListener(this);

        findViewById(R.id.button4).setOnClickListener(this);

    }

    @Override

    public void onClick(View v) {

        switch (v.getId()){

            case R.id.button1:  //普通的复选对话框

                showDialog(1);

                break;

            case R.id.button2:  //进度对话框

                final ProgressDialog dialog = ProgressDialog.show(this,"Do something","Please wait...");

                new Thread(new Runnable() {

                    @Override

                    public void run() {

                        SystemClock.sleep(5000);

                        dialog.dismiss();

                    }

                }).start();

                break;

            case R.id.button3:  //带进度调的对话框

                showDialog(2);

                progressDialog.setProgress(0);

                new Thread(new Runnable() {

                    @Override

                    public void run() {

                        for (int i = 0;i <= 15;i++){

                            SystemClock.sleep(1000);

                            progressDialog.incrementProgressBy(100/15);

                        }

                        progressDialog.dismiss();

                    }

                }).start();

                break;

            case R.id.button4: //采用android 3.0后推荐的创建dialog方式 DialogFragment 这里只是简单用法,想要了解更多请自己google

                EditNameDialogFragment editNameDialog = new EditNameDialogFragment();

                editNameDialog.show(getFragmentManager(), "EditNameDialog");

                break;

        }

    }

    @Override

    protected Dialog onCreateDialog(int id) {

        switch (id){

            case 1:

                AlertDialog.Builder builder = new AlertDialog.Builder(this);

                builder.setIcon(R.mipmap.ic_launcher);

                builder.setTitle("标题");

                builder.setPositiveButton("OK", new DialogInterface.OnClickListener() {

                    @Override

                    public void onClick(DialogInterface dialog, int which) {

                        Toast.makeText(getBaseContext(),"OK clicked",Toast.LENGTH_SHORT).show();

                    }

                });

                builder.setNegativeButton("cancel", new DialogInterface.OnClickListener() {

                    @Override

                    public void onClick(DialogInterface dialog, int which) {

                        Toast.makeText(getBaseContext(),"cancel clicked",Toast.LENGTH_SHORT).show();

                    }

                });

                builder.setMultiChoiceItems(items, itemChecked, new DialogInterface.OnMultiChoiceClickListener() {

                    @Override

                    public void onClick(DialogInterface dialog, int which, boolean isChecked) {

                        Toast.makeText(getBaseContext(),items[which] + (isChecked?"checked!":"unchecked!"),Toast.LENGTH_SHORT).show();

                    }

                });

                return builder.create();

            case 2:

                progressDialog = new ProgressDialog(this);

                progressDialog.setIcon(R.mipmap.ic_launcher);

                progressDialog.setTitle("Downloading files...");

                progressDialog.setProgressStyle(ProgressDialog.STYLE_HORIZONTAL);

                progressDialog.setButton(DialogInterface.BUTTON_POSITIVE, "OK", new DialogInterface.OnClickListener() {

                    @Override

                    public void onClick(DialogInterface dialog, int which) {

                        Toast.makeText(getBaseContext(),"OK clicked",Toast.LENGTH_SHORT).show();

                    }

                });

                progressDialog.setButton(DialogInterface.BUTTON_NEGATIVE, "Cancel", new DialogInterface.OnClickListener() {

                    @Override

                    public void onClick(DialogInterface dialog, int which) {

                        Toast.makeText(getBaseContext(),"cancel clicked",Toast.LENGTH_SHORT).show();

                    }

                });

                return progressDialog;

        }

        return null;

    }

}
EditNameDialogFragment
package zou.study.com.fragment;

import android.app.DialogFragment;

import android.os.Bundle;

import android.support.annotation.Nullable;

import android.view.LayoutInflater;

import android.view.View;

import android.view.ViewGroup;

import android.view.Window;

import zou.study.com.myfirstapp.R;

public class EditNameDialogFragment extends DialogFragment {

    @Nullable

    @Override

    public View onCreateView(LayoutInflater inflater, @Nullable ViewGroup container, Bundle savedInstanceState) {

        getDialog().requestWindowFeature(Window.FEATURE_NO_TITLE); //去掉action

        return inflater.inflate(R.layout.fragment_dialog,container);

    }

}
fragment_dialog.xml
<?xml version="1.0" encoding="utf-8"?>

<RelativeLayout xmlns:android="http://schemas.android.com/apk/res/android"

    android:layout_width="wrap_content"

    android:layout_height="wrap_content" >

    <TextView

        android:id="@+id/id_label_your_name"

        android:layout_width="wrap_content"

        android:layout_height="32dp"

        android:gravity="center_vertical"

        android:text="Your name:" />

    <EditText

        android:id="@+id/id_txt_your_name"

        android:layout_width="match_parent"

        android:layout_height="wrap_content"

        android:layout_toRightOf="@id/id_label_your_name"

        android:imeOptions="actionDone"

        android:inputType="text" />

    <Button

        android:id="@+id/id_sure_edit_name"

        android:layout_width="wrap_content"

        android:layout_height="wrap_content"

        android:layout_alignParentRight="true"

        android:layout_below="@id/id_txt_your_name"

        android:text="ok" />

</RelativeLayout>
学习记录之用,如有错误请指正谢谢.
从零开始学android -- dialog的更多相关文章
- 从零开始学android -- Service
废话不多说了,Service是四大组件之一,是一个后台处理长时间运行在主线程不需要依赖ui界面显示的应用组件,切记不能在service中做耗时操作,会阻塞主线程,要做也要在service中开个子线程做 ...
- 从零开始学android开发-项目打包发布
右键项目 选择[android tools]-[export signed application package] 点击[next] 如果没有keystore可以选择[create new keys ...
- 从零开始学android开发-adt-bundle-eclipse下的修改android app名称
eclipse中,打开项目根目录中的AndoirManifest.xml文件,找到如下内容 <application android:allowBackup="true" a ...
- 从零开始学android开发-通过WebService进行网络编程,使用工具类轻松实现
相信大家在平常的开发中,对网络的操作用到HTTP协议比较多,通过我们使用Get或者Post的方法调用一个数据接口,然后服务器给我们返回JSON格式的数据,我们解析JSON数据然后展现给用户,相信很多人 ...
- 从零开始学android开发-通过WebService获取今日天气情况
因为本身是在搞.NET方面的东东,现在在学习Android,所以想实现Android通过WebService接口来获取数据,网上很多例子还有有问题的.参考:Android 通过WebService进行 ...
- 从零开始学android开发-布局中 layout_gravity、gravity、orientation、layout_weight
线性布局中,有 4 个及其重要的参数,直接决定元素的布局和位置,这四个参数是 android:layout_gravity ( 是本元素相对于父元素的重力方向 ) android:gravity (是 ...
- 从零开始学android开发-setBackgroundDrawable与setBackgroundResource的区别
setBackgroundDrawable和setBackgroundResource的区别很多网友不知道View类提供的setBackgroundDrawable和setBackgroundReso ...
- 从零开始学android开发-用Intent启动Activity的方法
启动另外一个Activity,可以有的方法有用setClass()和Component Name 1. 先说在setClass启动一个Activity的方法吧: Intent intent = new ...
- 从零开始学android开发-View的setOnClickListener的添加方法
1)第一种,也是最长见的添加方法(一下都以Button为例) Button btn = (Button) findViewById(R.id.myButton); btn .setOnClickLis ...
随机推荐
- C++中数据对齐问题。struct、union、enum,类继承。再谈sizeof()
首先是struct,在C++中,结构体其实和class有很大的相似了.但是有一点不同的是,struct默认是public,而class中是private. 当然,struct继承等用法也是可以的. 共 ...
- make: ./libtool:命令未找到
make: ./libtool:命令未找到 问题描述: [root@bogon jpeg-6b]# ; make install./libtool --mode=compile gcc -O2 -I. ...
- ES6中的迭代器(Iterator)和生成器(Generator)(二)
一.内建迭代器 迭代器是ES6的一个重要组成部分,在ES6中,已经默认为许多内建类型提供了内建迭代器,只有当这些内建迭代器无法实现目标时才需要自己创建.通常来说当定义自己的对象和类时才会遇到这种情况, ...
- Java源码中遇到的一些问题(更新中)
1子类和父类实现同样的接口,这样做有什么意义吗? 举例:Vector和AbstractList的类签名 public class Vector<E> extends AbstractLis ...
- 【Zookeeper】Zookeeper部署笔记
Zookeeper部署笔记 .上传zk安装包 .解压 .配置(先在一台节点上配置) .1添加一个zoo.cfg配置文件 $ZOOKEEPER/conf mv zoo_sample.cfg zoo.cf ...
- 转: MyEclipse 10.0,9.0,8.0 下添加jadClipse反编译插件
MyEclipse 10.0,9.0,8.0 下添加jadClipse反编译插件 (2012-11-19 15:36:35) 转载▼ 标签: myeclipse jad 反编译 插件 it 分类: M ...
- [Fri, 3 Jul 2015 ~ Tue, 7 Jul 2015] Deep Learning in arxiv
Convolutional Color Constancy can this be used for training cnn to narrow the gap between different ...
- DeleteDC、ReleaseDC 、DeleteObject的使用
DeleteDC 该函数删除指定的设备上下文环境(DC). 原型: BOOL DeleteDC(HDC hdc): 参数: hdc:设备上下文环境的句柄. 返回值: 成功,返回非零值:失败,返回零.调 ...
- jquery load方式浏览器断点调试
jquery load的方式引入的,如果需要在浏览器中断点调试,需要在代码中使用debugger进行断点
- Java---24---基本数据类型对象包装类
基本数据类型对象包装类 byte Byte short short int Integer boolean Boolean float Float double Double char ...