从零开始学android -- dialog
先看个效果图
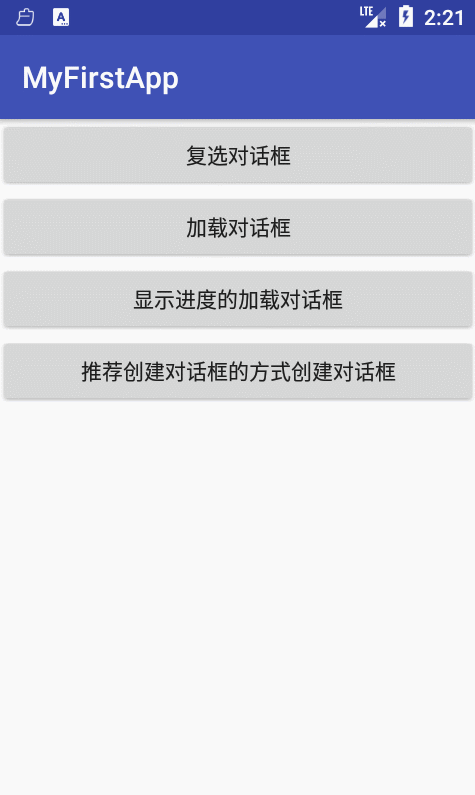
activity_main.xml
<?xml version="1.0" encoding="utf-8"?>

<LinearLayout xmlns:android="http://schemas.android.com/apk/res/android"

    android:layout_width="match_parent"

    android:layout_height="match_parent"

    android:orientation="vertical">

    <Button

        android:id="@+id/button1"

        android:layout_width="match_parent"

        android:layout_height="wrap_content"

        android:text="复选对话框"

         />

    <Button

        android:id="@+id/button2"

        android:layout_width="match_parent"

        android:layout_height="wrap_content"

        android:text="加载对话框"

         />

    <Button

        android:id="@+id/button3"

        android:layout_width="match_parent"

        android:layout_height="wrap_content"

        android:text="显示进度的加载对话框"

         />

    <Button

        android:id="@+id/button4"

        android:layout_width="match_parent"

        android:layout_height="wrap_content"

        android:text="推荐创建对话框的方式创建对话框"/>

</LinearLayout>
DialogActivity.class
package zou.study.com.myfirstapp;

import android.app.Dialog;

import android.app.ProgressDialog;

import android.content.DialogInterface;

import android.os.Bundle;

import android.os.SystemClock;

import android.support.v7.app.AlertDialog;

import android.support.v7.app.AppCompatActivity;

import android.view.View;

import android.widget.Toast;

import zou.study.com.fragment.EditNameDialogFragment;

public class DialogActivity extends AppCompatActivity implements View.OnClickListener{

    String[] items = {"Google","Apple","Microsoft"};

    boolean[] itemChecked = new boolean[items.length];

    ProgressDialog progressDialog;

    @Override

    protected void onCreate(Bundle savedInstanceState) {

        super.onCreate(savedInstanceState);

        setContentView(R.layout.activity_main);

        initView();

    }

    private void initView() {

        findViewById(R.id.button1).setOnClickListener(this);

        findViewById(R.id.button2).setOnClickListener(this);

        findViewById(R.id.button3).setOnClickListener(this);

        findViewById(R.id.button4).setOnClickListener(this);

    }

    @Override

    public void onClick(View v) {

        switch (v.getId()){

            case R.id.button1:  //普通的复选对话框

                showDialog(1);

                break;

            case R.id.button2:  //进度对话框

                final ProgressDialog dialog = ProgressDialog.show(this,"Do something","Please wait...");

                new Thread(new Runnable() {

                    @Override

                    public void run() {

                        SystemClock.sleep(5000);

                        dialog.dismiss();

                    }

                }).start();

                break;

            case R.id.button3:  //带进度调的对话框

                showDialog(2);

                progressDialog.setProgress(0);

                new Thread(new Runnable() {

                    @Override

                    public void run() {

                        for (int i = 0;i <= 15;i++){

                            SystemClock.sleep(1000);

                            progressDialog.incrementProgressBy(100/15);

                        }

                        progressDialog.dismiss();

                    }

                }).start();

                break;

            case R.id.button4: //采用android 3.0后推荐的创建dialog方式 DialogFragment 这里只是简单用法,想要了解更多请自己google

                EditNameDialogFragment editNameDialog = new EditNameDialogFragment();

                editNameDialog.show(getFragmentManager(), "EditNameDialog");

                break;

        }

    }

    @Override

    protected Dialog onCreateDialog(int id) {

        switch (id){

            case 1:

                AlertDialog.Builder builder = new AlertDialog.Builder(this);

                builder.setIcon(R.mipmap.ic_launcher);

                builder.setTitle("标题");

                builder.setPositiveButton("OK", new DialogInterface.OnClickListener() {

                    @Override

                    public void onClick(DialogInterface dialog, int which) {

                        Toast.makeText(getBaseContext(),"OK clicked",Toast.LENGTH_SHORT).show();

                    }

                });

                builder.setNegativeButton("cancel", new DialogInterface.OnClickListener() {

                    @Override

                    public void onClick(DialogInterface dialog, int which) {

                        Toast.makeText(getBaseContext(),"cancel clicked",Toast.LENGTH_SHORT).show();

                    }

                });

                builder.setMultiChoiceItems(items, itemChecked, new DialogInterface.OnMultiChoiceClickListener() {

                    @Override

                    public void onClick(DialogInterface dialog, int which, boolean isChecked) {

                        Toast.makeText(getBaseContext(),items[which] + (isChecked?"checked!":"unchecked!"),Toast.LENGTH_SHORT).show();

                    }

                });

                return builder.create();

            case 2:

                progressDialog = new ProgressDialog(this);

                progressDialog.setIcon(R.mipmap.ic_launcher);

                progressDialog.setTitle("Downloading files...");

                progressDialog.setProgressStyle(ProgressDialog.STYLE_HORIZONTAL);

                progressDialog.setButton(DialogInterface.BUTTON_POSITIVE, "OK", new DialogInterface.OnClickListener() {

                    @Override

                    public void onClick(DialogInterface dialog, int which) {

                        Toast.makeText(getBaseContext(),"OK clicked",Toast.LENGTH_SHORT).show();

                    }

                });

                progressDialog.setButton(DialogInterface.BUTTON_NEGATIVE, "Cancel", new DialogInterface.OnClickListener() {

                    @Override

                    public void onClick(DialogInterface dialog, int which) {

                        Toast.makeText(getBaseContext(),"cancel clicked",Toast.LENGTH_SHORT).show();

                    }

                });

                return progressDialog;

        }

        return null;

    }

}
EditNameDialogFragment
package zou.study.com.fragment;

import android.app.DialogFragment;

import android.os.Bundle;

import android.support.annotation.Nullable;

import android.view.LayoutInflater;

import android.view.View;

import android.view.ViewGroup;

import android.view.Window;

import zou.study.com.myfirstapp.R;

public class EditNameDialogFragment extends DialogFragment {

    @Nullable

    @Override

    public View onCreateView(LayoutInflater inflater, @Nullable ViewGroup container, Bundle savedInstanceState) {

        getDialog().requestWindowFeature(Window.FEATURE_NO_TITLE); //去掉action

        return inflater.inflate(R.layout.fragment_dialog,container);

    }

}
fragment_dialog.xml
<?xml version="1.0" encoding="utf-8"?>

<RelativeLayout xmlns:android="http://schemas.android.com/apk/res/android"

    android:layout_width="wrap_content"

    android:layout_height="wrap_content" >

    <TextView

        android:id="@+id/id_label_your_name"

        android:layout_width="wrap_content"

        android:layout_height="32dp"

        android:gravity="center_vertical"

        android:text="Your name:" />

    <EditText

        android:id="@+id/id_txt_your_name"

        android:layout_width="match_parent"

        android:layout_height="wrap_content"

        android:layout_toRightOf="@id/id_label_your_name"

        android:imeOptions="actionDone"

        android:inputType="text" />

    <Button

        android:id="@+id/id_sure_edit_name"

        android:layout_width="wrap_content"

        android:layout_height="wrap_content"

        android:layout_alignParentRight="true"

        android:layout_below="@id/id_txt_your_name"

        android:text="ok" />

</RelativeLayout>
学习记录之用,如有错误请指正谢谢.
从零开始学android -- dialog的更多相关文章
- 从零开始学android -- Service
废话不多说了,Service是四大组件之一,是一个后台处理长时间运行在主线程不需要依赖ui界面显示的应用组件,切记不能在service中做耗时操作,会阻塞主线程,要做也要在service中开个子线程做 ...
- 从零开始学android开发-项目打包发布
右键项目 选择[android tools]-[export signed application package] 点击[next] 如果没有keystore可以选择[create new keys ...
- 从零开始学android开发-adt-bundle-eclipse下的修改android app名称
eclipse中,打开项目根目录中的AndoirManifest.xml文件,找到如下内容 <application android:allowBackup="true" a ...
- 从零开始学android开发-通过WebService进行网络编程,使用工具类轻松实现
相信大家在平常的开发中,对网络的操作用到HTTP协议比较多,通过我们使用Get或者Post的方法调用一个数据接口,然后服务器给我们返回JSON格式的数据,我们解析JSON数据然后展现给用户,相信很多人 ...
- 从零开始学android开发-通过WebService获取今日天气情况
因为本身是在搞.NET方面的东东,现在在学习Android,所以想实现Android通过WebService接口来获取数据,网上很多例子还有有问题的.参考:Android 通过WebService进行 ...
- 从零开始学android开发-布局中 layout_gravity、gravity、orientation、layout_weight
线性布局中,有 4 个及其重要的参数,直接决定元素的布局和位置,这四个参数是 android:layout_gravity ( 是本元素相对于父元素的重力方向 ) android:gravity (是 ...
- 从零开始学android开发-setBackgroundDrawable与setBackgroundResource的区别
setBackgroundDrawable和setBackgroundResource的区别很多网友不知道View类提供的setBackgroundDrawable和setBackgroundReso ...
- 从零开始学android开发-用Intent启动Activity的方法
启动另外一个Activity,可以有的方法有用setClass()和Component Name 1. 先说在setClass启动一个Activity的方法吧: Intent intent = new ...
- 从零开始学android开发-View的setOnClickListener的添加方法
1)第一种,也是最长见的添加方法(一下都以Button为例) Button btn = (Button) findViewById(R.id.myButton); btn .setOnClickLis ...
随机推荐
- [NOIP模拟赛][贪心]奶牛晒衣服.
奶牛晒衣服(dry) [问题描述] 在熊大妈英明的带领下,时针和它的同伴生下了许多牛宝宝.熊大妈决定给每个宝宝都穿上可爱的婴儿装.于是,为牛宝宝洗晒衣服就成了很不爽的事情. 圣人王担负起了这个重任.洗 ...
- 用gulp+webpack构建多页应用——记一次Node多页应用的构建过程
通过参考网上的一些构建方法,当然也在开发过程中进行了一番实践,最终搭建了一套适用于当前多页应用的构建方案,当然该方案还处于draft版本,会在后续的演进过程中不断的优化. 个人觉得该方案的演进过程相对 ...
- linux之ssh命令
ssh命令用于远程登录上Linux主机. 常用格式:ssh [-l login_name] [-p port] [user@]hostname更详细的可以用ssh -h查看. 不指定用户: ssh 1 ...
- delphi 浮点数float转换成十六进制字符串的方法(FloatToHex)
重新书写了float型转为十六进制的delphi程序 Function FloatToHex(Value: single): string; var l, i: integer; HexText,te ...
- java中终止线程的三种方式
在java中有三种方式可以终止线程.分别为: 1. 使用退出标志,使线程正常退出,也就是当run方法完成后线程终止. 2. 使用stop方法强行终止线程(这个方法不推荐使用,因为stop和sus ...
- selenium 自动化测试 测试报告 生成
https://www.cnblogs.com/yoyoketang/p/6140439.html https://www.cnblogs.com/testyao/p/5658200.html 一.下 ...
- DotNetBrowser入门教程(更新完善中)
DotNetBrowser 希望实现的目标:桌面软件可以完美运行Html5,内置支持MVC与WebSocket的微型服务器. 基于.Net 4.0开发.开发环境:VS2017,运行环境支持Window ...
- DotnetBrowser高级教程-(4)使用MVC框架5-使用视图
mvc框架理所当然的要支持view了,我们看下前面上传文件的地方,在展示页面时,我们使用了如下的代码: public string UploadImgPage() { return "< ...
- quartz---任务调度小试(多任务)
quartz---任务调度小试 背景 笔者眼下做的项目"jrkj"首页上的信息都是从redis中读取的,每小时更新一次存入redis中,那么问题来了怎么才干让系统每 ...
- 分布式服务自增长唯一ID小结
1.常用生成唯一ID的方式,例如UUID 2.生成唯一自自增长ID方式: 例如: Zookeeper的增加ID: redis的incr方法 mongodb的objectId 3.采用雪花模型 如下代码 ...