
使用Cobbler无人值守安装CentOS6.5(一)
Cobbler是一个快速网络安装linux的服务,而且在经过调整也可以支持网络安装windows。该工具使用python开发,小巧轻便(才15k行代码),使用简单的命令即可完成PXE网络安装环境的配置,同时还可以管理DHCP,DNS,以及yum包镜像。
我用的系统是Centos6.5 64 位
配置epel yum源
我这用阿里云的epel
|
1
2
|
mv /etc/yum.repos.d/epel.repo /etc/yum.repos.d/epel.repo.backup wget -O /etc/yum.repos.d/epel.repo http://mirrors.aliyun.com/repo/epel-6.repo |
安装cobbler需要的服务
|
1
|
yum install dhcp tftp rsync xinetd httpd |
关闭selinux和防火墙自己做测试为了不影响就关了
|
1
2
|
[root@i51 upimg]# setenforce 0[root@i51 upimg]# service iptables stop |
安装cobbler并启动
|
1
2
3
4
5
|
[root@i51 yum.repos.d]# yum install cobbler -y[root@i51 yum.repos.d]# /etc/init.d/cobblerd startStarting cobbler daemon: [ OK ][root@i51 yum.repos.d]# /etc/init.d/httpd startStarting httpd: |
检查配置执行
|
1
2
3
4
5
6
7
8
9
10
11
12
13
14
15
16
17
18
19
|
[root@i51 ~]# cobbler checkTraceback (most recent call last): File "/usr/bin/cobbler", line 36, in <module> sys.exit(app.main()) File "/usr/lib/python2.6/site-packages/cobbler/cli.py", line 655, in main rc = cli.run(sys.argv) File "/usr/lib/python2.6/site-packages/cobbler/cli.py", line 270, in run self.token = self.remote.login("", self.shared_secret) File "/usr/lib64/python2.6/xmlrpclib.py", line 1199, in __call__ return self.__send(self.__name, args) File "/usr/lib64/python2.6/xmlrpclib.py", line 1489, in __request verbose=self.__verbose File "/usr/lib64/python2.6/xmlrpclib.py", line 1253, in request return self._parse_response(h.getfile(), sock) File "/usr/lib64/python2.6/xmlrpclib.py", line 1392, in _parse_response return u.close() File "/usr/lib64/python2.6/xmlrpclib.py", line 838, in close raise Fault(**self._stack[0])xmlrpclib.Fault: <Fault 1: "<class 'cobbler.cexceptions.CX'>:'login failed'"> |
报错了
经过网上查找这样解决如下:
|
1
2
3
4
5
6
7
8
9
10
11
12
13
14
15
16
17
|
[root@i51 ~]# service cobblerd restartStopping cobbler daemon: [ OK ]Starting cobbler daemon: [ OK ][root@i51 ~]# cobbler get-loaderstask started: 2014-10-23_131316_get_loaderstask started (id=Download Bootloader Content, time=Thu Oct 23 13:13:16 2014)downloading http://www.cobblerd.org/loaders/README to /var/lib/cobbler/loaders/READMEdownloading http://www.cobblerd.org/loaders/COPYING.elilo to /var/lib/cobbler/loaders/COPYING.elilodownloading http://www.cobblerd.org/loaders/COPYING.yaboot to /var/lib/cobbler/loaders/COPYING.yabootdownloading http://www.cobblerd.org/loaders/COPYING.syslinux to /var/lib/cobbler/loaders/COPYING.syslinuxdownloading http://www.cobblerd.org/loaders/elilo-3.8-ia64.efi to /var/lib/cobbler/loaders/elilo-ia64.efidownloading http://www.cobblerd.org/loaders/yaboot-1.3.14-12 to /var/lib/cobbler/loaders/yabootdownloading http://www.cobblerd.org/loaders/pxelinux.0-3.86 to /var/lib/cobbler/loaders/pxelinux.0downloading http://www.cobblerd.org/loaders/menu.c32-3.86 to /var/lib/cobbler/loaders/menu.c32downloading http://www.cobblerd.org/loaders/grub-0.97-x86.efi to /var/lib/cobbler/loaders/grub-x86.efidownloading http://www.cobblerd.org/loaders/grub-0.97-x86_64.efi to /var/lib/cobbler/loaders/grub-x86_64.efi*** TASK COMPLETE *** |
在检查配置
|
1
2
3
4
5
6
7
8
9
10
11
12
|
[root@i51 ~]# cobbler checkThe following are potential configuration items that you may want to fix:1 : The 'server' field in /etc/cobbler/settings must be set to something other than localhost, or kickstarting features will not work. This should be a resolvable hostname or IP for the boot server as reachable by all machines that will use it.2 : For PXE to be functional, the 'next_server' field in /etc/cobbler/settings must be set to something other than 127.0.0.1, and should match the IP of the boot server on the PXE network.3 : change 'disable' to 'no' in /etc/xinetd.d/rsync4 : debmirror package is not installed, it will be required to manage debian deployments and repositories5 : ksvalidator was not found, install pykickstart6 : The default password used by the sample templates for newly installed machines (default_password_crypted in /etc/cobbler/settings) is still set to 'cobbler' and should be changed, try: "openssl passwd -1 -salt 'random-phrase-here' 'your-password-here'" to generate new one7 : fencing tools were not found, and are required to use the (optional) power management features. install cman or fence-agents to use themRestart cobblerd and then run 'cobbler sync' to apply changes. |
上面这段信息大意就是:
1,编辑/etc/cobbler/settings文件,找到 server选项,修改为适当的ip地址,本实例配置ip为:192.168.1.243
2,编辑/etc/cobbler/settings文件,找到 next_server选项,修改为适当的ip地址,本实例配置ip为:192.168.1.243
3,编辑/etc/xinetd.d/rsync文件,将文件中的disable字段的配置由yes改为no
4,提示说debmirror没安装。如果不是安装 debian之类的系统,此提示可以忽略,如果需要安装,下载地址为:
http://rpmfind.net/linux/rpm2html/search.php?query=debmirror
5,ksvalidator没有被发现,安装pykickstart
|
1
|
[root@i51 ~]# yum install pykickstart |
6,修改cobbler用户的默认密码,可以使用如下命令生成密码,并使用生成后的密码替换/etc/cobbler/settings中的密码。生成密码命令: 其中“random-phrase-here”为干扰码
openssl passwd -1 -salt 'random-phrase-here' 'your-password-here'
7,fencing tools为找到安装
|
1
|
[root@i51 ~]# yum install fence-agents |
OK再来执行检查
|
1
2
3
4
5
6
7
8
9
|
[root@i51 ~]# cobbler checkThe following are potential configuration items that you may want to fix:1 : The 'server' field in /etc/cobbler/settings must be set to something other than localhost, or kickstarting features will not work. This should be a resolvable hostname or IP for the boot server as reachable by all machines that will use it.2 : For PXE to be functional, the 'next_server' field in /etc/cobbler/settings must be set to something other than 127.0.0.1, and should match the IP of the boot server on the PXE network.3 : debmirror package is not installed, it will be required to manage debian deployments and repositories4 : The default password used by the sample templates for newly installed machines (default_password_crypted in /etc/cobbler/settings) is still set to 'cobbler' and should be changed, try: "openssl passwd -1 -salt 'random-phrase-here' 'your-password-here'" to generate new oneRestart cobblerd and then run 'cobbler sync' to apply changes. |
重启cobbler
|
1
2
3
|
[root@i51 ~]# /etc/init.d/cobblerd restartStopping cobbler daemon: [ OK ]Starting cobbler daemon: [ OK ] |
cobbler使用 导入安装文件
导入安装源
准备好安装光盘 (ISO)我的服务器上有这么多
|
1
2
3
4
5
6
7
8
9
10
|
[root@i51 Soft]# cd 镜像像[root@i51 镜像]# lsCentOS-5.10-x86_64-bin-DVD-1of2.iso CentOS-6.5-x86_64-bin-DVD1.iso oracle_10201_for_linux32.isoCentOS-5.10-x86_64-bin-DVD-2of2.iso CentOS-7.0-1406-x86_64-DVD.iso redhat5_32CentOS-5.5-i386-bin-DVD.iso cn_windows_7_ultimate_with_sp1_x86_dvd_u_677486.iso rhel-client-7.0-x86_64-dvd.isoCentOS-6.4-i386-bin-DVD1.iso kali-linux-1.0.9a-amd64.iso rhel-server-5.8-x86_64-dvd.isoCentOS-6.4-i386-bin-DVD2.iso Office_Professional_Plus_2013.1403512018.img rhel-server-6.4-x86_64-dvd.isocentOS-6.4-x86_64-bin-DVD1.iso openfiler-2.3-x86-disc1.iso ubuntu-14.04-desktop-amd64.iso像[root@i51 镜像]# pwd/var/ftp/pub/Soft/镜像 |
挂载 ISO
|
1
2
|
[root@i51 镜像]# mkdir /mnt/Centos6.5像[root@i51 镜像]# mount -o loop CentOS-6.5-x86_64-bin-DVD1.iso /mnt/Centos6.5/ |
导入安装源 到Cobbler中
|
1
2
3
4
5
6
7
8
9
10
11
12
13
14
15
16
17
18
19
|
[root@i51 镜像]# cobbler import --path=/mnt/Centos6.5 --name=CentOS6.5 --arch=x86_64task started: 2014-10-23_134307_importtask started (id=Media import, time=Thu Oct 23 13:43:07 2014)Found a candidate signature: breed=redhat, version=rhel6Found a matching signature: breed=redhat, version=rhel6Adding distros from path /var/www/cobbler/ks_mirror/CentOS6.5-x86_64:creating new distro: CentOS6.5-x86_64trying symlink: /var/www/cobbler/ks_mirror/CentOS6.5-x86_64 -> /var/www/cobbler/links/CentOS6.5-x86_64creating new profile: CentOS6.5-x86_64associating reposchecking for rsync repo(s)checking for rhn repo(s)checking for yum repo(s)starting descent into /var/www/cobbler/ks_mirror/CentOS6.5-x86_64 for CentOS6.5-x86_64processing repo at : /var/www/cobbler/ks_mirror/CentOS6.5-x86_64need to process repo/comps: /var/www/cobbler/ks_mirror/CentOS6.5-x86_64looking for /var/www/cobbler/ks_mirror/CentOS6.5-x86_64/repodata/*comps*.xmlKeeping repodata as-is :/var/www/cobbler/ks_mirror/CentOS6.5-x86_64/repodata*** TASK COMPLETE *** |
|
1
2
|
[root@i51 镜像]# cobbler distro list CentOS6.5-x86_64 |
配置dhcp服务
首先修改cobbler配置,让cobbler来管理dhcp服务,编辑文件/etc/cobbler/settings
manage_dhcp: 1
接下来修改/etc/cobbler/dhcp.template,此文件是cobbler管理dhcp的模板
本例中只需要修改如下部分
|
1
2
3
4
5
6
7
8
9
10
11
12
13
14
15
16
17
18
19
20
21
22
|
subnet 192.168.1.0 netmask 255.255.255.0 { option routers 192.168.1.1; option domain-name-servers 192.168.1.1; option subnet-mask 255.255.255.0; range dynamic-bootp 192.168.1.30 192.168.1.80; default-lease-time 21600; max-lease-time 43200; next-server $next_server; class "pxeclients" { match if substring (option vendor-class-identifier, 0, 9) = "PXEClient"; if option pxe-system-type = 00:02 { filename "ia64/elilo.efi"; } else if option pxe-system-type = 00:06 { filename "grub/grub-x86.efi"; } else if option pxe-system-type = 00:07 { filename "grub/grub-x86_64.efi"; } else { filename "/pxelinux.0"; } }} |
IP地址段根据你实际环境中的给定
其他可以不用改
重启xinetd
|
1
2
3
|
[root@i51 镜像]# /etc/init.d/xinetd restartStopping xinetd: [ OK ]Starting xinetd: [ OK ] |
同步cobbler配置
cobbler sync
输出如下
|
1
2
3
4
5
6
7
8
9
10
11
12
13
14
15
16
17
18
19
20
21
22
23
24
25
26
27
28
29
30
31
32
33
34
35
36
37
38
39
40
41
42
43
44
45
46
47
48
|
[root@i51 镜像]cobbler syncrttask started: 2014-10-23_141019_synctask started (id=Sync, time=Thu Oct 23 14:10:19 2014)running pre-sync triggerscleaning treesremoving: /var/www/cobbler/images/CentOS6.5-x86_64removing: /var/lib/tftpboot/pxelinux.cfg/defaultremoving: /var/lib/tftpboot/grub/imagesremoving: /var/lib/tftpboot/grub/grub-x86.efiremoving: /var/lib/tftpboot/grub/grub-x86_64.efiremoving: /var/lib/tftpboot/grub/efidefaultremoving: /var/lib/tftpboot/images/CentOS6.5-x86_64removing: /var/lib/tftpboot/s390x/profile_listcopying bootloaderstrying hardlink /var/lib/cobbler/loaders/grub-x86.efi -> /var/lib/tftpboot/grub/grub-x86.efitrying hardlink /var/lib/cobbler/loaders/grub-x86_64.efi -> /var/lib/tftpboot/grub/grub-x86_64.eficopying distros to tftpbootcopying files for distro: CentOS6.5-x86_64trying hardlink /var/www/cobbler/ks_mirror/CentOS6.5-x86_64/images/pxeboot/vmlinuz -> /var/lib/tftpboot/images/CentOS6.5-x86_64/vmlinuztrying hardlink /var/www/cobbler/ks_mirror/CentOS6.5-x86_64/images/pxeboot/initrd.img -> /var/lib/tftpboot/images/CentOS6.5-x86_64/initrd.imgcopying imagesgenerating PXE configuration filesgenerating PXE menu structurecopying files for distro: CentOS6.5-x86_64trying hardlink /var/www/cobbler/ks_mirror/CentOS6.5-x86_64/images/pxeboot/vmlinuz -> /var/www/cobbler/images/CentOS6.5-x86_64/vmlinuztrying hardlink /var/www/cobbler/ks_mirror/CentOS6.5-x86_64/images/pxeboot/initrd.img -> /var/www/cobbler/images/CentOS6.5-x86_64/initrd.imgWriting template files for CentOS6.5-x86_64rendering DHCP filesgenerating /etc/dhcp/dhcpd.confrendering TFTPD filesgenerating /etc/xinetd.d/tftpprocessing boot_files for distro: CentOS6.5-x86_64cleaning link cachesrunning post-sync triggersrunning python triggers from /var/lib/cobbler/triggers/sync/post/*running python trigger cobbler.modules.sync_post_restart_servicesrunning: dhcpd -t -qreceived on stdout: received on stderr: running: service dhcpd restartreceived on stdout: Starting dhcpd: [ OK ]received on stderr: running shell triggers from /var/lib/cobbler/triggers/sync/post/*running python triggers from /var/lib/cobbler/triggers/change/*running python trigger cobbler.modules.scm_trackrunning shell triggers from /var/lib/cobbler/triggers/change/**** TASK COMPLETE *** |
cobbler会自动进行初始化工作,移除已经存在的启动项,然后根据模板拷贝loader文件。之后再生成pxe的配置文件,生成dhcp的配置文件,最后再重启dhcp服务。
至此,就可以使用虚拟机来测试cobbler安装了。
OK开启真机或者虚拟机来测试注意开启网络引导 网卡要开启PXE 引导程序
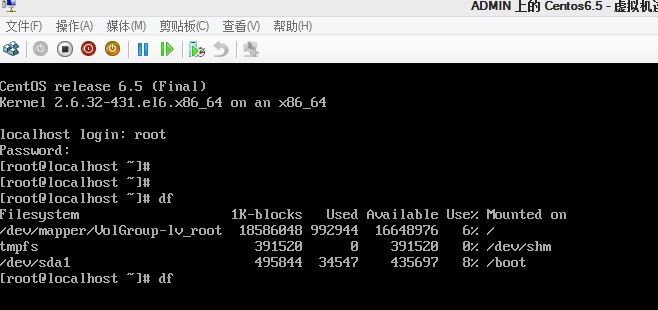
测试如下

登陆后如下默认root密码为cobbler
|
1
2
3
4
5
6
7
|
# 在要重装的机器安装koan yum install koan #查看cobbler服务器有哪些安装盘 koan --list-profiles --server=192.168.1.243 #选择要重装的系统并重启 koan --replace-self --server=192.168.1.243 --profile=CentOS-5-4-x86-64 reboot |
转载自:http://my.oschina.net/kcw/blog/336630
使用Cobbler无人值守安装CentOS6.5(一)的更多相关文章
- (转)COBBLER无人值守安装
COBBLER无人值守安装 说在最前面的话 在看Cobbler之前请大家先看一下Kickstart无人值守安装,了解一下Cobbler的实现原理.但是Cobbler是独立的,不需要先安装Kicksta ...
- 其他综合-Cobbler无人值守安装系统 CentOS 7
Cobbler 无人值守安装系统 CentOS 7 1.实验描述 1.1 概述 作为运维,在公司经常遇到一些机械性重复工作要做,例如:为新机器装系统,一台两台机器装系统,可以用光盘.U盘等介质安装,1 ...
- CentOS7.x安装cobbler无人值守安装系统
CentOS7.x cobbler无人值守安装 cobbler介绍 自打若干年前 Red Hat,推出了 Kickstart,不再需要刻了光盘一台一台地安装 Linux,只要搞定 PXE.DHCP.T ...
- 烂泥:kickstart无人值守安装CentOS6.5
本文由秀依林枫提供友情赞助,首发于烂泥行天下. 在本次实验进行之前,首先我们要把公司的网络环境进行介绍. 注意这个网络拓扑图,也是生产环境的一个实例.同时服务器192.168.1.214已关闭ipta ...
- cobbler部署安装CentOS6.8
Linux运维:cobbler : 矮哥linux运维群:93324526 学习cobbler的话,必须先搞懂kickstart,原理不是,不懂如何排错. kickstart部署请点击这里 1. Co ...
- U盘PE无人值守安装centOS6
一.制作 1.需要用到的工具:老毛桃PX工具.系统ISO.一个8GU盘 老毛桃PE工具 http://laomaotao.net/ CentOS启动映像 http://mirrors.163.com/ ...
- Cobbler无人值守安装系统
环境说明 系统版本 CentOS 6.9 x86_64 Cobbler是一款Linux安装服务器,可以快速设置网络安装环境.它粘合在一起并自动执行许多相关的Linux任务,因此部署新系统时不必在 ...
- COBBLER无人值守安装
cobbler-自动安装系统 1.1 cobber简介 1.1.1 cobbler说明 Cobbler是一个Linux服务器安装的服务,可以通过网络启动(PXE)的方式来快速安装.重装物理服务器和虚拟 ...
- PXE+DHCP+TFTP+Cobbler 无人值守安装centos 7
Cobbler(补鞋匠)是通过将DHCP.TFTP.DNS.HTTP等服务进行集成,创建一个中央管理节点,其可以实现的功能有配置服务,创建存储库,解压缩操作系统媒介,代理或集成一个配置管理系统,控制电 ...
随机推荐
- css 图片内容在不同分辨率下居中显示(演示的图片宽度是1920px,当图片宽度大于显示屏的宽度时)
1.img 图片内容在不同分辨率下居中显示(如果隐藏多余,在img外面套一个div 设定overflow: hidden.div的大小就是img显示区域的大小) <!DOCTYPE html& ...
- websocket 实现聊天功能
<html> <head> <base href="<%=basePath%>"> <title>webscoket t ...
- *HDU 1068 二分图
Girls and Boys Time Limit: 20000/10000 MS (Java/Others) Memory Limit: 65536/32768 K (Java/Others) ...
- *HDU3172 并查集
Virtual Friends Time Limit: 4000/2000 MS (Java/Others) Memory Limit: 32768/32768 K (Java/Others)T ...
- HDU 3605 Escape(状压+最大流)
Escape Time Limit: 4000/2000 MS (Java/Others) Memory Limit: 65536/65536 K (Java/Others) Total Sub ...
- 【完整靠谱版】结合公司项目,仔细总结自己使用百度编辑器实现FTP上传的完整过程
说在前面 工作中会遇到很多需要使用富文本编辑器的地方,比如我现在发布这篇文章离不开这个神器,而且现在网上编辑器太多了.记得之前,由于工作需要自己封装过一个编辑器的公共插件,是用ckeditor改版的, ...
- MongoDB学习记录
一.操作符 "$lt" :"<""$lte" :"<=""$gt" :"> ...
- Python 随机数生成总结
random.uniform(a, b),返回[a,b]之间的浮点数 random.randint(a, b),返回[a,b]之间的整数 random.randrange([start], stop[ ...
- 记一次程序排错与std::getline
今天忙活了半个下午,查找正式环境上面一个程序的问题.这个程序的作用是监控文件夹,处理每一个文件,分析每个文件的每行记录,然后将这个文件拆分成两个结果文件投放到另外两个不同的目录下面去,当处理完这个文件 ...
- python学习道路(day9note)(socketserver编程,ftp)
1.ftp client #!/usr/bin/env python #_*_coding:utf-8_*_ import socket import subprocess user_data = { ...