动态负载均衡(Nginx+Consul+UpSync)环境搭建
首先 安装好 Consul upsync
然后:
1、配置安装Nginx
需要做配置,包括分组之类的,创建目录,有些插件是需要存放在这些目录的
groupadd nginx
useradd -g nginx -s /sbin/nologin nginx
mkdir -p /var/tmp/nginx/client/
mkdir -p /usr/local/nginx
2、编译Nginx
cd /home/nginx/nginx-1.9.0
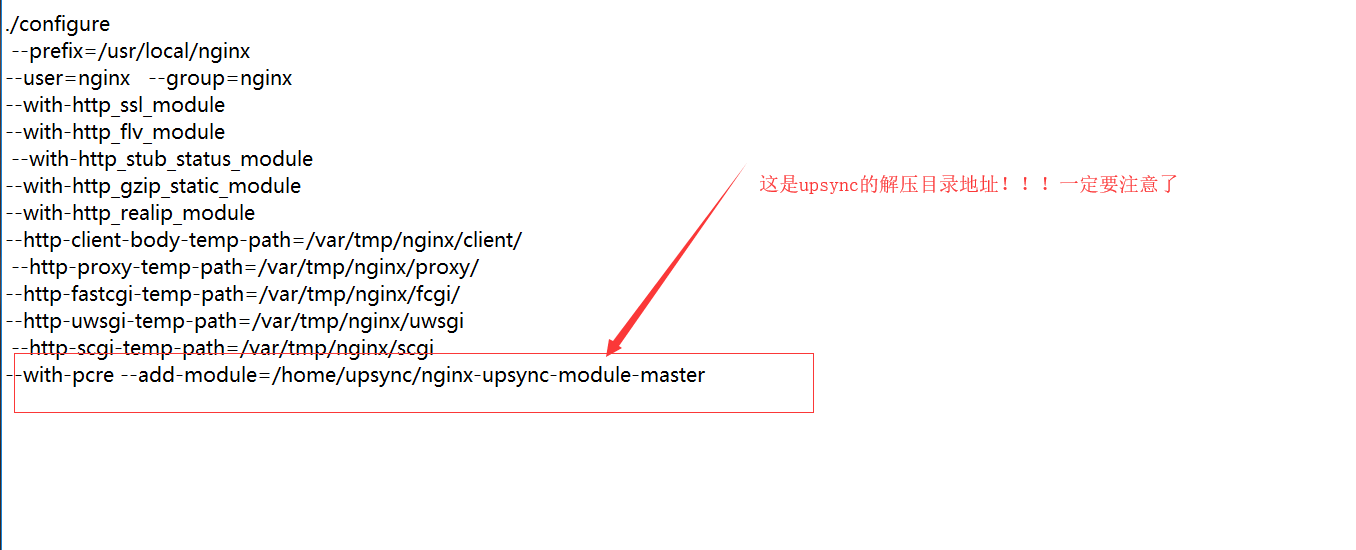
./configure --prefix=/usr/local/nginx --user=nginx --group=nginx --with-http_ssl_module --with-http_flv_module --with-http_stub_status_module --with-http_gzip_static_module --with-http_realip_module --http-client-body-temp-path=/var/tmp/nginx/client/ --http-proxy-temp-path=/var/tmp/nginx/proxy/ --http-fastcgi-temp-path=/var/tmp/nginx/fcgi/ --http-uwsgi-temp-path=/var/tmp/nginx/uwsgi --http-scgi-temp-path=/var/tmp/nginx/scgi --with-pcre --add-module=/home/upsync/nginx-upsync-module-master
解读:
注意,如果出现这个错误:

解决办法
yum -y install openssl openssl-devel
最后: make && make install
下面开始配置Nginx了
Upstream(上游服务器) 动态配置
##动态去consul 获取注册的真实反向代理地址
upstream toov5{
#自己虚拟出的 作为监听用的 端口号 固定死的
server 127.0.0.1:11111;
#连接consul server动态获取upstream配置负载均衡信息 间隔0.5秒读取一次 使用192.168.212.134:8500 原生的 他自己虚拟出来的 不要乱改! 读取的是toov5 这个分组的!!!
upsync 192.168.91.5:8500/v1/kv/upstreams/toov5 upsync_timeout=6m upsync_interval=500ms upsync_type=consul strong_dependency=off;
#动态拉取consulServer相关负载均衡配置信息持久化到硬盘上
upsync_dump_path /usr/local/nginx/conf/servers/servers_test.conf;
}
server {
listen 80;
server_name localhost;
location / {
#配置反向代理
proxy_pass http://toov5;
index index.html index.htm;
}
}
解读:
upsync指令指定从consul哪个路径拉取上游服务器配置;upsync_timeout配置从consul拉取上游服务器配置的超时时间;upsync_interval配置从consul拉取上游服务器配置的间隔时间;upsync_type指定使用consul配置服务器;strong_dependency配置nginx在启动时是否强制依赖配置服务器,如果配置为on,则拉取配置失败时nginx启动同样失败。upsync_dump_path指定从consul拉取的上游服务器后持久化到的位置,这样即使consul服务器出问题了,本地还有一个备份。
注意:替换 consul 注册中心地址
创建upsync_dump_path
mkdir /usr/local/nginx/conf/servers/
upsync_dump_path指定从consul拉取的上游服务器后持久化到的位置,这样即使consul服务器出问题了,本地还有一个备份。
配置时候的状态:
#user  nobody;

worker_processes  1;

#error_log  logs/error.log;

#error_log  logs/error.log  notice;

#error_log  logs/error.log  info;

#pid        logs/nginx.pid;

events {

    worker_connections  1024;

}

http {

    include       mime.types;

    default_type  application/octet-stream;

    #log_format  main  '$remote_addr - $remote_user [$time_local] "$request" '

    #                  '$status $body_bytes_sent "$http_referer" '

    #                  '"$http_user_agent" "$http_x_forwarded_for"';

    #access_log  logs/access.log  main;

    sendfile        on;

    #tcp_nopush     on;

    #keepalive_timeout  0;

    keepalive_timeout  65;

    #gzip  on;

##动态去consul 获取注册的真实反向代理地址

upstream toov5{

#自己虚拟出的 作为监听用的 端口号 固定死的

server 127.0.0.1:11111;

#连接consul server动态获取upstream配置负载均衡信息 间隔0.5秒读取一次

upsync 192.168.91.5:8500/v1/kv/upstreams/toov5 upsync_timeout=6m upsync_interval=500ms upsync_type=consul strong_dependency=off;

#动态拉取consulServer相关负载均衡配置信息持久化到硬盘上

upsync_dump_path /usr/local/nginx/conf/servers/servers_test.conf;

}

server {

listen 80;

server_name localhost;

location / {

#配置反向代理

proxy_pass http://toov5;

index index.html index.htm;

}

}

#    server {

#        listen       80;

#        server_name  localhost;

#        #charset koi8-r;

#        #access_log  logs/host.access.log  main;

#        location / {

#            root   html;

#            index  index.html index.htm;

#        }

#

        #error_page  404              /404.html;

        # redirect server error pages to the static page /50x.html

        #

#        error_page   500 502 503 504  /50x.html;

#        location = /50x.html {

#            root   html;

#        }

#

#    }

}
然后启动consul : ./consul agent -dev -ui -node=consul-dev -client=192.168.91.5
启动 Nginx ./nginx
本地启动三台:8080 8081 8082
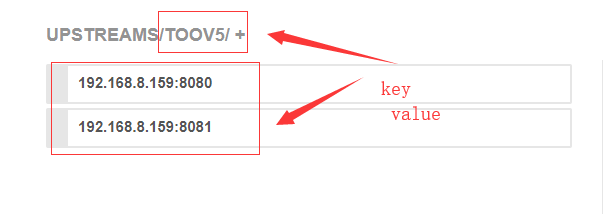
然后开始做动态负载均衡了!添加nginx Upstream服务开始:
1.使用linux命令方式发送put请求 添加这个 192.168.8.159:8081 到上游服务
curl -X PUT http://192.168.91.5:8500/v1/kv/upstreams/toov5/192.168.8.159:80812\
2、 使用postman方式
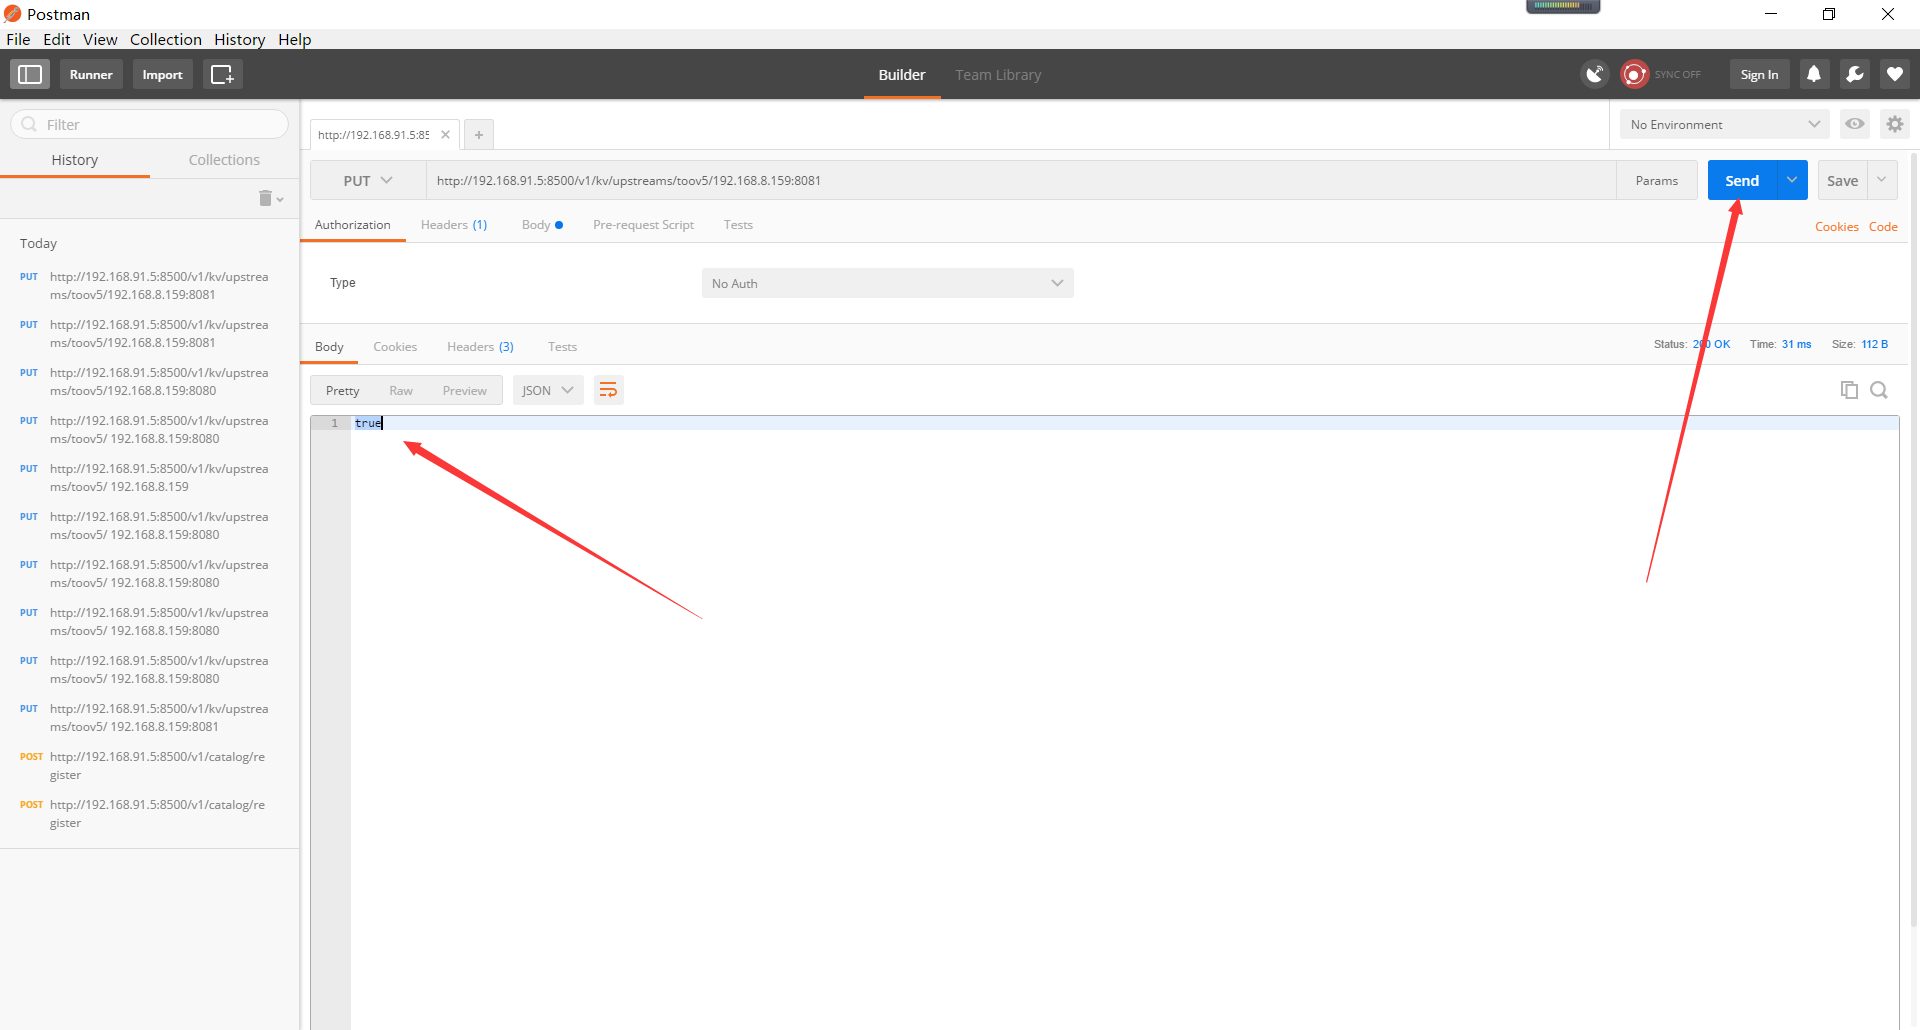
然后图形化界面:
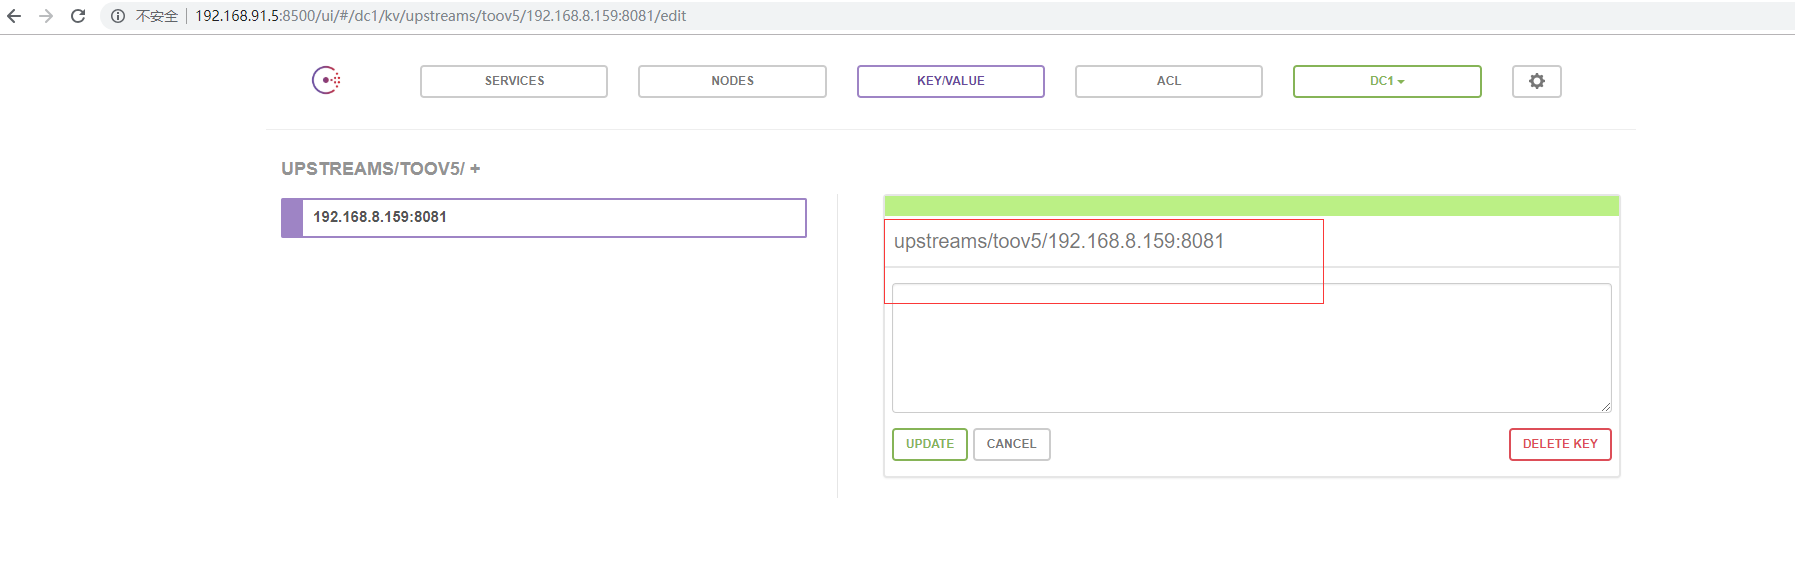
访问:

看看Nginx的本地:

成功了哦
配置权重:
{"weight":2, "max_fails":2, "fail_timeout":10, "down":0}

他可以实现轮训,故障转移哦。默认的~
看这里:

被同步过来了额
动态负载均衡(Nginx+Consul+UpSync)环境搭建的更多相关文章
- Consul+upsync+Nginx 动态负载均衡
1,动态负载均衡 传统的负载均衡,如果修改了nginx.conf 的配置,必须需要重启nginx 服务,效率不高.动态负载均衡,就是可配置化,动态化的去配置负载均衡. 2,实现方案 1. Consul ...
- Consul+upsync+Nginx实现动态负载均衡 摘自https://blog.csdn.net/qq_29247945/article/details/80787014
传统感念:每次修改完nginx配置文件,要重启nginx 动态感念:每次修改完nginx配置信息,不需要重启,nginx实时读取配置信息. Nginx: 反向代理和负载均衡 Consul:是用go编写 ...
- 基于Consul+Upsync+Nginx实现动态负载均衡
基于Consul+Upsync+Nginx实现动态负载均衡 1.Consul环境搭建 下载consul_0.7.5_linux_amd64.zip到/usr/local/src目录 cd /usr/l ...
- 【Nginx】基于Consul+Upsync+Nginx实现动态负载均衡
一.Http动态负载均衡 什么是动态负载均衡 动态负载均衡实现方案 常用服务器注册与发现框架 二.Consul快速入门 Consul环境搭建 三.nginx-upsync-module nginx-u ...
- 通过Nginx、Consul、Upsync实现动态负载均衡和服务平滑发布
前提 前段时间顺利地把整个服务集群和中间件全部从UCloud迁移到阿里云,笔者担任了架构和半个运维的角色.这里详细记录一下通过Nginx.Consul.Upsync实现动态负载均衡和服务平滑发布的核心 ...
- 动态负载均衡(Nginx+Consul+UpSync)
Http动态负载均衡 什么是动态负载均衡 传统的负载均衡,如果Upstream参数发生变化,每次都需要重新加载nginx.conf文件, 因此扩展性不是很高,所以我们可以采用动态负载均衡,实现Upst ...
- Nginx(四) nginx+consul+upasync 在ubnutu18带桌面系统 实现动态负载均衡
1.1 什么是动态负载均衡 传统的负载均衡,如果Upstream参数发生变化,每次都需要重新加载nginx.conf文件,因此扩展性不是很高,所以我们可以采用动态负载均衡,实现Upstream可配置化 ...
- Nginx 实现动态负载均衡(Nginx-1.10.1 + Consul v0.6.4)
一直也没有找到合适的类似Socat + Haproxy 的组合能用在Nginx,后来发现了Nginx的几个模块,但是也存在各种不足. 而且Nginx 在大流量的情况下nginx -s reload 是 ...
- 《nginx 三》实现nginx的动态负载均衡——实战
Http动态负载均衡 什么是动态负载均衡 传统的负载均衡,如果Upstream参数发生变化,每次都需要重新加载nginx.conf文件, 因此扩展性不是很高,所以我们可以采用动态负载均衡,实现Upst ...
随机推荐
- expect实现自动分发密钥、网站度量术语
1.优化ssh命令 sed -ir '13 iPort 52113\nPermitRootLogin no\nPermitEmptyPasswords no\n UseDNS no\nGSSAPIAu ...
- 某考试 T2 bomb
轰炸(bomb)[题目描述]有n座城市,城市之间建立了m条有向的地下通道.你需要发起若干轮轰炸,每轮可以轰炸任意多个城市.但每次轰炸的城市中,不能存在两个不同的城市i,j满足可以通过地道从城市i到达城 ...
- 设置linux编码utf-8
#vim /etc/sysconfig/i18n LANG="en_US.UTF-8" SYSFONT="latarcyrheb-sun16" source / ...
- 关于#!/usr/bin/env python 的用法
在linux的一些脚本里,需在开头一行指定脚本的解释程序,如: !/usr/bin/env python 再如: !/usr/bin/env perl 那么 env到底有什么用?何时用这个呢?脚本用e ...
- C#串口通信发送数据
1 发送数据 需要2个串口 http://www.openedv.com/thread-228847-1-1.html 下载源文件 File_Protocol_Test.rar
- 解决Gradle执行命令时报Could not determine the dependencies of task ':compileReleaseJava'.
Could not determine the dependencies of task ':compileReleaseJava'. > failed to find target andro ...
- mysql binlog配置详解
关闭binlog,注释掉mysql配置文件中的log-bin=mysql-bin即可 baidu zone - 关闭binlog方法 cnblogs - linux下mysql配置文件my ...
- css3: background-image使用多个背景图像
CSS3 允许元素使用多个背景图像. background-image: url(img/ic_ms.png),url(img/icon_dutyfree_invite.png); <!DOCT ...
- MYSQL主从不同步延迟原理分析及解决方案
1. MySQL数据库主从同步延迟原理.要说延时原理,得从mysql的数据库主从复制原理说起,mysql的主从复制都是单线程的操作,主库对所有DDL和DML产生binlog,binlog是顺序写,所以 ...
- vim 模式切换
1. 从插入模式退回到normal模式 <esc> <C-c> <C-[>