Python-S9——Day110-Git继续
1 当日内容概要
2 内容回顾
3 Git版本控制之多人协同开发
4 Git版本控制之fork
5 版本控制之其他
6 Redis之字典基本操作
7 Django中操作Redis
8 Django缓存
9 小补充:Rest Framework访问频率限制
1 当日内容概要
1.1 Git ;
1.2 Redis;
1.3 修改代码;
2 内容回顾
2.1 Git;
2.1.1 Git开发时候,出Bug之后如何解决?
2.1.2 Git rebase的作用?不出现分叉!
2.1.3 Git的操作命令;
- git init
- git add .
- git commit -m "初次提交代码"
- git config --global user.email "tqtl@tqtl.org"
- git config --global user.name "cuxiiaozhao"
- git branch
- git branch dev
- git branch master
- git checkout dev
- git pull origin dev
- git push origin dev
2.1.4 Redis是什么?
- 用于操作计算机内存的软件;
- 可以做数据持久化——AOF、RDB;
- 相当于是一个非常非常大的“字典”;
- Redis是一个单进程、单线程,但是因为数据放在内存中,速度也能保证很快!!!
2.1.5 使用连接池进行连接Redis(以后所有的软件基本都是使用“连接池”的概念);
- 使用连接池——本质是维护一个已经和服务端连接成功的socket,以后再次发送数据时候,直接获取一个socket,然后直接send data;
2.1.6 路飞学城的表结构
- 课程——大类、子类、学位课、奖学金、讲师、专题课、课程详细、大纲、作业、章节、课时、价格策略;
- 深科技——文章来源、文章、用户、token、评论、收藏;
2.1.7 支付宝支付
- 加密方式:rsa;
- 公钥私钥——商户私钥、支付宝公钥;
- 订单提交成功后,服务器断电宕机,成功:return HttpResponse('success');
2.1.8 Rest Framework 框架
2.1.9 数据库特点?
- 分页为什么越往后翻页越慢——限制页数、记录当前页的最大ID、最小ID;
- 错误答案——扫描索引表、再去数据库中获取数据;
2.1.10 缓存数据库Redis
3 Git版本控制之多人协同开发
3.1 多人协同开发;
3.1.1 允许他人操作程序代码——合作者、创建组织organization;
3.1.2 工作中常用到的分支——master、dev、cuixiaozhao、lijingping
3.1.3 协同开发的时候,规则——小组协同在一起进行合并;合并时间建议1~2天合并一下,最好一天合并一次;
3.1.4 问题:先拉取代码,再提交代码;
TQTL911@DESKTOP-U8JDGPP MINGW64 /e/TQTL/Practice/三里屯/dbhot (dev)

$ git push origin dev

To https://github.com/tqtl911/dbhot.git

 ! [rejected]        dev -> dev (fetch first)

error: failed to push some refs to 'https://github.com/tqtl911/dbhot.git'

hint: Updates were rejected because the remote contains work that you do

hint: not have locally. This is usually caused by another repository pushing

hint: to the same ref. You may want to first integrate the remote changes

hint: (e.g., 'git pull ...') before pushing again.

hint: See the 'Note about fast-forwards' in 'git push --help' for details.
3.1.5 对代码进行Review;
Who Do it?开发组长,技术导师;
- How Do it?创建Review分支;
4 Git版本控制之fork(如何提升自己)
4.1 找优秀的代码下载下来,“读源码”;
4.2 几个人做一个通用性的ORM;
4.3 接个人一起做一个开源项目并发布于Github;
4.4 发现著名开源项目的Bug,比如Django、Flask并给出修复建议;
4.5 Fork他人的项目;

5 版本控制之其他
5.1 给别人的代码贡献力量,比如Github如何做?先fork,再pull request;
5.2 其他;
5.2.1 pull或者push需要每次输入用户名和密码;
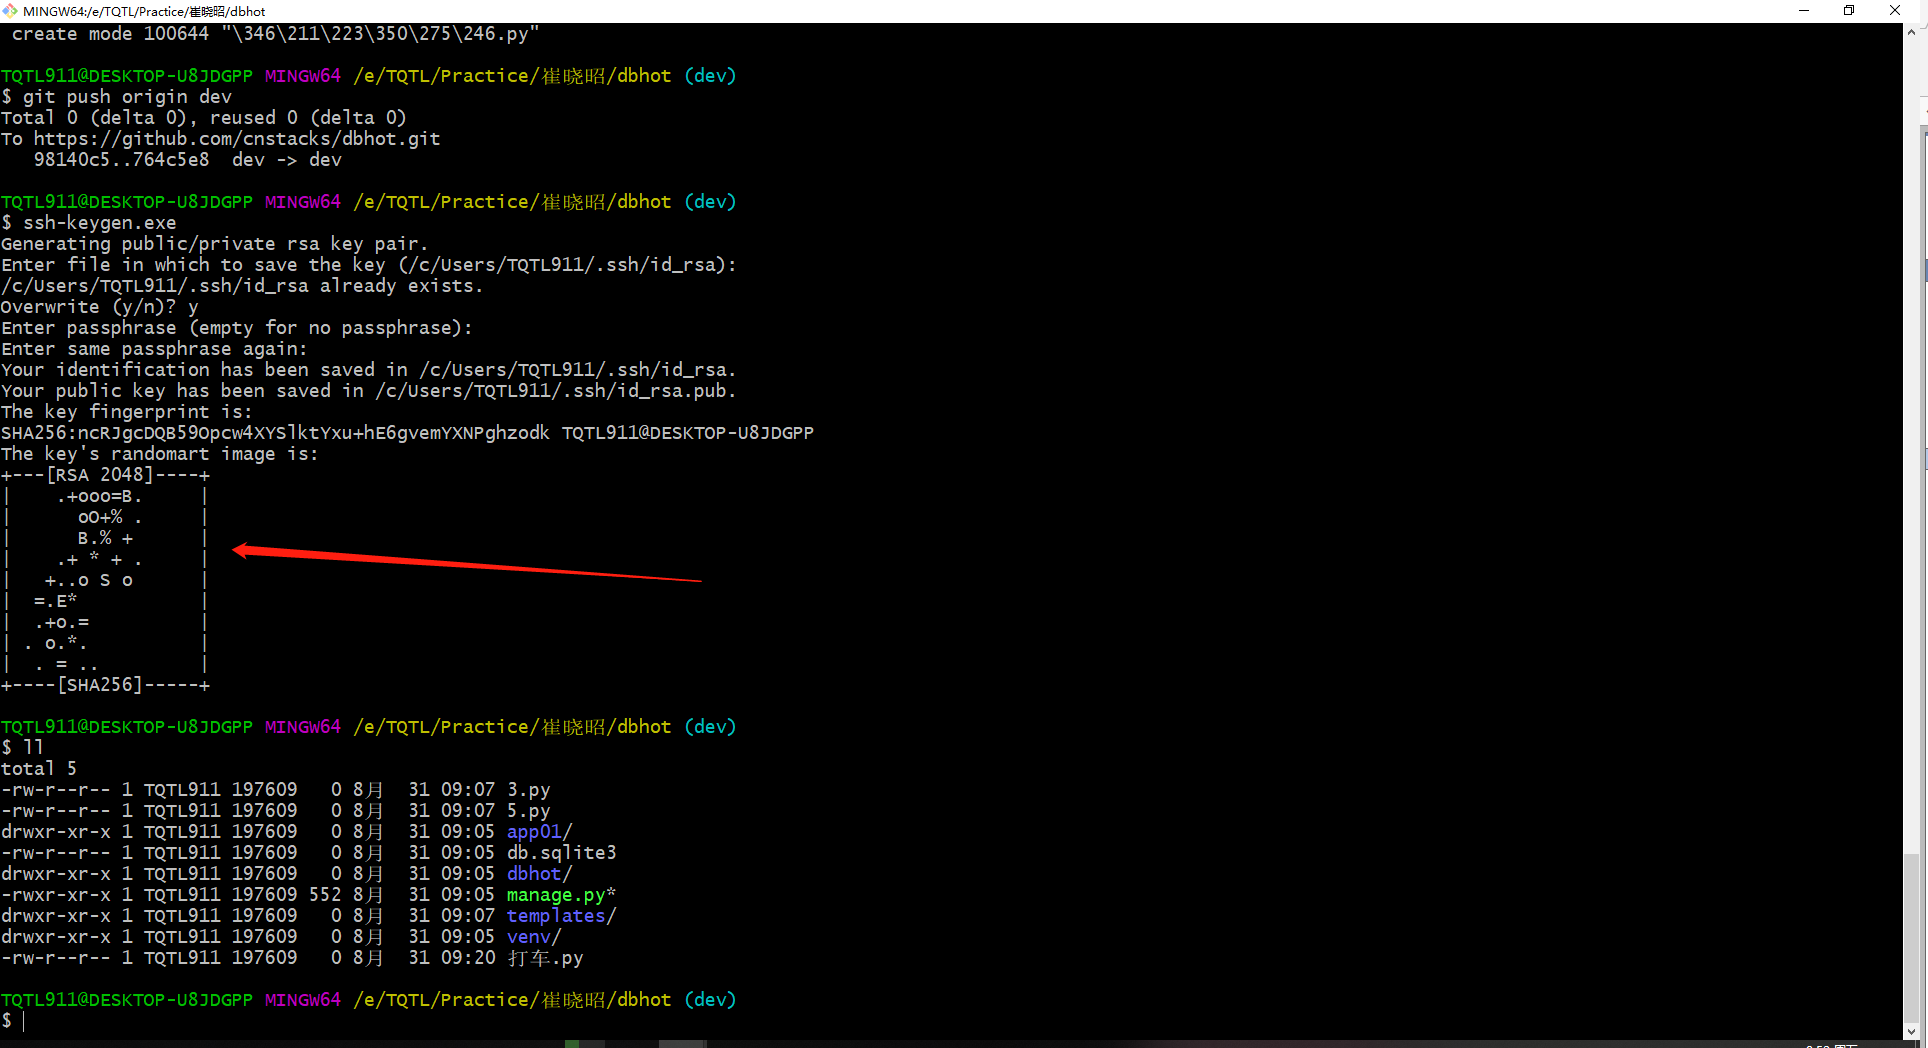
5.2.2 无需反复输入用户名和密码;
- git remote add origin https://用户名:密码@github.com/cnstack/Tyrion.git(不推荐)
- Use SSh:git@github.com:cnstack/Tyrion.git(推荐基于公钥私钥的方法)


5.3 .gitignore文件的引入,忽略不需要提交的文件;
https://github.com/github/gitignore/blob/master/Python.gitignore

5.4 创建项目的时候,指定忽略类型;

# Byte-compiled / optimized / DLL files

__pycache__/

*.py[cod]

*$py.class

# C extensions

*.so

# Distribution / packaging

.Python

build/

develop-eggs/

dist/

downloads/

eggs/

.eggs/

lib/

lib64/

parts/

sdist/

var/

wheels/

*.egg-info/

.installed.cfg

*.egg

MANIFEST

# PyInstaller

#  Usually these files are written by a python script from a template

#  before PyInstaller builds the exe, so as to inject date/other infos into it.

*.manifest

*.spec

# Installer logs

pip-log.txt

pip-delete-this-directory.txt

# Unit test / coverage reports

htmlcov/

.tox/

.coverage

.coverage.*

.cache

nosetests.xml

coverage.xml

*.cover

.hypothesis/

.pytest_cache/

# Translations

*.mo

*.pot

# Django stuff:

*.log

local_settings.py

db.sqlite3

# Flask stuff:

instance/

.webassets-cache

# Scrapy stuff:

.scrapy

# Sphinx documentation

docs/_build/

# PyBuilder

target/

# Jupyter Notebook

.ipynb_checkpoints

# pyenv

.python-version

# celery beat schedule file

celerybeat-schedule

# SageMath parsed files

*.sage.py

# Environments

.env

.venv

env/

venv/

ENV/

env.bak/

venv.bak/

# Spyder project settings

.spyderproject

.spyproject

# Rope project settings

.ropeproject

# mkdocs documentation

/site

# mypy

.mypy_cache/
5.5 项目版本release的引入;
5.5.1 git tag -a v1.0 -m "初次创建第一个版本";
5.5.2 git push origin --tags;
5.5.3 练习要求;
- 创建项目;
- 邀请成员参与github
- 各自创建以个人姓名命名的项目分支;
- 修改代码,进行提交;
- 分享项目的URL地址;
TQTL911@DESKTOP-U8JDGPP MINGW64 /e/TQTL/Practice/崔晓昭/dbhot (dev)

$ git push origin --tags

Enumerating objects: 1, done.

Counting objects: 100% (1/1), done.

Writing objects: 100% (1/1), 187 bytes | 187.00 KiB/s, done.

Total 1 (delta 0), reused 0 (delta 0)

To https://github.com/cnstacks/dbhot.git

 * [new tag]         v1.0 -> v1.0

TQTL911@DESKTOP-U8JDGPP MINGW64 /e/TQTL/Practice/崔晓昭/dbhot (dev)


6 Redis之字典基本操作
6.1 Redis的特点:a.持久化;b.单线程、单进程;c.5大数据类型;
redis = {

k1:'',字符串

k2:[1,2,3,4,5,6,7],列表

k3:{1,2,3,4},集合

k4:{name :123,age:26},字典

k5:{('alex',60),('eva-j',80),('rt',70),},有序集合

}
6.2 使用字典:
6.2.1 字典的基本操作;
6.2.2 慎重使用hgetall,优先使用hscan_iter
6.2.3 注意事项:不支持字典列表的多层级嵌套,仅支持第一层;
s2.py;
#!/usr/bin/env python3

# -*- coding:utf-8 -*-

# __Author__:TQTL911

# Version:python3.6.6

# Time:2018/8/30 22:57

import redis

pool = redis.ConnectionPool(host='47.95.121.154', port=6379, password='Ab123456.', max_connections=1000)

conn = redis.Redis(connection_pool=pool)

conn.set('foo', 'Bar')

# 字典的操作;

'''

redis = {

k4:{

username:alex,

age:18

}

}

'''

# conn.hset('k4', 'username', 'alex')

# conn.hset('k4', 'age', '18')

val = conn.hget('k4', 'username')

print(val)  # b'alex'

vals = conn.hgetall('k4')

print(vals)  # {b'username': b'alex', b'age': b'18'}

# Redis中的计数器;

print(conn.hget('k4', 'age'))

# conn.hincrby('k4','age',amount=1)

conn.hincrby('k4', 'age', amount=-1)

print(conn.hget('k4', 'age'))

'''

b'18'

b'19'

'''

# 如果Redis的k4对应的字典中,有1000w的数据,请打印所有数据;

# 方法1:从Redis拿到数据之后,服务器内存无法承受,爆栈!

result = conn.hgetall('k4')  #

print(result)  # {b'username': b'alex', b'age': b'19'}

# 方法2:慎重使用hgetall方法;

ret = conn.hscan_iter('k4', count=100)

for item in ret:

    print(item)
7 Django中操作Redis
7.1 Redis的应用
7.2 Django中使用Redis;
7.2.1 自定义redis连接池;
views.py.bak
from django.shortcuts import render,HttpResponse

import redis

from utils.redis_pool import POOL

# Create your views here.

def index(request):

    conn = redis.Redis(connection_pool=POOL)

    # 设置值;

    conn.hset('kkk', 'age',18)

    return HttpResponse('设置成功')

def order(request):

    conn = redis.Redis(connection_pool=POOL)

    conn.hget('kkk','age')

    return HttpResponse('获取成功')
utils/redis_pool.py;
#!/usr/bin/env python3

# -*- coding:utf-8 -*-

# __Author__:TQTL911

# Version:python3.6.6

# Time:2018/8/31 11:47

import redis

# 创建连接池(单例模式);

import redis

POOL = redis.ConnectionPool(host='47.205.221.154', port=6379, password='Ab123456.', max_connections=1000)
7.2.2 使用第三方组件,如Django中的pip3 install django-redis;
Microsoft Windows [版本 10.0.17134.1]

(c) 2018 Microsoft Corporation。保留所有权利。

(venv) C:\Users\TQTL911\PycharmProjects\s9day110>pip install redis

Collecting redis

  Using cached https://files.pythonhosted.org/packages/3b/f6/7a76333cf0b9251ecf49efff635015171843d9b977e4ffcf59f9c4428052/redis-2.10.6-py2.py3-none-any.whl

Installing collected packages: redis

Successfully installed redis-2.10.6

You are using pip version 10.0.1, however version 18.0 is available.

You should consider upgrading via the 'python -m pip install --upgrade pip' command.

(venv) C:\Users\TQTL911\PycharmProjects\s9day110>pip install django-redis

Collecting django-redis

  Downloading https://files.pythonhosted.org/packages/d5/3c/184b7a962f2aa5e49388ced9664a308b8d1b9864dc6afe7adb2a8302b5c4/django_redis-4.9.0-py2.py3-none-any.whl

You should consider upgrading via the 'python -m pip install --upgrade pip' command.

(venv) C:\Users\TQTL911\PycharmProjects\s9day110>pip install django-redis

Collecting django-redis

  Downloading https://files.pythonhosted.org/packages/d5/3c/184b7a962f2aa5e49388ced9664a308b8d1b9864dc6afe7adb2a8302b5c4/django_redis-4.9.0-py2.py3-none

-any.whl

Requirement already satisfied: redis>=2.10.0 in c:\users\tqtl911\pycharmprojects\s9day110\venv\lib\site-packages (from django-redis) (2.10.6)

Requirement already satisfied: Django>=1.11 in c:\users\tqtl911\pycharmprojects\s9day110\venv\lib\site-packages (from django-redis) (2.1)

Requirement already satisfied: pytz in c:\users\tqtl911\pycharmprojects\s9day110\venv\lib\site-packages (from Django>=1.11->django-redis) (2018.5)

Installing collected packages: django-redis

Successfully installed django-redis-4.9.0

You are using pip version 10.0.1, however version 18.0 is available.

You should consider upgrading via the 'python -m pip install --upgrade pip' command.

(venv) C:\Users\TQTL911\PycharmProjects\s9day110>
7.2.3 settings.py中的redis相关配置(default、back);
"""

Django settings for s9day110 project.

Generated by 'django-admin startproject' using Django 2.1.

For more information on this file, see

https://docs.djangoproject.com/en/2.1/topics/settings/

For the full list of settings and their values, see

https://docs.djangoproject.com/en/2.1/ref/settings/

"""

import os

# Build paths inside the project like this: os.path.join(BASE_DIR, ...)

BASE_DIR = os.path.dirname(os.path.dirname(os.path.abspath(__file__)))

# Quick-start development settings - unsuitable for production

# See https://docs.djangoproject.com/en/2.1/howto/deployment/checklist/

# SECURITY WARNING: keep the secret key used in production secret!

SECRET_KEY = ')jv_quydi65b@$3rl^$wsu94g^&vuxsjgpylpui_=js4-o^ni$'

# SECURITY WARNING: don't run with debug turned on in production!

DEBUG = True

ALLOWED_HOSTS = []

# Application definition

INSTALLED_APPS = [

    'django.contrib.admin',

    'django.contrib.auth',

    'django.contrib.contenttypes',

    'django.contrib.sessions',

    'django.contrib.messages',

    'django.contrib.staticfiles',

    'app01.apps.App01Config',

]

MIDDLEWARE = [

    'django.middleware.security.SecurityMiddleware',

    'django.contrib.sessions.middleware.SessionMiddleware',

    'django.middleware.common.CommonMiddleware',

    'django.middleware.csrf.CsrfViewMiddleware',

    'django.contrib.auth.middleware.AuthenticationMiddleware',

    'django.contrib.messages.middleware.MessageMiddleware',

    'django.middleware.clickjacking.XFrameOptionsMiddleware',

]

ROOT_URLCONF = 's9day110.urls'

TEMPLATES = [

    {

        'BACKEND': 'django.template.backends.django.DjangoTemplates',

        'DIRS': [os.path.join(BASE_DIR, 'templates')]

        ,

        'APP_DIRS': True,

        'OPTIONS': {

            'context_processors': [

                'django.template.context_processors.debug',

                'django.template.context_processors.request',

                'django.contrib.auth.context_processors.auth',

                'django.contrib.messages.context_processors.messages',

            ],

        },

    },

]

WSGI_APPLICATION = 's9day110.wsgi.application'

# Database

# https://docs.djangoproject.com/en/2.1/ref/settings/#databases

DATABASES = {

    'default': {

        'ENGINE': 'django.db.backends.sqlite3',

        'NAME': os.path.join(BASE_DIR, 'db.sqlite3'),

    }

}

# Password validation

# https://docs.djangoproject.com/en/2.1/ref/settings/#auth-password-validators

AUTH_PASSWORD_VALIDATORS = [

    {

        'NAME': 'django.contrib.auth.password_validation.UserAttributeSimilarityValidator',

    },

    {

        'NAME': 'django.contrib.auth.password_validation.MinimumLengthValidator',

    },

    {

        'NAME': 'django.contrib.auth.password_validation.CommonPasswordValidator',

    },

    {

        'NAME': 'django.contrib.auth.password_validation.NumericPasswordValidator',

    },

]

# Internationalization

# https://docs.djangoproject.com/en/2.1/topics/i18n/

LANGUAGE_CODE = 'en-us'

TIME_ZONE = 'UTC'

USE_I18N = True

USE_L10N = True

USE_TZ = True

# Static files (CSS, JavaScript, Images)

# https://docs.djangoproject.com/en/2.1/howto/static-files/

STATIC_URL = '/static/'

# Redis配置;

CACHES = {

    "default": {

        "BACKEND": "django_redis.cache.RedisCache",

        "LOCATION": "redis://127.0.0.1:6379",

        "OPTIONS": {

            "CLIENT_CLASS": "django_redis.client.DefaultClient",

            "CONNECTION_POOL_KWARGS": {"max_connections": 1000}

            # "PASSWORD":"密码",

        }

    },

    "back": {

        "BACKEND": "django_redis.cache.RedisCache",

        "LOCATION": "redis://127.0.0.1:6379",

        "OPTIONS": {

            "CLIENT_CLASS": "django_redis.client.DefaultClient",

            "CONNECTION_POOL_KWARGS": {"max_connections": 1000}

            # "PASSWORD":"密码",

        }

    },

}
7.2.4 django-redis的使用方法;
views.py;
import redis

from django.shortcuts import render, HttpResponse

from django_redis import get_redis_connection

# Create your views here.

def index(request):

    conn = get_redis_connection("default")

    return HttpResponse('设置成功')

def order(request):

    conn = get_redis_connection("back")

    return HttpResponse('获取成功')
8 Django缓存
8.1 让程序加上全站缓存;

8.2 全站缓存;
8.3 单视图缓存(基于装饰器做)from django.views.decorators.cache import cache_page;
import redis

from django.shortcuts import render, HttpResponse

from django_redis import get_redis_connection

import time

from django.views.decorators.cache import cache_page

# Create your views here.

@cache_page(60 * 15)

def index(request):

    ctime = str(time.time())

    return HttpResponse(ctime)

def order(request):

    return render(request, 'order.html')
8.4 局部页面做缓存;
<!DOCTYPE html>

<html lang="en">

<head>

    <meta charset="UTF-8">

    <title>order</title>

    <style type="text/css">

    </style>

</head>

<body>

<h1>cuixiaozhao</h1>

<div>

    cuixiaoshan

</div>

{% cache 10 cuixiaosi %}

    <di>

        cuixiaolei

    </di>

{% endcache %}

</body>

</html>
8.5 Redis的同类软件Memcache(不支持持久化),但是没有Redis优秀;
settings.py;
"""

Django settings for s9day110 project.

Generated by 'django-admin startproject' using Django 2.1.

For more information on this file, see

https://docs.djangoproject.com/en/2.1/topics/settings/

For the full list of settings and their values, see

https://docs.djangoproject.com/en/2.1/ref/settings/

"""

import os

# Build paths inside the project like this: os.path.join(BASE_DIR, ...)

BASE_DIR = os.path.dirname(os.path.dirname(os.path.abspath(__file__)))

# Quick-start development settings - unsuitable for production

# See https://docs.djangoproject.com/en/2.1/howto/deployment/checklist/

# SECURITY WARNING: keep the secret key used in production secret!

SECRET_KEY = ')jv_quydi65b@$3rl^$wsu94g^&vuxsjgpylpui_=js4-o^ni$'

# SECURITY WARNING: don't run with debug turned on in production!

DEBUG = True

ALLOWED_HOSTS = []

# Application definition

INSTALLED_APPS = [

    'django.contrib.admin',

    'django.contrib.auth',

    'django.contrib.contenttypes',

    'django.contrib.sessions',

    'django.contrib.messages',

    'django.contrib.staticfiles',

    'app01.apps.App01Config',

]

MIDDLEWARE = [

    'django.middleware.cache.UpdateCacheMiddleware',

    'django.middleware.security.SecurityMiddleware',

    'django.contrib.sessions.middleware.SessionMiddleware',

    'django.middleware.common.CommonMiddleware',

    'django.middleware.csrf.CsrfViewMiddleware',

    'django.contrib.auth.middleware.AuthenticationMiddleware',

    'django.contrib.messages.middleware.MessageMiddleware',

    'django.middleware.clickjacking.XFrameOptionsMiddleware',

    'django.middleware.cache.FetchFromCacheMiddleware',

]

ROOT_URLCONF = 's9day110.urls'

TEMPLATES = [

    {

        'BACKEND': 'django.template.backends.django.DjangoTemplates',

        'DIRS': [os.path.join(BASE_DIR, 'templates')]

        ,

        'APP_DIRS': True,

        'OPTIONS': {

            'context_processors': [

                'django.template.context_processors.debug',

                'django.template.context_processors.request',

                'django.contrib.auth.context_processors.auth',

                'django.contrib.messages.context_processors.messages',

            ],

        },

    },

]

WSGI_APPLICATION = 's9day110.wsgi.application'

# Database

# https://docs.djangoproject.com/en/2.1/ref/settings/#databases

DATABASES = {

    'default': {

        'ENGINE': 'django.db.backends.sqlite3',

        'NAME': os.path.join(BASE_DIR, 'db.sqlite3'),

    }

}

# Password validation

# https://docs.djangoproject.com/en/2.1/ref/settings/#auth-password-validators

AUTH_PASSWORD_VALIDATORS = [

    {

        'NAME': 'django.contrib.auth.password_validation.UserAttributeSimilarityValidator',

    },

    {

        'NAME': 'django.contrib.auth.password_validation.MinimumLengthValidator',

    },

    {

        'NAME': 'django.contrib.auth.password_validation.CommonPasswordValidator',

    },

    {

        'NAME': 'django.contrib.auth.password_validation.NumericPasswordValidator',

    },

]

# Internationalization

# https://docs.djangoproject.com/en/2.1/topics/i18n/

LANGUAGE_CODE = 'en-us'

TIME_ZONE = 'UTC'

USE_I18N = True

USE_L10N = True

USE_TZ = True

# Static files (CSS, JavaScript, Images)

# https://docs.djangoproject.com/en/2.1/howto/static-files/

STATIC_URL = '/static/'

# Redis配置;

CACHES = {

    "default": {

        "BACKEND": "django_redis.cache.RedisCache",

        "LOCATION": "redis://127.0.0.1:6379",

        "OPTIONS": {

            "CLIENT_CLASS": "django_redis.client.DefaultClient",

            "CONNECTION_POOL_KWARGS": {"max_connections": 1000}

            # "PASSWORD":"密码",

        }

    },

    "back": {

        "BACKEND": "django_redis.cache.RedisCache",

        "LOCATION": "redis://127.0.0.1:6379",

        "OPTIONS": {

            "CLIENT_CLASS": "django_redis.client.DefaultClient",

            "CONNECTION_POOL_KWARGS": {"max_connections": 1000}

            # "PASSWORD":"密码",

        }

    },

}

# 自定义的文件缓存;

# CACHES = {

#     'default': {

#         'BACKEND': 'django.core.cache.backends.filebased.FileBasedCache',

#         'LOCATION': '/var/tmp/django_cache',

#     }

# }

# 基于Memcache做缓存;

# CACHES = {

#     'default': {

#         'BACKEND': 'django.core.cache.backends.memcached.MemcachedCache',

#         'LOCATION': '127.0.0.1:11211',

#     }

# }

9 小补充:Rest Framework访问频率限制
9.1 Rest Framework框架访问频率限制,推荐大家使用Redis、Memcache;
Python-S9——Day110-Git继续的更多相关文章
- Python+Pytest+Allure+Git+Jenkins接口自动化框架
Python+Pytest+Allure+Git+Jenkins接口自动化框架 一.接口基础 接口测试是对系统和组件之间的接口进行测试,主要是效验数据的交换,传递和控制管理过程,以及相互逻辑依赖关系. ...
- Python的高级Git库 Gittle
Gittle是一个高级纯python git 库.构建在dulwich之上,提供了大部分的低层机制 Gittle是一个高级纯python git 库.构建在dulwich之上,提供了大部分的低层机制. ...
- python学习笔记——git的安装及使用
1 git的基本介绍 git 是目前世界上最先进的分布式版本哦内阁制系统 详细信息可参考廖雪峰的官方网站中的Git教程 比git功能更加强大的有TortoiseGit和Tortoise SVN,具体安 ...
- 利用python代码操作git
python操作git 安装模块 pip3 install gitpython 基本使用 import os from git.repo import Repo # 创建本地路径用来存放远程仓库下载的 ...
- Python增强下git那长长的指令
场景 现如今有点规模的公司都使用GitFlow模式进行分支管理.虽然插件给我们带来了非常大的方便,但切换分支.找分支.起分支还是那么的麻烦 需求 在社会主次国家,每个生活在底层的劳动人民,他们默默的工 ...
- python爬虫之git的使用(windows下pycharm使用)
相信很多同学学会了git或者github以后都不知道怎么跟windows上的pycharm连在一起工作,那么下面我们开始介绍简单的安装和使用方法. 一.安装 1.首先你的有一个github的账户.注册 ...
- python爬虫之git的团队协作
一.Git实践: commit,push,pull,status,add基本是最常用的几个命令. 1.首先我在github上创建了一个项目,然后我在本地的文件建立了一个普通的目录(git_data). ...
- python爬虫之git的使用(origin说明)
1.首先我们回忆两个命令 #git remote add origin 远程仓库链接 #git push -u origin master 我们一起看看这个命令,git是git的一级命令,push就是 ...
- python爬虫之git的使用(coding.net的使用)
1.注册coding.net账号,然后登陆. 2.创建项目 套路和github都一样. 1.1.我们在远程仓库上创建了一个仓库,这样的话,我们需要在本地随便建立一个文件普通文件夹,进去以后,执行git ...
- python爬虫之git的使用(github的使用)
上面博文中我们简单的了解了一下基本的git操作,但是我们都是将代码放到了本地的仓库里面,但是如果我们是一个团队开发的话,肯定不会放到每个人的本地,必须得有个统一的地方存放代码,国外的大家都在使用git ...
随机推荐
- java Vamei快速教程22 内存管理和垃圾回收
作者:Vamei 出处:http://www.cnblogs.com/vamei 欢迎转载,也请保留这段声明.谢谢! 整个教程中已经不时的出现一些内存管理和垃圾回收的相关知识.这里进行一个小小的总结. ...
- Missing map from Nullable`1 to String. Create using Mapper.CreateMap<Nullable`1, String>. 解决办法
这是一个叫做AutoMapper的插件,主要功能是让两个类的内容进行映射,最常见的例子就是EF查询出的内容映射到一个实体类上去然后返回这个实体类例如: Mapper.CreateMap(); 如果这时 ...
- RAC基本使用
@interface ViewController () @property (weak, nonatomic) IBOutlet lwRedView *redView; @property (wea ...
- Java 集合框架_上
集合框架被设计成要满足以下几个目标. 该框架必须是高性能的.基本集合(动态数组,链表,树,哈希表)的实现也必须是高效的. 该框架允许不同类型的集合,以类似的方式工作,具有高度的互操作性. 对一个集合的 ...
- 2017.12.13 Java中是怎样通过类名,创建一个这个类的数组
先在类方法中定义数组的方法: public int[] method6(int[] arr){ for(int i = 0; i<arr.length;i++){ arr[i] = (int)( ...
- DeepLearning tutorial(3)MLP多层感知机原理简介+代码详解
本文介绍多层感知机算法,特别是详细解读其代码实现,基于python theano,代码来自:Multilayer Perceptron,如果你想详细了解多层感知机算法,可以参考:UFLDL教程,或者参 ...
- 题解 CF20A 【BerOS file system】
对于此题,我的心近乎崩溃 这道题,注意点没有什么,相信大佬们是可以自己写出来的 我是蒟蒻,那我是怎么写出来的啊 好了,废话少说,开始进入正题 这道题,首先我想到的是字符串的 erase 函数,一边运行 ...
- UVA1629 Cake slicing
题目传送门 直接暴力定义f[x1][y1][x2][y2]是使对角为\((x1, y1),(x2, y2)\)这个子矩形满足要求的最短切割线长度 因为转移顺序不好递推,采用记忆化搜索 #include ...
- win10如何修改host文件
首先找到host文件,一般位于:C:\Windows\System32\drivers\etc 之后用记事本打开,直接修改.保存txt文件到桌面. 最后删除后缀名,再粘贴回去就可以了.
- 通过Tcode查找Badi或者客户出口
https://wiki.scn.sap.com/wiki/display/ABAP/Code+To+Find+BAdi Created by Naresh Reddy K, last modifie ...