BSBuDeJie_03
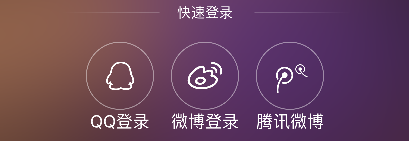
一 快速登录
1 改变状态栏的style
- (UIStatusBarStyle)preferredStatusBarStyle

{

    return UIStatusBarStyleLightContent;

}

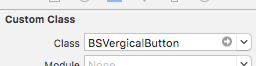
2 自定义按钮(图片在上,文字在下)
- (void)awakeFromNib

{

    self.titleLabel.textAlignment = NSTextAlignmentCenter;

}

- (void)layoutSubviews

{

    [super layoutSubviews];

    //调整图片

    self.imageView.x = ;

    self.imageView.y = ;

    self.imageView.width = self.width;

    self.imageView.height = self.imageView.width ;

    //调整文字

    self.titleLabel.x = ;

    self.titleLabel.y = self.imageView.height;

    self.titleLabel.width = self.width;

    self.titleLabel.height = self.height - self.titleLabel.y;

}
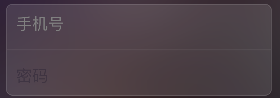
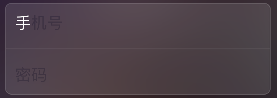
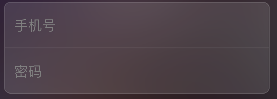
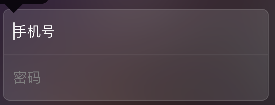
二 简单的登录框
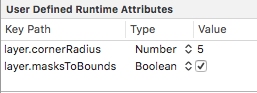
三 xib中使用kvc
四 占位文字颜色 - 01
若使用某种属性,在Inspecter中找,否则转到头文件中寻找
改变内部的属性,通过属性或重写某种方法
1 使用富文本技术
    //文字属性

    NSMutableDictionary *attrs = [NSMutableDictionary dictionary];

    attrs[NSForegroundColorAttributeName] = [UIColor grayColor];

    //NSAttributedString:带有属性的文字(富文本技术)

    NSAttributedString *placeholder = [[NSAttributedString alloc] initWithString:@"手机号" attributes:attrs];

    self.phoneField.attributedPlaceholder = placeholder;
2 可变属性
    //NSMutableAttributedString:可变

    NSMutableAttributedString *placeholder = [[NSMutableAttributedString alloc] initWithString:@"手机号"];

    [placeholder setAttributes:@{NSForegroundColorAttributeName : [UIColor whiteColor]} range:NSMakeRange(, )];

    self.phoneField.attributedPlaceholder = placeholder;
3 监听键盘弹出的两种方法
3.1 通过通知
3.2 通过textField的代理
五 占位文字:drawPlaceholderInRect - 02
自定义TextField
- (void)drawPlaceholderInRect:(CGRect)rect

{

    [self.placeholder drawInRect:CGRectMake(, , rect.size.width, ) withAttributes:@{NSForegroundColorAttributeName : [UIColor grayColor], NSFontAttributeName : self.font}];

}
六 占位文字颜色 (运行时)runtime - 03
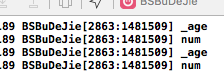
1 查找内部的成员变量 runtime
1.1 苹果官方一套C语言库, 能做很多底层操作(比如访问隐藏一些成员变量/成员方法...)
@interface BSTextField : UITextField

{

    int _age;

    int num;

}

@end
- (void)awakeFromNib

{

    unsigned int count = ;

    Ivar *ivars = class_copyIvarList([self class], &count);

    for (int i = ; i < count; i++) {

        //取出成员变量

        Ivar ivar = *(ivars + i);

        BSLog(@"%s", ivar_getName(ivar));

    }

}
2
- (void)awakeFromNib

{

    UILabel *placeholderLabel = [self valueForKeyPath:@"_placeholderLabel"];

    placeholderLabel.textColor = [UIColor redColor];

}
- (void)awakeFromNib

{

//    UILabel *placeholderLabel = [self valueForKeyPath:@"_placeholderLabel"];

//    placeholderLabel.textColor = [UIColor redColor];

    [self setValue:[UIColor grayColor] forKey:@"_placeholderLabel.textColor"];
   //设置光标颜色和占位文字颜色一致
   self.tintColor = [self.textColor;
}
3 代码整理
static NSString * const BSPlaceholderColorKeyPath = @"_placeholderLabel.textColor";

@implementation BSTextField

//- (void)awakeFromNib

//{

//    unsigned int count = 0;

//

//    Ivar *ivars = class_copyIvarList([UITextField class], &count);

//    for (int i = 0; i < count; i++) {

//        //取出成员变量

//        Ivar ivar = *(ivars + i);

//        //打印成员变量的名字

//        BSLog(@"%s", ivar_getName(ivar));

//    }

//

//    //释放

//    free(ivars);

//}

- (void)awakeFromNib

{

//    UILabel *placeholderLabel = [self valueForKeyPath:@"_placeholderLabel"];

//    placeholderLabel.textColor = [UIColor redColor];

    //修改占位文字颜色

//    [self setValue:[UIColor grayColor] forKey:@"_placeholderLabel.textColor"];

    //设置光标颜色和文字颜色一致

    self.tintColor = self.textColor;

    //不成为第一响应者

    [self resignFirstResponder];

}

//当前文本框聚焦时

- (BOOL)becomeFirstResponder

{

    //修改占位文字颜色

    [self setValue:self.textColor forKeyPath:BSPlaceholderColorKeyPath];

    return [super becomeFirstResponder];

}

//当前文本框失去焦点时

- (BOOL)resignFirstResponder

{

    //修改占位文字颜色

    [self setValue:[UIColor grayColor] forKeyPath:BSPlaceholderColorKeyPath];

    return [super resignFirstResponder];

}
七 注册框
1 清除按钮
2 控制间距约束实现滑动效果
/* 登录框距离控制器view左边的间距 */

@property (weak, nonatomic) IBOutlet NSLayoutConstraint *loginViewLeftMargin;
- (IBAction)showLoginOrRegister:(UIButton *)sender {

    //退出键盘

    [self.view endEditing:YES];

    if (self.loginViewLeftMargin.constant == ) {//显示注册

        self.loginViewLeftMargin.constant = - self.view.width;

        sender.selected = YES;

    }else{//显示登录

        self.loginViewLeftMargin.constant = ;

        sender.selected = NO;

    }

   [UIView animateWithDuration:0.25 animations:^{

       [self.view layoutIfNeeded];

   }];

}
八
九 推送界面
1 键盘类型

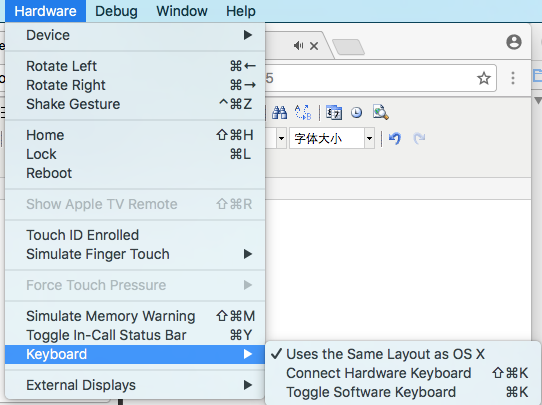
2 模拟器的键盘和电脑相连
3 判断是否第一次启动
获得当前软件版本号,通过当前软件的版本号和沙盒中存储的版本号相比,判断是否是初次打开
+ (void)show

{

    //获得当前软件的版本号

    NSString *key = @"CFBundleShortVersionString";

    NSString *currentVersion = [NSBundle mainBundle].infoDictionary[key];

    //获得沙盒中存储的版本号

    NSString *sanboxVersion = [[NSUserDefaults standardUserDefaults] stringForKey:key];

    if (![currentVersion isEqualToString:sanboxVersion]){//第一次打开当前版本

        UIWindow *window = [UIApplication sharedApplication].keyWindow;

        BSPushGuideView *guideView = [BSPushGuideView guideView];

        guideView.frame = window.frame;

        [window addSubview:guideView];

        //存储版本号

        [[NSUserDefaults standardUserDefaults] setObject:currentVersion forKey:key];

        [[NSUserDefaults standardUserDefaults] synchronize];

    }

}
4 若点击图片某一范围有效果,可用按钮覆盖上去
十
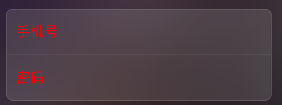
十一 顶部标签内容
1 白色半透明的背景色
    UIView *titlesView = [[UIView alloc] init];

    //白色半透明

    titlesView.backgroundColor = [UIColor colorWithRed:1.0 green:1.0 blue:1.0 alpha:0.5];

    titlesView.backgroundColor = [UIColor colorWithWhite:1.0 alpha:0.5];

    titlesView.backgroundColor = [[UIColor whiteColor] colorWithAlphaComponent:0.5];

    titlesView.width = self.view.width;

    titlesView.height = ;

    titlesView.y = ;

    [self.view addSubview:titlesView];
2 顶部的标签栏
    //内部的子标签

    NSArray *titles = @[@"全部", @"视频", @"声音", @"图片", @"段子"];

    CGFloat width = titlesView.width / titles.count;

    CGFloat height = titlesView.height;

    for (NSInteger i = ; i < titles.count; i++) {

        UIButton *button = [[UIButton alloc] init];

        button.height = height;

        button.width = width;

        button.x = i * width;

        [button setTitle:titles[i] forState:UIControlStateNormal];

        [button setTitleColor:[UIColor grayColor] forState:UIControlStateNormal];

        button.titleLabel.font = [UIFont systemFontOfSize:];

        [titlesView addSubview:button];

    }
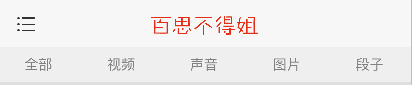
3 标签栏底部的指示器
    //底部的红色指示器

    UIView *indicatorView = [[UIView alloc] init];

    indicatorView.backgroundColor = [UIColor redColor];

    indicatorView.height = ;

    indicatorView.y = titlesView.height - indicatorView.height;

    [titlesView addSubview:indicatorView];

    self.indicatorView = indicatorView;
- (void)titleClick:(UIButton *)button

{

    [UIView animateWithDuration:0.25 animations:^{

        self.indicatorView.width = button.width;

        self.indicatorView.centerX = button.centerX;

    }];

}

十二 标签的选中和动画
1 选中
    //修改按钮颜色

    self.selectedButton.selected = NO;

    button.selected = YES;

    self.selectedButton = button;

2 防止一个标签重复被点 - Disabled
        [button setTitleColor:[UIColor grayColor] forState:UIControlStateNormal];

        [button setTitleColor:[UIColor redColor] forState:UIControlStateDisabled];
    //修改按钮颜色 防止标签重复被点

    self.selectedButton.enabled = YES;

    button.enabled = NO;

    self.selectedButton = button;
3 默认点击第一个按钮
        //默认点击第一个按钮

        if (i == ) {

            [self titleClick:button];

        }

4 强制布局
[button layoutIfNeeded];//强制布局(强制更新子控件的frame)
十三 显示子控制器
十四
十五 子控制器显示
1 系统自动创建的控制器的内边距默认是20
    //取出子控制器

    UITableViewController *vc = self.childViewControllers[index];

    vc.view.x = scrollView.contentOffset.x;

    vc.view.y = ;//设置内边距为0 其默认为20
2 设置滚动条的内边距
    //滚动条的内边距

    vc.tableView.scrollIndicatorInsets = vc.tableView.contentInset;
十六 加载文字帖子数据
将数据写入文件
[responseObject writeToFile:@"/Users/chenxiaolei/Desktop/duanzi.plist" atomically:YES];
BSBuDeJie_03的更多相关文章
随机推荐
- js创建,获取,检测cookie
- C语言运算符优先级 详细列表
首先还是插入原博客的地址http://blog.csdn.net/huangblog/article/details/8271791 另外还有一个参考博客http://www.slyar.com/bl ...
- resize
resize 属性规定是否可由用户调整元素尺寸. resize: none|both|horizontal|vertical; none:用户无法调整元素的尺寸. 比较常用 both:用户可 ...
- Rails 实现多对多自连接
1. 先生成关联代码 class WorkConnect < ActiveRecord::Base belongs_to :working, class_name: "Company& ...
- php libevent 扩展使用示例
<?php define()); define()); class epoll{ private static $socket; public static $connections; priv ...
- Unity3D 查找Update函数体为空的类
如果是大项目,有很多Update空跑还是多少有些效率损耗,那我们就把他们都找出来. 先引用Mono.Cecil //代码 using UnityEngine; using UnityEditor; u ...
- SQL Server 日期和时间函数
http://www.cnblogs.com/adandelion/archive/2006/11/08/554312.html 1.常用日期方法(下面的GetDate() = '2006-11-08 ...
- .NET 泛型
泛型 泛型将类型参数的概念引入 .NET Framework,类型参数使得设计如下类和方法成为可能:这些类和方法将一个或多个类型的指定推迟到客户端代码声明并实例化该类或方法的时候.例如,通过 ...
- IE 中单元格的 colspan 属性在某些情况下会影响 TABLE 元素的自动布局
今天在写一个jsp页面时,遇到一个如下的问题:在一个table中写了如下内容,table中定义了4列,在firefox中能正常显示,而在ie8中,显示不正常, 如下如图1:第二,三,四列宽度发生变化, ...
- MySQL批量UPDATE多行记录
UPDATE categories SET display_order = CASE id WHEN 1 THEN 3 WHEN 2 THEN 4 ...