django-生成随机验证码
pip3 install pillowpip3 install pillow
基本使用
 from PIL import Image            #导入模块

 img=Image.new(mode="RGB",size=(120,40),color="yellow")

 f=open("validCode.png","wb")

 img.save(f,"png")

 with open("validCode.png","rb") as f:

     data=f.read()

return HttpResponse(data)from PIL import Image #导入模块
img=Image.new(mode="RGB",size=(120,40),color="yellow")
f=open("validCode.png","wb")
img.save(f,"png")
with open("validCode.png","rb") as f:
data=f.read()
return HttpResponse(data)
img = Image.new(mode='RGB', size=(120, 30), color=(255, 255, 255))img = Image.new(mode='RGB', size=(120, 30), color=(255, 255, 255))
 img=Image.new(mode="RGB",size=(120,40),color="yellow")

 draw=ImageDraw.Draw(img,mode='RGB')

 draw.point([100,100],fill=255,255,255)

 #第一个参数:表示坐标

#第二个参数:表示颜色img=Image.new(mode="RGB",size=(120,40),color="yellow")
draw=ImageDraw.Draw(img,mode='RGB')
draw.point([100,100],fill=255,255,255)
#第一个参数:表示坐标
#第二个参数:表示颜色
draw.line((100,100,300,100), fill=(255, 255, 255))

#第一个表示起始坐标和结束坐标

#第二个参数:表示颜色draw.line((100,100,300,100), fill=(255, 255, 255))
#第一个表示起始坐标和结束坐标
#第二个参数:表示颜色
img = Image.new(mode='RGB', size=(120, 30), color=(255, 255, 255))

draw = ImageDraw.Draw(img, mode='RGB')

draw.arc((100,100,300,300),0,90,fill="red")

# 第一个参数:表示起始坐标和结束坐标(圆要画在其中间)

# 第二个参数:表示开始角度

# 第三个参数:表示结束角度

# 第四个参数:表示颜色img = Image.new(mode='RGB', size=(120, 30), color=(255, 255, 255))
draw = ImageDraw.Draw(img, mode='RGB')
draw.arc((100,100,300,300),0,90,fill="red")
# 第一个参数:表示起始坐标和结束坐标(圆要画在其中间)
# 第二个参数:表示开始角度
# 第三个参数:表示结束角度
# 第四个参数:表示颜色
draw.text([0,0],'python',"red")

# 第一个参数:表示起始坐标

# 第二个参数:表示写入内容

# 第三个参数:表示颜色draw.text([0,0],'python',"red")
# 第一个参数:表示起始坐标
# 第二个参数:表示写入内容
# 第三个参数:表示颜色
验证码的几种使用方式
#方式一

    #通过静态文件的目录来定位路径

    import os

    path = os.path.join(settings.BASE_DIR,"static","img","ss.jpg")  #BASE_DIR表示settings的上一级目录的上一级目录

    with open(path,"rb") as f:

        data=f.read()

#方式二

    from PIL import Image         #导入PIL模块

    img=Image.new(mode="RGB",size=(120,40),color="yellow")   #创建画笔

    f=open("validCode.png","wb")                     #保存在本地

    img.save(f,"png")

    with open("validCode.png","rb") as f:            #进行读取

        data=f.read()

    return HttpResponse(data)                        #然后返回给前端

'''

缺点:

    会在服务端的根目录下产生一个文件,我们不应该让它产生文件

'''

#方式三

'''

把文件读到内存中去

'''

    from io import BytesIO

    from PIL import Image

    img=Image.new(mode="RGB",size=(120,40),color="blue")

    f=BytesIO()

    img.save(f,"png")

    data=f.getvalue()

    return HttpResponse(data)

#方式四

 '''

 随机产生验证码

 '''

#        def text(self, xy, text, fill=None, font=None, anchor=None,*args, **kwargs):

 from io import BytesIO                 #把内容保存到内存中

 import random

    from PIL import Image,ImageDraw,ImageFont      #导入图画,画笔,字体

    img = Image.new(mode="RGB", size=(120, 40), color=(random.randint(0,255),random.randint(0,255),random.randint(0,255)))

    draw=ImageDraw.Draw(img,"RGB")

    font=ImageFont.truetype("blog/static/font/kumo.ttf",25)

    def fandomColor():

        '''

        生成随机颜色

        :return:

        '''

        random.randint(0, 255), random.randint(0, 255), random.randint(0, 255)

    valid_list=[]

    for i in range(5):

        random_num=str(random.randint(0,9))

        random_lower_zimu=chr(random.randint(65,90))

        random_upper_zimu=chr(random.randint(97,122))

        random_char=random.choice([random_num,random_lower_zimu,random_upper_zimu])

        draw.text([5+i*24,10],random_char,(fandomColor()),font=font)

        valid_list.append(random_char)

    for i in range(100):

        draw.point([random.randint(0, 5+i*24), random.randint(0,5+i*24 )], fill=fandomColor())

    f=BytesIO()

    img.save(f,"png")

    data=f.getvalue()

    valid_str="".join(valid_list)

    print(valid_str)

    request.session["keepValidCode"]=valid_str

    return HttpResponse(data)
#方式一
#通过静态文件的目录来定位路径
import os
path = os.path.join(settings.BASE_DIR,"static","img","ss.jpg") #BASE_DIR表示settings的上一级目录的上一级目录
with open(path,"rb") as f:
data=f.read()
#方式二
from PIL import Image #导入PIL模块
img=Image.new(mode="RGB",size=(120,40),color="yellow") #创建画笔
f=open("validCode.png","wb") #保存在本地
img.save(f,"png")
with open("validCode.png","rb") as f: #进行读取
data=f.read()
return HttpResponse(data) #然后返回给前端
'''
缺点:
会在服务端的根目录下产生一个文件,我们不应该让它产生文件
'''
#方式三
'''
把文件读到内存中去
'''
from io import BytesIO
from PIL import Image
img=Image.new(mode="RGB",size=(120,40),color="blue")
f=BytesIO()
img.save(f,"png")
data=f.getvalue()
return HttpResponse(data)
#方式四
'''
随机产生验证码
'''
# def text(self, xy, text, fill=None, font=None, anchor=None,*args, **kwargs):
from io import BytesIO #把内容保存到内存中
import random
from PIL import Image,ImageDraw,ImageFont #导入图画,画笔,字体
img = Image.new(mode="RGB", size=(120, 40), color=(random.randint(0,255),random.randint(0,255),random.randint(0,255)))
draw=ImageDraw.Draw(img,"RGB")
font=ImageFont.truetype("blog/static/font/kumo.ttf",25)
def fandomColor():
'''
生成随机颜色
:return:
'''
random.randint(0, 255), random.randint(0, 255), random.randint(0, 255)
valid_list=[]
for i in range(5):
random_num=str(random.randint(0,9))
random_lower_zimu=chr(random.randint(65,90))
random_upper_zimu=chr(random.randint(97,122))
random_char=random.choice([random_num,random_lower_zimu,random_upper_zimu])
draw.text([5+i*24,10],random_char,(fandomColor()),font=font)
valid_list.append(random_char)
for i in range(100):
draw.point([random.randint(0, 5+i*24), random.randint(0,5+i*24 )], fill=fandomColor())
f=BytesIO()
img.save(f,"png")
data=f.getvalue()
valid_str="".join(valid_list)
print(valid_str)
request.session["keepValidCode"]=valid_str
return HttpResponse(data)
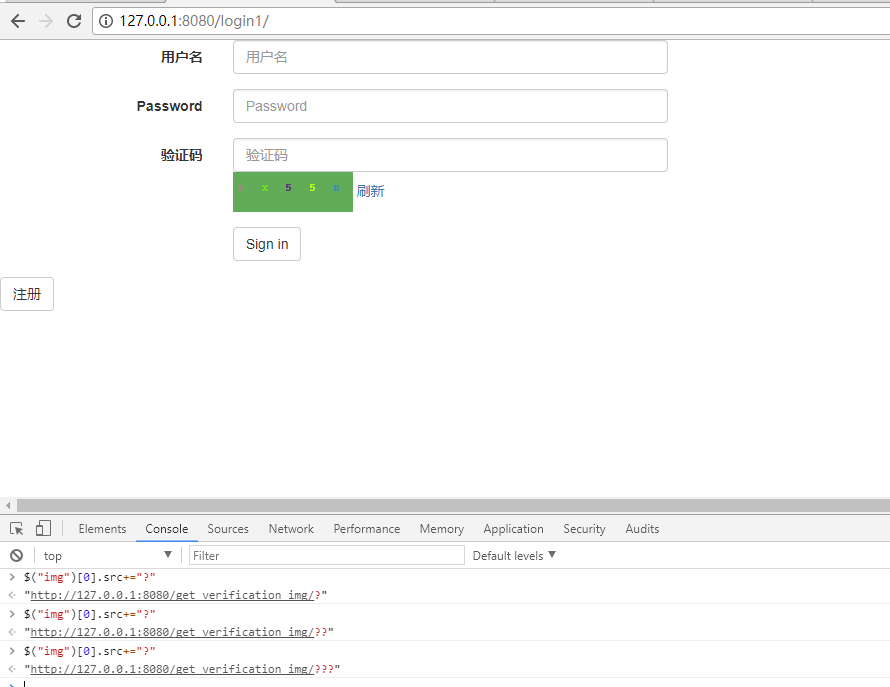
验证码的局部刷新
<!DOCTYPE html>

<html lang="en">

<head>

    <meta charset="UTF-8">

    <title>Title</title>

    <link rel="stylesheet" href="/static/bootstrap-3.3.7/css/bootstrap.min.css">

    <script src="/static/jquery-3.2.1.js"></script>

    <script src="/static/bootstrap-3.3.7/js/bootstrap.min.js"></script>

</head>

<body>

<form class="form-horizontal">

    {% csrf_token %}

  <div class="form-group">

    <label for="username" class="col-sm-2 control-label">用户名</label>

    <div class="col-sm-4">

      <input type="text" class="form-control" id="username" placeholder="用户名">

    </div>

  </div>

  <div class="form-group">

    <label for="inputPassword3" class="col-sm-2 control-label">Password</label>

    <div class="col-sm-4">

      <input type="password" class="form-control" id="password" placeholder="Password">

    </div>

  </div>

      <div class="form-group">

    <label for="validCode" class="col-sm-2 control-label">验证码</label>

    <div class="col-sm-4">

      <input type="text" class="form-control" id="validCode" placeholder="验证码">

      <img src="/get_verification_img/" alt="" class="valid_code_img" >

        <a class="refresh">刷新</a>

    </div>

  </div>

  <div class="form-group">

    <div class="col-sm-offset-2 col-sm-10">

      <button type="submit" class="btn btn-default signlogin">Sign in</button>

    </div>

        <div class="col-sm-offset-2 col-sm-10">

    </div>

  </div>

</form>

<script>

    $(".refresh").click(function () {

        $(".valid_code_img")[0].src+="?";

    });

    $("img").click(function () {

        $(this)[0].src+="?";

    });

</script>
x
<!DOCTYPE html>
<html lang="en">
<head>
<meta charset="UTF-8">
<title>Title</title>
<link rel="stylesheet" href="/static/bootstrap-3.3.7/css/bootstrap.min.css">
<script src="/static/jquery-3.2.1.js"></script>
<script src="/static/bootstrap-3.3.7/js/bootstrap.min.js"></script>
</head>
<body>
<form class="form-horizontal">
{% csrf_token %}
<div class="form-group">
<label for="username" class="col-sm-2 control-label">用户名</label>
<div class="col-sm-4">
<input type="text" class="form-control" id="username" placeholder="用户名">
</div>
</div>
<div class="form-group">
<label for="inputPassword3" class="col-sm-2 control-label">Password</label>
<div class="col-sm-4">
<input type="password" class="form-control" id="password" placeholder="Password">
</div>
</div>
<div class="form-group">
<label for="validCode" class="col-sm-2 control-label">验证码</label>
<div class="col-sm-4">
<input type="text" class="form-control" id="validCode" placeholder="验证码">
<img src="/get_verification_img/" alt="" class="valid_code_img" >
<a class="refresh">刷新</a>
</div>
</div>
<div class="form-group">
<div class="col-sm-offset-2 col-sm-10">
<button type="submit" class="btn btn-default signlogin">Sign in</button>
</div>
<div class="col-sm-offset-2 col-sm-10">
</div>
</div>
</form>
<script>
$(".refresh").click(function () {
$(".valid_code_img")[0].src+="?";
});
$("img").click(function () {
$(this)[0].src+="?";
});
</script>
django-生成随机验证码的更多相关文章
- Django中生成随机验证码(pillow模块的使用)
Django中生成随机验证码 1.html中a标签的设置 <img src="/get_validcode_img/" alt=""> 2.view ...
- Java生成随机验证码
package com.tg.snail.core.util; import java.awt.Color; import java.awt.Font; import java.awt.Graphic ...
- Python 生成随机验证码
Python生成随机验证码 Python生成随机验证码,需要使用PIL模块. 安装: 1 pip3 install pillow 基本使用 1. 创建图片 1 2 3 4 5 6 7 8 9 fro ...
- Python生成随机验证码
Python生成随机验证码,需要使用PIL模块. 安装: pip3 install pillow 基本使用 1.创建图片 from PIL import Image img = Image.new(m ...
- Python使用PIL模块生成随机验证码
PIL模块的安装 pip3 install pillow 生成随机验证码图片 import random from PIL import Image, ImageDraw, ImageFont fro ...
- C#生成随机验证码例子
C#生成随机验证码例子: 前端: <tr> <td width=" align="center" valign="top"> ...
- pillow实例 | 生成随机验证码
1 PIL(Python Image Library) PIL是Python进行基本图片处理的package,囊括了诸如图片的剪裁.缩放.写入文字等功能.现在,我便以生成随机验证码为例,讲述PIL的基 ...
- struts2生成随机验证码图片
之前想做一个随机验证码的功能,自己也搜索了一下别人写的代码,然后自己重新用struts2实现了一下,现在将我自己实现代码贴出来!大家有什么意见都可以指出来! 首先是生成随机验证码图片的action: ...
- python模块之PIL模块(生成随机验证码图片)
PIL简介 什么是PIL PIL:是Python Image Library的缩写,图像处理的模块.主要的类包括Image,ImageFont,ImageDraw,ImageFilter PIL的导入 ...
- C#生成随机验证码
使用YZMHelper帮助类即可 using System; using System.Web; using System.Drawing; using System.Security.Cryptog ...
随机推荐
- System.Func<>与System.Action<>
使用并行编程可以同时操作多个委托,在介绍并行编程前先简单介绍一下两个泛型委托System.Func<>与System.Action<>. Func<>是一个能接受多 ...
- 第一章 Spring.Net介绍
1.1 概述 在Java社区中Spring经历的长时间的考验,已经是一套很成熟稳定的框架.而Spring.Net 的前身是 Java版的Spring.Spring.Net是以Java版的Spring框 ...
- Linq中使用Left Join rught join
准备一些测试数据,如下: use Test Create table Student( ID int identity(1,1) primary key, [Name] nvarchar(50) no ...
- Android 中如何从一个App启动另外一个App(如启动支付界面、启动地图界面、应用商场下载App等场景)
假定两个App,分别是A和B,当A运行某个功能需要启动B,一种是启动B应用,一种直接进入B的某个Activity.搜了很多资料,没有一个完整的.下面就A--Android5.1.1.B--Androi ...
- mac平台安装类似yum的工具
首先从Apple Store下载Xcode,然后安装Xcode,接着安装Homebrew包管理,类似于Ubuntu下的apt-get: 终端下输入ruby -e "$(curl -fsSL ...
- 微信移动端(wap)开发调试工具
为帮助开发者更方便.更安全地开发和调试基于微信的网页,微信官方推出了 web 开发者工具.它是一个桌面应用,通过模拟微信客户端的表现,使得开发者可以使用这个工具方便地在 PC 或者 Mac 上进行开发 ...
- MySQL只有information_schema,test两个数据库
一.现象 1.今天登上数据库,用 mysql -uroot -proot 登录(本人密码是root),出现: 2.然后尝试 无密码登录,竟然登录成功: 3.查看mysql中的数据库,发现只有两个系统表 ...
- 第三篇:基于K-近邻分类算法的手写识别系统
前言 本文将继续讲解K-近邻算法的项目实例 - 手写识别系统. 该系统在获取用户的手写输入后,判断用户写的是什么. 为了突出核心,简化细节,本示例系统中的输入为32x32矩阵,分类结果也均为数字.但对 ...
- c++11——可变参数模板
在c++11之前,类模板和函数模板只能含有固定数量的模板参数,c++11增加了可变模板参数特性:允许模板定义中包含0到任意个模板参数.声明可变参数模板时,需要在typename或class后面加上省略 ...
- C++模板实战6:迭代器
1 迭代器的类型: 输入迭代器 .前向迭代器.双向迭代器.跳转迭代器以及输出迭代器.这五种迭代器的限制条件从左至右越来越强. 2 输入迭代器需满足的条件: X u(a); X可复制构造 u=a; 可赋 ...