FastDFS与springBoot集成
参考博客http://blog.csdn.net/xyang81/article/details/52850667
tobato在今年9月份在官方Java客户端的基础上进行了大量重构,且提供了更多丰富的api,主要新增的特性如下:
1 对关键部分代码加入了单元测试,便于理解与服务端的接口交易,提高接口质量
2将以前对byte硬解析风格重构为使用 对象+注解 的形式,尽量增强了代码的可读性
3支持对服务端的连接池管理(commons-pool2)
4支持上传图片时候检查图片格式,并且自动生成缩略图
5和Springboot整合方便
源码下载地址:https://github.com/tobato/FastDFS_Client
整合到Springboot项目流程
1.先创建springboot工程
工程目录如下

添加springboot pom依赖
<parent>

    <groupId>org.springframework.boot</groupId>

    <artifactId>spring-boot-starter-parent</artifactId>

    <version>1.4.2.RELEASE</version>

  </parent>

 <dependencies>

    <dependency>

      <groupId>org.springframework.boot</groupId>

      <artifactId>spring-boot-starter-thymeleaf</artifactId>

    </dependency>

    <!-- hot swapping, disable cache for template, enable live reload -->

    <dependency>

      <groupId>org.springframework.boot</groupId>

      <artifactId>spring-boot-devtools</artifactId>

      <optional>true</optional>

    </dependency>

    <!-- Optional, for bootstrap -->

    <dependency>

      <groupId>org.webjars</groupId>

      <artifactId>bootstrap</artifactId>

      <version>3.3.7</version>

    </dependency>

    <dependency>

      <groupId>junit</groupId>

      <artifactId>junit</artifactId>

      <version>3.8.1</version>

      <scope>test</scope>

    </dependency>

    <dependency>

      <groupId>com.github.tobato</groupId>

      <artifactId>fastdfs-client</artifactId>

      <version>1.25.2-RELEASE</version>

    </dependency>

    <dependency>

      <groupId>org.apache.commons</groupId>

      <artifactId>commons-lang3</artifactId>

      <version>3.0</version>

    </dependency>

  </dependencies>

  <build>

    <finalName>fastdfsspringboot</finalName>

    <plugins>

      <plugin>

        <groupId>org.springframework.boot</groupId>

        <artifactId>spring-boot-maven-plugin</artifactId>

      </plugin>

    </plugins>

  </build>
将Fdfs配置引入项目
 package com.cky.demo;

 import com.github.tobato.fastdfs.FdfsClientConfig;

 import org.springframework.boot.SpringApplication;

 import org.springframework.boot.autoconfigure.SpringBootApplication;

 import org.springframework.context.annotation.Import;

 /**

  * Created by chenkaiyang on 2017/11/30.

  */

 @Import(FdfsClientConfig.class)

 @SpringBootApplication

 public class JingtongApplication {

     public static void main(String[] args) {

         SpringApplication.run(JingtongApplication.class, args);

     }

 }
application.properties
fdfs.soTimeout=1500

fdfs.connectTimeout=600

fdfs.thumbImage.width=150

fdfs.thumbImage.height=150

fdfs.trackerList[0]=192.168.0.204:22122
在项目中使用
客户端主要包括以下接口:
TrackerClient - TrackerServer接口
GenerateStorageClient - 一般文件存储接口 (StorageServer接口)
FastFileStorageClient - 为方便项目开发集成的简单接口(StorageServer接口)
AppendFileStorageClient - 支持文件续传操作的接口 (StorageServer接口)
基于FastFileStorageClient接口和springmvc提供的MultipartFile接口封装了一个简单的工具类,方便全局管理与调用。如下所示
 package com.cky.demo.util;

 import com.cky.demo.constant.AppConfig;

 import com.cky.demo.constant.AppConstants;

 import com.github.tobato.fastdfs.domain.StorePath;

 import com.github.tobato.fastdfs.exception.FdfsUnsupportStorePathException;

 import com.github.tobato.fastdfs.service.FastFileStorageClient;

 import org.apache.commons.io.FilenameUtils;

 import org.apache.commons.lang3.StringUtils;

 import org.slf4j.Logger;

 import org.slf4j.LoggerFactory;

 import org.springframework.beans.factory.annotation.Autowired;

 import org.springframework.stereotype.Component;

 import org.springframework.web.multipart.MultipartFile;

 import java.io.ByteArrayInputStream;

 import java.io.IOException;

 import java.nio.charset.Charset;

 /**

  * Created by chenkaiyang on 2017/11/30.

  */

 @Component

 public class FastDFSClientWrapper {

     private final Logger logger = LoggerFactory.getLogger(FastDFSClientWrapper.class);

     @Autowired

     private FastFileStorageClient storageClient;

     @Autowired

     private AppConfig appConfig;   // 项目参数配置

     /**

      * 上传文件

      * @param file 文件对象

      * @return 文件访问地址

      * @throws IOException

      */

     public String uploadFile(MultipartFile file) throws IOException {

         StorePath storePath = storageClient.uploadFile(file.getInputStream(),file.getSize(), FilenameUtils.getExtension(file.getOriginalFilename()),null);

         return getResAccessUrl(storePath);

     }

     /**

      * 将一段字符串生成一个文件上传

      * @param content 文件内容

      * @param fileExtension

      * @return

      */

     public String uploadFile(String content, String fileExtension) {

         byte[] buff = content.getBytes(Charset.forName("UTF-8"));

         ByteArrayInputStream stream = new ByteArrayInputStream(buff);

         StorePath storePath = storageClient.uploadFile(stream,buff.length, fileExtension,null);

         return getResAccessUrl(storePath);

     }

     // 封装图片完整URL地址

     private String getResAccessUrl(StorePath storePath) {

         String fileUrl = AppConstants.HTTP_PRODOCOL + appConfig.getResHost()

                 + ":" + appConfig.getFdfsStoragePort() + "/" + storePath.getFullPath();

         return fileUrl;

     }

     /**

      * 删除文件

      * @param fileUrl 文件访问地址

      * @return

      */

     public void deleteFile(String fileUrl) {

         if (StringUtils.isEmpty(fileUrl)) {

             return;

         }

         try {

             StorePath storePath = StorePath.praseFromUrl(fileUrl);

             storageClient.deleteFile(storePath.getGroup(), storePath.getPath());

         } catch (FdfsUnsupportStorePathException e) {

             logger.warn(e.getMessage());

         }

     }

 }
除了FastDFSClientWrapper类中用到的api,客户端提供的api还有很多,可根据自身的业务需求,将其它接口也添加到工具类中即可。如下所示:
 // 上传文件,并添加文件元数据

 StorePath uploadFile(InputStream inputStream, long fileSize, String fileExtName, Set<MateData> metaDataSet);

 // 获取文件元数据

 Set<MateData> getMetadata(String groupName, String path);

 // 上传图片并同时生成一个缩略图

 StorePath uploadImageAndCrtThumbImage(InputStream inputStream, long fileSize, String fileExtName,

             Set<MateData> metaDataSet);

 // 。。。
FastStorage ip和端口配置
 package com.cky.demo.constant;

 import org.springframework.beans.factory.annotation.Value;

 import org.springframework.stereotype.Component;

 /**

  * Created by chenkaiyang on 2017/11/30.

  */

 @Component

 public class AppConfig {

     @Value("${resHost}")

     private String resHost;

     @Value("${fdfsStoragePort}")

     private String fdfsStoragePort;

     public String getResHost() {

         return resHost;

     }

     public void setResHost(String resHost) {

         this.resHost = resHost;

     }

     public String getFdfsStoragePort() {

         return fdfsStoragePort;

     }

     public void setFdfsStoragePort(String fdfsStoragePort) {

         this.fdfsStoragePort = fdfsStoragePort;

     }

 }
返回图片的连接地址的协议
 package com.cky.demo.constant;

 /**

  * Created by chenkaiyang on 2017/11/30.

  */

 public class AppConstants {

     public static final String HTTP_PRODOCOL = "http://";

 }
配置controller的页面跳转及上传接口
 package com.cky.demo.controller;

 import com.cky.demo.util.FastDFSClientWrapper;

 import org.springframework.beans.factory.annotation.Autowired;

 import org.springframework.stereotype.Controller;

 import org.springframework.web.bind.annotation.RequestMapping;

 import org.springframework.web.bind.annotation.RequestMethod;

 import org.springframework.web.bind.annotation.RequestParam;

 import org.springframework.web.bind.annotation.ResponseBody;

 import org.springframework.web.multipart.MultipartFile;

 import javax.servlet.http.HttpServletRequest;

 import javax.servlet.http.HttpServletResponse;

 import java.util.HashMap;

 import java.util.Map;

 /**

  * Created by chenkaiyang on 2017/12/1.

  */

 @Controller

 public class MyController {

     @Autowired

     private FastDFSClientWrapper dfsClient;

     @ResponseBody

     @RequestMapping(value = "/upload", method = RequestMethod.POST)

     public Map<String, String> upload(@RequestParam(value="file",required=false) MultipartFile file, HttpServletRequest request, HttpServletResponse response) throws Exception {

         // 省略业务逻辑代码。。。

         String imgUrl = dfsClient.uploadFile(file);

         Map<String, String> map = new HashMap<>();

         map.put("url", imgUrl);

         map.put("status", "success");

         // 。。。。

         return map;

     }

     @RequestMapping(value = "/topage", method = RequestMethod.GET)

     public String toIndex() {

         return "01";

     }

 }
到这里后端的代码就配置完成
下面开始配置前端代码
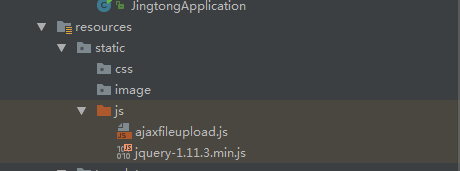
首先在rescources下面的static目录下的js目录下引入jquery-1.11.3min.js及ajaxfileupload.js
由于高版本的jquery里面会报找不到handleError
因此在ajaxfileupload.js里面开始加入下面的代码
 handleError: function( s, xhr, status, e )      {

        // If a local callback was specified, fire it

        if ( s.error ) {

            s.error.call( s.context || s, xhr, status, e );

        }

        // Fire the global callback

        if ( s.global ) {

            (s.context ? jQuery(s.context) : jQuery.event).trigger( "ajaxError", [xhr, s, e] );

        }

    },
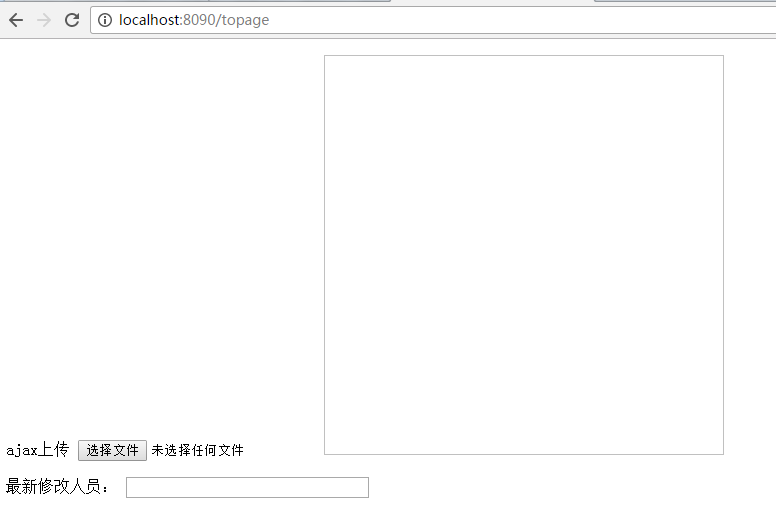
前端html代码
 <!DOCTYPE html>

 <html lang="en">

 <head>

     <meta charset="UTF-8"/>

     <title>Title</title>

     <script src="js/jquery-1.11.3.min.js"></script>

     <script src="js/ajaxfileupload.js"></script>

 </head>

 <body>

         <p>

             <label>ajax上传</label>

             <input type="file" name="file" id="fileToUpload" class="inp_fileToUpload" multiple="multiple"/>

             <img src="" width="400px" height="400px" class="img_upload" id="img" />

         </p>

         <p>

             <label>最新修改人员:</label>

             <input readonly="readonly" type="text" size="30" />

         </p>

 </body>

 <script type="text/javascript">

     $(function() {

         $(".inp_fileToUpload").on("change", function() {//现在这个已经适用于多个file表单。

             ajaxFileUpload($(this).attr("id"), $(this).parent().children(".img_upload").attr("id"));

         })

     })

     function ajaxFileUpload(file_id, img_id) {

         jQuery.ajaxFileUpload({

             url : '/upload', //用于文件上传的服务器端请求地址

             secureuri : false, //是否需要安全协议,一般设置为false

             fileElementId : file_id, //文件上传域的ID

             contentType:"application/json;charset=UTF-8",

             success : function(data, status)//服务器成功响应处理函数

             {

                 var str = $(data).find("body").text();//获取返回的字符串

                 var json = $.parseJSON(str);//把字符串转化为json对象

                 if(json.status){

                     //alert("上传成功URL为" + json.url);

                     $("#"+img_id).attr("src", json.url)

                 }

                 else{

                     alert("删除失败");

                 }

             },

             error : function(data, status, e)//服务器响应失败处理函数

             {

                 alert(e);

             }

         })

         return false;

     }

 </script>

 </html>
启动springboot

附送项目源码地址:
FastDFS与springBoot集成的更多相关文章
- 实战:docker搭建FastDFS文件系统并集成SpringBoot
实战:docker搭建FastDFS文件系统并集成SpringBoot 前言 15年的时候,那时候云存储还远远没有现在使用的这么广泛,归根结底就是成本和安全问题,记得那时候我待的公司是做建站开发的,前 ...
- 【springBoot】springBoot集成redis的key,value序列化的相关问题
使用的是maven工程 springBoot集成redis默认使用的是注解,在官方文档中只需要2步; 1.在pom文件中引入即可 <dependency> <groupId>o ...
- SpringBoot集成security
本文就SpringBoot集成Security的使用步骤做出解释说明.
- springboot集成Actuator
Actuator监控端点,主要用来监控与管理. 原生端点主要分为三大类:应用配置类.度量指标类.操作控制类. 应用配置类:获取应用程序中加载的配置.环境变量.自动化配置报告等与SpringBoot应用 ...
- SpringBoot集成Shiro并用MongoDB做Session存储
之前项目鉴权一直使用的Shiro,那是在Spring MVC里面使用的比较多,而且都是用XML来配置,用Shiro来做权限控制相对比较简单而且成熟,而且我一直都把Shiro的session放在mong ...
- SpringBoot集成redis的key,value序列化的相关问题
使用的是maven工程 springBoot集成redis默认使用的是注解,在官方文档中只需要2步; 1.在pom文件中引入即可 <dependency> <groupId>o ...
- springboot集成mybatis(二)
上篇文章<springboot集成mybatis(一)>介绍了SpringBoot集成MyBatis注解版.本文还是使用上篇中的案例,咱们换个姿势来一遍^_^ 二.MyBatis配置版(X ...
- springboot集成mybatis(一)
MyBatis简介 MyBatis本是apache的一个开源项目iBatis, 2010年这个项目由apache software foundation迁移到了google code,并且改名为MyB ...
- springboot集成redis(mybatis、分布式session)
安装Redis请参考:<CentOS快速安装Redis> 一.springboot集成redis并实现DB与缓存同步 1.添加redis及数据库相关依赖(pom.xml) <depe ...
随机推荐
- 在Qt(C++)中与Python混合编程
一.PythonQt库 在Qt(C++)中与Python混合编程,可以使用PythonQt库. 网站首页:http://pythonqt.sourceforge.net 下载页面:https://so ...
- 解决织梦替换ueditor编辑器后栏目与单页无法保存内容
织梦的默认编辑器是ckeditor,没有插入代码的功能,不够强大,就换成了百度的UEditor编辑器. 使用织梦DedeCMS百度整合UEditor编辑器时,碰到了栏目内容或者单页无法保存的问题,这个 ...
- Android开发之自定义的ProgressDialog
package com.example.dialog; import android.app.ProgressDialog; import android.content.Context; /** * ...
- poj 2528(线段树+离散化) 市长的海报
http://poj.org/problem?id=2528 题目大意是市长竞选要贴海报,给出墙的长度和依次张贴的海报的长度区间(参考题目给的图),问最后你能看见的海报有几张 就是有的先贴的海报可能会 ...
- java1.8 版本改成 java1.7版本
以前先安装的java1.7 大部分程序应该都是只支持1.7 不支持1.8 但是因为要跑一个别人的项目 要求是java1.8 所以想在电脑上同时装1.7和1.8 到官网上下载1.8 安装 安装完成后 并 ...
- Java Http协议处理类
public class HttpRequest { public static String doGet(String url,String params) throws Exception{ re ...
- Eloquent Attach/Detach/Sync Fires Any Event
eloquent-attach-detach-sync-fires-any-event I have a laravel project, and I need to make some calcul ...
- Ubunton安装mysql
#手下下载tar.gz包#首先手工建立mysql用户和用户组 > groupadd mysql > useradd -r -g mysql mysql#然后就是安装的解压 编译安装 > ...
- mysql8.0.4以后修改密码方式变更
https://blog.csdn.net/qq_38265784/article/details/80915098 use mysql: ALTER USER 'root'@'localhost' ...
- 如何将service绑入到spring 并且在action中使用
第一步:定制 service接口,为什么用接口我也不清楚 package com.inspur.services; import com.hsp.domain.User; public interfa ...