vue实现curd功能
一、实现效果
二、实现
(一)实现增加用户功能
Vuserlist组件中
<template> <div class="panel panel-default">
<div class="panel-body"> <!--<button type="button" class="btn btn-info" @click="addOneUser">添加</button>-->
<Vbutton typeBtn="success" :btnUserMethod="addOneUser" >添加用户</Vbutton> <table class="table table-hover">
<thead>
<tr class="info">
<td>用户名</td>
<td>密码</td>
<td>操作</td>
</tr>
</thead>
<tbody>
<VuserItem v-for="(item,index) in getAllUserList" v-bind:userinfo="item" v-bind:userid="item.id"></VuserItem>
</tbody>
</table> <div class="modal fade" id="addModal" tabindex="-1" role="dialog" aria-labelledby="myModalLabel">
<div class="modal-dialog" role="document">
<div class="modal-content">
<div class="modal-header">
<button type="button" class="close" data-dismiss="modal" aria-label="Close"><span
aria-hidden="true">×</span></button>
<h4 class="modal-title" id="myModalLabel">创建用户</h4>
</div>
<div class="modal-body">
<form id="fm" class="form-horizontal">
<div class="form-group">
<label for="username" class="col-sm-2 control-label">姓名</label>
<div class="col-sm-10">
<input type="text" class="form-control" name="username" placeholder="姓名" v-model="getUsername">
</div>
</div>
<div class="form-group">
<label for="password" class="col-sm-2 control-label">密码</label>
<div class="col-sm-10">
<input type="text" class="form-control" name="password" placeholder="密码" v-model="getPassword">
</div>
</div>
</form>
</div>
<div class="modal-footer">
<span id="errorMsg" style="color: red;"></span>
<button type="button" class="btn btn-default" data-dismiss="modal">取消</button>
<button type="button" class="btn btn-primary" @click="isSave">保存</button>
<div class="hidden">
<el-button :plain="true" @click="open2"></el-button> <!--保存成功提示-->
<el-button :plain="true" @click="open4"></el-button> <!--保存失败提示-->
</div>
</div>
</div>
</div>
</div> </div>
</div> </template> <script>
import VuserItem from '@/components/VuserItem'
import Vbutton from '@/components/Vbutton' export default {
name: "VuserList",
data: function () {
return { }
},
components: {
Vbutton,
VuserItem,
},
methods: {
addOneUser() {
//修复修改数据后input有默认值的bug
this.$store.state.UserObject.username="";
this.$store.state.UserObject.password=""; $('#addModal').modal('show')
}, //保存成功提示函数
open2(){
this.$message({
message: '恭喜你,创建用户成功!',
type: 'success'
});
}, //保存失败提示函数
open4() {
this.$message.error('对不起,创建用户失败!');
}, //发送数据
isSave(){ var data={
//通过计算属性获取数据,实际也是从store实例的状态中拿到数据
username:this.getUsername,
password:this.getPassword,
// csrfmiddlewaretoken: '{{ csrf_token }}'
}; //在这个地方触发对应mutation方法,也就是gaddUser,通过ajax提交所有的数据
// this.$store.commit(
// {
// type: 'addUser',
// data:data,
// getUsername:this.getUsername,
// getPassword:this.getPassword,
// successfunc: this.open2,
// failturefunc:this.open4,
// }
// ); this.$store.dispatch(
{
type: 'addUser',
data:data,
getUsername:this.getUsername,
getPassword:this.getPassword,
successfunc: this.open2,
failturefunc:this.open4,
}
); $('#addModal').modal('hide');//发送成功后模态对话框消失
this.getUsername=''; //添加成功后将input框置空
this.getPassword=''
} },
computed: { getAllUserList() {
return this.$store.state.UserList
}, getUsername: {
set(newValue) {
this.$store.state.UserObject.username = newValue
},
get() {
return this.$store.state.UserObject.username
}
}, getPassword:{
set(newValue) {
this.$store.state.UserObject.password = newValue
},
get() {
return this.$store.state.UserObject.password
}
} }
}
</script> <style scoped>
table tr td{
text-align:center;//水平居中
line-height: 25px;//行高
vertical-align:middle;//垂直居中
}
</style>
Vuserlist
这里引入一个按钮的组件,也就是根据传入的参数,变成对应的不同cued按钮:
<Vbutton typeBtn="success" :btnUserMethod="addOneUser" >添加用户</Vbutton>
Vuserlist组件会向按钮组件传入它自己的函数名,然后在按钮组件中执行Vuserlist的方法:
<template>

  <button class="btn" :class="currentBtn" @click="handleClickParent">

    <slot>按钮</slot>

  </button>

</template>

<script>

    export default {

        name: "Vbutton",

      data:function () {

        return {}

      },

      props:{

        typeBtn:String,

        btnUserMethod:Function

      },

      computed:{

        currentBtn(){

          return {

            'btn-success':this.typeBtn === 'success',

            'btn-warning':this.typeBtn === 'warning',

            'btn-danger':this.typeBtn === 'danger',

          }

        },

        currentMethod(){

          return this.btnUserMethod

        }

      },

      methods:{

        handleClickParent(){

          this.currentMethod();//执行父类方法

        }

      },

    }

</script>

<style scoped>

</style>
上面也就是子组件中执行父组件中的方法,详情可参考:https://www.cnblogs.com/shenjianping/p/11260397.html
执行addOneUser方法后弹出模态对话框,添加用户信息:
    methods: {

      addOneUser() {

        //修复修改数据后input有默认值的bug

        this.$store.state.UserObject.username="";

        this.$store.state.UserObject.password="";

        $('#addModal').modal('show')

      },

    }
当添加数据后执行保存数据,向后台接口发送数据的请求函数:
//发送数据

      isSave(){

        var data={

          //通过计算属性获取数据,实际也是从store实例的状态中拿到数据

          username:this.getUsername,

          password:this.getPassword,

          // csrfmiddlewaretoken: '{{ csrf_token }}'这里目前后端注释了csrf中间件

        };

        //在这个地方触发对应mutation方法,也就是gaddUser,通过ajax提交所有的数据

        this.$store.dispatch(

          {

            type: 'addUser',

            data:data,

            getUsername:this.getUsername,

            getPassword:this.getPassword,

            successfunc: this.open2,

            failturefunc:this.open4,

          }

        );

        $('#addModal').modal('hide');//发送成功后模态对话框消失

        this.getUsername=''; //添加成功后将input框置空

        this.getPassword=''

      }
可以看得到这里通过分发的方式,在main.js中执行action的异步操作:
 //用于执行异步函数操作,并且提交的是mutation

  actions:{

    addUser(context,payload){

      $.ajax({

        url:'http://127.0.0.1:8000/api/addUser/',

        method:'post',

        dataType:'JSON',

        contentType: 'application/json', //发送的数据类型为json,所以自己发送的数据必须保证为json

        data:JSON.stringify(payload.data), //发送json数据

        success:function (data) {

          if(data.state){

            payload.successfunc();   //执行保存成功提示函数

          }else {

            payload.failturefunc(); //执行保存失败提示函数

          }

          //保存返回的数据状态,mutation修改state状态,所以传给mutation处理

          context.commit('ADDUSER',data);

        }

      });

    },

}
这里最后提交的是mutation函数,因为只有mutation可以修改state,修改数据状态
 mutations: {

    ////action中提交该mutation

    ADDUSER(state,data){

      state.UserList.push(data.user); //将添加成功的数据添加到状态,用于页面更新

    },

}
可以看到在store实例中定义的state状态:
state: {

    //这里面的状态跟每一个数据属性有关

    UserList: [],

  },
(二)实现修改用户功能
在Vuseritem组件中
<template> <tr>
<td>{{userinfo.username}}</td>
<td>{{userinfo.password}}</td>
<td>
<Vbutton typeBtn="danger" @click="delUse" :btnUserMethod="delUse">删除</Vbutton>
|
<Vbutton typeBtn="warning" @click="editUser" :btnUserMethod="editUser">修改</Vbutton> <Vmodal :VmodalUserMethod="isdelUser"></Vmodal> <div class="modal fade" id="editModal" tabindex="-1" role="dialog" aria-labelledby="myModalLabel">
<div class="modal-dialog" role="document">
<div class="modal-content">
<div class="modal-header">
<button type="button" class="close" data-dismiss="modal" aria-label="Close"><span
aria-hidden="true">×</span></button>
<h4 class="modal-title" id="myModalLabel">修改用户</h4>
</div>
<div class="modal-body">
<form id="fm" class="form-horizontal">
<div class="form-group">
<label for="username" class="col-sm-2 control-label">姓名</label>
<div class="col-sm-10">
<input type="text" class="form-control" name="username" placeholder="姓名" v-model="getUsername">
</div>
</div>
<div class="form-group">
<label for="password" class="col-sm-2 control-label">密码</label>
<div class="col-sm-10">
<input type="text" class="form-control" name="password" placeholder="密码" v-model="getPassword">
</div>
</div>
</form>
</div>
<div class="modal-footer">
<span id="errorMsg" style="color: red;"></span>
<button type="button" class="btn btn-default" data-dismiss="modal">取消</button>
<button type="button" class="btn btn-primary" @click="isEditSave">保存</button>
<div class="hidden">
<el-button :plain="true" @click="open2"></el-button> <!--保存成功提示-->
<el-button :plain="true" @click="open4"></el-button> <!--保存失败提示-->
</div>
</div>
</div>
</div>
</div> </td>
</tr> </template> <script>
import Vbutton from '@/components/Vbutton'
import Vmodal from '@/components/Vmodal' export default {
name: "VuserItem",
components: {
Vmodal,
Vbutton
},
data: function () {
return { }
}, props: {
userinfo: {
type: Object,
require: true
},
userid: {
type: Number,
require: true
},
}, computed: { getUserId(){ return this.$store.state.UserId
},
getUsername: {
set(newValue) {
this.$store.state.UserObject.username = newValue
},
get() {
return this.$store.state.UserObject.username
}
}, getPassword: {
set(newValue) {
this.$store.state.UserObject.password = newValue
},
get() {
return this.$store.state.UserObject.password
}
} },
methods: {
delUse() {
$('#delModal').modal('show');
}, editUser() {
this.$store.state.UserId = this.userinfo.id;
this.$store.state.UserObject.username = this.userinfo.username;
this.$store.state.UserObject.password = this.userinfo.password;
//模态对话框隐藏
$('#editModal').modal('show');
}, isdelUser(open2, open4) {
console.log(this.userid); this.$store.dispatch({
type: 'delUser',
data: {id: this.userid},
successfunc: open2,
failturefunc: open4, }); $('#delModal').modal('hide'); }, //修改成功提示函数
open2(){
this.$message({
message: '恭喜你,修改用户成功!',
type: 'success'
});
}, //修改失败提示函数
open4() {
this.$message.error('对不起,修改用户失败!');
}, isEditSave() {
console.log(this.getUserId);
this.$store.dispatch(
{
type: 'editUser',
data: {
id: this.getUserId,
username: this.getUsername,
password: this.getPassword
},
successfunc: this.open2,
failturefunc: this.open4,
}
); $('#editModal').modal('hide');//发送成功后模态对话框消失 } } }
</script> <style scoped>
tr td {
text-align: center;
/ / 水平居中 line-height: 25 px;
/ / 行高 vertical-align: middle; / / 垂直居中
}
</style>
Vuseritem
按钮组件:
<Vbutton typeBtn="warning" @click="editUser" :btnUserMethod="editUser">修改</Vbutton>
点击修改按钮执行editUser函数,并且将函数名传递给了按钮,这与增加一样的效果:
//在methods方法中
editUser() {

        this.$store.state.UserId = this.userinfo.id;

        this.$store.state.UserObject.username = this.userinfo.username;

        this.$store.state.UserObject.password = this.userinfo.password;

        //模态对话框显示

        $('#editModal').modal('show');

      },
可以看到在模态对话框显示前,做了两件事,第一件事是将用户id存在store实例中,第二件事是将用户的默认值填保存起来,实际上下面使用计算属性获取input框中的值,其中的getter方法就会获取默认值,用户id等值是从父组件Vuserlist传递过来的:
props: {

      userinfo: {

        type: Object,

        require: true

      },

      userid: {

        type: Number,

        require: true

      },

    },
利用计算属性获取默认值以及用户填写的值:
computed: {

      getUserId(){

        return this.$store.state.UserId

      },

      getUsername: {

        set(newValue) {

          this.$store.state.UserObject.username = newValue

        },

        get() {

          return this.$store.state.UserObject.username

        }

      },

      getPassword: {

        set(newValue) {

          this.$store.state.UserObject.password = newValue

        },

        get() {

          return this.$store.state.UserObject.password

        }

      }

    },
最后就是发送修改过后的值:
 isEditSave() {

        console.log(this.getUserId);

        this.$store.dispatch(

          {

            type: 'editUser',

            data: {

              id: this.getUserId,

              username: this.getUsername,

              password: this.getPassword

            },

            successfunc: this.open2,

            failturefunc: this.open4,

          }

        );

        $('#editModal').modal('hide');//发送成功后模态对话框消失

      }
剩下的操作就与增加的类似了,这里不再过多赘述,删除操作也较为简单。详情参考github:
三、curd总结
1、绑定属性与非绑定属性传值
绑定的是数据属性,也就是类似for循环出来的属性或者data存在的属性都需要进行绑定
<VuserItem v-for="(item,index) in getAllUserList" v-bind:userinfo="item" v-bind:userid="item.id"></VuserItem> //userinfo或者userid属性
而对于非数据属性不要绑定,直接传值:
<Vbutton typeBtn="success" :btnUserMethod="addOneUser" >添加用户</Vbutton> //类似typeBtn属性
这两种绑定与非绑定属性都可以进行父子传值
2、获取input框默认值以及用户id
这里碰到的问题就是在VuserList中将每一个用户id传给Vitem了,但是在接收后使用过程中,每一个用户id都是数据表的第一个id,自己也不清楚问什么,但是这里将用户id接收过后存储在state状态中就会正确了,所以将传递过来的用户信息可以完全保存在state中,然后再使用。
const store = new Vuex.Store({

  state: {

    //这里面的状态跟每一个数据属性有关

    UserList: [],

    UserObject: {

      username: '',

      password: ''

    },

    UserId:""

  }

}
3、子组件调用父组件方法
在父组件中将方法名传给子组件,然后子组件进行调用
//在父组件中
<Vbutton typeBtn="success" :btnUserMethod="addOneUser" >添加用户</Vbutton>
然后子组件Vbutton 调用
<template>

  <button class="btn" :class="currentBtn" @click="handleClickParent">

    <slot>按钮</slot>

  </button>

      props:{

        btnUserMethod:Function

      },

 computed:{

        currentMethod(){

          return this.btnUserMethod

        }

      },

      methods:{

        handleClickParent(){

          this.currentMethod();  //调用父组件中的方法

        }

      },
4、全局引用jquery
- 找到webpack.base.conf.js文件
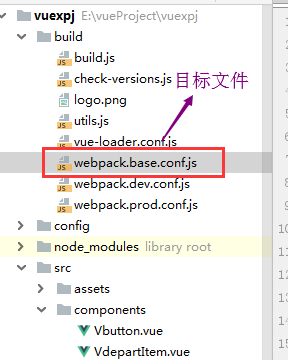
- 添加配置
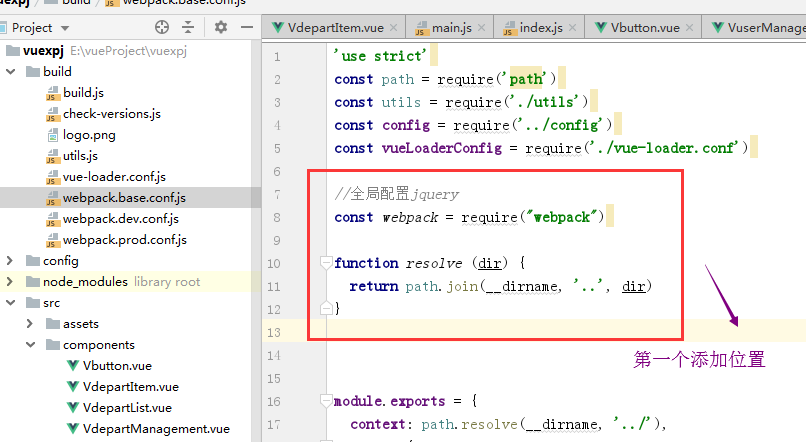
(1)添加参数的第一个位置
//添加全局配置jquery第一个位置

const webpack = require("webpack")

function resolve (dir) {

  return path.join(__dirname, '..', dir)

}
(2)添加参数的第二个位置
  //添加全局配置jquery第二个位置

  plugins: [

    new webpack.optimize.CommonsChunkPlugin('common.js'),

    new webpack.ProvidePlugin({

      jQuery: "jquery",

      $: "jquery"

    })

  ],

项目详情参考:https://github.com/ShenJianPing0307/vue-curdUser
后台API项目参考:https://github.com/ShenJianPing0307/VueTestAPI
vue实现curd功能的更多相关文章
- Vue.js 基本功能了解
一.写在前面 隔了这么久才来出Vue的第二篇文章,真是堕落了,自己先惩罚下/(ㄒoㄒ)/~~ 回过头看自己第一篇相关文章<初试 Vue.js>(http://www.cnblogs.com ...
- Vue.js 基本功能了解一下~
一.写在前面 隔了这么久才来出Vue的第二篇文章,真是堕落了,自己先惩罚下/(ㄒoㄒ)/~~ 回过头看自己第一篇相关文章<初试 Vue.js>(http://www.cnblogs.com ...
- Vue实现上传图片功能
前言: 用vue实现上传图片功能,效果图如下: 先说文件上传控件样式美化怎么做,我有两种方法. 1.先上代码 html部分: <div class="pics-wrapper" ...
- vue实现搜索功能
vue实现搜索功能 template 部分 <!-- 搜索页面 --> <template> <div> <div class="goback&qu ...
- 使用.Net Core+IView+Vue集成上传图片功能
最近的项目里有上传图片的功能,当然这个功能在项目里是必须要有的,那么目前这个项目是使用完全的前后端分离,在选择文件上传的组件中还是选择了全面支持Vue的IView,任何上传图片都是通过HTTP请求,服 ...
- vue实战记录(五)- vue实现购物车功能之商品总金额计算和单选全选删除功能
vue实战,一步步实现vue购物车功能的过程记录,课程与素材来自慕课网,自己搭建了express本地服务器来请求数据 作者:狐狸家的鱼 本文链接:vue实战-实现购物车功能(五) GitHub:sue ...
- vue实战记录(六)- vue实现购物车功能之地址列表选配
vue实战,一步步实现vue购物车功能的过程记录,课程与素材来自慕课网,自己搭建了express本地服务器来请求数据 作者:狐狸家的鱼 本文链接:vue实战-实现购物车功能(六) GitHub:sue ...
- vue实战记录(四)- vue实现购物车功能之过滤器的使用
vue实战,一步步实现vue购物车功能的过程记录,课程与素材来自慕课网,自己搭建了express本地服务器来请求数据 作者:狐狸家的鱼 本文链接:vue实战-实现购物车功能(四) GitHub:sue ...
- vue实战记录(三)- vue实现购物车功能之渲染商品列表
vue实战,一步步实现vue购物车功能的过程记录,课程与素材来自慕课网,自己搭建了express本地服务器来请求数据 作者:狐狸家的鱼 本文链接:vue实战-实现购物车功能(三) GitHub:sue ...
随机推荐
- python之arrow时间处理模块
首先安装 pip install arrow 直接创建arrow对象 print(arrow.get(2019, 1, 23)) # 2019-01-23T00:00:00+00:00 print(a ...
- List、Map、Set三个接口存取元素时,各有什么特点
List接口以特定索引来存取元素,可以有重复元素 Set接口不可以存放重复元素(使用equals方法区分是否重复) Map接口保存的是键值对(key-value-pair)映射,映射关系可以是一对一或 ...
- 学习笔记-es5新增的一些数组的API(不全)-字符串-字符串API(不全)
### es5新增的数组的api + indexOf() 搜索数组中的元素,并返回它所在的位置. arr.indexOf(str,index) 参数: str为要查找的字符串 index为开始查找的下 ...
- 【Luogu】【关卡2-2】交叉模拟(2017年10月)
任务说明:这里也是模拟,但是会混有些别的部分.思维难度不大,但是编写起来会有些难度.
- transform:translate(-50%,-50%)
和父亲元素没关系,走自己盒子宽度一半
- java基础之toString的使用方法
toString方法,其返回值类型为String类型,用于返回表示对象值的字符串,返回类名和它的引用地址(散列码 hashCode)toString方法是Object类中的一个实例方法,所有的java ...
- Windows 屏幕保护程序
{ 创建一个win32 窗口项目,不是控制台的 把exe改为src文件 复制到windows目录下 ok }
- 【dart学习】-- Dart之元数据
一,概述 元数据概述 元数据(Metadata),又称中介数据.中继数据,为描述数据的数据(data about data),主要是描述数据属性(property)的信息,用来支持如指示存储位置.历 ...
- python 拆分字符串(3.0)
拆分字符串 1. def my_split(s, ds): l = [s] for d in ds: res = [] list(map(lambda x: res.extend(x.split(d) ...
- 用 Flask 来写个轻博客 (2) — Hello World!
Blog 项目源码:https://github.com/JmilkFan/JmilkFan-s-Blog 目录 目录 前文列表 扩展阅读 实现最简单的 Flask 应用 创建 config.py 文 ...