configParse模块
一、配置文件简介
在各种程序里面都有配置文件,为了对配置文件进行操作。 python中引入了configParse模块进行操作。
配置数值类型:
配置文件中,我们看到的bool型,整数型,在我们操作的时候,都是字符串类型。
配置文件的三种定义:
section:章节。 章节需要注意,大写的DEFAULT的基类,下面所有新增加的章节,都会继承这个,后面章节不写option都会继承这个章节的。
option :选项,是每一个章节的定义。
value:选项的值
二、配置文件模块的使用
2.1 初步认识使用方法
import configparser

import os

conf = configparser.ConfigParser()  # 第一步:生成一个configParser对象,所有的操作都是根据这个对象来的,

conf['DEFAULT'] = {}           # 第二步:先生产一个章节,必需先定义一个字典 (空字典,或 有值的字典 或 k,v的方式)

conf['DEFAULT']['base_dir'] = 'c:/Users/sothi/Desktop/py2018/02-auto/data'

conf['DEFAULT']['db_type'] = 'db'

conf['DEFAULT']['db_path'] = 'data.db'

conf['DEFAULT']['max_items'] = ''

conf['DEFAULT']['auto_save'] = 'True'

conf['louhui'] = {}

conf['louhui']['auto_del'] = 'True'

                     # 第三步:写入到文件中

base_dir = r'C:\Users\LH\Desktop\data'

path = os.path.join(base_dir, 'comeon.ini')

with open(path, 'w') as f:

    conf.write(f)  # 使用conf对象进行io
2.2 配置文件的读写
2.2.1 写入到配置文件
base_dir = r'C:\Users\LH\Desktop\data'

path = os.path.join(base_dir, 'comeon.ini')

with open(path, 'w') as f:

    conf.write(f)  # 使用conf对象进行io。 conf就是上面的对象
2.2.2 读取配置文件到内存中
base_dir = r'C:\Users\LH\Desktop\data'

path = os.path.join(base_dir, 'comeon.ini')

# 读取配置文件

conf = configparser.ConfigParser()  # 定义一个对象接收

conf.read(path)
三、各种方法大全
配置文件的所有操作都是基于 configParse对象来操作。这点记住
3.1 增加
增加有两种方法:使用字典的形式来操作 或 使用内置方法
# 1.用前面写的方式追加

conf['diaosinan'] = {}

conf['diaosinan']['auto_add'] = ''

with open(path, 'w') as f:

    conf.write(f)

# 2.使用add_section进行追加,使用set使用set进行各种修改

conf.add_section('diaosinan')

conf.set('diaosinan','auto_dellll', '')   # set可以进行修改,也可以添加

conf.set('DEFAULT', 'auto_save', 'False')  # 修改父类的val

print(conf['louhui']['auto_save'])         # 子类直接改变
3.2 删除
- self.conf.remove_option()
- self.conf.remove_section()
def delete_option(self, section, option):

        '删除指定的section下的option'

        if self.conf.has_section(section) and self.conf.has_option(section, option):

            self.conf.remove_option(section, option)

        else:

            print('section or option is wrong!')
3.3 修改
直接使用3.1中的set可以进行修改。
3.4 查看
查看的各种方法
conf.has_section()      # 查看是否有该章节

conf.has_option()       # 查看是否有该option

conf.sections()         # 返回所有的章节.默认的大写的DEFAULT是不返回的,DEFAULT是默认的基类,类似继承,下面所有的都会继承这个属性

conf.options(section)   # 查看section下的所有章节

conf.items()            # 打印所有的项目
配置文件中获取的val是字符串,进行类型转换
# 获取指定的值

result = conf['louhui']['auto_save'] # 定义louhui这个章节的时候,没有auto_save,但是我们能打印出来,继承了DEFAULT

print(result, type(result))          # 返回的默认就是字符串. 我们可以用两种方式 进行 转换

print(conf.options('louhui'))

# 方式1

bool(result)

# 方式2

y = conf.getboolean('louhui','auto_save')

print(y, type(y))

## 或

louhui = conf['louhui']  # 定义一个变量名,存这个章节的对象

y = louhui.getboolean('auto_save')
s使用字典的方式进行操作
louhui = conf['louhui']

print(louhui['auto_save'])

print(louhui.get('auto_save'))
打印整个配置文件
# 打印整个配置文件

for k,v in conf.items():

    print(f'{[k]}')

    for key, val in conf.items(k):

        print(key, val)

    print('')
3.5 替换变量:
替换变量:
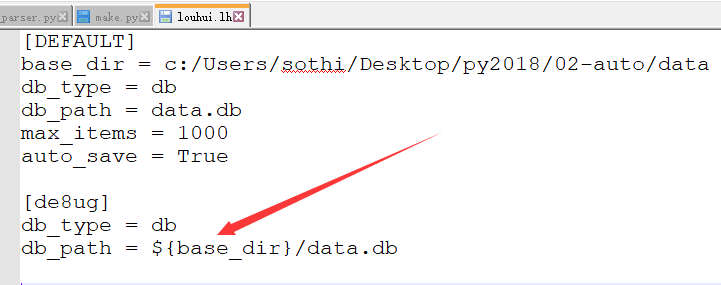
import configparser,os

base_dir = r'C:\Users\LH\Desktop\data'

path = os.path.join(base_dir, 'louhui.lh')

# conf = configparser.ConfigParser()

conf = configparser.ConfigParser(interpolation=configparser.ExtendedInterpolation())

conf.read(path)

print(conf['de8ug']['db_path'])
四、自己封装的一个config类:
import configparser,os class MyConf:
def __init__(self, path: str):
'初始化的时候读取配置文件'
self.path = path
self.conf = configparser.ConfigParser()
self.conf.read(self.path) # 空文件也不会出错 def add(self, section):
'增加一个章节'
if self.conf.has_section(section):
print('改章节已经存在')
else:
self.conf.add_section(section) def write(self, dic: dict):
'直接写入一个字典'
for k, v in dic.items():
self.conf[k] = v def del_section(self, section):
'删除section'
if self.conf.has_section(section):
self.conf.remove_section(section)
else:
print('该章节不存在') def modify_val(self, section, option, val):
if self.conf.has_section(section) and self.conf.has_option(section, option):
self.conf.set(section, option, val)
print('修改成功')
else:
print('修改失败') def delete_option(self, section, option):
'删除指定的section下的option'
if self.conf.has_section(section) and self.conf.has_option(section, option):
self.conf.remove_option(section, option)
else:
print('section or option is wrong!') def save(self):
'保存到配置文件中'
with open(self.path, 'w') as f:
self.conf.write(f) def check_all(self):
'答应全部'
for k, v in self.conf.items():
print(f'[{k}]')
for key, val in self.conf.items(k):
print(key, val)
self.conf.remove_option()
self.conf.remove_section() def test(self, li):
print(self.conf.options(li))
x = self.conf['louhui']
print(type(x)) def main():
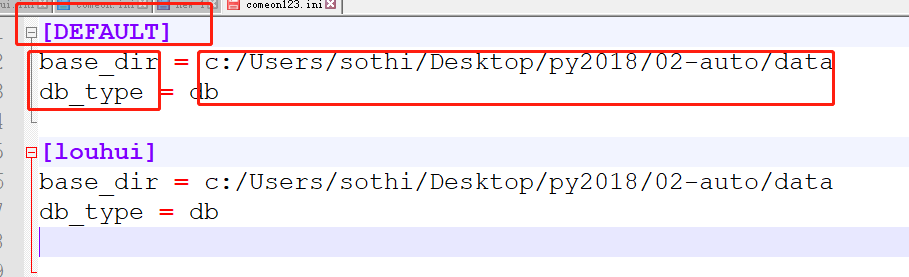
data = {
'DEFAULT': {
'base_dir': 'c:/Users/sothi/Desktop/py2018/02-auto/data',
'db_type': 'db'
},
'de8ug': {
'base_dir': 'c:/Users/sothi/Desktop/py2018/02-auto/data',
'db_type': 'pkl'
}
} data.get('lh', False)
base_dir = r'C:\Users\LH\Desktop\data'
path = os.path.join(base_dir, 'comeon123.ini')
myconf = MyConf(path)
myconf.write(data) if __name__ == '__main__':
main()
封装的config
configParse模块的更多相关文章
- python configparse模块&xml模块
configparse模块 用于生成和修改常见配置文档,当前模块的名称在 python 3.x 版本中变更为 configparser. [DEFAULT] serveraliveinterval = ...
- 【转】Python3 configparse模块(配置)
[转]Python3 configparse模块(配置) ConfigParser模块在python中是用来读取配置文件,配置文件的格式跟windows下的ini配置文件相似,可以包含一个或多个节(s ...
- python模块: hashlib模块, configparse模块, logging模块,collections模块
一. hashlib模块 Python的hashlib提供了常见的摘要算法,如MD5,SHA1等等. 摘要算法又称哈希算法.散列算法.它通过一个函数,把任意长度的数据转换为一个长度固定的数据串(通常用 ...
- 14 ConfigParse模块
1.ConfigParse模块的基本概念 此模块用于生成和修改常见配置文档. ConfigParser 是用来读取配置文件的包. 配置文件的格式如下:中括号“[ ]”内包含的为section.sect ...
- 0423 hashlib模块、logging模块、configparse模块、collections模块
一.hashlib模块补充 1,密文验证 import hashlib #引入模块 m =hashlib.md5() # 创建了一个md5算法的对象 m.update(b') print(m.hexd ...
- Python模块-configparse模块
configparse模块用来解析配置文件 配置文件 [DEFAULT] port = 3306 socket = /tmp/mysql.sock [mysqldump] max_allowed_pa ...
- Python进阶-XVV hashlib模块、configparse模块、logging模块
1.配置相关的configparse模块 配置文件如何组织?python中常见的是将配置文件写成py,然后引入该模块即可.优点是方便访问. 但是也有用类似windows中的ini文件的配置文件,了解即 ...
- python学习-58 configparse模块
configparse模块 1.生成文件 import configparser # 配置解析模块 config = configparser.ConfigParser() # config = { ...
- python基础--xml和configparse模块
1)XML模块 xml是实现不同语言或程序之间进行数据交换的协议,跟json差不多. 下面是xml的遍历查询删除修改和生成 # -*- coding:utf-8 -*- __author__ = 's ...
随机推荐
- 阿里云搭建go开发环境
开通了一个阿里云来玩,记录一下环境搭建的过程 运行环境 ECS Ubuntu 16.04 64位 过程 #切换到安装文件夹 cd /usr/local #下载go #由于墙的原因,直接下载官方的可能会 ...
- ruby中的可调用对象--方法
上一篇讲了ruby中的可调用对象proc和lambda,他们都是块转换成的对象.ruby中的可调用对象还有方法.通过使用method方法,并且以方法名作为参数(字符串或者符号),就可以得到一个方法对象 ...
- pc端样式初始化
pc端样式初始化: /* http://meyerweb.com/eric/tools/css/reset/ /* http://meyerweb.com/eric/tools/css/reset/ ...
- Loadrunner自带协议分析工具:Protocol Advisor
录制脚本之前,选对协议很关键,否则错误的协议会导致Virtual User Generator 录制不到脚本,或录制的脚本不完整,有些应用可能需要选择多个协议才能完整的记录 客户端与服务器端的请求. ...
- Centos上安装python3.5以上版本
一.准备工作: yum install zlib-devel yum install openssl-devel 二.安装python3.5 wget https://www.python.org/f ...
- httpd sshd firewalld 很多服务后面的d是什么意思
在操作系统中,一般系统的服务都是以后台进程的方式存在,而且都会常驻系统中,直到关机才结束.这类服务也称Daemon,在Linux系统中就包含许多的Daemon. 判断Daemon最简单的方法就是从名称 ...
- netty7---自定义序列化接口
package com.cn.core; import java.nio.ByteOrder; import java.nio.charset.Charset; import java.util.Ar ...
- myeclipse 方法上加上@Override就报错的处理方法
在有@Override方法上面会报错如下: The method oncreate(Bundle) of type HelloWorld must override or implement a su ...
- Web安全学习笔记之Nmap脚本编写
0x00 Nmap脚本简介 夜无眠,看了一下Nmap官方的英文API文档(全是English),瞬间心态崩塌,不想吐槽它们的nmap官网前端太丑了=.=,但是都是大牛啊,挺敬佩开源开发者的. Nmap ...
- Base64编码原理
Base64编码之所以称为Base64,是因为其使用64个字符来对任意数据进行编码,同理有Base32.Base16编码.标准Base64编码使用的64个字符为: 这64个字符是各种字符编码(比如AS ...