Springboot+swagger2的接口文档开发
一、创建一个SpringBoot项目
1.

2.

3.

4. 把web里的web选中,SQL里选择自己需要的,点击next

二、创建各项所需的controller,configure等
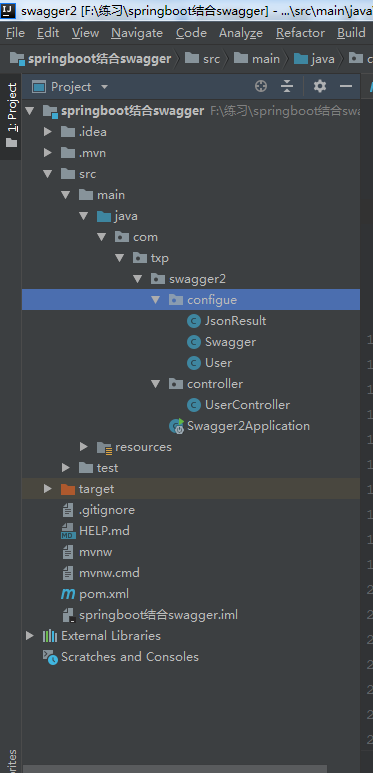
1. 项目布局
2. 引入的包
       <!-- swagger2所用的包 -->

        <dependency>

            <groupId>io.springfox</groupId>

            <artifactId>springfox-swagger2</artifactId>

            <version>2.6.1</version>

        </dependency>

        <dependency>

            <groupId>io.springfox</groupId>

            <artifactId>springfox-swagger-ui</artifactId>

            <version>2.6.1</version>

        </dependency>
3. swagger配置类,配置类有多种方法,试过使用.apis(RequestHandlerSelectors.basePackage("com.txp.controller"))的方法扫描controller包的位置,结果访问swagger页面的时候显示不出来,应该是没有扫描到,所以使用了下面的方法,即所有使用@ApiOperation注解的类都会被扫描
 package com.txp.swagger2.configue;

 import io.swagger.annotations.ApiOperation;

 import org.springframework.context.annotation.Bean;

 import org.springframework.context.annotation.Configuration;

 import springfox.documentation.builders.ApiInfoBuilder;

 import springfox.documentation.builders.RequestHandlerSelectors;

 import springfox.documentation.service.ApiInfo;

 import springfox.documentation.spi.DocumentationType;

 import springfox.documentation.spring.web.plugins.Docket;

 import springfox.documentation.swagger2.annotations.EnableSwagger2;

 // 用@Configuration注解该类,等价于XML中配置beans;用@Bean标注方法等价于XML中配置bean。

 @Configuration

 @EnableSwagger2

 public class Swagger {

     @Bean

     public Docket api(){

         return new Docket(DocumentationType.SWAGGER_2)

                 .apiInfo(apiInfo())

                 .select()

                 .apis(RequestHandlerSelectors.withMethodAnnotation(ApiOperation.class))

                 .build();

     }

     private ApiInfo apiInfo(){

         return new ApiInfoBuilder()

                 .title("springboot利用swagger构建api文档") // 页面标题

                 .description("简单优雅的restful风格") // 创建人

                 .termsOfServiceUrl("")

                 .version("1.0")// 版本号

                 .description("测试springboot结合swagger2")// 描述

                 .build();

     }

 }
4. 实体类User,JsonResult
 package com.txp.swagger2.configue;

 import java.util.Date;

 public class User {

     private int id;

     private String username;

     private int age;

     private Date ctm;

     public int getId() {

         return id;

     }

     public void setId(int id) {

         this.id = id;

     }

     public String getUsername() {

         return username;

     }

     public void setUsername(String username) {

         this.username = username;

     }

     public int getAge() {

         return age;

     }

     public void setAge(int age) {

         this.age = age;

     }

     public Date getCtm() {

         return ctm;

     }

     public void setCtm(Date ctm) {

         this.ctm = ctm;

     }

 }
 package com.txp.swagger2.configue;

 public class JsonResult {

     private String status = null;

     private Object result = null;

     public String getStatus() {

         return status;

     }

     public void setStatus(String status) {

         this.status = status;

     }

     public Object getResult() {

         return result;

     }

     public void setResult(Object result) {

         this.result = result;

     }

 }
5. UserController类
 package com.txp.swagger2.controller;

 import com.txp.swagger2.configue.JsonResult;

 import com.txp.swagger2.configue.User;

 import io.swagger.annotations.ApiImplicitParam;

 import io.swagger.annotations.ApiOperation;

 import org.springframework.http.ResponseEntity;

 import org.springframework.web.bind.annotation.RequestMapping;

 import org.springframework.web.bind.annotation.RequestMethod;

 import org.springframework.web.bind.annotation.RestController;

 import java.util.*;

 @RestController

 public class UserController {

     static Map<Integer, User> users = Collections.synchronizedMap(new HashMap<Integer,User>());

     @ApiOperation(value = "获取用户详细信息",notes = "根据url的id来获取用户详细信息")

     @ApiImplicitParam(name = "id",value = "用户ID",required = true, dataType = "Integer", paramType = "path")

     @RequestMapping(value = "users",method = RequestMethod.GET)

     public ResponseEntity<JsonResult> getUserById(){

         JsonResult r = new JsonResult();

         try{

             List<User> userList = new ArrayList<User>(users.values());

             r.setResult(userList);

             r.setStatus("ok");

         } catch (Exception e){

             r.setResult(e.getClass().getName() + ":" + e.getMessage());

             r.setStatus("error");

             e.printStackTrace();

         }

         return ResponseEntity.ok(r);

     }

 }
6. 启动类配置
 package com.txp.swagger2;

 import org.springframework.boot.SpringApplication;

 import org.springframework.boot.autoconfigure.SpringBootApplication;

 import org.springframework.boot.autoconfigure.jdbc.DataSourceAutoConfiguration;

 import springfox.documentation.swagger2.annotations.EnableSwagger2;

 @SpringBootApplication(exclude = {DataSourceAutoConfiguration.class})

 // 加上注解@EnableSwagger2 表示开启Swagger

 @EnableSwagger2

 public class Swagger2Application {

     public static void main(String[] args) {

         SpringApplication.run(Swagger2Application.class, args);

     }

 }
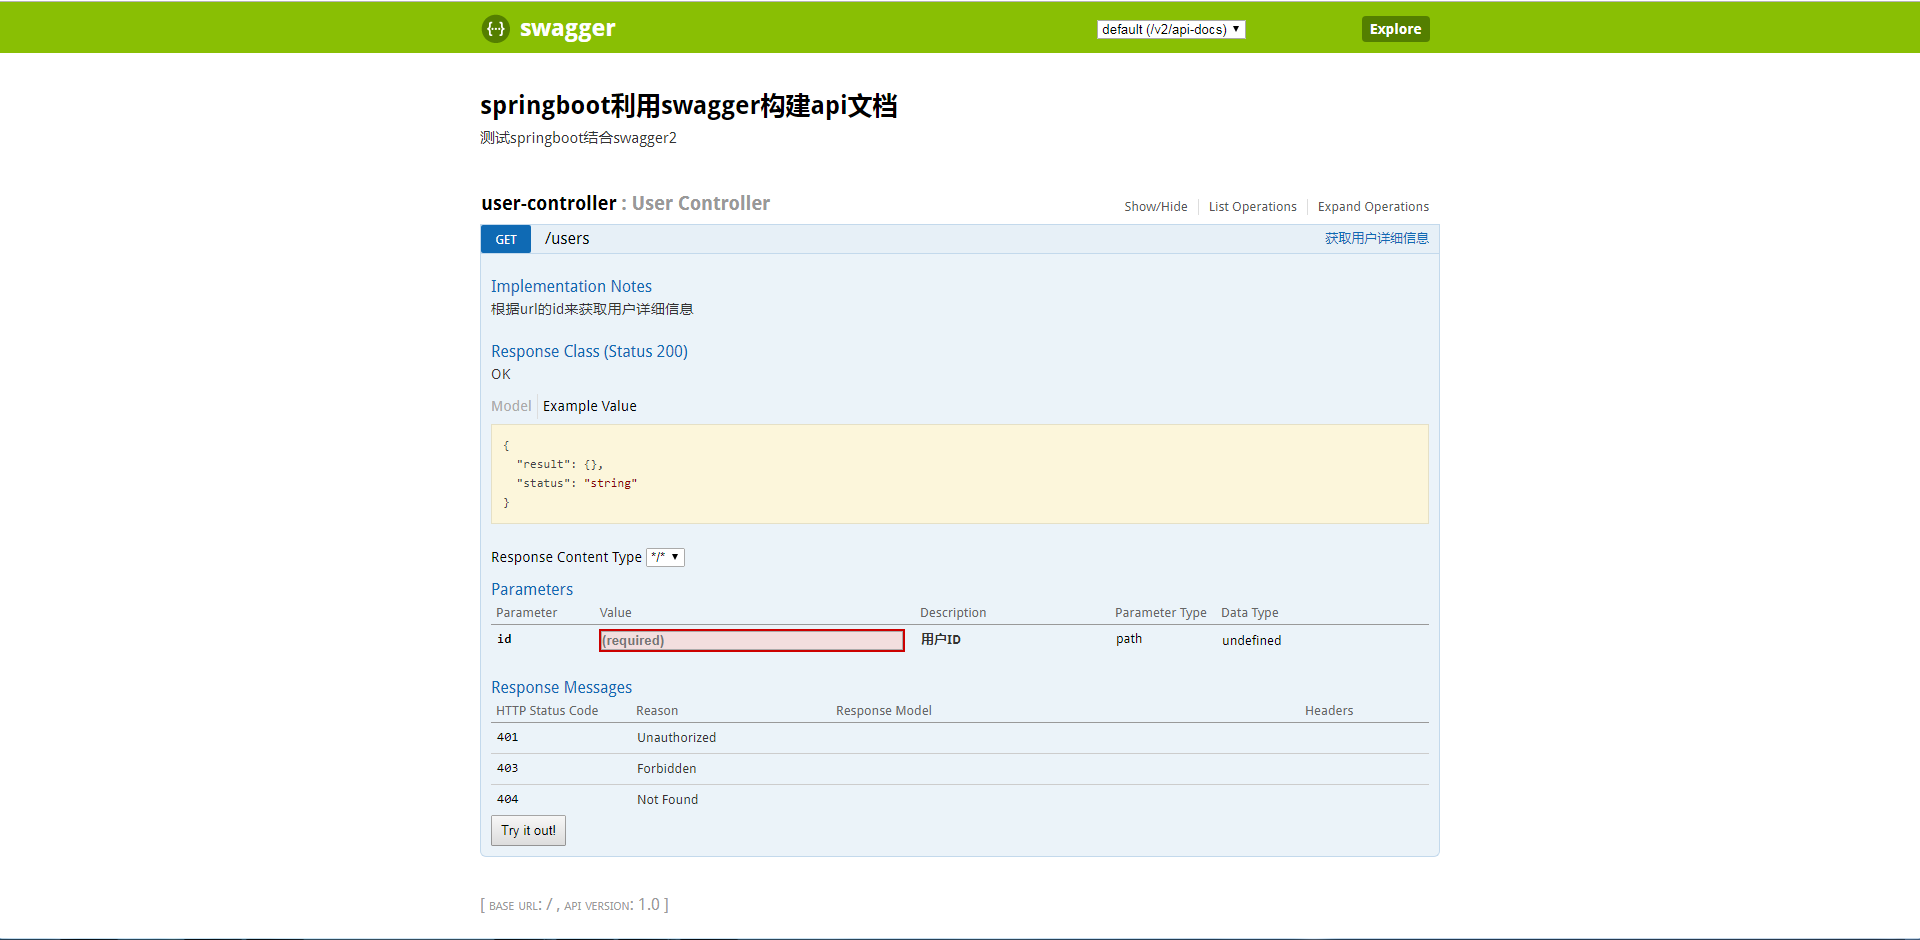
三、结果
四、Swagger注解
swagger通过注解表明该接口会生成文档,包括接口名、请求方法、参数、返回信息的等等。
- @Api:修饰整个类,描述Controller的作用
- @ApiOperation:描述一个类的一个方法,或者说一个接口
- @ApiParam:单个参数描述
- @ApiModel:用对象来接收参数
- @ApiProperty:用对象接收参数时,描述对象的一个字段
- @ApiResponse:HTTP响应其中1个描述
- @ApiResponses:HTTP响应整体描述
- @ApiIgnore:使用该注解忽略这个API
- @ApiError :发生错误返回的信息
- @ApiImplicitParam:一个请求参数
- @ApiImplicitParams:多个请求参数
补充常用参数、属性
备注(各参数意义):
作用范围	API	使用位置

对象属性	@ApiModelProperty	用在出入参数对象的字段上

协议集描述	@Api	用于controller类上

协议描述	@ApiOperation	用在controller的方法上

Response集	@ApiResponses	用在controller的方法上

Response	@ApiResponse	用在 @ApiResponses里边

非对象参数集	@ApiImplicitParams	用在controller的方法上

非对象参数描述	@ApiImplicitParam	用在@ApiImplicitParams的方法里边

描述返回对象的意义	@ApiModel	用在返回对象类上
@ApiImplicitParam参数:
属性	取值	作用

paramType		查询参数类型

path	以地址的形式提交数据

query	直接跟参数完成自动映射赋值

body	以流的形式提交 仅支持POST

header	参数在request headers 里边提交

form	以form表单的形式提交 仅支持POST

dataType		参数的数据类型 只作为标志说明,并没有实际验证

Long

String

name		接收参数名

value		接收参数的意义描述

required		参数是否必填

true	必填

false	非必填

defaultValue		默认值
Springboot+swagger2的接口文档开发的更多相关文章
- swagger2的接口文档
以前见过一个swagger2的接口文档,特别好用,好看,对接口中入参描述的很详细:适合用于项目的开发 后来自己做项目的时候,没有找到这个swagger版本 <dependency> < ...
- Springboot集成swagger2生成接口文档
[转载请注明]: 原文出处:https://www.cnblogs.com/jstarseven/p/11509884.html 作者:jstarseven 码字挺辛苦的..... 一 ...
- SpringBoot 如何生成接口文档,老鸟们都这么玩的!
大家好,我是飘渺. SpringBoot老鸟系列的文章已经写了两篇,每篇的阅读反响都还不错,果然大家还是对SpringBoot比较感兴趣.那今天我们就带来老鸟系列的第三篇:集成Swagger接口文档以 ...
- springboot + swagger2 生成api文档
直接贴代码: <dependency> <groupId>io.springfox</groupId> <artifactId>springfox-sw ...
- SpringFox swagger2 and SpringFox swagger2 UI 接口文档生成与查看
依赖: <!-- https://mvnrepository.com/artifact/io.springfox/springfox-swagger2 --> <dependency ...
- Springboot swagger2 导出api文档
具体导出的代码,参考了:http://www.spring4all.com/article/699 导出前,首先需要配置好swagger2,参见 https://www.cnblogs.com/yan ...
- SpringBoot 使用Swagger2打造在线接口文档(附汉化教程)
原文地址: https://www.jianshu.com/p/7e543f0f0bd8 SpringBoot + Swagger2 UI界面-汉化教程 1.默认的英文界面UI 想必很多小伙伴都曾经使 ...
- springboot+swagger接口文档企业实践(上)
目录 1.引言 2.swagger简介 2.1 swagger 介绍 2.2 springfox.swagger与springboot 3. 使用springboot+swagger构建接口文档 3. ...
- 接口开发-集成接口文档(swagger)
在正式进入主题之前,先说说实际工作中遇到的问题.不算是传统的原生APP开发,还是眼下的H5混合开发,只要是需要前后端通过接口配合的,往往都存在几个普遍的问题 (1)接口文档谁来写,尤其是跨部门,并且, ...
随机推荐
- APICloud资料
//语音读text里面的文字 var text=document.getElementById('ready').value; alert(text); var obj = api.require(' ...
- vue 页面跳转及参数传递和接收
跳转: this.$router.push({name: 'My',params:{ id:'1',name:'anson'}}); 接收: {{this.$route.params.id}}
- Java简述
Java的特点(11个关键术语)from<Java核心技术I> 1) 简单性 2) 面向对象 3) 分布式 Java有一个丰富的例程库,用于处理像HTTP和FTP之类的TCP/IP协议 ...
- MyEclipse 设置JSP,HTML的默认打开方式,避免出现打开后上面出现浏览器
1. 2. 3. jsp的设置一样,这样myeclipse打开jsp就不会出现上面的浏览器了
- 紫书 例题7-14 UVa 1602(搜索+STL+打表)
这道题想了很久不知道怎么设置状态,怎么拓展,怎么判重, 最后看了这哥们的博客 终于明白了. https://blog.csdn.net/u014800748/article/details/47400 ...
- php获取时间是星期几
PHP星期几获取代码: date("l"); //data就可以获取英文的星期比如Sundaydate("w"); //这个可以获取数字星期比如123,注意0是 ...
- Linux 截图
方法一:快捷键截图 对整个屏幕截图: PrintScreen 对活动窗体截图: Alt+PrintScreen 对随意矩形截图: Shift+PrintScreen 以上三个快捷键再加上Ctrl.就会 ...
- 软工视频总结Part Three
软件需求分析 任务 解决目标系统"做什么"问题 深入描写叙述软件的功能和性能 确定软件涉及到的约束和软件接口 定义软件的其它有效需求 特点 一致性.完整性.限时性.有效性.可验证性 ...
- C#帮助控件HelpProvider的使用
using System; using System.Collections.Generic; using System.ComponentModel; using System.Data; usin ...
- ubuntu 搜狗输入法的安装
本文主要解决的是,通过安装搜狗网站提供的*.deb安装文件,使用ctrl+shift/space无法切换搜狗输入法的问题. 搜狗输入法 for linux:搜狗输入法 for linux,这还不算完: ...