Numpy的基础使用
数据分析: 是把隐藏在一些看似杂乱无章的数据背后的信息提取出来,总结出所研究对象的内在规律
- 数据分析的三剑客: Numpy, Pandas, Matplotlib
NumPy(Numerical Python) 是 Python 语言的一个扩展程序库,支持大量的维度数组与矩阵运算,此外也针对数组运算提供大量的数学函数库。
一, 创建ndarry
使用np.array()创建
import numpy as np # 约定使用np
np.array([1, 2, 3, 4, 5]) # 一维数组
array([1, 2, 3, 4, 5])
np.array([[1, 2], [1, 2]]) # 二维数组
array([[1, 2],

       [1, 2]])
np.array([[1, 'two'], [1, 2.3]])
array([['1', 'two'],

       ['1', '2.3']], dtype='<U11')
注意:
- numpy默认ndarray的所有元素的类型是相同的
- 如果传进来的列表中包含不同的类型,则自动统一为同一类型,优先级:str>float>int
使用案例:
- 使用matplotlib.pyplot获取一个numpy数组,数据来源于一张图片
import matplotlib.pyplot as plt   # 约定使用plt

img_arr = plt.imread('./ceshi.bmp')

img_arr  # 三维数组
array([[[255, 255, 255],

        [255, 255, 255],

        [255, 255, 255],

        ...,

        [255, 255, 255],

        [255, 255, 255],

        [255, 255, 255]]], dtype=uint8)
plt.imshow(img_arr) # 将三维数组展示成图片
<matplotlib.image.AxesImage at 0x1470e667160>

plt.imshow(img_arr - 50) # 操作该numpy数据,该操作会同步到图片中,发现眼色变了
<matplotlib.image.AxesImage at 0x14713a59cc0>
2. 使用np的routines函数创建
- np.linspace(start, stop, num=50, endpoint=True, retstep=False, dtype=None) 等差数列
np.linspace(0, 100, 10) # 返回等差数列的一维数组 第三个参数表示元素的个数
array([  0.        ,  11.11111111,  22.22222222,  33.33333333,

        44.44444444,  55.55555556,  66.66666667,  77.77777778,

        88.88888889, 100.        ])
- np.arange([start, ]stop, [step, ]dtype=None)
np.arange(0, 100, 2) # 返回等差数列的一维数组 第三个参数表示步长
array([ 0,  2,  4,  6,  8, 10, 12, 14, 16, 18, 20, 22, 24, 26, 28, 30, 32,

       34, 36, 38, 40, 42, 44, 46, 48, 50, 52, 54, 56, 58, 60, 62, 64, 66,

       68, 70, 72, 74, 76, 78, 80, 82, 84, 86, 88, 90, 92, 94, 96, 98])
- np.random.randint(low, high=None, size=None, dtype='l')
np.random.randint(0, 100, size=(3, 5)) # 获得一个3行5列的二维数组,数组的每个元素是0-100的随机数
array([[74, 54, 26, 79, 64],

       [ 3, 14,  4, 41, 10],

       [29, 96, 61, 16, 70]])
np.random.randint(0, 100, size=(3, 2, 4)) # 三维数组
array([[[17, 31, 72, 71],

        [68, 71, 69, 60]],

       [[47, 91, 94, 32],

        [ 9, 54, 47, 71]],

       [[ 6, 96, 34, 25],

        [13, 51, 29, 34]]])
- 随机函数的原理
- 时间种子(随机因子):无时无刻都在变化的值(系统时间)
- 固定随机因子就可以固定随机函数的随机性
np.random.seed(90)

np.random.randint(0, 100, size=(3, 5))  # 每次得到的数组都是一样的
array([[91, 29, 31, 67, 39],

       [68, 58, 37, 18, 74],

       [96, 51, 30, 80, 18]])
- np.random.random(size=None)
np.random.random(size=(3, 4)) # 0-1的随机数
array([[0.65727519, 0.1262984 , 0.5755297 , 0.39088299],

       [0.17033964, 0.42278594, 0.94238902, 0.29860718],

       [0.36670103, 0.39093547, 0.53337014, 0.97951138]])
二、ndarray的属性
主要参数:
- ndim:维度
- shape:形状(各维度的长度)
- size:总长度
- dtype:元素类型
type(img_arr)
numpy.ndarray
img_arr.ndim # 三维
3
img_arr.shape # 形状: 三个数表示维度是三
(519, 500, 3)
arr = np.array([[1, 2, 3], [1, 2, 3]])
arr.shape # 二维数组时,(2, 3): 第一个元素可以看作数组的行数,第二个元素看作数组的列数
(2, 3)
arr.size # 数组的总长度
6
arr.dtype # 数组的元素类型
dtype('int32')
三、ndarray的基本操作
索引
arr = np.random.randint(0, 100, size=(5, 8))

arr
array([[43, 84,  3, 27, 75, 62, 17, 50],

       [98, 95, 95, 40, 64, 51, 54, 36],

       [47, 77, 93, 97, 97, 32, 54, 95],

       [86, 54, 46, 33, 52, 53, 61,  8],

       [19, 72, 40, 90, 69, 11, 91, 72]])
- 根据索引修改数据
arr[0] # 第0行
array([43, 84, 3, 27, 75, 62, 17, 50])
arr[[0, 1]] # 第0行, 第1行
array([[43, 84,  3, 27, 75, 62, 17, 50],

       [98, 95, 95, 40, 64, 51, 54, 36]])
arr[0, 3] # 第0行, 第3列
40
arr[0, [2, 3, 4]] # 0行, 2, 3, 4列
array([95, 40, 64])
切片
一维数组的切片与列表完全一致, 多维时同理
arr
array([[43, 84,  3, 27, 75, 62, 17, 50],

       [98, 95, 95, 40, 64, 51, 54, 36],

       [47, 77, 93, 97, 97, 32, 54, 95],

       [86, 54, 46, 33, 52, 53, 61,  8],

       [19, 72, 40, 90, 69, 11, 91, 72]])
# 获取二维数组前两行

arr[0:2]
array([[43, 84,  3, 27, 75, 62, 17, 50],

       [98, 95, 95, 40, 64, 51, 54, 36]])
# 获取二维数组前两列

arr[:, 0:2]    # arr[行, 列]
array([[43, 84],

       [98, 95],

       [47, 77],

       [86, 54],

       [19, 72]])
# 获取二维数组前两行和前两列数据

arr[0:2, 0:2]
array([[43, 84],

       [98, 95]])
# 将数组的行倒序

arr[::-1, :]
array([[19, 72, 40, 90, 69, 11, 91, 72],

       [86, 54, 46, 33, 52, 53, 61,  8],

       [47, 77, 93, 97, 97, 32, 54, 95],

       [98, 95, 95, 40, 64, 51, 54, 36],

       [43, 84,  3, 27, 75, 62, 17, 50]])
# 列倒序

arr[:, ::-1]
array([[50, 17, 62, 75, 27,  3, 84, 43],

       [36, 54, 51, 64, 40, 95, 95, 98],

       [95, 54, 32, 97, 97, 93, 77, 47],

       [ 8, 61, 53, 52, 33, 46, 54, 86],

       [72, 91, 11, 69, 90, 40, 72, 19]])
# 行列均倒序

arr[::-1, ::-1]
array([[72, 91, 11, 69, 90, 40, 72, 19],

       [ 8, 61, 53, 52, 33, 46, 54, 86],

       [95, 54, 32, 97, 97, 93, 77, 47],

       [36, 54, 51, 64, 40, 95, 95, 98],

       [50, 17, 62, 75, 27,  3, 84, 43]])
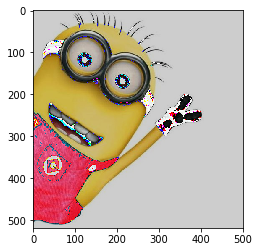
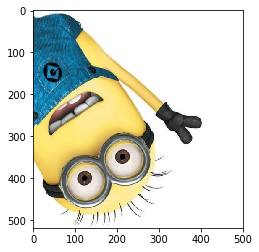
# 将图片进行倒置操作

plt.imshow(img_arr[::-1])   # 行倒序, 上下翻转, 其余翻转同理
<matplotlib.image.AxesImage at 0x14713cc2080>
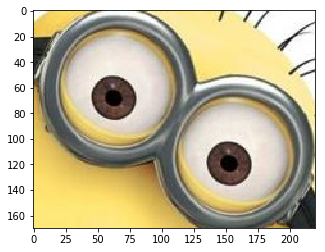
# 裁剪出小黄人的眼镜
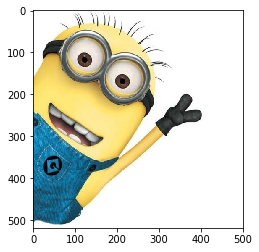
plt.imshow(img_arr)
<matplotlib.image.AxesImage at 0x14714164978>
plt.imshow(img_arr[50:220, 60:280])
<matplotlib.image.AxesImage at 0x147144fd940>
变形
- 使用arr.reshape()函数,注意参数是一个tuple!
- 元素总数不可变
arr = np.random.randint(0, 100, 40)

arr
array([49, 49, 68, 31,  7, 18, 89, 80, 66, 29, 68, 42, 31, 42, 61, 58, 29,

       88, 74, 64, 34, 53, 62, 57, 61, 60, 61, 47, 99, 15, 54, 24,  3, 90,

       10, 71,  4, 34, 52,  1])
将一维数组变形成多维数组
arr.reshape((4, 10)) # 将arr变形为4行10列
array([[49, 49, 68, 31,  7, 18, 89, 80, 66, 29],

       [68, 42, 31, 42, 61, 58, 29, 88, 74, 64],

       [34, 53, 62, 57, 61, 60, 61, 47, 99, 15],

       [54, 24,  3, 90, 10, 71,  4, 34, 52,  1]])
arr.reshape((4, -1)) # -1表示依照另一个参数自动计算
array([[49, 49, 68, 31,  7, 18, 89, 80, 66, 29],

       [68, 42, 31, 42, 61, 58, 29, 88, 74, 64],

       [34, 53, 62, 57, 61, 60, 61, 47, 99, 15],

       [54, 24,  3, 90, 10, 71,  4, 34, 52,  1]])
将多维数组变形成一维数组
arr = np.random.randint(0, 100, size=(5, 8))

arr
array([[10, 21, 77,  5,  5,  2, 54, 84],

       [88, 24, 15, 98, 16, 75, 93, 38],

       [75, 85,  6, 61, 89,  7, 70, 55],

       [44, 65, 94, 26, 88, 41, 25, 75],

       [51, 40, 66, 65, 84, 11, 98, 12]])
arr.reshape((40))
array([10, 21, 77,  5,  5,  2, 54, 84, 88, 24, 15, 98, 16, 75, 93, 38, 75,

       85,  6, 61, 89,  7, 70, 55, 44, 65, 94, 26, 88, 41, 25, 75, 51, 40,

       66, 65, 84, 11, 98, 12])
级联
- np.concatenate()
1.一维,二维,多维数组的级联,实际操作中级联多为二维数组
np.concatenate((arr, arr), axis=1) # 将arr与arr拼接,1表示x轴拼接,0表示y轴拼接
array([[10, 21, 77,  5,  5,  2, 54, 84, 10, 21, 77,  5,  5,  2, 54, 84],

       [88, 24, 15, 98, 16, 75, 93, 38, 88, 24, 15, 98, 16, 75, 93, 38],

       [75, 85,  6, 61, 89,  7, 70, 55, 75, 85,  6, 61, 89,  7, 70, 55],

       [44, 65, 94, 26, 88, 41, 25, 75, 44, 65, 94, 26, 88, 41, 25, 75],

       [51, 40, 66, 65, 84, 11, 98, 12, 51, 40, 66, 65, 84, 11, 98, 12]])
2.合并两张照片
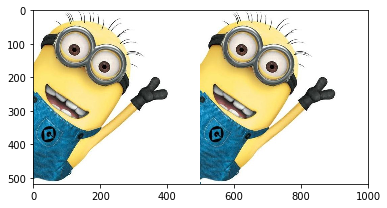
plt.imshow(np.concatenate((img_arr, img_arr), axis=1))
<matplotlib.image.AxesImage at 0x147146be6d8>
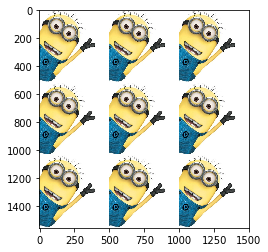
img_arr_3 = np.concatenate((img_arr, img_arr, img_arr), axis=1)

img_arr_9 = np.concatenate((img_arr_3, img_arr_3, img_arr_3), axis=0)

plt.imshow(img_arr_9)
<matplotlib.image.AxesImage at 0x14713ef15c0>
级联需要注意的点:
- 级联的参数是列表:一定要加中括号或小括号
- 维度必须相同
- 形状相符:在维度保持一致的前提下,如果进行横向(axis=1)级联,必须保证进行级联的数组行数保持一致。如果进行纵向(axis=0)级联,必须保证进行级联的数组列数保持一致。
- 可通过axis参数改变级联的方向
四、ndarray的聚合操作
arr = np.random.randint(1, 100, size=(5, 8))

arr
array([[21, 65, 34, 74, 99, 44, 26, 41],

       [66,  1, 27, 72, 35, 77, 22, 24],

       [ 2, 11, 17, 64, 56, 75, 19, 50],

       [85, 32, 80, 30, 11, 60, 48, 22],

       [ 9, 53, 51, 48, 16, 61, 81, 21]])
求和np.sum
arr.sum() # 所有元素的和
1730
arr.sum(axis=1) # 每一行的和
array([404, 324, 294, 368, 340])
arr.sum(axis=0) # 每一列的和
array([183, 162, 209, 288, 217, 317, 196, 158])
最大最小值:np.max/ np.min
arr.max() # 参数同sum()
99
arr.min()
1
平均值:np.mean()
arr.mean(axis=1) # 每一行的平均值
array([50.5 , 40.5 , 36.75, 46. , 42.5 ])
其他聚合操作
Function Name	NaN-safe Version	Description

np.sum	np.nansum	Compute sum of elements

np.prod	np.nanprod	Compute product of elements

np.mean	np.nanmean	Compute mean of elements

np.std	np.nanstd	Compute standard deviation

np.var	np.nanvar	Compute variance

np.min	np.nanmin	Find minimum value

np.max	np.nanmax	Find maximum value

np.argmin	np.nanargmin	Find index of minimum value

np.argmax	np.nanargmax	Find index of maximum value

np.median	np.nanmedian	Compute median of elements

np.percentile	np.nanpercentile	Compute rank-based statistics of elements

np.any	N/A	Evaluate whether any elements are true

np.all	N/A	Evaluate whether all elements are true

np.power 幂运算
五、ndarray的排序
快速排序
np.sort()与ndarray.sort()都可以,但有区别:
- np.sort()不改变输入
- ndarray.sort()本地处理,不占用空间,但改变输入
arr
array([[21, 65, 34, 74, 99, 44, 26, 41],

       [66,  1, 27, 72, 35, 77, 22, 24],

       [ 2, 11, 17, 64, 56, 75, 19, 50],

       [85, 32, 80, 30, 11, 60, 48, 22],

       [ 9, 53, 51, 48, 16, 61, 81, 21]])
np.sort(arr, axis=0) # 不改变原始数组
array([[ 2,  1, 17, 30, 11, 44, 19, 21],

       [ 9, 11, 27, 48, 16, 60, 22, 22],

       [21, 32, 34, 64, 35, 61, 26, 24],

       [66, 53, 51, 72, 56, 75, 48, 41],

       [85, 65, 80, 74, 99, 77, 81, 50]])
arr.sort(axis=1)  # 改变原始数组

arr
array([[21, 26, 34, 41, 44, 65, 74, 99],

       [ 1, 22, 24, 27, 35, 66, 72, 77],

       [ 2, 11, 17, 19, 50, 56, 64, 75],

       [11, 22, 30, 32, 48, 60, 80, 85],

       [ 9, 16, 21, 48, 51, 53, 61, 81]])
Numpy的基础使用的更多相关文章
- numpy的基础运算2-【老鱼学numpy】
numpy的基础运算中还有很多运算,我们这里再记录一些. 最小/大值索引 前面一篇博文中我们讲述过如何获得数组中的最小值,这里我们获得最小/大值的索引值,也就是这个最小/大值在整个数组中位于第几位. ...
- Python Numpy shape 基础用法(转自他人的博客,如涉及到侵权,请联系我)
Python Numpy shape 基础用法 shape函数是numpy.core.fromnumeric中的函数,它的功能是读取矩阵的长度,比如shape[0]就是读取矩阵第一维度的长度.它的输入 ...
- 1.2 NumPy数组基础
目录 第一章 numpy入门 1.2 numpy数组基础 1.2.1 数组的属性 1.2.2 数组的索引:获取单个元素 1.2.3 数组切片:获取子数组 1.2.4 数组的变形 1.2.5 数组的拼接 ...
- 【笔记】numpy.array基础(1)
numpy.array基础 使用numpy.__version__可以检查numpy的版本 当然也可以直接使用命令行检查numpy版本 也可以用来简化引用,使用as python list特点 num ...
- [转]numpy线性代数基础 - Python和MATLAB矩阵处理的不同
转自:http://blog.csdn.net/pipisorry/article/details/45563695 http://blog.csdn.net/pipisorry/article/de ...
- numpy&pandas基础
numpy基础 import numpy as np 定义array In [156]: np.ones(3) Out[156]: array([1., 1., 1.]) In [157]: np.o ...
- 【笔记】numpy.array基础(2)
numpy数组的基本操作 以几个数组为例 使用ndim可以显示出是几维数组 使用shape可以查看元素维度数 使用size可以查看元素个数 对一维数组进行数据访问 对多维数组进行数据访问 切片访问,使 ...
- Python Numpy,Pandas基础笔记
Numpy Numpy是python的一个库.支持维度数组与矩阵计算并提供大量的数学函数库. arr = np.array([[1.2,1.3,1.4],[1.5,1.6,1.7]])#创建ndarr ...
- 数据分析入门——numpy类库基础知识
numpy类库是数据分析的利器,用于高性能的科学计算和数据分析.使用python进行数据分析,numpy这个类库是必须掌握的.numpy并没有提供强大的数据分析功能,而是它提供的ndarray数据结构 ...
- numpy的基础运算-【老鱼学numpy】
概述 本节主要讲解numpy数组的加减乘除四则运算. np.array()返回的是numpy的数组,官方称为:ndarray,也就是N维数组对象(矩阵),N-dimensional array obj ...
随机推荐
- 两台服务器共享文件Windows和Linux
最近遇到一个问题,新装的两台服务器死活就是挂载不上samba服务器上的文件,在输入mount挂载命令的时候提示只读什么的,尝试了在挂载的时候用只读的方式去挂载也是不行,最终发现了,缺少安装cifs包, ...
- 学Python的第五天
最近忙着学MySQL,但是小编也不会放弃学Python!!! 因为热爱所以学习~ 好了各位,进入正题,由于时间问题今天学的不是很多.... #!/usr/bin/env python # -*- co ...
- ivew 限制输入 0 到 1 的数字 包括小数, 0 ,1
input <FormItem label="> <Input v-model="formItem.shapeDifferen.breastScaleOutSpa ...
- thinkphp 数据库连接报错 SQLSTATE[HY000] [2002] No such file or directory
https://blog.csdn.net/tornge/article/details/51388233 找到mysql sokcet的路径 vim /etc/mysql/mysql.conf.d/ ...
- 从Excel粘到Word的图片只有下面一半
把图片粘贴到WORD上为什么只显示最底下一部分? 出现此故障的原因,有可能是设置为固定值的文档行距小于图形的高度,从而导致插入的图形只显示出了一部分.所以要调整图片的段落格式中的行间距. 解决方法 选 ...
- 02.list--约瑟夫环
from fib import fib # 参考01.线性表 def josephus_a(n, k, m): """ 约瑟夫环 没有人用0表示,n个人出列即结束 :pa ...
- 16.go语言基础学习(上)——2019年12月16日
2019年12月13日10:35:20 1.介绍 2019年10月31日15:09:03 2.基本语法 2.1 定义变量 2019年10月31日16:12:34 1.函数外必须使用var定义变量 va ...
- [BZOJ] 书堆
问题描述 蚂蚁是勤劳的动物,他们喜欢挑战极限?现在他们迎来了一个难题!蚂蚁居住在图书馆里,图书馆里有大量的书籍.书是形状大小质量都一样的矩形.蚂蚁要把这些书摆在水平桌子的边緣.蚂蚁喜欢整洁的布置,所以 ...
- 4412 移植x264并且YUV422转x264
转自http://blog.sina.com.cn/s/blog_af9acfc60101alxx.html 一.YUV422转换规律 做视频采集与处理,自然少不了要学会分析YUV数据.因为从采集的角 ...
- Nginx负载均衡与反向代理—《亿级流量网站架构核心技术》
当我们的应用单实例不能支撑用户请求时,此时就需要扩容,从一台服务器扩容到两台.几十台.几百台.然而,用户访问时是通过如http://www.XX.com的方式访问,在请求时,浏览器首先会查询DNS服务 ...