ActiveMQ (三) Spring整合JMS入门
Spring整合JMS入门
前提:安装好了ActiveMQ ActiveMQ安装
Demo结构:

生产者项目springjms_producer:
pom.xml
<?xml version="1.0" encoding="UTF-8"?>

<project xmlns="http://maven.apache.org/POM/4.0.0"

         xmlns:xsi="http://www.w3.org/2001/XMLSchema-instance"

         xsi:schemaLocation="http://maven.apache.org/POM/4.0.0 http://maven.apache.org/xsd/maven-4.0.0.xsd">

    <parent>

        <artifactId>project_demo</artifactId>

        <groupId>com.zy</groupId>

        <version>1.0-SNAPSHOT</version>

    </parent>

    <modelVersion>4.0.0</modelVersion>

    <artifactId>springjms_producer</artifactId>

    <dependencies>

        <dependency>

            <groupId>org.springframework</groupId>

            <artifactId>spring-jms</artifactId>

            <version>4.3.2.RELEASE</version>

        </dependency>

        <dependency>

            <groupId>org.apache.activemq</groupId>

            <artifactId>activemq-client</artifactId>

            <version>5.13.4</version>

        </dependency>

        <dependency>

            <groupId>org.springframework</groupId>

            <artifactId>spring-test</artifactId>

            <version>4.3.2.RELEASE</version>

        </dependency>

        <dependency>

            <groupId>junit</groupId>

            <artifactId>junit</artifactId>

            <version>4.12</version>

        </dependency>

    </dependencies>

    <build>

        <plugins>

            <!-- java编译插件 -->

            <plugin>

                <groupId>org.apache.maven.plugins</groupId>

                <artifactId>maven-compiler-plugin</artifactId>

                <version>3.2</version>

                <configuration>

                    <source>1.8</source>

                    <target>1.8</target>

                    <encoding>UTF-8</encoding>

                </configuration>

            </plugin>

        </plugins>

    </build>

</project>
applicationContext-activemq-producer.xml
<?xml version="1.0" encoding="UTF-8"?>

<beans xmlns="http://www.springframework.org/schema/beans" xmlns:context="http://www.springframework.org/schema/context"

       xmlns:xsi="http://www.w3.org/2001/XMLSchema-instance"

       xsi:schemaLocation="http://www.springframework.org/schema/beans

        http://www.springframework.org/schema/beans/spring-beans.xsd

        http://www.springframework.org/schema/context

        http://www.springframework.org/schema/context/spring-context.xsd">

    <!--扫描提供者类 单元测试需要注入-->

    <context:component-scan base-package="com.zy.demo"></context:component-scan>

    <!-- 真正可以产生Connection的ConnectionFactory,由对应的 JMS服务厂商提供-->

    <bean id="targetConnectionFactory" class="org.apache.activemq.ActiveMQConnectionFactory">

        <property name="brokerURL" value="tcp://192.168.25.128:61616"/>

    </bean>

    <!-- Spring用于管理真正的ConnectionFactory的ConnectionFactory -->

    <bean id="connectionFactory" class="org.springframework.jms.connection.SingleConnectionFactory">

        <!-- 目标ConnectionFactory对应真实的可以产生JMS Connection的ConnectionFactory -->

        <property name="targetConnectionFactory" ref="targetConnectionFactory"/>

    </bean>

    <!-- Spring提供的JMS工具类,它可以进行消息发送、接收等 -->

    <bean id="jmsTemplate" class="org.springframework.jms.core.JmsTemplate">

        <!-- 这个connectionFactory对应的是我们定义的Spring提供的那个ConnectionFactory对象 -->

        <property name="connectionFactory" ref="connectionFactory"/>

    </bean>

    <!--这个是队列目的地,点对点的  文本信息-->

    <bean id="queueTextDestination" class="org.apache.activemq.command.ActiveMQQueue">

        <constructor-arg value="queue_text"/>

    </bean>

    <!--这个是订阅模式  文本信息-->

    <bean id="topicTextDestination" class="org.apache.activemq.command.ActiveMQTopic">

        <constructor-arg value="topic_text"/>

    </bean>

</beans>
点对点生产者QueueProducer:
package com.zy.demo;

import org.springframework.beans.factory.annotation.Autowired;

import org.springframework.jms.core.JmsTemplate;

import org.springframework.jms.core.MessageCreator;

import org.springframework.stereotype.Component;

import javax.jms.Destination;

import javax.jms.JMSException;

import javax.jms.Message;

import javax.jms.Session;

/**

 * 点对点模式 生产者

 */

@Component

public class QueueProducer {

    @Autowired

    private JmsTemplate jmsTemplate;

    @Autowired

    private Destination queueTextDestination;

    /**

     * 发送文本消息

     *

     * @param text

     */

    public void sendTextMessage(final String text) {

        jmsTemplate.send(queueTextDestination, new MessageCreator() {

            public Message createMessage(Session session) throws JMSException {

                return session.createTextMessage(text);

            }

        });

    }

}
发布订阅生产者TopicProducer:
package com.zy.demo;

import org.springframework.beans.factory.annotation.Autowired;

import org.springframework.jms.core.JmsTemplate;

import org.springframework.jms.core.MessageCreator;

import org.springframework.stereotype.Component;

import javax.jms.Destination;

import javax.jms.JMSException;

import javax.jms.Message;

import javax.jms.Session;

/**

 * 发布订阅模式 生产者

 */

@Component

public class TopicProducer {

    @Autowired

    private JmsTemplate jmsTemplate;

    @Autowired

    private Destination topicTextDestination;

    /**

     * 发送文本消息

     */

    public void sendTextMessage(String text) {

        jmsTemplate.send(topicTextDestination, new MessageCreator() {

            public Message createMessage(Session session) throws JMSException {

                return session.createTextMessage(text);

            }

        });

    }

}
点对点生产者单元测试QueueProducerTest:
package com.zy.demo;

import org.junit.Test;

import org.junit.runner.RunWith;

import org.springframework.test.context.ContextConfiguration;

import org.springframework.test.context.junit4.SpringJUnit4ClassRunner;

import java.io.IOException;

import static org.junit.Assert.*;

@RunWith(SpringJUnit4ClassRunner.class)

@ContextConfiguration("classpath:spring/applicationContext-activemq-consumer.xml")

public class QueueMessageListenerTest {

    @Test

    public void onMessage() throws Exception {

        try {

            System.in.read();

        } catch (IOException e) {

            e.printStackTrace();

        }

    }

}
发布订阅生产者单元测试TopicProducerTest:
package com.zy.demo;

import org.junit.Test;

import org.junit.runner.RunWith;

import org.springframework.beans.factory.annotation.Autowired;

import org.springframework.test.context.ContextConfiguration;

import org.springframework.test.context.junit4.SpringJUnit4ClassRunner;

import static org.junit.Assert.*;

@RunWith(SpringJUnit4ClassRunner.class)

@ContextConfiguration("classpath:spring/applicationContext-activemq-producer.xml")

public class TopicProducerTest {

    @Autowired

    private TopicProducer topicProducer;

    @Test

    public void sendTextMessage() throws Exception {

        topicProducer.sendTextMessage("SpringJms发布订阅");

    }

}
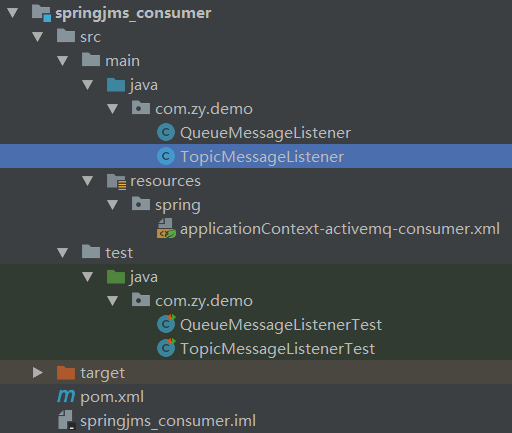
消费者项目springjms_consumer:
pom.xml
<?xml version="1.0" encoding="UTF-8"?>

<project xmlns="http://maven.apache.org/POM/4.0.0"

         xmlns:xsi="http://www.w3.org/2001/XMLSchema-instance"

         xsi:schemaLocation="http://maven.apache.org/POM/4.0.0 http://maven.apache.org/xsd/maven-4.0.0.xsd">

    <parent>

        <artifactId>project_demo</artifactId>

        <groupId>com.zy</groupId>

        <version>1.0-SNAPSHOT</version>

    </parent>

    <modelVersion>4.0.0</modelVersion>

    <artifactId>springjms_consumer</artifactId>

    <dependencies>

        <dependency>

            <groupId>org.springframework</groupId>

            <artifactId>spring-jms</artifactId>

            <version>4.3.2.RELEASE</version>

        </dependency>

        <dependency>

            <groupId>org.apache.activemq</groupId>

            <artifactId>activemq-client</artifactId>

            <version>5.13.4</version>

        </dependency>

        <dependency>

            <groupId>org.springframework</groupId>

            <artifactId>spring-test</artifactId>

            <version>4.3.2.RELEASE</version>

        </dependency>

        <dependency>

            <groupId>junit</groupId>

            <artifactId>junit</artifactId>

            <version>4.12</version>

        </dependency>

    </dependencies>

</project>
applicationContext-activemq-consumer.xml
<?xml version="1.0" encoding="UTF-8"?>

<beans xmlns="http://www.springframework.org/schema/beans" xmlns:xsi="http://www.w3.org/2001/XMLSchema-instance"

       xsi:schemaLocation="http://www.springframework.org/schema/beans

        http://www.springframework.org/schema/beans/spring-beans.xsd">

    <!-- 真正可以产生Connection的ConnectionFactory,由对应的 JMS服务厂商提供-->

    <bean id="targetConnectionFactory" class="org.apache.activemq.ActiveMQConnectionFactory">

        <property name="brokerURL" value="tcp://192.168.25.128:61616"/>

    </bean>

    <!-- Spring用于管理真正的ConnectionFactory的ConnectionFactory -->

    <bean id="connectionFactory" class="org.springframework.jms.connection.SingleConnectionFactory">

        <!-- 目标ConnectionFactory对应真实的可以产生JMS Connection的ConnectionFactory -->

        <property name="targetConnectionFactory" ref="targetConnectionFactory"/>

    </bean>

    <!--start-->

    <!--这个是队列目的地,点对点的  文本信息-->

    <bean id="queueTextDestination" class="org.apache.activemq.command.ActiveMQQueue">

        <constructor-arg value="queue_text"/>

    </bean>

    <!-- 我的监听类 -->

    <bean id="queueMessageListener" class="com.zy.demo.QueueMessageListener"></bean>

    <!-- 消息监听容器 -->

    <bean class="org.springframework.jms.listener.DefaultMessageListenerContainer">

        <property name="connectionFactory" ref="connectionFactory"/>

        <property name="destination" ref="queueTextDestination"/>

        <property name="messageListener" ref="queueMessageListener"/>

    </bean>

    <!--end-->

    <!--start-->

    <!--这个是队列目的地,点对点的  文本信息-->

    <bean id="topicTextDestination" class="org.apache.activemq.command.ActiveMQTopic">

        <constructor-arg value="topic_text"/>

    </bean>

    <!-- 我的监听类 -->

    <bean id="topicMessageListener" class="com.zy.demo.TopicMessageListener"></bean>

    <!-- 消息监听容器 -->

    <bean class="org.springframework.jms.listener.DefaultMessageListenerContainer">

        <property name="connectionFactory" ref="connectionFactory"/>

        <property name="destination" ref="topicTextDestination"/>

        <property name="messageListener" ref="topicMessageListener"/>

    </bean>

    <!--end-->

</beans>
点对点消费者QueueMessageListener:
package com.zy.demo;

import org.springframework.stereotype.Component;

import javax.jms.JMSException;

import javax.jms.Message;

import javax.jms.MessageListener;

import javax.jms.TextMessage;

/**

 * 点对点模式 消费者

 */

@Component

public class QueueMessageListener implements MessageListener {

    public void onMessage(Message message) {

        TextMessage textMessage = (TextMessage) message;

        try {

            System.out.println("接收到消息:" + textMessage.getText());

        } catch (JMSException e) {

            e.printStackTrace();

        }

    }

}
发布订阅消费者TopicMessageListener:
package com.zy.demo;

import org.springframework.stereotype.Component;

import javax.jms.JMSException;

import javax.jms.Message;

import javax.jms.MessageListener;

import javax.jms.TextMessage;

/**

 * 发布订阅模式 消费者

 */

@Component

public class TopicMessageListener implements MessageListener {

    public void onMessage(Message message) {

        TextMessage textMessage = (TextMessage) message;

        try {

            System.out.println("接收到消息:" + textMessage.getText());

        } catch (JMSException e) {

            e.printStackTrace();

        }

    }

}
点对点消费者单元测试QueueMessageListenerTest:
package com.zy.demo;

import org.junit.Test;

import org.junit.runner.RunWith;

import org.springframework.test.context.ContextConfiguration;

import org.springframework.test.context.junit4.SpringJUnit4ClassRunner;

import java.io.IOException;

import static org.junit.Assert.*;

@RunWith(SpringJUnit4ClassRunner.class)

@ContextConfiguration("classpath:spring/applicationContext-activemq-consumer.xml")

public class QueueMessageListenerTest {

    @Test

    public void onMessage() throws Exception {

        try {

            System.in.read();

        } catch (IOException e) {

            e.printStackTrace();

        }

    }

}
发布订阅消费者单元测试TopicMessageListenerTest:
package com.zy.demo;

import org.junit.Test;

import org.junit.runner.RunWith;

import org.springframework.test.context.ContextConfiguration;

import org.springframework.test.context.junit4.SpringJUnit4ClassRunner;

import java.io.IOException;

import static org.junit.Assert.*;

@RunWith(SpringJUnit4ClassRunner.class)

@ContextConfiguration("classpath:spring/applicationContext-activemq-consumer.xml")

public class TopicMessageListenerTest {

    @Test

    public void onMessage() throws Exception {

        try {

            System.in.read();

        } catch (IOException e) {

            e.printStackTrace();

        }

    }

}
ActiveMQ (三) Spring整合JMS入门的更多相关文章
- 消息中间件ActiveMQ及Spring整合JMS
一 .消息中间件的基本介绍 1.1 消息中间件 1.1.1 什么是消息中间件 消息中间件利用高效可靠的消息传递机制进行平台无关的数据交流,并基于数据通信来进行分布式系统的集成.通过提供消息传递和消息排 ...
- 消息中间件ActiveMQ及Spring整合JMS的介绍
一 .消息中间件的基本介绍 1.1 消息中间件 1.1.1 什么是消息中间件 消息中间件利用高效可靠的消息传递机制进行平台无关的数据交流,并基于数据通信来进行分布式系统的集成.通过提供消息传递和消息排 ...
- Spring整合JMS(二)——三种消息监听器
原文地址:http://haohaoxuexi.iteye.com/blog/1893676 1.3 消息监听器MessageListener 在Spring整合JMS的应用中我们在定义消息监 ...
- Spring整合JMS(二)——三种消息监听器(转)
*注:别人那复制来的 1.3 消息监听器MessageListener 在Spring整合JMS的应用中我们在定义消息监听器的时候一共可以定义三种类型的消息监听器,分别是MessageList ...
- Spring整合JMS(一)——基于ActiveMQ实现 (转)
*注:别人那复制来的 1.1 JMS简介 JMS的全称是Java Message Service,即Java消 息服务.它主要用于在生产者和消费者之间进行消息传递,生产者负责产生消息,而消费者 ...
- Spring整合JMS(一)——基于ActiveMQ实现
1.1 JMS简介 JMS的全称是Java Message Service,即Java消息服务.它主要用于在生产者和消费者之间进行消息传递,生产者负责产生消息,而消费者负责接收消息.把它应用到 ...
- Spring整合JMS(四)——事务管理
原文链接:http://haohaoxuexi.iteye.com/blog/1983532 Spring提供了一个JmsTransactionManager用于对JMS ConnectionFact ...
- Spring整合JMS——事务管理
Spring提供了一个JmsTransactionManager用于对JMS ConnectionFactory做事务管理.这将允许JMS应用利用Spring的事务管理特性.JmsTransactio ...
- Spring整合JMS(四)——事务管理(转)
*注:别人那复制来的 Spring提供了一个JmsTransactionManager用于对JMS ConnectionFactory做事务管理.这将允许JMS应用利用Spring的事务管理特性.Jm ...
随机推荐
- spring boot 基础篇 -- 集成接口测试Swagger
一.在pom.xml加入Swagger jar包引入 <dependency> <groupId>io.springfox</groupId> <artifa ...
- Chrome Adobe flash player已过期怎么办
越来越多的朋友感受到了来自谷歌chrome新版浏览器的压力,因为有不少朋友在使用新版chrome浏览器看视频时,却出现了这样的提示:Adobe flash player已过期!怎么办啊? 有网友抱怨: ...
- run as android application过程
1.打包 >> 把所有的class打包成为classes.dex >> AndroidManifest.xml 打包成二进制文件 >> res目录下面的文件打包到r ...
- MyISAM引擎的特点及优化方法
1.什么是MyISAM引擎?MyISAM引擎是MySQL关系数据库管理系统的默认存储引擎(MySQL5.5.5以前),这种MySQL的表存储结构从旧的ISAM代码扩展出许多有用的功能.在存储的时候,每 ...
- VC6常用插件
VC6常用插件 2009-10-09 17:27 1.Visual Assist(强烈推荐) http://www.wholetomato.com/ VA从5.0一直到现在的VAX,功能 ...
- tensorflow中创建多个计算图(Graph)
tf程序中,系统会自动创建并维护一个默认的计算图,计算图可以理解为神经网络(Neural Network)结构的程序化描述.如果不显式指定所归属的计算图,则所有的tensor和Operation都是在 ...
- UVA - 11019 Matrix Matcher (二维字符串哈希)
给你一个n*m的矩阵,和一个x*y的模式矩阵,求模式矩阵在原矩阵中的出现次数. 看上去是kmp在二维情况下的版本,但单纯的kmp已经无法做到了,所以考虑字符串哈希. 类比一维情况下的哈希算法,利用容斥 ...
- HihoCoder1139 二分·二分答案
描述 在上一回和上上回里我们知道Nettle在玩<艦これ>,Nettle在整理好舰队之后终于准备出海捞船和敌军交战了.在这个游戏里面,海域是N个战略点(编号1..N)组成,如下图所示其中红 ...
- Spark入门实战系列
转自:http://www.cnblogs.com/shishanyuan/p/4699644.html 这一两年Spark技术很火,自己也凑热闹,反复的试验.研究,有痛苦万分也有欣喜若狂,抽空把这些 ...
- shell while的用法
1. #!/bin/shint=1while (( "$int < 10" ))doecho "$int"let "int++"don ...