nginx tomcat负载均衡 使用redis session共享
环境准备
1、准备一台nginx服务器 ip192.168.1.133 端口81
安装过程:
#首先安装依赖:

yum -y install gcc-c++

yum -y install pcre pcre-devel

yum -y install zlib zlib-devel

yum -y install openssl openssl—devel

#注意 : 安装nginx必须使用 root 用户安装

#创建一个nginx目录

mkdir /usr/local/src/nginx

#进入到nginx目录

cd /usr/local/src/nginx

#下载或上传安装包

wget http://nginx.org/download/nginx.tar.gz 或 rz上传

#解压安装包

tar -xvf nginx.tar.gz

#进入到解压后的目录

cd nginx

# 下面 才开始正式安装

#把nginx安装到指定用户的目录

mkdir -p /ucenter/soft/nginx

#安装配置  prefix为安装目录 user为用户 group为 组

./configure --prefix=/ucenter/soft/nginx --user=ucenter --group=ucenter

#编译

make

#安装

make install

#在linux系统中由于非root用户不能占用80端口,所以需要使普通用户以root身份启动nginx。

cd /ucenter/soft/nginx/sbin

#把soft文件下所有的文件所属者修改为ucener  -R 表示递归

chown ucenter:ucenter ./soft/ -R

#修改 ./nginx 的所属为root

chown root nginx

#让普通用户可以使用80端口,可以使用root权限启用nginx

chmod u+s nginx

#修改配置文件 在修改配置文件之前 ,要备份该文件

cd conf/

# 要注意nginx 的工作进程,一般根据cpu的核数去修改

vim nginx.conf

#关闭防火墙,打开80端口

service iptables stop

#启动nginx

./nginx

#重启nginx

./nginx -s reload

#关闭nginx

./nginx -s stop
准备一台tomcat服务器,先准备java环境,安装jdk步骤省略
然后分别安装3个tomcat 服务器ip地址:192.168.1.143,tomcat1 8080端口,tomcat2 8081端口,tomcat3 8082端口。
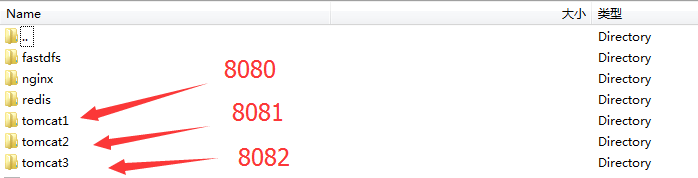
apache-tomcat-7.0.64/conf/server.xml配置文件修改这三个地方,这样端口就不会冲突
<Server port="8005" shutdown="SHUTDOWN">

<Connector port="8080" protocol="HTTP/1.1"

connectionTimeout="20000"

redirectPort="8443" />

<Connector port="8009" protocol="AJP/1.3" redirectPort="8443" />
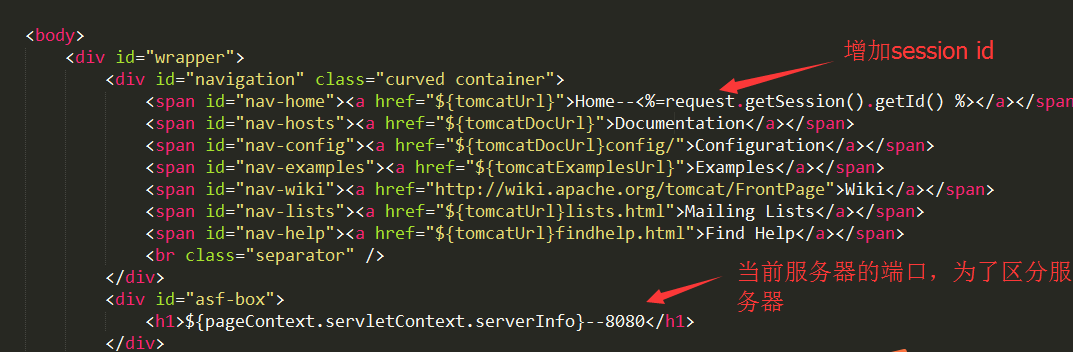
修改tomcat ROOT目录下index.jsp,分别增加每个tomcat的标识,以及在页面上显示session ID
<%--
Licensed to the Apache Software Foundation (ASF) under one or more
contributor license agreements. See the NOTICE file distributed with
this work for additional information regarding copyright ownership.
The ASF licenses this file to You under the Apache License, Version 2.0
(the "License"); you may not use this file except in compliance with
the License. You may obtain a copy of the License at http://www.apache.org/licenses/LICENSE-2.0 Unless required by applicable law or agreed to in writing, software
distributed under the License is distributed on an "AS IS" BASIS,
WITHOUT WARRANTIES OR CONDITIONS OF ANY KIND, either express or implied.
See the License for the specific language governing permissions and
limitations under the License.
--%>
<!DOCTYPE html>
<%@ page session="true" %>
<%
java.text.SimpleDateFormat sdf = new java.text.SimpleDateFormat("yyyy");
request.setAttribute("year", sdf.format(new java.util.Date()));
request.setAttribute("tomcatUrl", "http://tomcat.apache.org/");
request.setAttribute("tomcatDocUrl", "/docs/");
request.setAttribute("tomcatExamplesUrl", "/examples/");
%>
<html lang="en">
<head>
<title><%=request.getServletContext().getServerInfo() %></title>
<link href="favicon.ico" rel="icon" type="image/x-icon" />
<link href="favicon.ico" rel="shortcut icon" type="image/x-icon" />
<link href="tomcat.css" rel="stylesheet" type="text/css" />
</head> <body>
<div id="wrapper">
<div id="navigation" class="curved container">
<span id="nav-home"><a href="${tomcatUrl}">Home--<%=request.getSession().getId() %></a></span>
<span id="nav-hosts"><a href="${tomcatDocUrl}">Documentation</a></span>
<span id="nav-config"><a href="${tomcatDocUrl}config/">Configuration</a></span>
<span id="nav-examples"><a href="${tomcatExamplesUrl}">Examples</a></span>
<span id="nav-wiki"><a href="http://wiki.apache.org/tomcat/FrontPage">Wiki</a></span>
<span id="nav-lists"><a href="${tomcatUrl}lists.html">Mailing Lists</a></span>
<span id="nav-help"><a href="${tomcatUrl}findhelp.html">Find Help</a></span>
<br class="separator" />
</div>
<div id="asf-box">
<h1>${pageContext.servletContext.serverInfo}--8080</h1>
</div>
<div id="upper" class="curved container">
<div id="congrats" class="curved container">
<h2>If you're seeing this, you've successfully installed Tomcat. Congratulations!</h2>
</div>
<div id="notice">
<img src="tomcat.png" alt="[tomcat logo]" />
<div id="tasks">
<h3>Recommended Reading:</h3>
<h4><a href="${tomcatDocUrl}security-howto.html">Security Considerations HOW-TO</a></h4>
<h4><a href="${tomcatDocUrl}manager-howto.html">Manager Application HOW-TO</a></h4>
<h4><a href="${tomcatDocUrl}cluster-howto.html">Clustering/Session Replication HOW-TO</a></h4>
</div>
</div>
<div id="actions">
<div class="button">
<a class="container shadow" href="/manager/status"><span>Server Status</span></a>
</div>
<div class="button">
<a class="container shadow" href="/manager/html"><span>Manager App</span></a>
</div>
<div class="button">
<a class="container shadow" href="/host-manager/html"><span>Host Manager</span></a>
</div>
</div>
<!--
<br class="separator" />
-->
<br class="separator" />
</div>
<div id="middle" class="curved container">
<h3>Developer Quick Start</h3>
<div class="col25">
<div class="container">
<p><a href="${tomcatDocUrl}setup.html">Tomcat Setup</a></p>
<p><a href="${tomcatDocUrl}appdev/">First Web Application</a></p>
</div>
</div>
<div class="col25">
<div class="container">
<p><a href="${tomcatDocUrl}realm-howto.html">Realms & AAA</a></p>
<p><a href="${tomcatDocUrl}jndi-datasource-examples-howto.html">JDBC DataSources</a></p>
</div>
</div>
<div class="col25">
<div class="container">
<p><a href="${tomcatExamplesUrl}">Examples</a></p>
</div>
</div>
<div class="col25">
<div class="container">
<p><a href="http://wiki.apache.org/tomcat/Specifications">Servlet Specifications</a></p>
<p><a href="http://wiki.apache.org/tomcat/TomcatVersions">Tomcat Versions</a></p>
</div>
</div>
<br class="separator" />
</div>
<div id="lower">
<div id="low-manage" class="">
<div class="curved container">
<h3>Managing Tomcat</h3>
<p>For security, access to the <a href="/manager/html">manager webapp</a> is restricted.
Users are defined in:</p>
<pre>$CATALINA_HOME/conf/tomcat-users.xml</pre>
<p>In Tomcat 7.0 access to the manager application is split between
different users. <a href="${tomcatDocUrl}manager-howto.html">Read more...</a></p>
<br />
<h4><a href="${tomcatDocUrl}RELEASE-NOTES.txt">Release Notes</a></h4>
<h4><a href="${tomcatDocUrl}changelog.html">Changelog</a></h4>
<h4><a href="${tomcatUrl}migration.html">Migration Guide</a></h4>
<h4><a href="${tomcatUrl}security.html">Security Notices</a></h4>
</div>
</div>
<div id="low-docs" class="">
<div class="curved container">
<h3>Documentation</h3>
<h4><a href="${tomcatDocUrl}">Tomcat 7.0 Documentation</a></h4>
<h4><a href="${tomcatDocUrl}config/">Tomcat 7.0 Configuration</a></h4>
<h4><a href="http://wiki.apache.org/tomcat/FrontPage">Tomcat Wiki</a></h4>
<p>Find additional important configuration information in:</p>
<pre>$CATALINA_HOME/RUNNING.txt</pre>
<p>Developers may be interested in:</p>
<ul>
<li><a href="http://tomcat.apache.org/bugreport.html">Tomcat 7.0 Bug Database</a></li>
<li><a href="${tomcatDocUrl}api/index.html">Tomcat 7.0 JavaDocs</a></li>
<li><a href="http://svn.apache.org/repos/asf/tomcat/tc7.0.x/">Tomcat 7.0 SVN Repository</a></li>
</ul>
</div>
</div>
<div id="low-help" class="">
<div class="curved container">
<h3>Getting Help</h3>
<h4><a href="${tomcatUrl}faq/">FAQ</a> and <a href="${tomcatUrl}lists.html">Mailing Lists</a></h4>
<p>The following mailing lists are available:</p>
<ul>
<li id="list-announce"><strong><a href="${tomcatUrl}lists.html#tomcat-announce">tomcat-announce</a><br />
Important announcements, releases, security vulnerability notifications. (Low volume).</strong>
</li>
<li><a href="${tomcatUrl}lists.html#tomcat-users">tomcat-users</a><br />
User support and discussion
</li>
<li><a href="${tomcatUrl}lists.html#taglibs-user">taglibs-user</a><br />
User support and discussion for <a href="${tomcatUrl}taglibs/">Apache Taglibs</a>
</li>
<li><a href="${tomcatUrl}lists.html#tomcat-dev">tomcat-dev</a><br />
Development mailing list, including commit messages
</li>
</ul>
</div>
</div>
<br class="separator" />
</div>
<div id="footer" class="curved container">
<div class="col20">
<div class="container">
<h4>Other Downloads</h4>
<ul>
<li><a href="${tomcatUrl}download-connectors.cgi">Tomcat Connectors</a></li>
<li><a href="${tomcatUrl}download-native.cgi">Tomcat Native</a></li>
<li><a href="${tomcatUrl}taglibs/">Taglibs</a></li>
<li><a href="${tomcatDocUrl}deployer-howto.html">Deployer</a></li>
</ul>
</div>
</div>
<div class="col20">
<div class="container">
<h4>Other Documentation</h4>
<ul>
<li><a href="${tomcatUrl}connectors-doc/">Tomcat Connectors</a></li>
<li><a href="${tomcatUrl}connectors-doc/">mod_jk Documentation</a></li>
<li><a href="${tomcatUrl}native-doc/">Tomcat Native</a></li>
<li><a href="${tomcatDocUrl}deployer-howto.html">Deployer</a></li>
</ul>
</div>
</div>
<div class="col20">
<div class="container">
<h4>Get Involved</h4>
<ul>
<li><a href="${tomcatUrl}getinvolved.html">Overview</a></li>
<li><a href="${tomcatUrl}svn.html">SVN Repositories</a></li>
<li><a href="${tomcatUrl}lists.html">Mailing Lists</a></li>
<li><a href="http://wiki.apache.org/tomcat/FrontPage">Wiki</a></li>
</ul>
</div>
</div>
<div class="col20">
<div class="container">
<h4>Miscellaneous</h4>
<ul>
<li><a href="${tomcatUrl}contact.html">Contact</a></li>
<li><a href="${tomcatUrl}legal.html">Legal</a></li>
<li><a href="http://www.apache.org/foundation/sponsorship.html">Sponsorship</a></li>
<li><a href="http://www.apache.org/foundation/thanks.html">Thanks</a></li>
</ul>
</div>
</div>
<div class="col20">
<div class="container">
<h4>Apache Software Foundation</h4>
<ul>
<li><a href="${tomcatUrl}whoweare.html">Who We Are</a></li>
<li><a href="${tomcatUrl}heritage.html">Heritage</a></li>
<li><a href="http://www.apache.org">Apache Home</a></li>
<li><a href="${tomcatUrl}resources.html">Resources</a></li>
</ul>
</div>
</div>
<br class="separator" />
</div>
<p class="copyright">Copyright ©1999-${year} Apache Software Foundation. All Rights Reserved</p>
</div>
</body> </html>
这时候 修改nginx配置文件nginx.conf,把三台tomcat的ip地址以及端口号加入进去,使用nginx做代理
#user  nobody;

worker_processes  1;

#error_log  logs/error.log;

#error_log  logs/error.log  notice;

#error_log  logs/error.log  info;

#pid        logs/nginx.pid;

events {

    worker_connections  1024;

}

http {

    include       mime.types;

    default_type  application/octet-stream;

    #log_format  main  '$remote_addr - $remote_user [$time_local] "$request" '

    #                  '$status $body_bytes_sent "$http_referer" '

    #                  '"$http_user_agent" "$http_x_forwarded_for"';

    #access_log  logs/access.log  main;

    sendfile        on;

    #tcp_nopush     on;

    #keepalive_timeout  0;

    keepalive_timeout  65;

    #gzip  on;

    upstream localhost1 {

          #ip_hash;

           server 192.168.1.143:8080;

           server 192.168.1.143:8081;

         server 192.168.1.143:8082;

    }

    server {

        listen       81;

        server_name  localhost;

        #charset koi8-r;

        #access_log  logs/host.access.log  main;

        location / {

             proxy_connect_timeout   3;

             proxy_send_timeout      30;

             proxy_read_timeout      30;

             proxy_pass http://localhost1;

        }

        #error_page  404              /404.html;

        # redirect server error pages to the static page /50x.html

        #

        error_page   500 502 503 504  /50x.html;

        location = /50x.html {

            root   html;

        }

        # proxy the PHP scripts to Apache listening on 127.0.0.1:80

        #

        #location ~ \.php$ {

        #    proxy_pass   http://127.0.0.1;

        #}

        # pass the PHP scripts to FastCGI server listening on 127.0.0.1:9000

        #

        #location ~ \.php$ {

        #    root           html;

        #    fastcgi_pass   127.0.0.1:9000;

        #    fastcgi_index  index.php;

        #    fastcgi_param  SCRIPT_FILENAME  /scripts$fastcgi_script_name;

        #    include        fastcgi_params;

        #}

        # deny access to .htaccess files, if Apache's document root

        # concurs with nginx's one

        #

        #location ~ /\.ht {

        #    deny  all;

        #}

    }

    # another virtual host using mix of IP-, name-, and port-based configuration

    #

    #server {

    #    listen       8000;

    #    listen       somename:8080;

    #    server_name  somename  alias  another.alias;

    #    location / {

    #        root   html;

    #        index  index.html index.htm;

    #    }

    #}

    # HTTPS server

    #

    #server {

    #    listen       443;

    #    server_name  localhost;

    #    ssl                  on;

    #    ssl_certificate      cert.pem;

    #    ssl_certificate_key  cert.key;

    #    ssl_session_timeout  5m;

    #    ssl_protocols  SSLv2 SSLv3 TLSv1;

    #    ssl_ciphers  HIGH:!aNULL:!MD5;

    #    ssl_prefer_server_ciphers   on;

    #    location / {

    #        root   html;

    #        index  index.html index.htm;

    #    }

    #}

}
这时候,分别启动三台tomcat以及nginx,访问http://192.168.1.133:81,这时候每次刷新页面,都会随机访问8080或者8081或者8082,而且页面上出现的session id也都是不一样的,我们应该如何让这三台tomcat共享session呢,我们使用redis来做。
这时候,在已经按照三台tomcat的服务器192.168.1.143上,安装redis,安装步骤如下:
$ wget http://download.redis.io/releases/redis-3.2.3.tar.gz

$ tar xzf redis-3.2.3.tar.gz

$ cd redis-3.2.3

$ make MALLOC=libc

#启动redis  src前面是安装的路径

$ src/redis-server &

#关闭redis

src/redis-cli shutdown
#使用redis 放入键值对 key value

$ src/redis-cli

127.0.0.1:6379> set foo bar

OK

127.0.0.1:6379> get foo

"bar"

$
安装完redis之后,在三个tomcat的lib文件夹内分别上传这五个所依赖的jar,分别是
commons-pool2-2.0.jar
jedis-2.5.2.jar
tomcat-redis-session-manager1.2.jar
tomcat-juli.jar
tomcat-juli-adapters.jar
所有jar我上传到博客园里了,下载地址:
http://files.cnblogs.com/files/jiafuwei/tomcat_redis_session%E5%85%B1%E4%BA%ABjar.rar
复制该链接,即可下载,如果有问题,可以及时联系我。
然后分别修个三个tomcat的context.xml文件,增加如下的配置
<?xml version='1.0' encoding='utf-8'?>

<Context>

    <!-- Default set of monitored resources -->

    <WatchedResource>WEB-INF/web.xml</WatchedResource>

   <!-- 这里增加redis session共享的配置 6379是redis的端口-->

   <Valve className="com.orangefunction.tomcat.redissessions.RedisSessionHandlerValve" />

   <Manager className="com.orangefunction.tomcat.redissessions.RedisSessionManager"

   host="127.0.0.1"

   port="6379"

   database="0"

   maxInactiveInterval="60" />

</Context>
这时候,分别重启三个tomcat以及nginx,查看tomcat日志之后,发现没有任何异常报错,说明我们成功了,接下来开始测试。
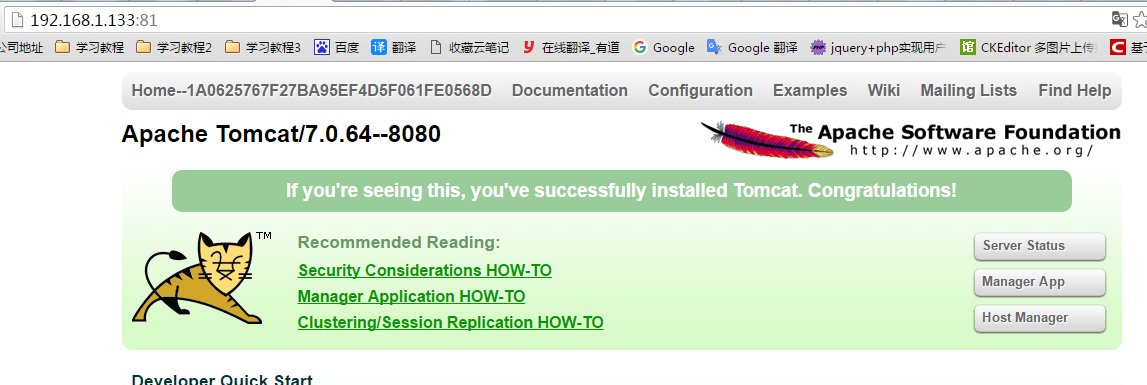
我们访问nginx服务器地址:http://192.168.1.133:81/
得到的是8080端口的 tomcat1 ,session id为1A0625767F27BA95EF4D5F061FE0568D
这时候按F5刷新页面,得到的是8081端口的 tomcat2 ,session id依旧是 1A0625767F27BA95EF4D5F061FE0568D
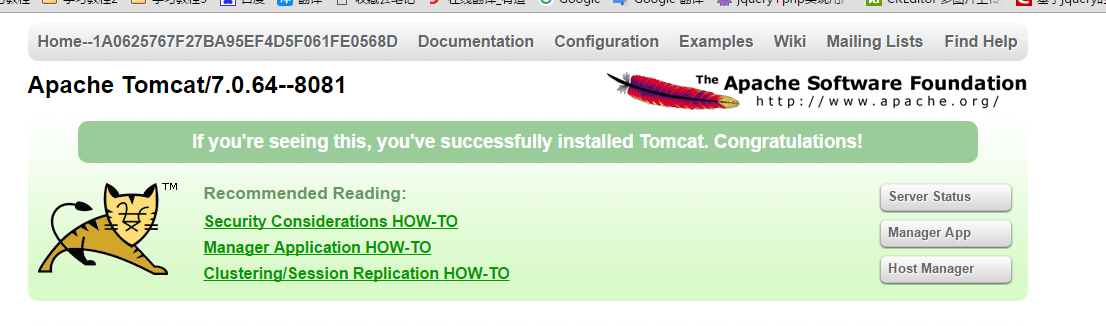
再次刷新页面,得到的是8082端口的 tomcat3,session id依旧是 1A0625767F27BA95EF4D5F061FE0568D。
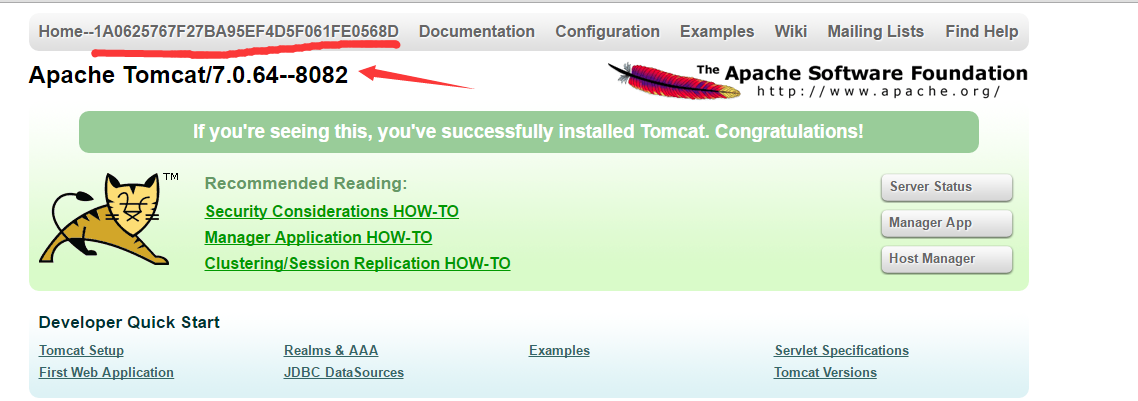
这时候,说明我们搭建tomcat + nginx负载均衡 + redis session同步成功啦!
nginx帮助把我们的请求均匀的分发给三个tomcat --》tomcat1 、tomcat2以及tomcat3
redis帮助我们同步session,这样一来,我们的服务器性能就会提高许多,任何一台tomcat发生故障后,对整体的服务都不会有影响了。
nginx tomcat负载均衡 使用redis session共享的更多相关文章
- Nginx反向代理,负载均衡,redis session共享,keepalived高可用
相关知识自行搜索,直接上干货... 使用的资源: nginx主服务器一台,nginx备服务器一台,使用keepalived进行宕机切换. tomcat服务器两台,由nginx进行反向代理和负载均衡,此 ...
- linux+nginx+tomcat负载均衡,实现session同步
linux+nginx+tomcat负载均衡,实现session同步 花了一个上午的时间研究nginx+tomcat的负载均衡测试,集群环境搭建比较顺利,但是session同步的问题折腾了几个小时才搞 ...
- 如何运用PHP+REDIS解决负载均衡后的session共享问题
一.为什么要使用Session共享? 稍大一些的网站,通常都会有好几个服务器,每个服务器运行着不同功能的模块,使用不同的二级域名,而一个整体性强的网站,用户系统是统一的,即一套用户名.密码在整个网站的 ...
- nginx+tomcat负载均衡
最近练习nginx+tomcat负载均衡.根据一些资料整理了大体思路,最终实现了1个nginx+2个tomcat负载均衡. 安装JDK 1>进入安装目录,给所有用户添加可执行的权限 #chmod ...
- Nginx+Tomcat负载均衡、动静分离群集
Nginx+Tomcat负载均衡.动静分离群集 目录 Nginx+Tomcat负载均衡.动静分离群集 一.Tomcat 1. Tomcat简介 2. Tomcat重要目录 二.Nginx负载均衡原理 ...
- Nginx + Tomcat 负载均衡配置详解
Nginx常用操作指南一.Nginx 与 Tomcat 安装.配置及优化1. 检查和安装依赖项 yum -y install gcc pcre pcre-devel zlib zlib-devel o ...
- nginx+tomcat负载均衡和session复制
本文介绍下传统的tomcat负载均衡和session复制. session复制是基于JVM内存的,当然在当今的互联网大数据时代,有更好的替代方案,如将session数据保存在Redis中. 1.安装n ...
- nginx 之负载均衡 :PHP session 跨多台服务器配置
公司一个项目单点压力越来越大,考虑到稳定性和降压,使用nginx做负载均衡,将请求分发到多个docker上去,这里记录下PHP多服务器间的会话session共享问题,解决方案是把session单独存在 ...
- nginx+tomcat负载均衡策略
測试环境均为本地,測试软件为: nginx-1.6.0,apache-tomcat-7.0.42-1.apache-tomcat-7.0.42-2.apache-tomcat-7.0.42-3 利用n ...
随机推荐
- (转)零基础学习 Hadoop 该如何下手?
推荐一些Hadoop家族系列文章,主要介绍Hadoop家族产品,常用的项目包括Hadoop, Hive, Pig, HBase, Sqoop, Mahout, Zookeeper, Avro, Amb ...
- windows系统下用VScode配置远程编辑服务器文件的环境!通过Rmate方法
虽然公司电脑win可以通过Xshell通过SSH远程连接家中内网linux服务器了,但是只能用vim编辑文件有点不爽. 于是上网查询,windows下使用vscode远程编辑服务器文件的办法.参照博文 ...
- Numpy基础数据结构 python
Numpy基础数据结构 NumPy数组是一个多维数组对象,称为ndarray.其由两部分组成: 实际的数据 描述这些数据的元数据 1.一维数组 import numpy as np ar = np.a ...
- BZOJ 3027: [Ceoi2004]Sweet
容斥 #include<cstdio> using namespace std; int a,b,n,m[15]; long long ans=0,mod=2004; long long ...
- P2341 [HAOI2006]受欢迎的牛(tarjan+缩点)
P2341 [HAOI2006]受欢迎的牛 题目描述 每头奶牛都梦想成为牛棚里的明星.被所有奶牛喜欢的奶牛就是一头明星奶牛.所有奶 牛都是自恋狂,每头奶牛总是喜欢自己的.奶牛之间的“喜欢”是可以传递的 ...
- 使用Autofac实现依赖注入注入
依赖注入是什么意思? 依赖倒置 在软件设计原则中,有一种重要的思想叫做依赖倒置.它的核心思想是:不能让高层组件依赖底层组件,而且,不管高层组件和底层组件,两者都应依赖于抽象.那么,这个原则和我们上面的 ...
- Maven学习 (六) 搭建多模块企业级项目
首先,前面几次学习已经学会了安装maven,如何创建maven项目等,最近的学习,终于有点进展了,搭建一下企业级多模块项目. 好了,废话不多说,具体如下: 首先新建一个maven项目,pom.xml的 ...
- 利用socket.io构建一个聊天室
利用socket.io来构建一个聊天室,输入自己的id和消息,所有的访问用户都可以看到,类似于群聊. socket.io 这里只用来做一个简单的聊天室,官网也有例子,很容易就做出来了.其实主要用的东西 ...
- [转载]Network-Emulator Network-Emulato
Network-Emulator-Toolkit网络模拟器使用详细介绍 by:授客 QQ:1033553122 原理介绍 图1 如上图,一个ADSL用户通过modem连接到网络,通过网络应用如IE,M ...
- 孤荷凌寒自学python第六十二天学习mongoDB的基本操作并进行简单封装1
孤荷凌寒自学python第六十二天学习mongoDB的基本操作并进行简单封装1 (完整学习过程屏幕记录视频地址在文末) 今天是学习mongoDB数据库的第八天. 今天开始学习mongoDB的简单操作, ...