Opencv + opencv_contrib + Tesseract 之Qt开发环境搭建
1.软件包准备
- opencv源码包地址: 官网 github
- opencv_contrib源码包地址: github
- Tesseract源码包地址: github
- cmake.exe 下载地址: 官网
- qt 下载地址: 官网
注意: opencv和open_contrib包的版本号要一致(比如都是3.4.0)
Tesseract源码安装参考: Win10 使用MinGW-w64编译Tesseract4.0
2. 在环境变量PATH中添加:
C:\Qt\Qt5.9.0\5.9\mingw53_32\bin

C:\Qt\Qt5.9.0\Tools\mingw530_32\bin
一方面方便日后在cmd中直接使用gcc、g++,qmake和mingw32-make
另一方面,方便下一步cmake查找Qt相关配置
3. 使用cmake生成解决方案
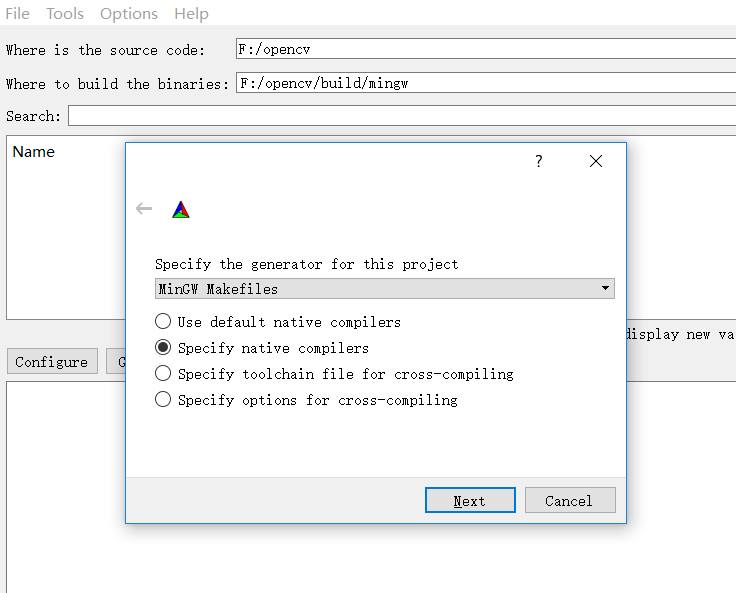

如果提示:

直接将 "CMAKE_SH"项删除即可。
修改配置如下:
- CMAKE_BUILD_TYPE: Debug或者Release
- CMAKE_INSTALL_PREFIX: 指定程序安装位置
- ENABLE_CXX11: 支持c11特性
- WITH_QT
- WITH_OPENGL
- OPENCV_EXTRA_MODULES_PATH: 若使用opencv_contrib模块,则在此处填写解压后的路径,如 F:\opencv_contrib\modules\
- Tesseract_INCLUDE_DIR: Tesseract头文件所在路径
- Tesseract_LIBRARY: Tesseract lib文件所在路径
- Lept_LIBRARY: leptonica lib文件所在路径 (很重要, 一定要配置,否则可能找不到Tesseract)
建议取消勾选:
- BUILD_DOCS :生成文档,需要安装Doxygen。官网提供了在线文档和离线文档。
- BUILD_PERF_TESTS: 性能测试相关
- BUILD_TESTS: 测试相关
- BUILD_opencv_ts :一些单元测试代码。
- INSTALL_TESTS :与开发无关。
配置截图:

Tesseract 相关:

Qt 相关: 
# 模块相关配置

OpenCV modules:

    To be built:                 aruco bgsegm bioinspired calib3d ccalib core datasets dnn dpm face features2d flann fuzzy highgui img_hash imgcodecs imgproc line_descriptor ml objdetect optflow phase_unwrapping photo plot reg rgbd saliency shape stereo stitching structured_light superres surface_matching text tracking video videoio videostab world xfeatures2d ximgproc xobjdetect xphoto

    Disabled:                    js python2 python_bindings_generator cvv

    Disabled by dependency:      -

    Unavailable:                 cnn_3dobj cudaarithm cudabgsegm cudacodec cudafeatures2d cudafilters cudaimgproc cudalegacy cudaobjdetect cudaoptflow cudastereo cudawarping cudev dnn_modern freetype hdf java matlab ovis python3 python3 sfm ts viz

    Applications:                apps

    Documentation:               NO

    Non-free algorithms:         NO
BUILD_opencv_world : 将.lib或者.dll文件统一整合进一个world文件中,方便使用。但若想只使用一部分模块可不勾选以减少体积
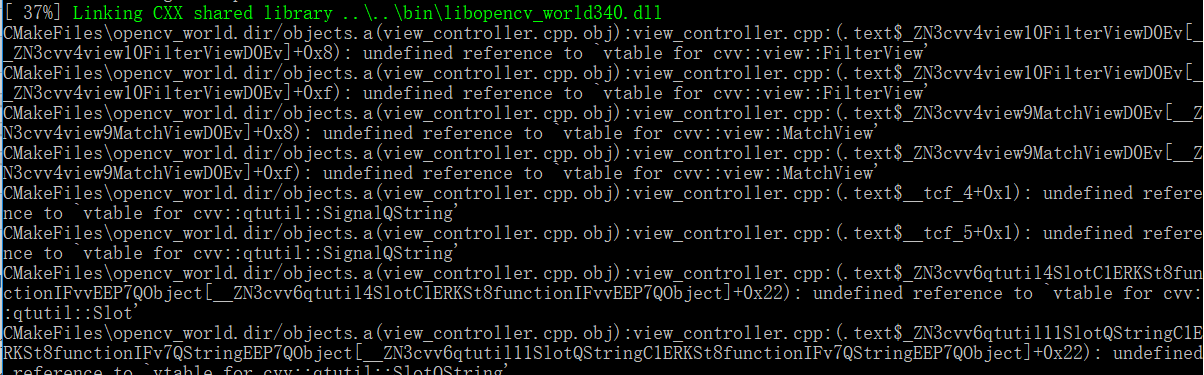
重要:
如果勾选BUILD_opencv_world, 就需要取消勾选BUILD_opencv_cvv,否则会出现以下错误
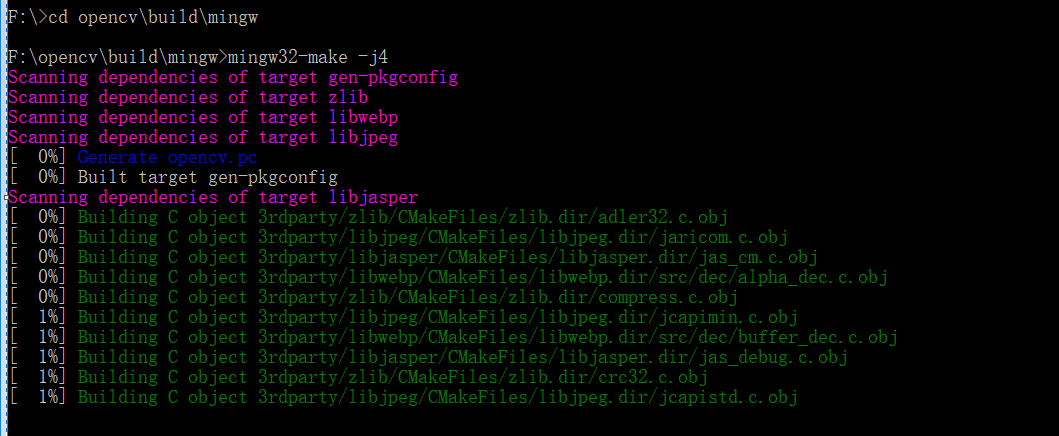
4.安装:

5. 遇到的问题:
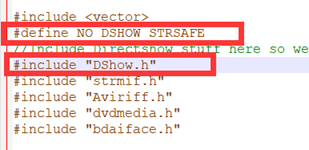
1) 'sprintf_instead_use_StringCbPrintfA_or_StringCchPrintfA' was not declared in this scope .

解决方法: 修改opencv源码目录中modules\videoio\src\cap_dshow.cpp, 找到#include "DShow.h",然后在其上面添加一行
release版本:
#define NO_DSHOW_STRSAFE
debug版本:
#define STRSAFE_NO_DEPRECATE
如下图:
2)
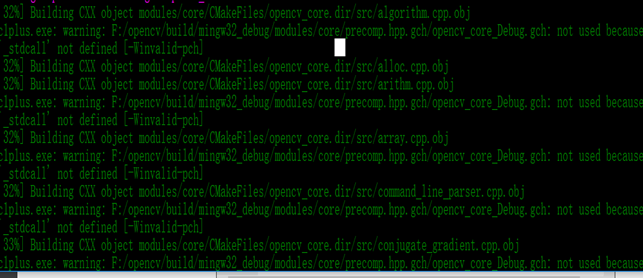
解决方法:
关闭预编译头, 取消勾选"ENABLE_PRECOMPILED_HEADERS"
参考: https://wiki.qt.io/How_to_setup_Qt_and_openCV_on_Windows
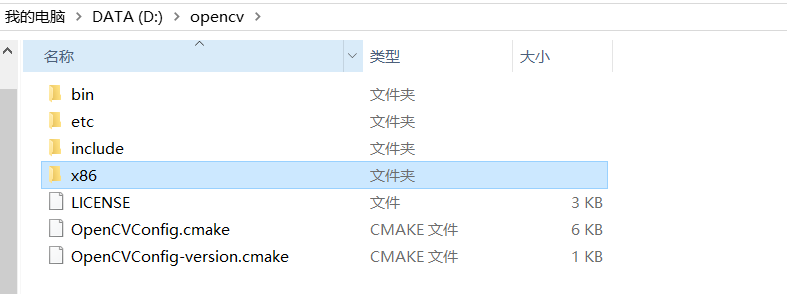
6.目录结构
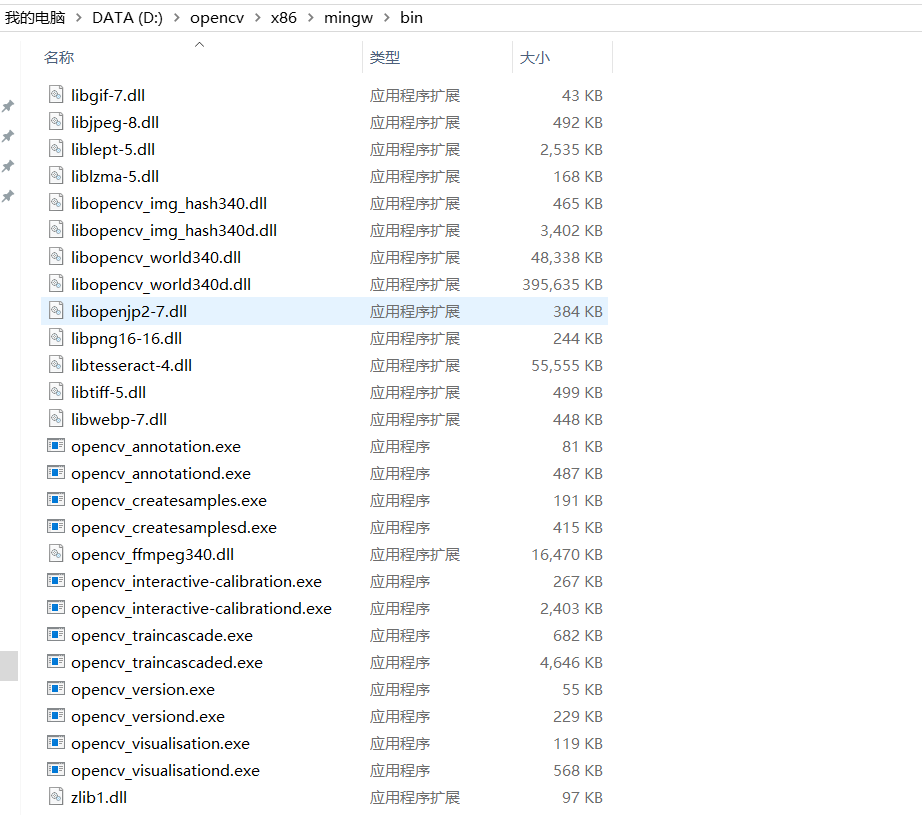
7. 向环境变量PATH中加入dll所在路径
D:\opencv\x86\mingw\bin
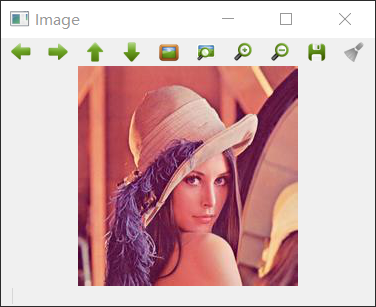
8. 测试
打开Qtcreator,创建一个c++项目。
测试1:
代码:
#include <opencv2/opencv.hpp>

using namespace cv;

int main()

{

    Mat im = imread("lena.png");

    namedWindow("Image");

    imshow("Image", im);

    waitKey();

    destroyWindow("Image");

    return ;

}
ShowImage.cpp
.pro配置文件:
TEMPLATE = app
CONFIG += console c++
CONFIG -= app_bundle
CONFIG -= qt SOURCES += main.cpp INCLUDEPATH += D:\opencv\include
CONFIG(debug, debug | release) {
LIBS += D:\opencv\x86\mingw\bin\libopencv_world340d.dll
} else {
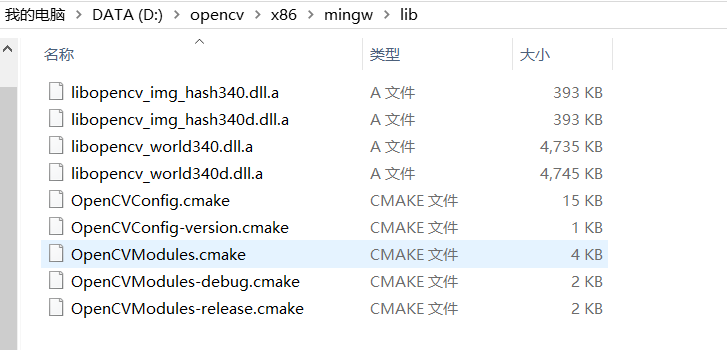
LIBS += -LD:\opencv\x86\mingw\lib -lopencv_world340
}
ShowImage.pro
效果:
测试2:
/*
* textdetection.cpp
*
* A demo program of End-to-end Scene Text Detection and Recognition:
* Shows the use of the Tesseract OCR API with the Extremal Region Filter algorithm described in:
* Neumann L., Matas J.: Real-Time Scene Text Localization and Recognition, CVPR 2012
*
* Created on: Jul 31, 2014
* Author: Lluis Gomez i Bigorda <lgomez AT cvc.uab.es>
*/ #include "opencv2/text.hpp"
#include "opencv2/core/utility.hpp"
#include "opencv2/highgui.hpp"
#include "opencv2/imgproc.hpp" #include <iostream> using namespace std;
using namespace cv;
using namespace cv::text; //Calculate edit distance between two words
size_t edit_distance(const string& A, const string& B);
size_t min(size_t x, size_t y, size_t z);
bool isRepetitive(const string& s);
bool sort_by_lenght(const string &a, const string &b);
//Draw ER's in an image via floodFill
void er_draw(vector<Mat> &channels, vector<vector<ERStat> > ®ions, vector<Vec2i> group, Mat& segmentation); //Perform text detection and recognition and evaluate results using edit distance
int main1(int argc, char* argv[])
{
cout << endl << argv[] << endl << endl;
cout << "A demo program of End-to-end Scene Text Detection and Recognition: " << endl;
cout << "Shows the use of the Tesseract OCR API with the Extremal Region Filter algorithm described in:" << endl;
cout << "Neumann L., Matas J.: Real-Time Scene Text Localization and Recognition, CVPR 2012" << endl << endl; Mat image; if(argc>)
image = imread(argv[]);
else
{
cout << " Usage: " << argv[] << " <input_image> [<gt_word1> ... <gt_wordN>]" << endl;
return();
} cout << "IMG_W=" << image.cols << endl;
cout << "IMG_H=" << image.rows << endl; /*Text Detection*/ // Extract channels to be processed individually
vector<Mat> channels; Mat grey;
cvtColor(image,grey,COLOR_RGB2GRAY); // Notice here we are only using grey channel, see textdetection.cpp for example with more channels
channels.push_back(grey);
channels.push_back(-grey); double t_d = (double)getTickCount();
// Create ERFilter objects with the 1st and 2nd stage default classifiers
Ptr<ERFilter> er_filter1 = createERFilterNM1(loadClassifierNM1("trained_classifierNM1.xml"),,0.00015f,0.13f,0.2f,true,0.1f);
Ptr<ERFilter> er_filter2 = createERFilterNM2(loadClassifierNM2("trained_classifierNM2.xml"),0.5); vector<vector<ERStat> > regions(channels.size());
// Apply the default cascade classifier to each independent channel (could be done in parallel)
for (int c=; c<(int)channels.size(); c++)
{
er_filter1->run(channels[c], regions[c]);
er_filter2->run(channels[c], regions[c]);
}
cout << "TIME_REGION_DETECTION = " << ((double)getTickCount() - t_d)*/getTickFrequency() << endl; Mat out_img_decomposition= Mat::zeros(image.rows+, image.cols+, CV_8UC1);
vector<Vec2i> tmp_group;
for (int i=; i<(int)regions.size(); i++)
{
for (int j=; j<(int)regions[i].size();j++)
{
tmp_group.push_back(Vec2i(i,j));
}
Mat tmp= Mat::zeros(image.rows+, image.cols+, CV_8UC1);
er_draw(channels, regions, tmp_group, tmp);
if (i > )
tmp = tmp / ;
out_img_decomposition = out_img_decomposition | tmp;
tmp_group.clear();
} double t_g = (double)getTickCount();
// Detect character groups
vector< vector<Vec2i> > nm_region_groups;
vector<Rect> nm_boxes;
erGrouping(image, channels, regions, nm_region_groups, nm_boxes,ERGROUPING_ORIENTATION_HORIZ);
cout << "TIME_GROUPING = " << ((double)getTickCount() - t_g)*/getTickFrequency() << endl; /*Text Recognition (OCR)*/ double t_r = (double)getTickCount();
Ptr<OCRTesseract> ocr = OCRTesseract::create();
cout << "TIME_OCR_INITIALIZATION = " << ((double)getTickCount() - t_r)*/getTickFrequency() << endl;
string output; Mat out_img;
Mat out_img_detection;
Mat out_img_segmentation = Mat::zeros(image.rows+, image.cols+, CV_8UC1);
image.copyTo(out_img);
image.copyTo(out_img_detection);
float scale_img = .f/image.rows;
float scale_font = (float)(-scale_img)/1.4f;
vector<string> words_detection; t_r = (double)getTickCount(); for (int i=; i<(int)nm_boxes.size(); i++)
{ rectangle(out_img_detection, nm_boxes[i].tl(), nm_boxes[i].br(), Scalar(,,), ); Mat group_img = Mat::zeros(image.rows+, image.cols+, CV_8UC1);
er_draw(channels, regions, nm_region_groups[i], group_img);
Mat group_segmentation;
group_img.copyTo(group_segmentation);
//image(nm_boxes[i]).copyTo(group_img);
group_img(nm_boxes[i]).copyTo(group_img);
copyMakeBorder(group_img,group_img,,,,,BORDER_CONSTANT,Scalar()); vector<Rect> boxes;
vector<string> words;
vector<float> confidences;
ocr->run(group_img, output, &boxes, &words, &confidences, OCR_LEVEL_WORD); output.erase(remove(output.begin(), output.end(), '\n'), output.end());
//cout << "OCR output = \"" << output << "\" length = " << output.size() << endl;
if (output.size() < )
continue; for (int j=; j<(int)boxes.size(); j++)
{
boxes[j].x += nm_boxes[i].x-;
boxes[j].y += nm_boxes[i].y-; //cout << " word = " << words[j] << "\t confidence = " << confidences[j] << endl;
if ((words[j].size() < ) || (confidences[j] < ) ||
((words[j].size()==) && (words[j][] == words[j][])) ||
((words[j].size()< ) && (confidences[j] < )) ||
isRepetitive(words[j]))
continue;
words_detection.push_back(words[j]);
rectangle(out_img, boxes[j].tl(), boxes[j].br(), Scalar(,,),);
Size word_size = getTextSize(words[j], FONT_HERSHEY_SIMPLEX, (double)scale_font, (int)(*scale_font), NULL);
rectangle(out_img, boxes[j].tl()-Point(,word_size.height+), boxes[j].tl()+Point(word_size.width,), Scalar(,,),-);
putText(out_img, words[j], boxes[j].tl()-Point(,), FONT_HERSHEY_SIMPLEX, scale_font, Scalar(,,),(int)(*scale_font));
out_img_segmentation = out_img_segmentation | group_segmentation;
} } cout << "TIME_OCR = " << ((double)getTickCount() - t_r)*/getTickFrequency() << endl; /* Recognition evaluation with (approximate) Hungarian matching and edit distances */ if(argc>)
{
int num_gt_characters = ;
vector<string> words_gt;
for (int i=; i<argc; i++)
{
string s = string(argv[i]);
if (s.size() > )
{
words_gt.push_back(string(argv[i]));
//cout << " GT word " << words_gt[words_gt.size()-1] << endl;
num_gt_characters += (int)(words_gt[words_gt.size()-].size());
}
} if (words_detection.empty())
{
//cout << endl << "number of characters in gt = " << num_gt_characters << endl;
cout << "TOTAL_EDIT_DISTANCE = " << num_gt_characters << endl;
cout << "EDIT_DISTANCE_RATIO = 1" << endl;
}
else
{ sort(words_gt.begin(),words_gt.end(),sort_by_lenght); int max_dist=;
vector< vector<int> > assignment_mat;
for (int i=; i<(int)words_gt.size(); i++)
{
vector<int> assignment_row(words_detection.size(),);
assignment_mat.push_back(assignment_row);
for (int j=; j<(int)words_detection.size(); j++)
{
assignment_mat[i][j] = (int)(edit_distance(words_gt[i],words_detection[j]));
max_dist = max(max_dist,assignment_mat[i][j]);
}
} vector<int> words_detection_matched; int total_edit_distance = ;
int tp=, fp=, fn=;
for (int search_dist=; search_dist<=max_dist; search_dist++)
{
for (int i=; i<(int)assignment_mat.size(); i++)
{
int min_dist_idx = (int)distance(assignment_mat[i].begin(),
min_element(assignment_mat[i].begin(),assignment_mat[i].end()));
if (assignment_mat[i][min_dist_idx] == search_dist)
{
//cout << " GT word \"" << words_gt[i] << "\" best match \"" << words_detection[min_dist_idx] << "\" with dist " << assignment_mat[i][min_dist_idx] << endl;
if(search_dist == )
tp++;
else { fp++; fn++; } total_edit_distance += assignment_mat[i][min_dist_idx];
words_detection_matched.push_back(min_dist_idx);
words_gt.erase(words_gt.begin()+i);
assignment_mat.erase(assignment_mat.begin()+i);
for (int j=; j<(int)assignment_mat.size(); j++)
{
assignment_mat[j][min_dist_idx]=INT_MAX;
}
i--;
}
}
} for (int j=; j<(int)words_gt.size(); j++)
{
//cout << " GT word \"" << words_gt[j] << "\" no match found" << endl;
fn++;
total_edit_distance += (int)words_gt[j].size();
}
for (int j=; j<(int)words_detection.size(); j++)
{
if (find(words_detection_matched.begin(),words_detection_matched.end(),j) == words_detection_matched.end())
{
//cout << " Detection word \"" << words_detection[j] << "\" no match found" << endl;
fp++;
total_edit_distance += (int)words_detection[j].size();
}
} //cout << endl << "number of characters in gt = " << num_gt_characters << endl;
cout << "TOTAL_EDIT_DISTANCE = " << total_edit_distance << endl;
cout << "EDIT_DISTANCE_RATIO = " << (float)total_edit_distance / num_gt_characters << endl;
cout << "TP = " << tp << endl;
cout << "FP = " << fp << endl;
cout << "FN = " << fn << endl;
}
} //resize(out_img_detection,out_img_detection,Size(image.cols*scale_img,image.rows*scale_img),0,0,INTER_LINEAR_EXACT);
//imshow("detection", out_img_detection);
//imwrite("detection.jpg", out_img_detection);
//resize(out_img,out_img,Size(image.cols*scale_img,image.rows*scale_img),0,0,INTER_LINEAR_EXACT);
namedWindow("recognition",WINDOW_NORMAL);
imshow("recognition", out_img);
waitKey();
//imwrite("recognition.jpg", out_img);
//imwrite("segmentation.jpg", out_img_segmentation);
//imwrite("decomposition.jpg", out_img_decomposition); return ;
} size_t min(size_t x, size_t y, size_t z)
{
return x < y ? min(x,z) : min(y,z);
} size_t edit_distance(const string& A, const string& B)
{
size_t NA = A.size();
size_t NB = B.size(); vector< vector<size_t> > M(NA + , vector<size_t>(NB + )); for (size_t a = ; a <= NA; ++a)
M[a][] = a; for (size_t b = ; b <= NB; ++b)
M[][b] = b; for (size_t a = ; a <= NA; ++a)
for (size_t b = ; b <= NB; ++b)
{
size_t x = M[a-][b] + ;
size_t y = M[a][b-] + ;
size_t z = M[a-][b-] + (A[a-] == B[b-] ? : );
M[a][b] = min(x,y,z);
} return M[A.size()][B.size()];
} bool isRepetitive(const string& s)
{
int count = ;
for (int i=; i<(int)s.size(); i++)
{
if ((s[i] == 'i') ||
(s[i] == 'l') ||
(s[i] == 'I'))
count++;
}
if (count > ((int)s.size()+)/)
{
return true;
}
return false;
} void er_draw(vector<Mat> &channels, vector<vector<ERStat> > ®ions, vector<Vec2i> group, Mat& segmentation)
{
for (int r=; r<(int)group.size(); r++)
{
ERStat er = regions[group[r][]][group[r][]];
if (er.parent != NULL) // deprecate the root region
{
int newMaskVal = ;
int flags = + (newMaskVal << ) + FLOODFILL_FIXED_RANGE + FLOODFILL_MASK_ONLY;
floodFill(channels[group[r][]],segmentation,Point(er.pixel%channels[group[r][]].cols,er.pixel/channels[group[r][]].cols),
Scalar(),,Scalar(er.level),Scalar(),flags);
}
}
} bool sort_by_lenght(const string &a, const string &b){return (a.size()>b.size());}
end_to_end_recognition.cpp
测试用到的文件end_to_end_recognition.cpp、scenetext01.jpg、trained_classifierNM1.xml、trained_classifierNM2.xml都位于opencv_contrib源码包目录下的modules\text\samples中
效果:

Opencv + opencv_contrib + Tesseract 之Qt开发环境搭建的更多相关文章
- qt学习教程1.qt开发环境搭建
qt学习教程1.qt开发环境搭建 首先下载qt 下载地址:http://download.qt.io/archive/qt/ 此教程使用的版本为5.1.1 下载好后,打开安装包,然后点下一步 选择一个 ...
- Zynq7000开发系列-6(QT开发环境搭建:Ubuntu、Zynq)
操作系统:Ubuntu14.04.5 LTS 64bit Qt:Qt 5.4.2 (qt-opensource-linux-x64-5.4.2.run.qt-everywhere-opensource ...
- Qt开发环境搭建 - Windows + VS2010 + VS插件
Qt 开发环境搭建 - Windows+VS2010+VS插件 1.Qt在Windows平台下的三种开发环境 方案 编辑器 编译器 调试器 一 Qt Creator MinGW GDB 二 Qt Cr ...
- Linux下使用VsCode进行Qt开发环境搭建
最近在Linux上搞Qt, vim环境还用不太习惯, QtCreator之前使用时莫名其妙崩溃然后丢失代码之后就被我彻底放弃了, 于是研究了一下用VsCode进行Qt开发. 首先是系统环境和下载安装包 ...
- 【Qt开发】【VS开发】VS2010+Qt开发环境搭建
QT与JAVA有点类似,也是一种跨平台的软件(当然在windows平台和linux平台需要安装相应的QT开发环境和运行库,类似于JAVA在不同平台下的虚拟机JVM环境),因此对于某些需要同时支持win ...
- Win7下 OpenCV+Qt开发环境搭建
1.所需软件工具: (1)OpenCV开发库,2.4.9版:包括源文件(source文件夹)和编译后的文件(build文件夹),但最好自己使用CMake又一次编译.否则easy出错. (2)Qt Cr ...
- VS2008下QT开发环境搭建(转)
原博文地址:http://blog.csdn.net/sunnyboycao/article/details/6364444 VS2008集成QT4.7.2环境搭建 作者:jimmy 日期:2011- ...
- QT开发环境搭建
一.Qt发展史 1991年,由奇趣科技开发的跨平台C++图形用户界面应用程序开发框架: 2008年,Nokia从Trolltech公司收购Qt, 并增加LGPL的授权模式: 2011年,Digia从N ...
- Visual Studio + Qt开发环境搭建
1. 安装Visual Studio 2015 Visual Studio 2015下载地址如下,安装比较常规,不做介绍. Visual Studio Enterprise 2015 with Upd ...
随机推荐
- Raspberry Pi 安装配置 Home Assistant
家庭助理(Home Assistant)是一款基于 Python 的智能家居开源系统,支持众多品牌的智能家居设备,可以轻松实现设备的语音控制.跟踪和控制家里的所有设备, 并自动化控制,能完美的运行在树 ...
- amaze ui 滚动监听
引入 此框架的css js 前提还要有jquery http://amazeui.org/javascript/scrollspy 然后看这个链接里的各种动画 运用方法就是 在你想要有动 ...
- JavaScript构造函数原理
1.var obj={} plainObject 对象字面量/对象直接量2.构造函数创建 1).系统自带的构造函数 Object() var obj=new Object(); 和 var obj = ...
- 轻松理解AOP(面向切面编程)
https://my.oschina.net/yanquan345/blog/203415
- 关于jetbrains系列产品2018.1.5以后的使用(crack)方法
产品请一律官网下载:https://www.jetbrains.com/ 我这里以JetBrains GoLand 2018.2.1为例说明下非付费的使用方法(若资金允许,请点击https://www ...
- CentOS无法使用ifconfig和root密码修改
初学Linux,总是有许多问题,这次就遇到了这个问题: 想使用ifconfig命令查看一下虚拟机的ip地址,结果发现ifconfig命令无法使用,总是显示找不到ifconfig这个命令. 上网查询帮助 ...
- nodejs连接阿里云物联网套件(mqtt)
文档地址:https://help.aliyun.com/document_detail/73742.html 连接方法:先HTTPS认证再连接 /* *阿里云物联网套件nodejs连接示例 *C ...
- Spark的mlib中的稠密向量和稀疏向量
spark mlib中2种局部向量:denseVector(稠密向量)和sparseVector(稀疏向量) denseVector向量的生成方法:Vector.dense() sparseVecto ...
- Python:从入门到实践--第十一章--测试代码--练习
#1.城市和国家:编写一个函数,它接受两个形参:一个城市名和一个国家名. #这个函数返回一个格式为City,Country的字符串,如Santiago,Chile.将这个函数 #存储在一个名为city ...
- React项目中跨域问题的解决方案
刚刚找到到通过creat-react-app创建的项目中跨域问题的解决方案,记录下来以备后用. 如果接口地址为: http://my.example.com/eg-api 则配置package ...