【鸡年大吉】,不知道写点啥,放个demo(小球碰撞)吧,有兴趣的看看
最初的想法是仿写win7的泡泡屏保效果,但是对于小球的斜碰问题一直没搞明白(如果你会这个,欢迎留言或者做个demo),所以只是简单处理了碰撞后的速度,有时候会看起来很搞笑~~~funny guy
话不多说,先上demo
https://win7killer.github.io/demo_set/html_demo/canvas/can_ps/ball.html
效果如下:
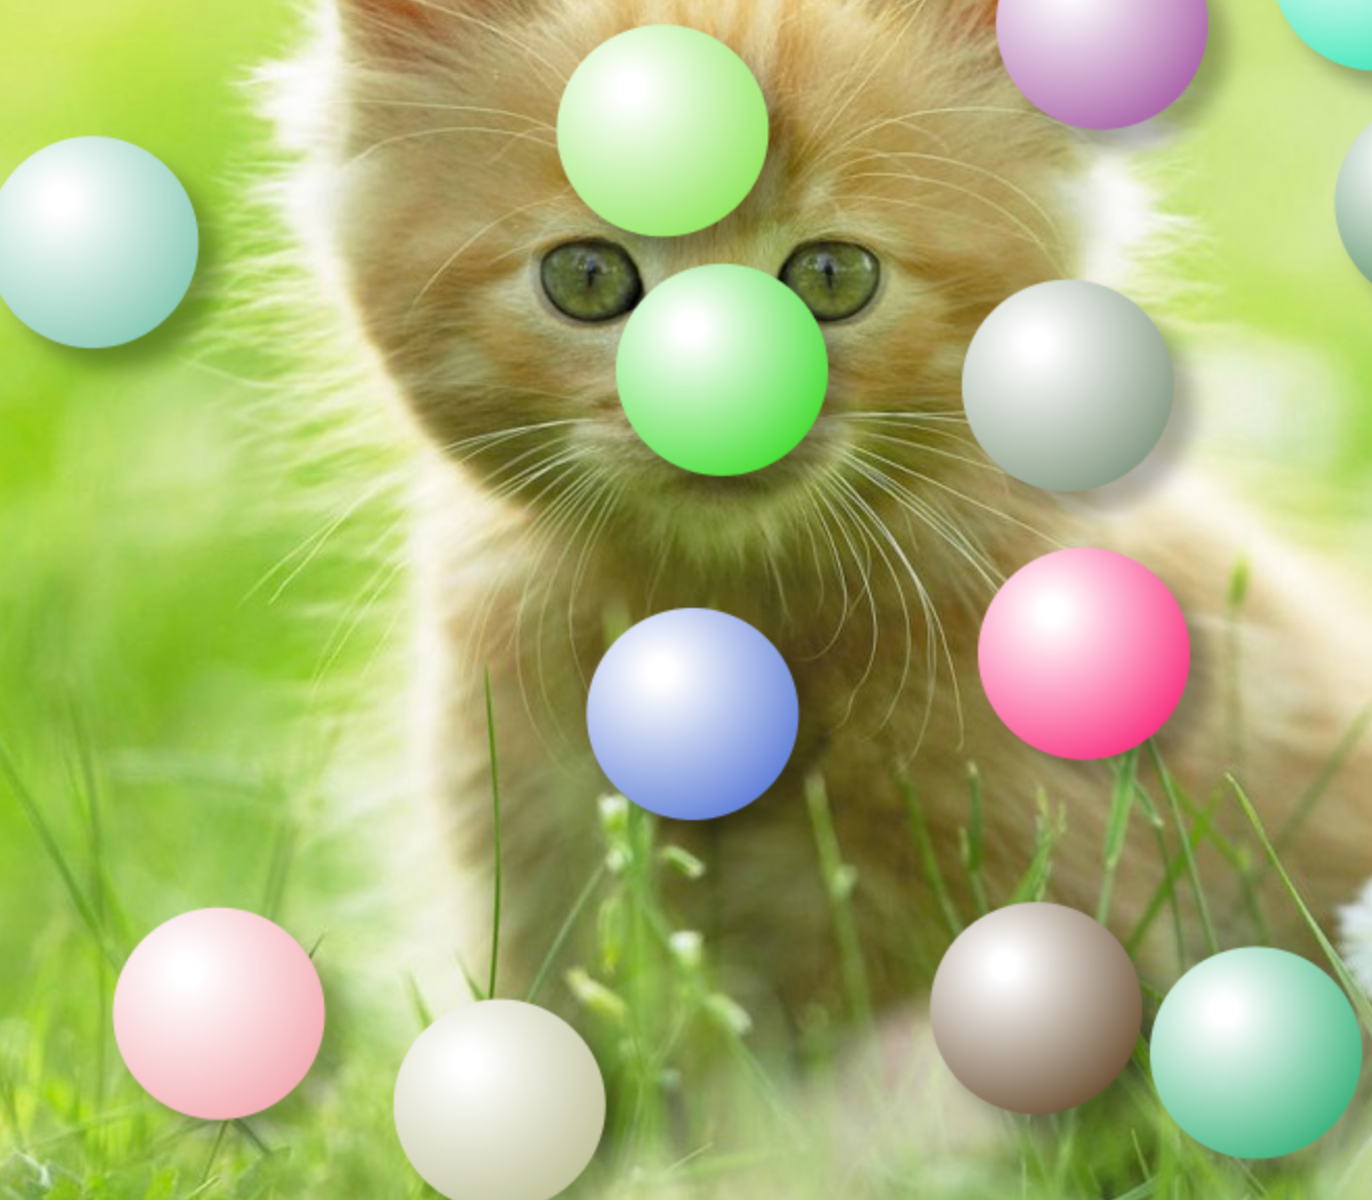
code:
 <!DOCTYPE html>

 <html lang="zh">

 <head>

     <meta charset="UTF-8">

     <meta name="viewport" content="width=device-width, initial-scale=1.0">

     <meta http-equiv="X-UA-Compatible" content="ie=edge">

     <title>Document</title>

     <style>

         * {

             margin: 0;

             padding: 0;

         }

         html {

             height: 100%;

         }

         body {

             width: 100%;

             height: 100%;

             background: #333;

             background: url(./img/6.jpg) no-repeat 0 0;

             background-size: cover;

         }

         canvas {

             display: block;

         }

     </style>

 </head>

 <body>

     <canvas id="can" width=0 height=0></canvas>

     <script>

         var ballsNum = 20;

         window.onload = function() {

             var can = document.getElementById('can');

             can.width = document.body.offsetWidth;

             can.height = document.body.offsetHeight;

             var ctx = can.getContext('2d');

             var ballR = Math.floor(can.height / 15);

             ctx.shadowColor = 'rgba(0,0,0,.3)';

             ctx.shadowOffsetX = ballR / 5;

             ctx.shadowOffsetY = ballR / 5;

             // ctx.shadowBlur = ballR / 10 > 5 ? ballR / 10 : 5;

             ctx.shadowBlur = 16;

             var aObj = randomBall(ballsNum);

             var raf = window.requestAnimationFrame(loop);

             function loop() {

                 ctx.clearRect(0, 0, can.width, can.height);

                 for (var i = 0, l = aObj.length; i < l; i++) {

                     fnChange(aObj[i]);

                     checkPeng(aObj, i);

                 }

                 if (raf) {

                     raf = window.requestAnimationFrame(loop);

                 }

             }

             //  改变圆心坐标

             function fnChange(obj) {

                 drawArc(obj);

                 obj.x += obj.sx * 10 / 4;

                 obj.y += obj.sy * 5 / 4;

                 if (obj.x >= can.width - ballR) {

                     obj.x = can.width - ballR;

                     obj.sx = -1 * obj.sx;

                 } else if (obj.x <= ballR) {

                     obj.x = ballR;

                     obj.sx = -1 * obj.sx;

                 }

                 if (obj.y >= can.height - ballR) {

                     obj.y = can.height - ballR;

                     obj.sy = -1 * obj.sy;

                 } else if (obj.y <= ballR) {

                     obj.y = ballR;

                     obj.sy = -1 * obj.sy;

                 }

             }

             //画圆

             function drawArc(obj) {

                 ctx.save();

                 ctx.beginPath();

                 ctx.arc(obj.x % can.width, obj.y % can.height, ballR, 0, 2 * Math.PI);

                 ctx.closePath();

                 var grd = ctx.createRadialGradient(obj.x - ballR * 3 / 10, obj.y - ballR * 4 / 10, ballR / 8, obj.x - ballR * 4 / 10, obj.y - ballR * 4 / 10, ballR * 16 / 10);

                 grd.addColorStop(0, "rgba(255,255,255,1)");

                 grd.addColorStop(1, obj.scolor);

                 ctx.fillStyle = grd;

                 ctx.fill();

                 ctx.restore();

             }

             function randomBall(num) {

                 var barr = [];

                 var ball;

                 for (var i = 0; i < num || 0; i++) {

                     ball = {};

                     ball.x = Math.random() * (can.width - ballR * 2) + ballR;

                     ball.y = Math.random() * (can.height - ballR * 2) + ballR;

                     ball.sx = Math.random() * 6 - 6 / 2;

                     ball.sy = Math.random() * 6 - 6 / 2;

                     var scr = Math.round(Math.random() * 200 + 50);

                     var scg;

                     var scb;

                     if (scr > 200) {

                         if (Math.random() > 1) {

                             scg = Math.round(Math.random() * 150 + 50);

                             scb = Math.round(Math.random() * 200 + 50);

                         } else {

                             scb = Math.round(Math.random() * 150 + 50);

                             scg = Math.round(Math.random() * 200 + 50);

                         }

                     } else {

                         scg = Math.round(Math.random() * 200 + 50);

                         scb = Math.round(Math.random() * 200 + 50);

                     }

                     ball.scolor = 'rgba(' + [scr, scg, scb, 1].join(',') + ')';

                     barr.push(ball);

                 }

                 return barr;

             }

             //碰撞检测

             function checkPeng(arr, i) {

                 var j, len;

                 for (j = 0, len = arr.length; j < len; j++) {

                     if (i === j) {

                         continue;

                     }

                     var ca = {

                         x: arr[i].x - arr[j].x,

                         y: arr[i].y - arr[j].y

                     }

                     var z = Math.sqrt(Math.pow(ca.x, 2) + Math.pow(ca.y, 2));

                     var cha = z - ballR * 2;

                     if (cha <= 0) {

                         if (arr[i].x < arr[j].x) {

                             arr[i].x += cha;

                         } else {

                             arr[i].x += -cha;

                         }

                         if (arr[i].y < arr[j].y) {

                             arr[i].y += cha;

                         } else {

                             arr[i].y += -cha;

                         }

                         //arr[i].sy = -1*arr[i].sy;

                         var iTY = arr[i].sy;

                         arr[i].sy = 1 * arr[j].sy;

                         arr[j].sy = iTY;

                         //arr[i].sx = -1*arr[i].sx;

                         var iTX = arr[i].sx;

                         arr[i].sx = 1 * arr[j].sx;

                         arr[j].sx = iTX;

                     }

                 }

             }

         }

     </script>

 </body>

 </html>
然后是加强版的透明泡泡
https://win7killer.github.io/demo_set/html_demo/canvas/can_ps/ball_1.html
效果如下:
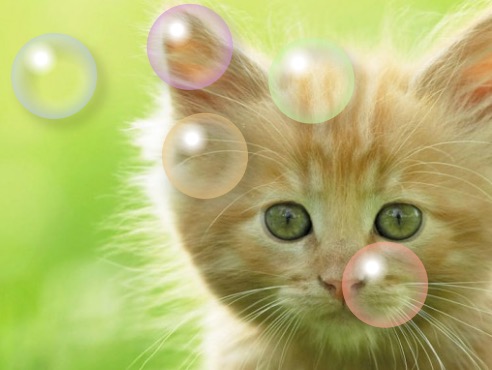
code:
 <!DOCTYPE html>

 <html lang="zh">

 <head>

     <meta charset="UTF-8">

     <meta name="viewport" content="width=device-width, initial-scale=1.0">

     <meta http-equiv="X-UA-Compatible" content="ie=edge">

     <title>Document</title>

     <style>

         * {

             margin: 0;

             padding: 0;

         }

         html {

             height: 100%;

         }

         body {

             width: 100%;

             height: 100%;

             background: #333;

             background: url(./img/6.jpg) no-repeat 0 0;

             background-size: cover;

         }

         canvas {

             display: block;

         }

     </style>

 </head>

 <body>

     <canvas id="can" width=0 height=0></canvas>

     <script>

         var ballsNum = 20;

         window.onload = function() {

             var can = document.getElementById('can');

             can.width = document.body.offsetWidth;

             can.height = document.body.offsetHeight;

             var ctx = can.getContext('2d');

             var ballR = Math.floor(can.height / 15);

             ctx.shadowColor = 'rgba(0,0,0,.3)';

             ctx.shadowOffsetX = ballR / 5;

             ctx.shadowOffsetY = ballR / 5;

             // ctx.shadowBlur = ballR / 10 > 5 ? ballR / 10 : 5;

             ctx.shadowBlur = 16;

             var aObj = randomBall(ballsNum);

             var raf = window.requestAnimationFrame(loop);

             function loop() {

                 ctx.clearRect(0, 0, can.width, can.height);

                 for (var i = 0, l = aObj.length; i < l; i++) {

                     fnChange(aObj[i]);

                     checkPeng(aObj, i);

                 }

                 if (raf) {

                     raf = window.requestAnimationFrame(loop);

                 }

             }

             //  改变圆心坐标

             function fnChange(obj) {

                 drawArc(obj);

                 obj.x += obj.sx * 10 / 4;

                 obj.y += obj.sy * 5 / 4;

                 if (obj.x >= can.width - ballR) {

                     obj.x = can.width - ballR;

                     obj.sx = -1 * obj.sx;

                 } else if (obj.x <= ballR) {

                     obj.x = ballR;

                     obj.sx = -1 * obj.sx;

                 }

                 if (obj.y >= can.height - ballR) {

                     obj.y = can.height - ballR;

                     obj.sy = -1 * obj.sy;

                 } else if (obj.y <= ballR) {

                     obj.y = ballR;

                     obj.sy = -1 * obj.sy;

                 }

             }

             //画圆

             function drawArc(obj) {

                 ctx.save();

                 ctx.beginPath();

                 ctx.arc(obj.x % can.width, obj.y % can.height, ballR, 0, 2 * Math.PI);

                 ctx.closePath();

                 var grd1 = ctx.createRadialGradient(

                     obj.x,

                     obj.y,

                     ballR / 2,

                     obj.x,

                     obj.y,

                     ballR * 13 / 10

                 );

                 // grd1.addColorStop(0, "rgba(255,255,255,1)");

                 grd1.addColorStop(0, "rgba(255,255,255,0)");

                 grd1.addColorStop(1, obj.scolor);

                 ctx.fillStyle = grd1;

                 ctx.fill();

                 ctx.restore();

                 var grd = ctx.createRadialGradient(obj.x - ballR * 3 / 10, obj.y - ballR * 4 / 10, ballR / 8, obj.x - ballR * 4 / 10, obj.y - ballR * 4 / 10, ballR * 16 / 10);

                 grd.addColorStop(0, "rgba(255,255,255,1)");

                 grd.addColorStop(0.2, "rgba(255,255,255,0)");

                 grd.addColorStop(1, "rgba(255,255,255,0)");

                 // grd.addColorStop(1, obj.scolor);

                 ctx.fillStyle = grd;

                 ctx.save();

                 ctx.shadowColor = 'rgba(0,0,0,.0)';

                 ctx.fill();

                 ctx.restore();

             }

             function randomBall(num) {

                 var barr = [];

                 var ball;

                 for (var i = 0; i < num || 0; i++) {

                     ball = {};

                     ball.x = Math.random() * (can.width - ballR * 2) + ballR;

                     ball.y = Math.random() * (can.height - ballR * 2) + ballR;

                     ball.sx = Math.random() * 6 - 6 / 2;

                     ball.sy = Math.random() * 6 - 6 / 2;

                     var scr = Math.round(Math.random() * 200 + 50);

                     var scg;

                     var scb;

                     if (scr > 200) {

                         if (Math.random() > 1) {

                             scg = Math.round(Math.random() * 150 + 50);

                             scb = Math.round(Math.random() * 200 + 50);

                         } else {

                             scb = Math.round(Math.random() * 150 + 50);

                             scg = Math.round(Math.random() * 200 + 50);

                         }

                     } else {

                         scg = Math.round(Math.random() * 200 + 50);

                         scb = Math.round(Math.random() * 200 + 50);

                     }

                     ball.scolor = 'rgba(' + [scr, scg, scb, 1].join(',') + ')';

                     barr.push(ball);

                 }

                 return barr;

             }

             //碰撞检测

             function checkPeng(arr, i) {

                 var j, len;

                 for (j = 0, len = arr.length; j < len; j++) {

                     if (i === j) {

                         continue;

                     }

                     var ca = {

                         x: arr[i].x - arr[j].x,

                         y: arr[i].y - arr[j].y

                     }

                     var z = Math.sqrt(Math.pow(ca.x, 2) + Math.pow(ca.y, 2));

                     var cha = z - ballR * 2;

                     if (cha <= 0) {

                         if (arr[i].x < arr[j].x) {

                             arr[i].x += cha;

                         } else {

                             arr[i].x += -cha;

                         }

                         if (arr[i].y < arr[j].y) {

                             arr[i].y += cha;

                         } else {

                             arr[i].y += -cha;

                         }

                         //arr[i].sy = -1*arr[i].sy;

                         var iTY = arr[i].sy;

                         arr[i].sy = 1 * arr[j].sy;

                         arr[j].sy = iTY;

                         //arr[i].sx = -1*arr[i].sx;

                         var iTX = arr[i].sx;

                         arr[i].sx = 1 * arr[j].sx;

                         arr[j].sx = iTX;

                     }

                 }

             }

         }

     </script>

 </body>

 </html>
就这样吧,canvas写了一些有意思的demo,但是没有系统的可以写成博客的东西,之后会慢慢整理一下介绍给大家~
最后,祝大家鸡年大吉吧,升职涨薪。
【鸡年大吉】,不知道写点啥,放个demo(小球碰撞)吧,有兴趣的看看的更多相关文章
- 使用 Flask 框架写用户登录功能的Demo时碰到的各种坑(五)——实现注册功能
使用 Flask 框架写用户登录功能的Demo时碰到的各种坑(一)——创建应用 使用 Flask 框架写用户登录功能的Demo时碰到的各种坑(二)——使用蓝图功能进行模块化 使用 Flask 框架写用 ...
- 使用 Flask 框架写用户登录功能的Demo时碰到的各种坑(四)——对 run.py 的调整
使用 Flask 框架写用户登录功能的Demo时碰到的各种坑(一)——创建应用 使用 Flask 框架写用户登录功能的Demo时碰到的各种坑(二)——使用蓝图功能进行模块化 使用 Flask 框架写用 ...
- 使用 Flask 框架写用户登录功能的Demo时碰到的各种坑(一)——创建应用
使用 Flask 框架写用户登录功能的Demo时碰到的各种坑(一)——创建应用 使用 Flask 框架写用户登录功能的Demo时碰到的各种坑(二)——使用蓝图功能进行模块化 使用 Flask 框架写用 ...
- 使用 Flask 框架写用户登录功能的Demo时碰到的各种坑(二)——使用蓝图功能进行模块化
使用 Flask 框架写用户登录功能的Demo时碰到的各种坑(一)——创建应用 使用 Flask 框架写用户登录功能的Demo时碰到的各种坑(二)——使用蓝图功能进行模块化 使用 Flask 框架写用 ...
- 使用 Flask 框架写用户登录功能的Demo时碰到的各种坑(三)——使用Flask-Login库实现登录功能
使用 Flask 框架写用户登录功能的Demo时碰到的各种坑(一)——创建应用 使用 Flask 框架写用户登录功能的Demo时碰到的各种坑(二)——使用蓝图功能进行模块化 使用 Flask 框架写用 ...
- 记写 android 微信登录的demo历程
前言 首先看一条链接: https://github.com/Tencent/WeDemo 腾讯给了一个wedemo,微信第三方登录的例子.里面是php和ios,ios是object写的,php还是原 ...
- canvas写的一个小时钟demo
<!DOCTYPE html> <html> <head> <title>HTML5 Canvas Demo of clock</title> ...
- webpack学习(二):先写几个webpack基础demo
一.先写一个简单demo1 1-1安装好webpack后创建这样一个目录: 1-2:向src各文件和dist/index.html文件写入内容: <!DOCTYPE html> <h ...
- js 模仿jquery 写个简单的小demo
<div id="div" style="background:red;width:100px;height:300px"> 123123123 & ...
随机推荐
- jQuery方式事件冒泡的2个方法
方式1:通过 event.stopPropagation(); $("div").click(function (event) { slide.call(this); event ...
- 多机并行计算框架 和CoolHash数据库(可用于多机机器学习)
http://my.oschina.net/fourinone/blog/289122 http://www.oschina.net/p/fourinone
- JavaScript(二)---- 变量、数据类型和运算符
变量 javaScript中的变量变量是弱类型的,用var来声明. javascript的变量声明格式: var 变量名 = 数据; 声明变量要注意的事项: 1. 在javascript中声明变量是 ...
- 火狐上的一个post提交工具(主要用于测试接口时候)
添加的过程 安装完后,就可以在下图上,看到一个poster 点击poster就可以看到下图 图中红线圈好的,是必须要填写的 Url是访问路径 Name是参数名称 Value是参数值 需要注意一点的是: ...
- STM32驱动DS18B20
DS18B20 是由 DALLAS 半导体公司推出的一种的“一线总线”接口的温度传感器.与传 统的热敏电阻等测温元件相比,它是一种新型的体积小.适用电压宽.与微处理器接口简单的 数字化温度传感器.一线 ...
- foreach笔记
结合泛型使用,不然就只能写成for(Object o : T). 缺点是没有下标,如下面代码 public class ForeachTest { public static void main(St ...
- Backbone+React使用
1.react作为backbone的视图 2.backone和react和通信,backbone的view 渲染react组件, react组件使用backbone的collection数据 < ...
- A股暴跌三日市值蒸发4.2万亿 股民人均浮亏超2万
A股暴跌三日市值蒸发4.2万亿 股民人均浮亏超2万 http://finance.qq.com/a/20150508/010324.htm?pgv_ref=aio2015&ptlang=205 ...
- nginx代理tomcat后,tomcat获取真实(非proxy,非别名)nginx服务端ip端口的解决方案
nginx代理tomcat后,tomcat获取服务端ip端口的解决方案 1.注意修改nginx配置代理,标红地方 #user nginx; worker_processes ; error_log l ...
- HTML5学习笔记一:与html4的区别(整合)
一 语法的改变 1.1 HTML5中标记方法 1.内容类型(ContentType):扩展符仍为“.html”或".htm",内容类型仍是“text/html”. 2.DOCTYP ...