spring实现读写分离
(转自:http://www.cnblogs.com/surge/p/3582248.html)
现在大型的电子商务系统,在数据库层面大都采用读写分离技术,就是一个Master数据库,多个Slave数据库。Master库负责数据更新和实时数据查询,Slave库当然负责非实时数据查询。因为在实际的应用中,数据库都是读多写少(读取数据的频率高,更新数据的频率相对较少),而读取数据通常耗时比较长,占用数据库服务器的CPU较多,从而影响用户体验。我们通常的做法就是把查询从主库中抽取出来,采用多个从库,使用负载均衡,减轻每个从库的查询压力。
采用读写分离技术的目标:有效减轻Master库的压力,又可以把用户查询数据的请求分发到不同的Slave库,从而保证系统的健壮性。我们看下采用读写分离的背景。
随着网站的业务不断扩展,数据不断增加,用户越来越多,数据库的压力也就越来越大,采用传统的方式,比如:数据库或者SQL的优化基本已达不到要求,这个时候可以采用读写分离的策 略来改变现状。
具体到开发中,如何方便的实现读写分离呢?目前常用的有两种方式:
1 第一种方式是我们最常用的方式,就是定义2个数据库连接,一个是MasterDataSource,另一个是SlaveDataSource。更新数据时我们读取MasterDataSource,查询数据时我们读取SlaveDataSource。这种方式很简单,我就不赘述了。
2 第二种方式动态数据源切换,就是在程序运行时,把数据源动态织入到程序中,从而选择读取主库还是从库。主要使用的技术是:annotation,Spring AOP ,反射。下面会详细的介绍实现方式。
在介绍实现方式之前,我们先准备一些必要的知识,spring 的AbstractRoutingDataSource 类
AbstractRoutingDataSource这个类 是spring2.0以后增加的,我们先来看下AbstractRoutingDataSource的定义:
public abstract class AbstractRoutingDataSource extends AbstractDataSource implements InitializingBean {}
AbstractRoutingDataSource继承了AbstractDataSource ,而AbstractDataSource 又是DataSource 的子类。DataSource 是javax.sql 的数据源接口,定义如下:
public interface DataSource  extends CommonDataSource,Wrapper {

  /**

   * <p>Attempts to establish a connection with the data source that

   * this <code>DataSource</code> object represents.

   *

   * @return  a connection to the data source

   * @exception SQLException if a database access error occurs

   */

  Connection getConnection() throws SQLException;

  /**

   * <p>Attempts to establish a connection with the data source that

   * this <code>DataSource</code> object represents.

   *

   * @param username the database user on whose behalf the connection is

   *  being made

   * @param password the user's password

   * @return  a connection to the data source

   * @exception SQLException if a database access error occurs

   * @since 1.4

   */

  Connection getConnection(String username, String password)

    throws SQLException;

}
DataSource 接口定义了2个方法,都是获取数据库连接。我们在看下AbstractRoutingDataSource 如何实现了DataSource接口:
public Connection getConnection() throws SQLException {

        return determineTargetDataSource().getConnection();

    }

    public Connection getConnection(String username, String password) throws SQLException {

        return determineTargetDataSource().getConnection(username, password);

    }
很显然就是调用自己的determineTargetDataSource() 方法获取到connection。determineTargetDataSource方法定义如下:
protected DataSource determineTargetDataSource() {

        Assert.notNull(this.resolvedDataSources, "DataSource router not initialized");

        Object lookupKey = determineCurrentLookupKey();

        DataSource dataSource = this.resolvedDataSources.get(lookupKey);

        if (dataSource == null && (this.lenientFallback || lookupKey == null)) {

            dataSource = this.resolvedDefaultDataSource;

        }

        if (dataSource == null) {

            throw new IllegalStateException("Cannot determine target DataSource for lookup key [" + lookupKey + "]");

        }

        return dataSource;

    }
我们最关心的还是下面2句话:
Object lookupKey = determineCurrentLookupKey();
DataSource dataSource = this.resolvedDataSources.get(lookupKey);
determineCurrentLookupKey方法返回lookupKey,resolvedDataSources方法就是根据lookupKey从Map中获得数据源。resolvedDataSources 和determineCurrentLookupKey定义如下:
private Map<Object, DataSource> resolvedDataSources;
protected abstract Object determineCurrentLookupKey()
看到以上定义,我们是不是有点思路了,resolvedDataSources是Map类型,我们可以把MasterDataSource和SlaveDataSource存到Map中,如下:
key value
master MasterDataSource
slave SlaveDataSource
我们在写一个类DynamicDataSource 继承AbstractRoutingDataSource,实现其determineCurrentLookupKey() 方法,该方法返回Map的key,master或slave。
好了,说了这么多,有点烦了,下面我们看下怎么实现。
上面已经提到了我们要使用的技术,我们先看下annotation的定义:
@Retention(RetentionPolicy.RUNTIME)

@Target(ElementType.METHOD)

public @interface DataSource {

    String value();

}
@Retention(RetentionPolicy.RUNTIME)

@Target(ElementType.METHOD)

public @interface DataSource {

    String value();

}
我们还需要实现spring的抽象类AbstractRoutingDataSource,就是实现determineCurrentLookupKey方法:
public class DynamicDataSource extends AbstractRoutingDataSource {

    @Override

    protected Object determineCurrentLookupKey() {

        // TODO Auto-generated method stub

        return DynamicDataSourceHolder.getDataSouce();

    }

}

public class DynamicDataSourceHolder {

    public static final ThreadLocal<String> holder = new ThreadLocal<String>();

    public static void putDataSource(String name) {

        holder.set(name);

    }

    public static String getDataSouce() {

        return holder.get();

    }

}
从DynamicDataSource 的定义看出,他返回的是DynamicDataSourceHolder.getDataSouce()值,我们需要在程序运行时调用DynamicDataSourceHolder.putDataSource()方法,对其赋值。下面是我们实现的核心部分,也就是AOP部分,DataSourceAspect定义如下:
public class DataSourceAspect {

    public void before(JoinPoint point)

    {

        Object target = point.getTarget();

        String method = point.getSignature().getName();

        Class<?>[] classz = target.getClass().getInterfaces();

        Class<?>[] parameterTypes = ((MethodSignature) point.getSignature())

                .getMethod().getParameterTypes();

        try {

            Method m = classz[0].getMethod(method, parameterTypes);

            if (m != null && m.isAnnotationPresent(DataSource.class)) {

                DataSource data = m

                        .getAnnotation(DataSource.class);

                DynamicDataSourceHolder.putDataSource(data.value());

                System.out.println(data.value());

            }

        } catch (Exception e) {

            // TODO: handle exception

        }

    }

}
为了方便测试,我定义了2个数据库,shop模拟Master库,test模拟Slave库,shop和test的表结构一致,但数据不同,数据库配置如下:
<bean id="masterdataSource"

        class="org.springframework.jdbc.datasource.DriverManagerDataSource">

        <property name="driverClassName" value="com.mysql.jdbc.Driver" />

        <property name="url" value="jdbc:mysql://127.0.0.1:3306/shop" />

        <property name="username" value="root" />

        <property name="password" value="yangyanping0615" />

    </bean>

    <bean id="slavedataSource"

        class="org.springframework.jdbc.datasource.DriverManagerDataSource">

        <property name="driverClassName" value="com.mysql.jdbc.Driver" />

        <property name="url" value="jdbc:mysql://127.0.0.1:3306/test" />

        <property name="username" value="root" />

        <property name="password" value="yangyanping0615" />

    </bean>

        <beans:bean id="dataSource" class="com.air.shop.common.db.DynamicDataSource">

        <property name="targetDataSources">

              <map key-type="java.lang.String">

                  <!-- write -->

                 <entry key="master" value-ref="masterdataSource"/>

                 <!-- read -->

                 <entry key="slave" value-ref="slavedataSource"/>

              </map>

        </property>

        <property name="defaultTargetDataSource" ref="masterdataSource"/>

    </beans:bean>

    <bean id="transactionManager"

        class="org.springframework.jdbc.datasource.DataSourceTransactionManager">

        <property name="dataSource" ref="dataSource" />

    </bean>

    <!-- 配置SqlSessionFactoryBean -->

    <bean id="sqlSessionFactory" class="org.mybatis.spring.SqlSessionFactoryBean">

        <property name="dataSource" ref="dataSource" />

        <property name="configLocation" value="classpath:config/mybatis-config.xml" />

    </bean>
在spring的配置中增加aop配置
<!-- 配置数据库注解aop -->

    <aop:aspectj-autoproxy></aop:aspectj-autoproxy>

    <beans:bean id="manyDataSourceAspect" class="com.air.shop.proxy.DataSourceAspect" />

    <aop:config>

        <aop:aspect id="c" ref="manyDataSourceAspect">

            <aop:pointcut id="tx" expression="execution(* com.air.shop.mapper.*.*(..))"/>

            <aop:before pointcut-ref="tx" method="before"/>

        </aop:aspect>

    </aop:config>

    <!-- 配置数据库注解aop -->
下面是MyBatis的UserMapper的定义,为了方便测试,登录读取的是Master库,用户列表读取Slave库:
public interface UserMapper {

    @DataSource("master")

    public void add(User user);

    @DataSource("master")

    public void update(User user);

    @DataSource("master")

    public void delete(int id);

    @DataSource("slave")

    public User loadbyid(int id);

    @DataSource("master")

    public User loadbyname(String name);

    @DataSource("slave")

    public List<User> list();

}
好了,运行我们的Eclipse看看效果,输入用户名admin 登录看看效果
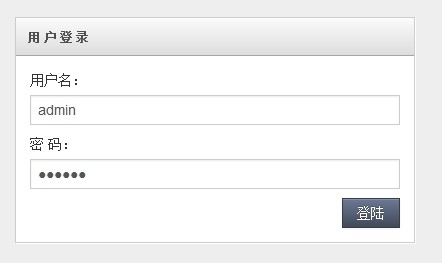
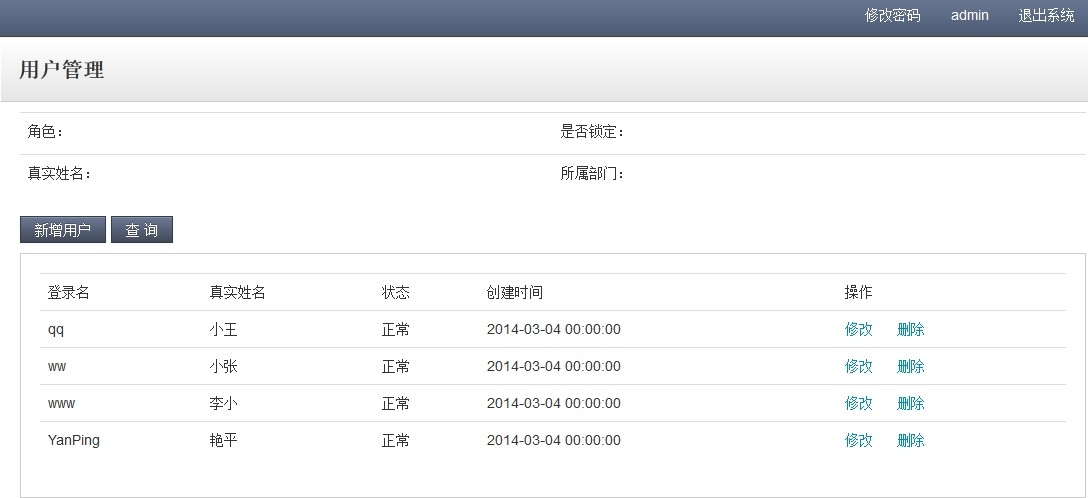
从图中可以看出,登录的用户和用户列表的数据是不同的,也验证了我们的实现,登录读取Master库,用户列表读取Slave库。
spring实现读写分离的更多相关文章
- java 使用spring实现读写分离
最近上线的项目中数据库数据已经临近饱和,最大的一张表数据已经接近3000W,百万数据的表也有几张,项目要求读数据(select)时间不能超过0.05秒,但实际情况已经不符合要求,explain建立索引 ...
- ssm maven spring AOP读写分离
ssm maven spring AOP读写分离 总体流程 配置最开始写在pom.xml文件,解析到数据库配置文件,再解析到spring配置文件. 自定义注解DataSource:通过这个注解并且在s ...
- [转]Spring数据库读写分离
数据库的读写分离简单的说是把对数据库的读和写操作分开对应不同的数据库服务器,这样能有效地减轻数据库压力,也能减轻io压力. 主(master)数据库提供写操作,从(slave)数据库提供读操作,其实在 ...
- 使用Spring实现读写分离( MySQL实现主从复制)
详见:http://blog.yemou.net/article/query/info/tytfjhfascvhzxcyt403 1. 背景 我们一般应用对数据库而言都是"读多写少&quo ...
- Spring 数据库读写分离
读写分离常见有俩种方式 1 第一种方式比较常用就是定义2个数据库连接,一个是Master,另一个是Slave.更新数据时我们取Master,查询数据时取Slave.太过简单不做介绍. 2 第二种方数据 ...
- Spring + Mybatis 读写分离
项目背景:项目开发中数据库使用了读写分离,所有查询语句走从库,除此之外走主库. 实现思路是: 第一步,实现动态切换数据源:配置两个DataSource,配置两个SqlSessionFactory指向两 ...
- 使用Spring实现读写分离( MySQL实现主从复制)(转)
本文转自:http://blog.csdn.net/jack85986370/article/details/51559232 1. 背景 我们一般应用对数据库而言都是“读多写少”,也就说对数据库读 ...
- Spring aop读写分离
一.采用读写分离技术的目标 随着网站的业务不断扩展,数据不断增加,用户越来越多,数据库的压力也就越来越大,采用传统的方式,比如:数据库或者SQL的优化基本已达不到要求,这个时候可以采用读写分离的策略来 ...
- 002-使用Spring实现读写分离(MySQL实现主从复制)
一. 背景 一般应用对数据库而言都是“读多写少”,也就说对数据库读取数据的压力比较大主库,负责写入数据,我们称之为:写库:从库,负责读取数据,我们称之为:读库: 1. 读库和写库的数据一致:2. 写数 ...
随机推荐
- 使用 JUnit 报错 java.lang.Exception: No runnable methods
错误详情如下: java.lang.Exception: No runnable methods at org.junit.runners.BlockJUnit4ClassRunner.validat ...
- iOS中定时器NSTimer的使用/开启与关闭
一.只调用一次计时器方法: //不重复,只调用一次.timer运行一次就会自动停止运行 myTimer = [NSTimer scheduledTimerWithTimeInterval:1.5 ...
- 详细介绍Java垃圾回收机制
垃圾收集GC(Garbage Collection)是Java语言的核心技术之一,之前我们曾专门探讨过Java 7新增的垃圾回收器G1的新特性,但在JVM的内部运行机制上看,Java的垃圾回收原理与机 ...
- 简单的jquery实现tab切换
$(document).ready(function(){ $(".nav-menu-ctn").find("a").click(function(){ $(t ...
- linux配置更改yum源
1,进入yum源配置目录 cd /etc/yum.repos.d 2,备份系统自带的yum源mv CentOS-Base.repo CentOS-Base.repo.bk下载163网易的yum源:wg ...
- 移动app安全测试
安全方面逐渐转向app安全,服务端app安全测试基本上跟常规的web方面挖掘差不多,只是增加了一个反编译或抓包的过程. 参考文献: http://drops.wooyun.org/tips/749 h ...
- 5、范围标签<fieldset></fieldset>
<fieldset style="border:0;border:1px solid red;"> <legend style="background- ...
- Python基础知识学习_Day2
一.for循环 1.1功能及语法 for循环是迭代循环机制(while是条件循环),语法如下: for i in a b c: print(i) 1.2典型例子: 1.2.1猜年龄循环 realy_a ...
- centos7 安装openvswitch
安装 1.安装依赖包:yum -y install openssl-devel wget kernel-devel 2.安装开发工具:yum groupinstall "Developmen ...
- react总结
在我的工作用到的最多就是backbone,其次还会有ember/Ext,backbone目前能实现我们team所需要实现的功能,因为我们的component不需要频繁的操作Dom,当后台API返回数据 ...