android 之 spinner的简单使用
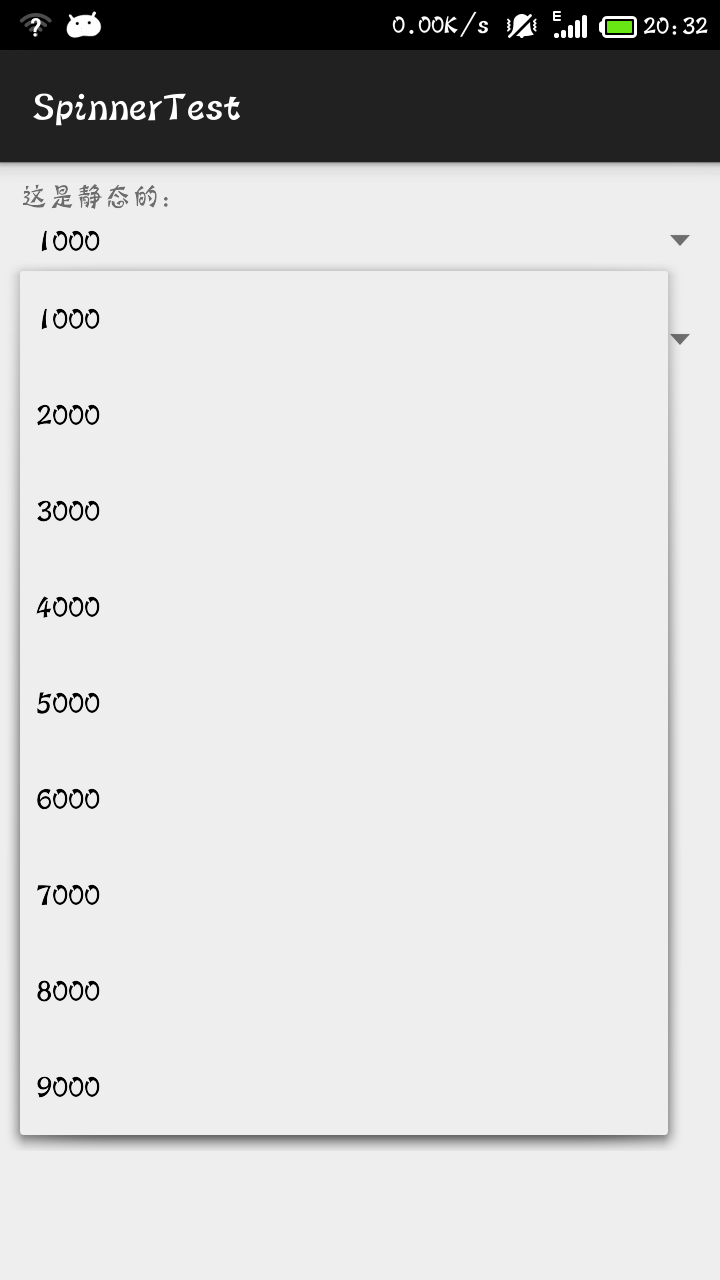
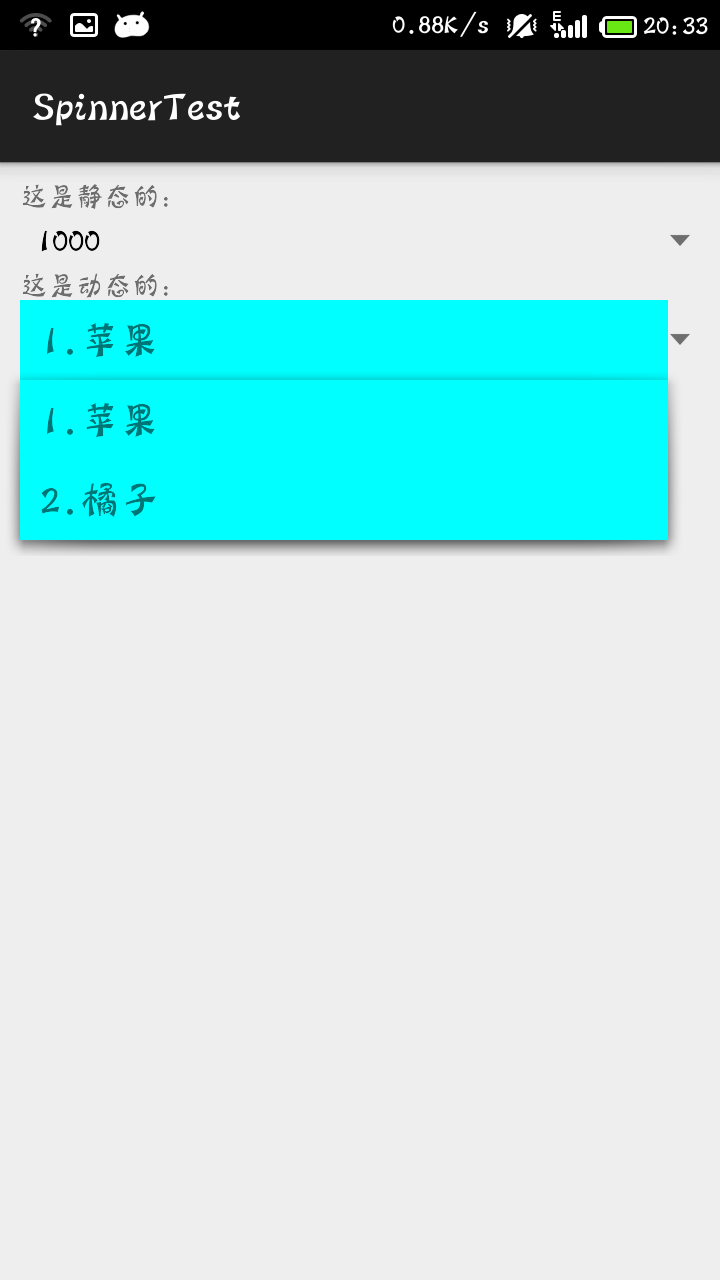
先看spinner的效果图:
代码:
MainActivity
package com.mecury.spinnertest;

import java.util.ArrayList;

import android.support.v7.app.ActionBarActivity;

import android.os.Bundle;

import android.view.View;

import android.widget.AdapterView;

import android.widget.ArrayAdapter;

import android.widget.Spinner;

public class MainActivity extends ActionBarActivity {

    private Spinner spinnerButton;

    private Spinner spinner;

    @Override

    protected void onCreate(Bundle savedInstanceState) {

        super.onCreate(savedInstanceState);

        setContentView(R.layout.activity_main);

        spinnerButton = (Spinner) findViewById(R.id.spinnerButton);

        spinner = (Spinner) findViewById(R.id.spinner2);

        /*静态的显示下来出来的菜单选项,显示的数组元素提前已经设置好了

         * 第二个参数:已经编写好的数组

         * 第三个数据:默认的样式

         */

        ArrayAdapter<CharSequence> adapter =

        ArrayAdapter.createFromResource(this, R.array.number_array, android.R.layout.simple_spinner_item);

        //设置spinner中每个条目的样式,同样是引用android提供的布局文件

        adapter.setDropDownViewResource(android.R.layout.simple_spinner_dropdown_item);

        spinnerButton.setAdapter(adapter);

        spinnerButton.setPrompt("测试");

        spinnerButton.setOnItemSelectedListener(new spinnerListener());

        /*

         * 动态添显示下来菜单的选项,可以动态添加元素

         */

        ArrayList<String> list = new ArrayList<String>();

        list.add("1.苹果");

        list.add("2.橘子");

        /*

         * 第二个参数是显示的布局

         * 第三个参数是在布局显示的位置id

         * 第四个参数是将要显示的数据

         */

        ArrayAdapter adapter2 = new ArrayAdapter(this, R.layout.item, R.id.textview,list);

        spinner.setAdapter(adapter2);

        spinner.setOnItemSelectedListener(new spinner2Listener());

    }

    class spinnerListener implements android.widget.AdapterView.OnItemSelectedListener{

        @Override

        public void onItemSelected(AdapterView<?> parent, View view,

                int position, long id) {

            //将选择的元素显示出来

            String selected = parent.getItemAtPosition(position).toString();

        }

        @Override

        public void onNothingSelected(AdapterView<?> parent) {

            System.out.println("nothingSelect");

        }

    }

    class spinner2Listener implements android.widget.AdapterView.OnItemSelectedListener{

        @Override

        public void onItemSelected(AdapterView<?> parent, View view,

                int position, long id) {

            String selected = parent.getItemAtPosition(position).toString();

        }

        @Override

        public void onNothingSelected(AdapterView<?> parent) {

            System.out.println("nothingSelect");

        }

    }

}
main_activity的代码:
<LinearLayout xmlns:android="http://schemas.android.com/apk/res/android"

    xmlns:tools="http://schemas.android.com/tools"

    android:layout_width="match_parent"

    android:layout_height="match_parent"

    android:orientation="vertical"

    android:padding="10dp"

    tools:context="com.mecury.spinnertest.MainActivity" >

    <TextView

        android:layout_width="match_parent"

        android:layout_height="wrap_content"

        android:text="这是静态的:"/>

    <Spinner

        android:id="@+id/spinnerButton"

        android:layout_width="match_parent"

        android:layout_height="30dp"/>

    <TextView

        android:layout_width="match_parent"

        android:layout_height="wrap_content"

        android:text="这是动态的:"/>

    <Spinner

        android:id="@+id/spinner2"

        android:layout_width="match_parent"

        android:layout_height="wrap_content"/>

</LinearLayout>
因为第一种是静态的实现方法,我们需要事先设置好spinner要显示的内容。在String.xml文件中添加需要显示的内容:
    <string-array name="number_array">

        <item>1000</item>

        <item>2000</item>

        <item>3000</item>

        <item>4000</item>

        <item>5000</item>

        <item>6000</item>

        <item>7000</item>

        <item>8000</item>

        <item>9000</item>

    </string-array>
第二种是静态的实现方法,我们使用自己的显示布局item.xml。
<?xml version="1.0" encoding="utf-8"?>

<LinearLayout xmlns:android="http://schemas.android.com/apk/res/android"

    android:layout_width="match_parent"

    android:layout_height="match_parent"

    android:background="#00ffff"

    android:padding="10dp"

    android:orientation="vertical" >

    <TextView

        android:id="@+id/textview"

        android:layout_width="match_parent"

        android:layout_height="wrap_content"

        android:textSize="20dp"/>

</LinearLayout>
android 之 spinner的简单使用的更多相关文章
- Xamarin.Android之Spinner的简单探讨
一.前言 今天用了一下Spinner这个控件,主要是结合官网的例子来用的,不过官网的是把数据写在Strings.xml中的, 某种程度上,不是很符合我们需要的,比较多的应该都是从数据库读出来,绑定上去 ...
- Android基本控件Spinner的简单使用【转】
Android基本控件Spinner的简单使用 感谢大佬:https://blog.csdn.net/bingocoder/article/details/80469939 学习过了Textview, ...
- 在android的spinner中,实现取VALUE值和TEXT值。 ZT
在android的spinner中,实现取VALUE值和TEXT值. 为了实现在android的 spinner实现取VALUE值和TEXT值,我尝试过好些办法,在网上查的资料,都是说修改适配器, ...
- 在android的spinner中,实现取VALUE值和TEXT值
为了实现在android的spinner实现取VALUE值和TEXT值,我尝试过好些办法,在网上查的资料,都是说修改适配器,刚开始我也是通过修改适配器的方法来做的,但是如果一个activity有多个s ...
- [置顶]
xamarin android自定义spinner
以前弄的一个下拉框时自带的spinner,感觉好丑,实际效果实在满足不了基本的UI界面要求,还是自己动手丰衣足食,看了网上关于android中自定义spinner的文章,感觉实现原理还是比较简单,所以 ...
- 我的Android进阶之旅】GitHub 上排名前 100 的 Android 开源库进行简单的介绍
GitHub Android Libraries Top 100 简介 本文转载于:https://github.com/Freelander/Android_Data/blob/master/And ...
- Xamarin.Android之封装个简单的网络请求类
一.前言 回忆到上篇 <Xamarin.Android再体验之简单的登录Demo> 做登录时,用的是GET的请求,还用的是同步, 于是现在将其简单的改写,做了个简单的封装,包含基于Http ...
- Spinner的简单学习
代码分析: package com.mecury.spinnertest; import java.util.ArrayList; import android.support.v7.app.Acti ...
- Android组件Spinner使用
Spinner组件是Android当中非常常用的一种用于下拉选择的组件. 本blog当中主要解决的几个问题: 如何在XML中初始化Spinner选项 如何使用代码的方式初始化Spinner选项 一个A ...
随机推荐
- EventBus初理解
缘由: 平时工作,因为懒于动笔的原因,也没注重技术和经验的积累,导致之前曾经研究过的问题现在又忘记了,所以要慢慢注重积累,那么就从写作开始,谈谈对工作中碰到的问题进行整理和归纳. 我们 ...
- [Bootstrap]7天深入Bootstrap(1)入门准备
由于申请了一个域名,一个云主机,开始弄个人网站. 发现Bootstrap非常方便,和重要,故开始学习与分享关于Bootstrap的技术. 推个广告 个人网站:http://www.neverc.cn ...
- 6/20 sprint3 看板和燃尽图的更新
- C#设计模式——工厂方法模式(Factory Method Pattern)
一.概述在软件系统中,经常面临着“某个对象”的创建工作,由于需求的变化,这个对象的具体实现经常面临着剧烈的变化,但是它却拥有比较稳定的接口.如何应对这种变化?如何提供一种封装机制来隔离出“这个易变对象 ...
- WPF学习之深入浅出话命令
WPF为我们准备了完善的命令系统,你可能会问:"有了路由事件为什么还需要命令系统呢?".事件的作用是发布.传播一些消息,消息传达到了接收者,事件的指令也就算完成了,至于如何响应事件 ...
- sql跨数据库转移
结构一样的话insert into 数据库A.dbo.TableAselect * from 数据库B.dbo.TableA 另外:nsert into DDD(字段1,字段2,字段3 .....)( ...
- 浅谈ImageList
ImageList组件用了很久,但是一直不太清楚它的实现原理,今天专门特意花了时间倒腾了下,终于弄明白了!于是在这里和大家分享下! 在设计页面中打卡工具箱-组件 找到ImageList组件,将它直接拖 ...
- C#怎样处理xml文件的大于号和小于号等常用符号(xml符号引发的程序错误)
在程序中由xml配置而成的sql语句要转换为C#支持的sql语句 <settings> <select> a.*</select> <from> (se ...
- 发现自己喜欢了移动端开发--Android
喜欢.net一直到现在了,但是自己做过的项目都不是让我自己很满意,不知道为什么,可能是自己的要求比较高吧! 下面自己记录自己的学习 src专门存放我们java源代码的包 Android 4.2.2存放 ...
- Unity3D脚本语言UnityScript初探
译者注: Unity3D中支持三种语言:JavaScript.C#.Boo,很多人不知道如何选择,通过这篇译文,我们可以搞清楚这三者语言的来龙去脉,对选择主语言有一定的借鉴意义. 首先,Unity是基 ...