Ocelot和IdentityServer4初体验
Ocelot是一个用.NET Core实现的开源API网关技术。IdentityServer4是一个基于OpenID Connect和OAuth2.0的针对ASP.NET Core的框架,以中间件的形式存在。OAuth是一种授权机制。系统产生一个短期的token,用来代替密码,供第三方应用使用。
使用Ocelot实现路由功能的初体验:
打开VS2019,新建一个ASP.NET Core空白项目,名为“OcelotDemo”
右键-依赖项-管理NuGet程序包-安装Ocelot

新建一个ASP.NET Core Web Api项目,名为“ApiResource”。自动建立了一个WeatherForecastController.cs文件。本demo直接使用这个文件。更改Properties文件夹中的launchSettings.json文件中的"applicationUrl"为“http://localhost:5001”(只要不是5000就行了,因为5000端口已经被OcelotDemo占用了)
在OcelotDemo项目中,右键添加一个JSON文件,名为ocelot.json。
{

  "Routes": [

    {

      "DownstreamPathTemplate": "/weatherforecast",

      "UpstreamPathTemplate": "/weatherforecast",

      "UpstreamHttpMethod": [ "GET" ],

      "DownstreamScheme": "http",

      "DownstreamHostAndPorts": [

        {

          "Host": "localhost",

          "Port": 5001

        }

      ]

    }

  ],

  "GlobalConfiguration": {}

}
可见,ocelot.json文件包括两个部分:“Routes”和“GlobalConfiguration”。这里要注意,一定是“Routes”而不是“ReRoutes”。"Routes"中包括路由的上下游的信息。“GlobalConfiguration”就是全局配置,比如BaseUrl等。
右键ocelot.json文件,选择“属性”-“始终复制”。
Startup.cs代码:
public class Startup

    {

        public void ConfigureServices(IServiceCollection services)

        {

            services.AddOcelot();

        }

        public void Configure(IApplicationBuilder app, IWebHostEnvironment env)

        {

            if (env.IsDevelopment())

            {

                app.UseDeveloperExceptionPage();

            }

            app.UseOcelot().Wait();

        }

    }
Program.cs代码:
public class Program

    {

        public static void Main(string[] args)

        {

            CreateWebHostBuilder(args).Build().Run();

        }

        public static IWebHostBuilder CreateWebHostBuilder(string[] args) =>

            WebHost.CreateDefaultBuilder(args)

            .ConfigureAppConfiguration((hostingContext, config) =>

            {

                config

                .SetBasePath(hostingContext.HostingEnvironment.ContentRootPath)

                .AddJsonFile("appsettings.json", true, true)

                .AddJsonFile($"appsettings.{hostingContext.HostingEnvironment.EnvironmentName}.json", true, true)

                .AddJsonFile("ocelot.json")

                .AddEnvironmentVariables();

            })

            .UseStartup<Startup>();

    }
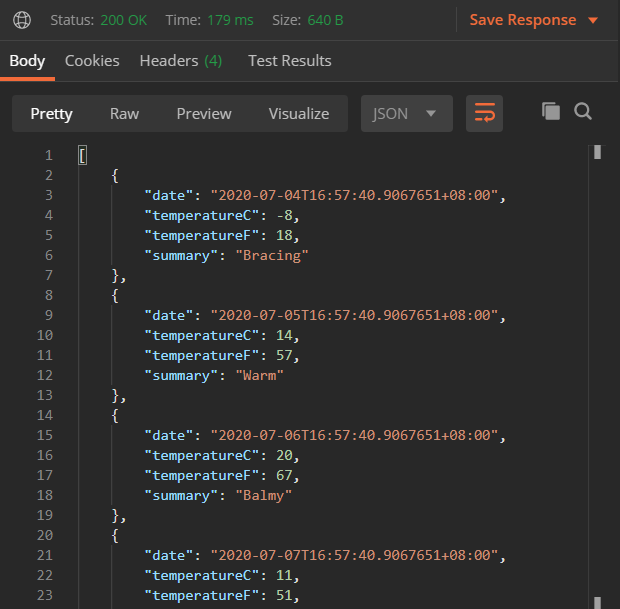
同时启动ApiResource和OcelotDemo两个项目。在Postman中,我们测试一下路由功能。输入上游地址,可以路由到下游的weatherforecast网页。

使用IdentityServer4进行验证和授权的初体验:
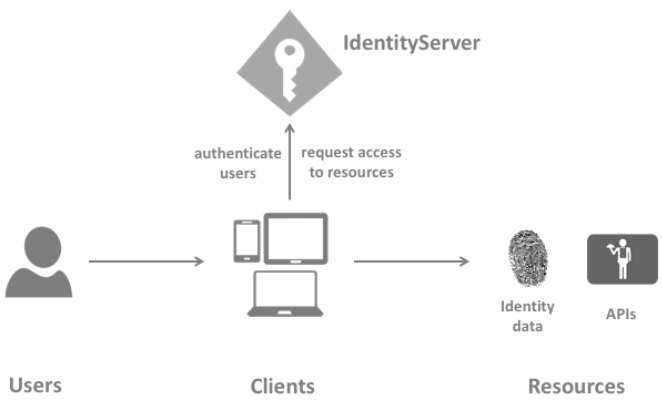
Clients是从IdentityServer中请求token的软件,可以是web/desktop app。Clients需要先在IdentityServer中注册,然后才能去申请token。Client既可以通过身份认证令牌(Identity Token)来验证user身份,也可通过授权令牌(Access Token)来访问服务器端的Resources。
Resources是IdentityServer要保护的资源,比如用户的身份数据(IdentityResource)或者API资源(ApiResource)。每个资源都有一个唯一的名称,Client使用这个唯一的名称来访问资源。
Users使用注册过的Clients访问Resources。
在我们上面的项目中,ApiResource项目就相当于Resources,OcelotDemo项目相当于Clients。那么我们现在就再建立一个IdentityServerDemo。同样也是ASP.NET Core空白项目。添加IdentityServer4的NuGet包。同样也需要先修改launchSettings.json中的applicationUrl,不能为5000端口。并添加一个新的ApiConfiguration.cs文件。
public class ApiConfiguration

    {

        public static IEnumerable<ApiScope> ApiScopes =>

            new List<ApiScope> {

                new ApiScope("ApiResource", "ApiResource")

            };

        public static IEnumerable<Client> Clients =>

            new List<Client>

            {

                new Client

                {

                    ClientId = "Client",

                    ClientSecrets = {new Secret("secret".Sha256())},

                    AllowedGrantTypes = GrantTypes.ClientCredentials,

                    AllowedScopes = {"ApiResource"}

                }

            };

    }
用Postman测试并获取AccessToken。启动IdentityServerDemo项目。注意需要使用POST,x-www-form-urlencoded格式,并输入client_id, client_secret, grant_type对应的参数。在右侧可以见到成功生成了access_token。

通过OcelotDemo访问受保护的ApiResource:
给ApiResource添加验证(受到IdentityServer保护),ApiResource.Controllers.WeatherForecastController.cs中的Get函数中,添加[Authorize]。ApiResource.Startup.cs代码:
public class Startup

    {

        public Startup(IConfiguration configuration)

        {

            Configuration = configuration;

        }

        public IConfiguration Configuration { get; }

        public void ConfigureServices(IServiceCollection services)

        {

            services.AddControllers();

            services.AddAuthentication("Bearer")

                .AddJwtBearer(options =>

                {

                    options.Authority = "http://localhost:5002";

                    options.RequireHttpsMetadata = false;

                    options.TokenValidationParameters = new Microsoft.IdentityModel.Tokens.TokenValidationParameters

                    {

                        ValidateAudience = false

                    };

                });

        }

        public void Configure(IApplicationBuilder app, IWebHostEnvironment env)

        {

            if (env.IsDevelopment())

            {

                app.UseDeveloperExceptionPage();

            }

            app.UseAuthentication();

            app.UseRouting();

            app.UseAuthorization();

            app.UseEndpoints(endpoints =>

            {

                endpoints.MapControllers();

            });

        }

    }
这个时候再访问ApiResource会显示401 Unauthorized

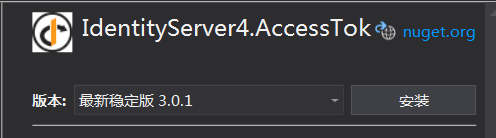
将OcelotDemo注册到IdentityServerDemo中,在OcelotDemo中添加IdentityServer4.AccessTokenValidation程序包。
OcelotDemo.Startup.cs代码:
public class Startup

    {

        public void ConfigureServices(IServiceCollection services)

        {

            services.AddOcelot();

            services.AddAuthentication("Bearer")

                .AddJwtBearer(options =>

                {

                    options.Authority = "http://localhost:5002";

                    options.RequireHttpsMetadata = false;

                });

        }

        public void Configure(IApplicationBuilder app, IWebHostEnvironment env)

        {

            if (env.IsDevelopment())

            {

                app.UseDeveloperExceptionPage();

            }

            app.UseAuthentication();

            app.UseOcelot().Wait();

        }

    }
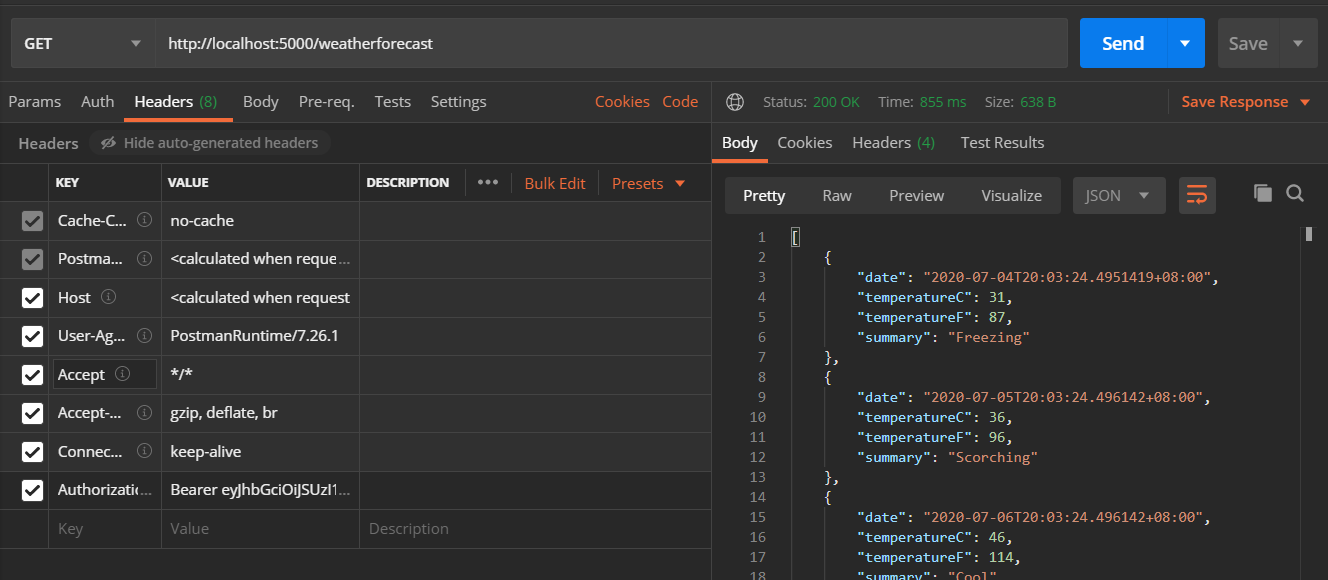
同时启动这三个项目,使用Postman测试。先生成token,然后将access_token的内容复制,输入到Authorization Header中(前面要加Bearer),如下图所示,就可以访问受保护的ApiResource了。
Ps:纯新手,这里面还有很多概念我都不是特别能理解。下面给出了IdentityServer4和Ocelot的官方文档,建议遇到问题首先查查官网文档,因为不同的版本问题,产生的错误和解决的方法也是不一样的。
参考文献:
[1].https://www.cnblogs.com/yilezhu/p/9557375.html
[2].http://docs.identityserver.io/en/release/index.html
[3].https://ocelot.readthedocs.io/en/latest/index.html
Ocelot和IdentityServer4初体验的更多相关文章
- .NET平台开源项目速览(15)文档数据库RavenDB-介绍与初体验
不知不觉,“.NET平台开源项目速览“系列文章已经15篇了,每一篇都非常受欢迎,可能技术水平不高,但足够入门了.虽然工作很忙,但还是会抽空把自己知道的,已经平时遇到的好的开源项目分享出来.今天就给大家 ...
- Xamarin+Prism开发详解四:简单Mac OS 虚拟机安装方法与Visual Studio for Mac 初体验
Mac OS 虚拟机安装方法 最近把自己的电脑升级了一下SSD固态硬盘,总算是有容量安装Mac 虚拟机了!经过心碎的安装探索,尝试了国内外的各种安装方法,最后在youtube上找到了一个好方法. 简单 ...
- Spring之初体验
Spring之初体验 Spring是一个轻量级的Java Web开发框架,以IoC(Inverse of Control 控制反转)和 ...
- Xamarin.iOS开发初体验
aaarticlea/png;base64,iVBORw0KGgoAAAANSUhEUgAAAKwAAAA+CAIAAAA5/WfHAAAJrklEQVR4nO2c/VdTRxrH+wfdU84pW0
- 【腾讯Bugly干货分享】基于 Webpack & Vue & Vue-Router 的 SPA 初体验
本文来自于腾讯bugly开发者社区,非经作者同意,请勿转载,原文地址:http://dev.qq.com/topic/57d13a57132ff21c38110186 导语 最近这几年的前端圈子,由于 ...
- 【Knockout.js 学习体验之旅】(1)ko初体验
前言 什么,你现在还在看knockout.js?这货都已经落后主流一千年了!赶紧去学Angular.React啊,再不赶紧的话,他们也要变out了哦.身旁的90后小伙伴,嘴里还塞着山东的狗不理大蒜包, ...
- 在同一个硬盘上安装多个 Linux 发行版及 Fedora 21 、Fedora 22 初体验
在同一个硬盘上安装多个 Linux 发行版 以前对多个 Linux 发行版的折腾主要是在虚拟机上完成.我的桌面电脑性能比较强大,玩玩虚拟机没啥问题,但是笔记本电脑就不行了.要在我的笔记本电脑上折腾多个 ...
- 百度EChart3初体验
由于项目需要在首页搞一个订单数量的走势图,经过多方查找,体验,感觉ECharts不错,封装的很细,我们只需要看自己需要那种类型的图表,搞定好自己的json数据就OK.至于说如何体现出来,官网的教程很详 ...
- Python导出Excel为Lua/Json/Xml实例教程(二):xlrd初体验
Python导出Excel为Lua/Json/Xml实例教程(二):xlrd初体验 相关链接: Python导出Excel为Lua/Json/Xml实例教程(一):初识Python Python导出E ...
随机推荐
- 直接copy大于某一个时间小于某一个时间的文件--find进阶用法
find ./ -type f -newermt '2000-01-04 10:30:00' ! -newermt '2019-10-28 10:57:00' -exec cp -a {} /var/ ...
- Shell 脚本进阶,经典用法及其案例
一.条件选择.判断 1.条件选择if (1)用法格式 if 判断条件 1 ; then 条件为真的分支代码 elif 判断条件 2 ; then 条件为真的分支代码 elif 判断条件 3 ; the ...
- linux区分atime,ctime and mtime
- Grad-CAM:Visual Explanations from Deep Networks via Gradient-based Localization
目录 Grad-CAM:Visual Explanations from Deep Networks via Gradient-based Localization 1.Abstract 2.Intr ...
- C# 实例解释面向对象编程中的单一功能原则
在面向对象编程中,SOLID 是五个设计原则的首字母缩写,旨在使软件设计更易于理解.灵活和可维护.这些原则是由美国软件工程师和讲师罗伯特·C·马丁(Robert Cecil Martin)提出的许多原 ...
- UIScrollView的代理方法(delegate)
// ViewController.m // 05-UIScrollView的代理(delegate) #import "ViewController.h" @interface ...
- shell——trap捕捉信号(附信号表)
trap捕捉信号有三种形式 第一种:trap "commands" signal-list 当脚本收到signal-list清单内列出的信号时,trap命令执行双引号中的命令. 例 ...
- python 使用pip安装包的总结
multiprocessing.logging模块安装 如果使用在cmd中使用 pip install multiprocessing 会报错, 将命令改为 pip3 install multipro ...
- 编译安装nginx,实现多域名 https
一.编译安装nginx 1.1 获取源码包 [root@cetnos7 ~]#wget -O /usr/local/src/nginx-1.18.0.tar.gz http://nginx.org/d ...
- 用Express 创建项目
1.Node.js Express 框架安装:npm install express --save在当前目录下创建一个node_modules 2.安装必要的中间件npm install body-p ...