
k8s笔记0528-基于KUBERNETES构建企业容器云手动部署集群记录-2
三、ETCD集群部署
类似于走zookeeper集群分布式协调服务,可做以key v形式存储在ETCD中。
官方链接:https://github.com/coreos/etcd 分布式kv存储,为分布式系统设计。
部署版本以etcd-v3.2.18类例子部署
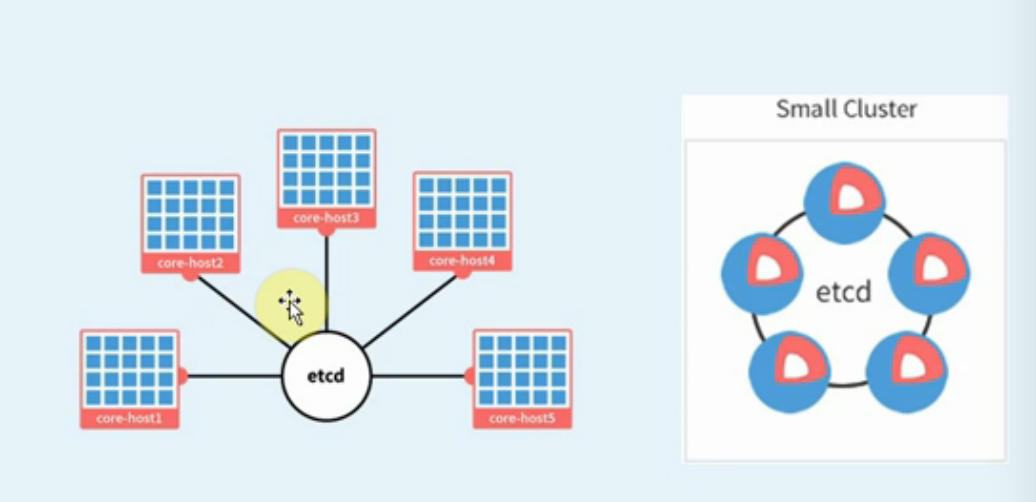
三、手动部署ETCD集群
0.准备etcd软件包
wget https://github.com/coreos/etcd/releases/download/v3.2.18/etcd-v3.2.18-linux-amd64.tar.gz
[root@linux-node1 src]# tar zxf etcd-v3.2.18-linux-amd64.tar.gz
[root@linux-node1 src]# cd etcd-v3.2.18-linux-amd64
[root@linux-node1 etcd-v3.2.18-linux-amd64]# cp etcd etcdctl /opt/kubernetes/bin/
[root@linux-node1 etcd-v3.2.18-linux-amd64]# scp etcd etcdctl 192.168.158.132:/opt/kubernetes/bin/
etcd 100% 17MB 48.9MB/s 00:00
etcdctl 100% 15MB 54.2MB/s 00:00
[root@linux-node1 etcd-v3.2.18-linux-amd64]# scp etcd etcdctl 192.168.158.133:/opt/kubernetes/bin/
etcd 100% 17MB 50.7MB/s 00:00
etcdctl 100% 15MB 52.8MB/s 00:00
[root@linux-node1 etcd-v3.2.18-linux-amd64]#
1.创建 etcd 证书签名请求:
[root@linux-node1 etcd-v3.2.18-linux-amd64]# cd /usr/local/src/ssl/
[root@linux-node1 ssl]# ll
total 20
-rw-r--r-- 1 root root 291 May 28 15:43 ca-config.json
-rw-r--r-- 1 root root 1001 May 28 15:44 ca.csr
-rw-r--r-- 1 root root 208 May 28 15:43 ca-csr.json
-rw------- 1 root root 1675 May 28 15:44 ca-key.pem
-rw-r--r-- 1 root root 1359 May 28 15:44 ca.pem
[root@linux-node1 ssl]#
所有证书都创建在linux-node1上后再传给其他两个节点上
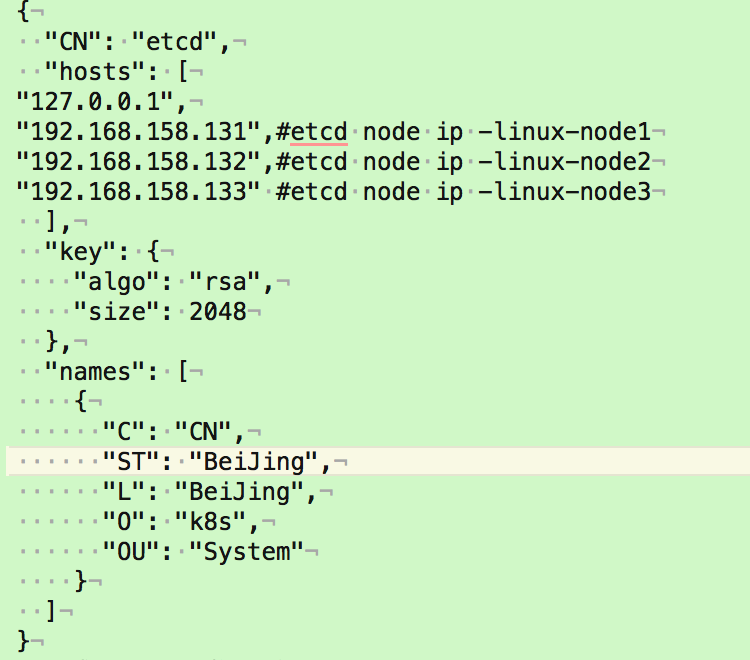
[root@linux-node1 ~]# vim etcd-csr.json
{
"CN": "etcd",
"hosts": [
"127.0.0.1",
"192.168.158.131",#etcd node ip -linux-node1
"192.168.158.132",#etcd node ip -linux-node2
"192.168.158.133" #etcd node ip -linux-node3
],
"key": {
"algo": "rsa",
"size": 2048
},
"names": [
{
"C": "CN",
"ST": "BeiJing",
"L": "BeiJing",
"O": "k8s",
"OU": "System"
}
]
}
2.生成 etcd 证书和私钥:
[root@linux-node1 ~]# cfssl gencert -ca=/opt/kubernetes/ssl/ca.pem \
-ca-key=/opt/kubernetes/ssl/ca-key.pem \
-config=/opt/kubernetes/ssl/ca-config.json \
-profile=kubernetes etcd-csr.json | cfssljson -bare etcd
------
[root@linux-node1 ssl]# cfssl gencert -ca=/opt/kubernetes/ssl/ca.pem \
> -ca-key=/opt/kubernetes/ssl/ca-key.pem \
> -config=/opt/kubernetes/ssl/ca-config.json \
> -profile=kubernetes etcd-csr.json | cfssljson -bare etcd
2018/05/28 16:50:32 [INFO] generate received request
2018/05/28 16:50:32 [INFO] received CSR
2018/05/28 16:50:32 [INFO] generating key: rsa-2048
2018/05/28 16:50:32 [INFO] encoded CSR
2018/05/28 16:50:32 [INFO] signed certificate with serial number 181517898254851153801250749057054103551198706935
2018/05/28 16:50:32 [WARNING] This certificate lacks a "hosts" field. This makes it unsuitable for
websites. For more information see the Baseline Requirements for the Issuance and Management
of Publicly-Trusted Certificates, v.1.1.6, from the CA/Browser Forum (https://cabforum.org);
specifically, section 10.2.3 ("Information Requirements").
------
会生成以下证书文件
[root@linux-node1 ssl]# ll
total 36
-rw-r--r-- 1 root root 291 May 28 15:43 ca-config.json
-rw-r--r-- 1 root root 1001 May 28 15:44 ca.csr
-rw-r--r-- 1 root root 208 May 28 15:43 ca-csr.json
-rw------- 1 root root 1675 May 28 15:44 ca-key.pem
-rw-r--r-- 1 root root 1359 May 28 15:44 ca.pem
-rw-r--r-- 1 root root 1062 May 28 16:50 etcd.csr
-rw-r--r-- 1 root root 289 May 28 16:49 etcd-csr.json
-rw------- 1 root root 1679 May 28 16:50 etcd-key.pem
-rw-r--r-- 1 root root 1436 May 28 16:50 etcd.pem
[root@linux-node1 ssl]# cat etcd-csr.json
{
"CN": "etcd",
"hosts": [
"127.0.0.1",
"192.168.158.131",
"192.168.158.132",
"192.168.158.133"
],
"key": {
"algo": "rsa",
"size": 2048
},
"names": [
{
"C": "CN",
"ST": "BeiJing",
"L": "BeiJing",
"O": "k8s",
"OU": "System"
}
]
}
3.将证书移动到/opt/kubernetes/ssl目录下
[root@linux-node1 ssl]# cp etcd*.pem /opt/kubernetes/ssl
[root@linux-node1 ssl]# scp etcd*.pem 192.168.158.132:/opt/kubernetes/ssl
etcd-key.pem 100% 1679 1.5MB/s 00:00
etcd.pem 100% 1436 1.4MB/s 00:00
[root@linux-node1 ssl]# scp etcd*.pem 192.168.158.133:/opt/kubernetes/ssl
etcd-key.pem 100% 1679 1.7MB/s 00:00
etcd.pem 100% 1436 1.5MB/s 00:00
[root@linux-node1 ssl]#
[root@k8s-master ~]# rm -f etcd.csr etcd-csr.json
4.设置ETCD配置文件
[root@linux-node1 ~]# vim /opt/kubernetes/cfg/etcd.conf
[root@linux-node1 ssl]# cat /opt/kubernetes/cfg/etcd.conf
#[member]
ETCD_NAME="etcd-node1"
ETCD_DATA_DIR="/var/lib/etcd/default.etcd"
#ETCD_SNAPSHOT_COUNTER="10000"
#ETCD_HEARTBEAT_INTERVAL="100"
#ETCD_ELECTION_TIMEOUT="1000"
ETCD_LISTEN_PEER_URLS="https://192.168.158.131:2380"
ETCD_LISTEN_CLIENT_URLS="https://192.168.158.131:2379,https://127.0.0.1:2379"
#ETCD_MAX_SNAPSHOTS="5"
#ETCD_MAX_WALS="5"
#ETCD_CORS=""
#[cluster]
ETCD_INITIAL_ADVERTISE_PEER_URLS="https://192.168.158.131:2380"
# if you use different ETCD_NAME (e.g. test),
# set ETCD_INITIAL_CLUSTER value for this name, i.e. "test=http://..."
ETCD_INITIAL_CLUSTER="etcd-node1=https://192.168.158.131:2380,etcd-node2=https://192.168.158.132:2380,etcd-node3=https://192.168.158.133:2380"
ETCD_INITIAL_CLUSTER_STATE="new"
ETCD_INITIAL_CLUSTER_TOKEN="k8s-etcd-cluster"
ETCD_ADVERTISE_CLIENT_URLS="https://192.168.158.131:2379"
#[security]
CLIENT_CERT_AUTH="true"
ETCD_CA_FILE="/opt/kubernetes/ssl/ca.pem"
ETCD_CERT_FILE="/opt/kubernetes/ssl/etcd.pem"
ETCD_KEY_FILE="/opt/kubernetes/ssl/etcd-key.pem"
PEER_CLIENT_CERT_AUTH="true"
ETCD_PEER_CA_FILE="/opt/kubernetes/ssl/ca.pem"
ETCD_PEER_CERT_FILE="/opt/kubernetes/ssl/etcd.pem"
ETCD_PEER_KEY_FILE="/opt/kubernetes/ssl/etcd-key.pem"
5.创建ETCD系统服务
[root@linux-node1 ~]# vim /etc/systemd/system/etcd.service
[Unit]
Description=Etcd Server
After=network.target
[Service]
Type=simple
WorkingDirectory=/var/lib/etcd
EnvironmentFile=-/opt/kubernetes/cfg/etcd.conf
# set GOMAXPROCS to number of processors
ExecStart=/bin/bash -c "GOMAXPROCS=$(nproc) /opt/kubernetes/bin/etcd"
Type=notify
[Install]
WantedBy=multi-user.target
6.重新加载系统服务
[root@linux-node1 ssl]# systemctl daemon-reload
[root@linux-node1 ssl]#
[root@linux-node1 ssl]#
[root@linux-node1 ssl]# systemctl enable etcd #etcd启动会检查集群中其他的成员
Created symlink from /etc/systemd/system/multi-user.target.wants/etcd.service to /etc/systemd/system/etcd.service.
# scp /opt/kubernetes/cfg/etcd.conf 192.168.56.12:/opt/kubernetes/cfg/
# scp /etc/systemd/system/etcd.service 192.168.56.12:/etc/systemd/system/
# scp /opt/kubernetes/cfg/etcd.conf 192.168.56.13:/opt/kubernetes/cfg/
# scp /etc/systemd/system/etcd.service 192.168.56.13:/etc/systemd/system/
------------------------
[root@linux-node1 ssl]# scp /opt/kubernetes/cfg/etcd.conf 192.168.158.132:/opt/kubernetes/cfg/
etcd.conf 100% 1182 1.2MB/s 00:00
[root@linux-node1 ssl]# scp /opt/kubernetes/cfg/etcd.conf 192.168.158.133:/opt/kubernetes/cfg/
etcd.conf 100% 1182 451.4KB/s 00:00
[root@linux-node1 ssl]# scp /etc/systemd/system/etcd.service 192.168.158.132:/etc/systemd/system/
etcd.service 100% 314 124.5KB/s 00:00
[root@linux-node1 ssl]# scp /etc/systemd/system/etcd.service 192.168.158.133:/etc/systemd/system/
etcd.service
登录到Linux-node2节点
[root@linux-node2 src]# cat /opt/kubernetes/cfg/etcd.conf
#[member]
ETCD_NAME="etcd-node2"
ETCD_DATA_DIR="/var/lib/etcd/default.etcd"
#ETCD_SNAPSHOT_COUNTER="10000"
#ETCD_HEARTBEAT_INTERVAL="100"
#ETCD_ELECTION_TIMEOUT="1000"
ETCD_LISTEN_PEER_URLS="https://192.168.158.132:2380"
ETCD_LISTEN_CLIENT_URLS="https://192.168.158.132:2379,https://127.0.0.1:2379"
#ETCD_MAX_SNAPSHOTS="5"
#ETCD_MAX_WALS="5"
#ETCD_CORS=""
#[cluster]
ETCD_INITIAL_ADVERTISE_PEER_URLS="https://192.168.158.132:2380"
# if you use different ETCD_NAME (e.g. test),
# set ETCD_INITIAL_CLUSTER value for this name, i.e. "test=http://..."
ETCD_INITIAL_CLUSTER="etcd-node1=https://192.168.158.131:2380,etcd-node2=https://192.168.158.132:2380,etcd-node3=https://192.168.158.133:2380"
ETCD_INITIAL_CLUSTER_STATE="new"
ETCD_INITIAL_CLUSTER_TOKEN="k8s-etcd-cluster"
ETCD_ADVERTISE_CLIENT_URLS="https://192.168.158.132:2379"
#[security]
CLIENT_CERT_AUTH="true"
ETCD_CA_FILE="/opt/kubernetes/ssl/ca.pem"
ETCD_CERT_FILE="/opt/kubernetes/ssl/etcd.pem"
ETCD_KEY_FILE="/opt/kubernetes/ssl/etcd-key.pem"
PEER_CLIENT_CERT_AUTH="true"
ETCD_PEER_CA_FILE="/opt/kubernetes/ssl/ca.pem"
ETCD_PEER_CERT_FILE="/opt/kubernetes/ssl/etcd.pem"
ETCD_PEER_KEY_FILE="/opt/kubernetes/ssl/etcd-key.pem"
[root@linux-node1 src]#
登录到Linux-node3节点
[root@linux-node3 bin]# cat /opt/kubernetes/cfg/etcd.conf
#[member]
ETCD_NAME="etcd-node3"
ETCD_DATA_DIR="/var/lib/etcd/default.etcd"
#ETCD_SNAPSHOT_COUNTER="10000"
#ETCD_HEARTBEAT_INTERVAL="100"
#ETCD_ELECTION_TIMEOUT="1000"
ETCD_LISTEN_PEER_URLS="https://192.168.158.133:2380"
ETCD_LISTEN_CLIENT_URLS="https://192.168.158.133:2379,https://127.0.0.1:2379"
#ETCD_MAX_SNAPSHOTS="5"
#ETCD_MAX_WALS="5"
#ETCD_CORS=""
#[cluster]
ETCD_INITIAL_ADVERTISE_PEER_URLS="https://192.168.158.133:2380"
# if you use different ETCD_NAME (e.g. test),
# set ETCD_INITIAL_CLUSTER value for this name, i.e. "test=http://..."
ETCD_INITIAL_CLUSTER="etcd-node1=https://192.168.158.131:2380,etcd-node2=https://192.168.158.132:2380,etcd-node3=https://192.168.158.133:2380"
ETCD_INITIAL_CLUSTER_STATE="new"
ETCD_INITIAL_CLUSTER_TOKEN="k8s-etcd-cluster"
ETCD_ADVERTISE_CLIENT_URLS="https://192.168.158.133:2379"
#[security]
CLIENT_CERT_AUTH="true"
ETCD_CA_FILE="/opt/kubernetes/ssl/ca.pem"
ETCD_CERT_FILE="/opt/kubernetes/ssl/etcd.pem"
ETCD_KEY_FILE="/opt/kubernetes/ssl/etcd-key.pem"
PEER_CLIENT_CERT_AUTH="true"
ETCD_PEER_CA_FILE="/opt/kubernetes/ssl/ca.pem"
ETCD_PEER_CERT_FILE="/opt/kubernetes/ssl/etcd.pem"
ETCD_PEER_KEY_FILE="/opt/kubernetes/ssl/etcd-key.pem"
[root@linux-node1 bin]#
-------------------------
在所有节点上创建etcd存储目录并启动etcd
[root@linux-node1 bin]# mkdir /var/lib/etcd
[root@linux-node1 bin]# systemctl daemon-reload
[root@linux-node1 ~]# systemctl start etcd
-----131------
[root@linux-node1 ssl]# systemctl status etcd
[0m etcd.service - Etcd Server
Loaded: loaded (/etc/systemd/system/etcd.service; enabled; vendor preset: disabled)
Active: active (running) since Mon 2018-05-28 17:26:05 CST; 19s ago
Main PID: 13541 (etcd)
CGroup: /system.slice/etcd.service
13541 /opt/kubernetes/bin/etcd
May 28 17:26:07 linux-node1.example.com etcd[13541]: the clock difference against peer 4f85d0c8dbf19c6e is...1s]
May 28 17:26:07 linux-node1.example.com etcd[13541]: health check for peer c9853b276ee3f050 could not conn...sed
May 28 17:26:08 linux-node1.example.com etcd[13541]: peer c9853b276ee3f050 became active
May 28 17:26:08 linux-node1.example.com etcd[13541]: established a TCP streaming connection with peer c985...er)
May 28 17:26:08 linux-node1.example.com etcd[13541]: established a TCP streaming connection with peer c985...er)
May 28 17:26:08 linux-node1.example.com etcd[13541]: established a TCP streaming connection with peer c985...er)
May 28 17:26:08 linux-node1.example.com etcd[13541]: established a TCP streaming connection with peer c985...er)
May 28 17:26:09 linux-node1.example.com etcd[13541]: updating the cluster version from 3.0 to 3.2
May 28 17:26:09 linux-node1.example.com etcd[13541]: updated the cluster version from 3.0 to 3.2
May 28 17:26:09 linux-node1.example.com etcd[13541]: enabled capabilities for version 3.2
Hint: Some lines were ellipsized, use -l to show in full.
-----132------
[root@linux-node2 src]# systemctl status etcd
[0m etcd.service - Etcd Server
Loaded: loaded (/etc/systemd/system/etcd.service; enabled; vendor preset: disabled)
Active: active (running) since Mon 2018-05-28 17:19:21 CST; 29s ago
Main PID: 12006 (etcd)
CGroup: /system.slice/etcd.service
12006 /opt/kubernetes/bin/etcd
May 28 17:19:21 linux-node1.example.com etcd[12006]: set the initial cluster version to 3.0
May 28 17:19:21 linux-node1.example.com etcd[12006]: enabled capabilities for version 3.0
May 28 17:19:24 linux-node1.example.com etcd[12006]: peer c9853b276ee3f050 became active
May 28 17:19:24 linux-node1.example.com etcd[12006]: established a TCP streaming connection with peer c985...er)
May 28 17:19:24 linux-node1.example.com etcd[12006]: established a TCP streaming connection with peer c985...er)
May 28 17:19:24 linux-node1.example.com etcd[12006]: 4f85d0c8dbf19c6e initialzed peer connection; fast-for...(s)
May 28 17:19:24 linux-node1.example.com etcd[12006]: established a TCP streaming connection with peer c985...er)
May 28 17:19:24 linux-node1.example.com etcd[12006]: established a TCP streaming connection with peer c985...er)
May 28 17:19:25 linux-node1.example.com etcd[12006]: updated the cluster version from 3.0 to 3.2
May 28 17:19:25 linux-node1.example.com etcd[12006]: enabled capabilities for version 3.2
Hint: Some lines were ellipsized, use -l to show in full.
-----133------
[root@linux-node3 bin]# systemctl status etcd
[0m etcd.service - Etcd Server
Loaded: loaded (/etc/systemd/system/etcd.service; enabled; vendor preset: disabled)
Active: active (running) since Mon 2018-05-28 17:26:08 CST; 30s ago
Main PID: 12448 (etcd)
Memory: 10.1M
CGroup: /system.slice/etcd.service
12448 /opt/kubernetes/bin/etcd
May 28 17:26:08 linux-node1.example.com etcd[12448]: published {Name:etcd-node3 ClientURLs:[https://192.16...e8c
May 28 17:26:08 linux-node1.example.com etcd[12448]: ready to serve client requests
May 28 17:26:08 linux-node1.example.com etcd[12448]: c9853b276ee3f050 initialzed peer connection; fast-for...(s)
May 28 17:26:08 linux-node1.example.com etcd[12448]: ready to serve client requests
May 28 17:26:08 linux-node1.example.com etcd[12448]: serving client requests on 192.168.158.133:2379
May 28 17:26:08 linux-node1.example.com etcd[12448]: serving client requests on 127.0.0.1:2379
May 28 17:26:08 linux-node1.example.com systemd[1]: Started Etcd Server.
May 28 17:26:09 linux-node1.example.com etcd[12448]: updated the cluster version from 3.0 to 3.2
May 28 17:26:09 linux-node1.example.com etcd[12448]: enabled capabilities for version 3.2
May 28 17:26:13 linux-node1.example.com etcd[12448]: the clock difference against peer 4f85d0c8dbf19c6e is...1s]
Hint: Some lines were ellipsized, use -l to show in full.
--------验证etcd集群2379端口是否起来------
[root@linux-node1 ssl]# netstat -nptl
Active Internet connections (only servers)
Proto Recv-Q Send-Q Local Address Foreign Address State PID/Program name
tcp 0 0 192.168.158.131:2379 0.0.0.0:* LISTEN 13541/etcd
tcp 0 0 127.0.0.1:2379 0.0.0.0:* LISTEN 13541/etcd
tcp 0 0 192.168.158.131:2380 0.0.0.0:* LISTEN 13541/etcd
tcp 0 0 0.0.0.0:22 0.0.0.0:* LISTEN 895/sshd
tcp 0 0 127.0.0.1:25 0.0.0.0:* LISTEN 1105/master
tcp6 0 0 :::22 :::* LISTEN 895/sshd
tcp6 0 0 ::1:25 :::* LISTEN 1105/master
[root@linux-node1 ssl]#
--------------------------------------
下面需要大家在所有的 etcd 节点重复上面的步骤,直到所有机器的 etcd 服务都已启动。
7.验证集群
----linux-node1-------
[root@linux-node1 ssl]# etcdctl --endpoints=https://192.168.158.131:2379 \
> --ca-file=/opt/kubernetes/ssl/ca.pem \
> --cert-file=/opt/kubernetes/ssl/etcd.pem \
> --key-file=/opt/kubernetes/ssl/etcd-key.pem cluster-health
member 4f85d0c8dbf19c6e is healthy: got healthy result from https://192.168.158.132:2379
member 534d4f341140accf is healthy: got healthy result from https://192.168.158.131:2379
member c9853b276ee3f050 is healthy: got healthy result from https://192.168.158.133:2379
cluster is healthy
----linux-node2-------
[root@linux-node2 src]# etcdctl --endpoints=https://192.168.158.132:2379 \
> --ca-file=/opt/kubernetes/ssl/ca.pem \
> --cert-file=/opt/kubernetes/ssl/etcd.pem \
> --key-file=/opt/kubernetes/ssl/etcd-key.pem cluster-health
member 4f85d0c8dbf19c6e is healthy: got healthy result from https://192.168.158.132:2379
member 534d4f341140accf is healthy: got healthy result from https://192.168.158.131:2379
member c9853b276ee3f050 is healthy: got healthy result from https://192.168.158.133:2379
cluster is healthy
----linux-node3-------
[root@linux-node3 bin]# etcdctl --endpoints=https://192.168.158.133:2379 \
> --ca-file=/opt/kubernetes/ssl/ca.pem \
> --cert-file=/opt/kubernetes/ssl/etcd.pem \
> --key-file=/opt/kubernetes/ssl/etcd-key.pem cluster-health
member 4f85d0c8dbf19c6e is healthy: got healthy result from https://192.168.158.132:2379
member 534d4f341140accf is healthy: got healthy result from https://192.168.158.131:2379
member c9853b276ee3f050 is healthy: got healthy result from https://192.168.158.133:2379
cluster is healthy
------END--------------
k8s笔记0528-基于KUBERNETES构建企业容器云手动部署集群记录-2的更多相关文章
- k8s笔记0528-基于KUBERNETES构建企业容器云手动部署集群记录-4
部署kubelet 1.二进制包准备 将软件包从linux-node1复制到linux-node2中去. [root@linux-node1 ~]# cd /usr/local/src/kuberne ...
- k8s笔记0528-基于KUBERNETES构建企业容器云手动部署集群记录-5
1.为Flannel生成证书 [root@linux-node1 ~]# vim flanneld-csr.json { "CN": "flanneld", & ...
- k8s笔记0528-基于KUBERNETES构建企业容器云手动部署集群记录-7
Kubernetes Dashboard 创建CoreDNS [root@linux-node1 ~]# kubectl create -f coredns.yaml [root@linux-node ...
- k8s笔记0528-基于KUBERNETES构建企业容器云手动部署集群记录-6
1.创建一个测试用的deployment [root@linux-node1 ~]# kubectl run net-test --image=alpine --replicas=2 sleep 36 ...
- 基于Kubernetes构建企业容器云
前言 团队成员有DBA.运维.Python开发,由于需要跨部门向公司私有云团队申请虚拟机, 此时我在思考能否在现有已申请的虚拟机之上,再进行更加细粒度的资源隔离和划分,让本团队的成员使用, 也就是在私 ...
- 腾讯基于Kubernetes的企业级容器云平台GaiaStack (转)
GaiaStack介绍 GaiaStack是腾讯基于Kubernetes打造的容器私有云平台.这里有几个关键词: 腾讯:GaiaStack可服务腾讯内部所有BG的业务: Kubernetes:Gaia ...
- 容器云平台No.1~基于Docker及Kubernetes构建的容器云平台
开篇 最近整理笔记,不知不觉发现关于kubernetes相关的笔记已经达99篇了,索性一起总结了.算是对这两年做容器云平台的一个总结,本文是开篇,先介绍下所有用到的组件.首先来看下架构图(实在画的太丑 ...
- 基于Kubernetes构建企业Jenkins master/slave CI/CD平台
搭建平台目的: k8s中搭建jenkins master/slave架构,解决单jenkins执行效率低,资源不足等问题(jenkins master 调度任务到 slave上,并发执行任务,提升任务 ...
- Kubernetes v1.12/v1.13 二进制部署集群(HTTPS+RBAC)
官方提供的几种Kubernetes部署方式 minikube Minikube是一个工具,可以在本地快速运行一个单点的Kubernetes,尝试Kubernetes或日常开发的用户使用.不能用于生产环 ...
随机推荐
- python3中匿名函数做参数,匿名函数做实参,eval关键字
一:说到匿名函数,大家都感到陌生又熟悉,今天我带大家了解一下py3中的匿名函数,以及匿名函数作为函数的参数的情况 主要通过以下实例来说明: 实例一: newarr =[33,44444,6222,88 ...
- Jmeter RMI 反序列化命令执行漏洞(CVE-2018-1297)
下载ysoserial,git git clone https://github.com/frohoff/ysoserial.git cd ysoserialmvn clean package -Ds ...
- mout -t -cifs 解析
mount -t cifs //<azurefile_url> <linux_mountpoint(folder)> df 查看挂载 umount取消挂载 umount -l ...
- Kubernetes安装报错总结
1.kubeadm init初使化报错 [root@k8s01 ~]# kubeadm init --kubernetes-version=v1.13.3 --pod-network-cidr=1 ...
- 剑指 Offer 39. 数组中出现次数超过一半的数字
剑指 Offer 39. 数组中出现次数超过一半的数字 数组中有一个数字出现的次数超过数组长度的一半,请找出这个数字. 你可以假设数组是非空的,并且给定的数组总是存在多数元素. 示例 1: 输入: [ ...
- Cell Reports | 上海瑞金医院糜坚青等揭示组蛋白酰化/乙酰化修饰比率调控BRD4基因组分布
景杰生物 | 报道 组蛋白翻译后修饰,被认为构成一类超越基因序列的"组蛋白密码",控制着遗传信息的组织层次及其在染色质层面的解读.组蛋白赖氨酸乙酰化是研究最早的一类组蛋白修饰, ...
- Flutter开发进阶学习指南Flutter开发进阶学习指南
Flutter 的起源 Flutter 的诞生其实比较有意思,Flutter 诞生于 Chrome 团队的一场内部实验, 谷歌的前端团队在把前端一些"乱七八糟"的规范去掉后,发现在 ...
- 【Lua篇】静态代码扫描分析(三)语法分析
一.语法分析 通过将词法分析获取的Token流按照目标语言的语法进行解析的过程,例如解析函数声明.函数调用.变量声明.各种语句等. 二.Lua语法分析 在写语法分析程序前,先需要了解Lua的语句和语法 ...
- Spring学习02(DI依赖注入)
5.依赖注入(Dependency Injection,DI) 5.1 概念 依赖 : 指Bean对象的创建依赖于容器 . Bean对象的依赖资源 . 注入 : 指Bean对象所依赖的资源 , 由容器 ...
- awk-04-流程控制
if 格式: if ( 条件 ) 语句 [ else 语句 ] 单分支 正则匹配判断 双分支 多分支 while 格式 while (条件) 语句 awk是按行处理的,每次读取一行,并遍历打印每个字段 ...