Centos7安装mysql5.7.21
1、卸载系统自带的 MariaDB
[root@CentOS ~]# rpm -qa | grep mariadb

mariadb-libs-5.5.-.el7.x86_64

[root@CentOS ~]# rpm -e --nodeps mariadb-libs-5.5.-.el7.x86_64
2、下载 mysql5.7.21 安装包
[root@CentOS local]# wget https://dev.mysql.com/get/Downloads/MySQL-5.7/mysql-5.7.21-linux-glibc2.12-x86_64.tar.gz
3、创建 mysql 用户组和 mysql 用户
[root@CentOS local]# useradd mysql
4、解压安装包,并将解压好的文件夹重命名为mysql
[root@CentOS local]# tar -zxvf mysql-5.7.-linux-glibc2.-x86_64.tar.gz
mysql-5.7.-linux-glibc2.-x86_64/bin/myisam_ftdump
mysql-5.7.-linux-glibc2.-x86_64/bin/myisamchk
mysql-5.7.-linux-glibc2.-x86_64/bin/myisamlog
mysql-5.7.-linux-glibc2.-x86_64/bin/myisampack
mysql-5.7.-linux-glibc2.-x86_64/bin/mysql
mysql-5.7.-linux-glibc2.-x86_64/bin/mysql_client_test_embedded
mysql-5.7.-linux-glibc2.-x86_64/bin/mysql_config_editor
mysql-5.7.-linux-glibc2.-x86_64/bin/mysql_embedded
mysql-5.7.-linux-glibc2.-x86_64/bin/mysql_install_db
mysql-5.7.-linux-glibc2.-x86_64/bin/mysql_plugin
......(略去内容).....
[root@CentOS local]# mv mysql-5.7.-linux-glibc2.-x86_64 mysql
5、将 mysql 添加为系统服务
[root@CentOS local]# cp mysql/support-files/mysql.server /etc/init.d/mysql
[root@CentOS local]# chkconfig --add mysql
6、初始化数据库
[root@CentOS mysql]# mkdir data
[root@CentOS mysql]# ./bin/mysqld --initialize --user=mysql --basedir=/usr/local/mysql --datadir=/usr/local/mysql/data
--24T11::.265873Z [Warning] TIMESTAMP with implicit DEFAULT value is deprecated. Please use --explicit_defaults_for_timestamp server option (see documentation for more details).
--24T11::.343129Z [Warning] InnoDB: New log files created, LSN=
--24T11::.473269Z [Warning] InnoDB: Creating foreign key constraint system tables.
--24T11::.541782Z [Warning] No existing UUID has been found, so we assume that this is the first time that this server has been started. Generating a new UUID: 63b1ed0c--11e8-aa97-000c29847b2d.
--24T11::.542867Z [Warning] Gtid table is not ready to be used. Table 'mysql.gtid_executed' cannot be opened.
--24T11::.543383Z [Note] A temporary password is generated for root@localhost: =u>yyVorV7g%
[root@CentOS mysql]#
例如在 /usr/local/mysql 目录下创建用于保存数据的data 目录,初始化数据库后获得的临时密码为:=u>yyVorV7g%
7、启动mysql服务,使用临时密码登录mysql
[root@CentOS mysql]# systemctl start mysql # 使用 service mysql start 也可以
[root@CentOS mysql]# ps -ef | grep mysql
root : ? :: /bin/sh /usr/local/mysql/bin/mysqld_safe --datadir=/usr/local/mysql/data --pid-file=/usr/local/mysql/data/CentOS.pid
mysql : ? :: /usr/local/mysql/bin/mysqld --basedir=/usr/local/mysql --datadir=/usr/local/mysql/data --plugin-dir=/usr/local/mysql/lib/plugin --user=mysql --log-error=CentOS.err --pid-file=/usr/local/mysql/data/CentOS.pid
root : pts/ :: grep --color=auto mysql
[root@CentOS mysql]# ./bin/mysql -u root -p
Enter password: # 这里输入刚获取的临时密码
Welcome to the MySQL monitor. Commands end with ; or \g.
Your MySQL connection id is
Server version: 5.7. Copyright (c) , , Oracle and/or its affiliates. All rights reserved. Oracle is a registered trademark of Oracle Corporation and/or its
affiliates. Other names may be trademarks of their respective
owners. Type 'help;' or '\h' for help. Type '\c' to clear the current input statement. mysql>
8、修改登录密码
mysql> SET PASSWORD FOR 'root'@'localhost' = PASSWORD(''); # 将 root 登录密码修改为123456
Query OK, rows affected, warning (0.00 sec)
mysql>
9、将 mysql 服务设置为开机启动
[root@CentOS mysql]# chkconfig mysql on
10、设置任何远程主机都可以访问数据库
[root@CentOS bin]# ./mysql -u root -p
Enter password:
Welcome to the MySQL monitor. Commands end with ; or \g.
Your MySQL connection id is
Server version: 5.7. MySQL Community Server (GPL) Copyright (c) , , Oracle and/or its affiliates. All rights reserved. Oracle is a registered trademark of Oracle Corporation and/or its
affiliates. Other names may be trademarks of their respective
owners. Type 'help;' or '\h' for help. Type '\c' to clear the current input statement. mysql> grant all privileges on *.* to 'root' @'%' identified by ''; # 设置任何远程主机都可以访问
Query OK, rows affected, warning (0.00 sec) mysql> flush privileges; # 刷新权限
Query OK, rows affected (0.00 sec) mysql>
11、开放 3306 端口(mysql 默认端口)
[root@CentOS bin]# firewall-cmd --zone=public --add-port=/tcp --permanent # 添加 端口
success
[root@CentOS bin]# firewall-cmd --reload # 重新载入
success
[root@CentOS bin]#
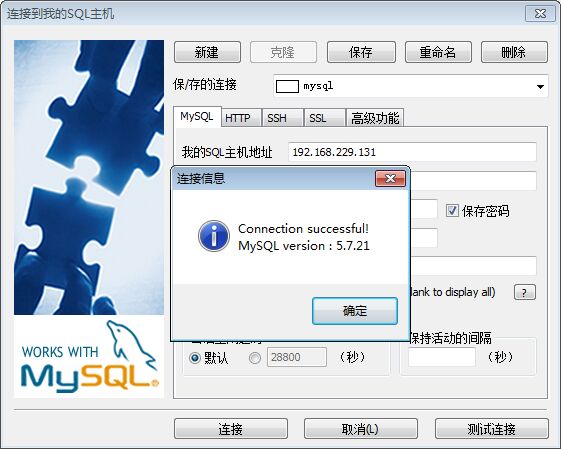
12、使用 Sqlyog 客户端进行测试

Centos7安装mysql5.7.21的更多相关文章
- Centos7安装Mysql5.7方法总结 - 实操手册
Centos7.x版本下针对Mysql的安装和使用多少跟之前的Centos6之前版本有所不同的,废话就不多赘述了,下面介绍下在centos7.x环境里安装mysql5.7的几种方法:一.yum方式安装 ...
- Centos7 安装 MySQL5.7
Centos7 安装 MySQL5.7 一.环境介绍 1.安装包版本介绍 MySQL 有三种安装方式:RPM安装.二进制包安装.源码包安装.我们这篇文章以二进制方式安装MySQL 软件名称 版本 系统 ...
- centos7安装mysql5.7.19及配置远程连接
centos7安装mysql5.7.19及配置远程连接------https://blog.csdn.net/Lh19931122/article/details/77996213
- CENTOS7上安装MYSQL5.7.21流程
1系统约定安装文件下载目录:/data/softwareMysql目录安装位置:/usr/local/mysql数据库保存位置:/data/mysql日志保存位置:/data/log/mysql 2下 ...
- Linux学习第三步(Centos7安装mysql5.7数据库)
版本:mysql-5.7.16-1.el7.x86_64.rpm-bundle.tar 前言:在linux下安装mysql不如windows下面那么简单,但是也不是很难.本文向大家讲解了如何在Cent ...
- Centos7安装mysql-5.7.19
Centos7安装Mysql 一 mysql下载 地址: https://dev.mysql.com/downloads/mysql/#downloads 二 在centos7上创建安装文件存放.解压 ...
- centos7安装mysql5.7修改设置密码策略
centos7操作系统在安装mysql5.7社区版之后会有默认密码,通过grep命令在mysqld.log文件中即可找到,如下所示: 标识位置即在初始化安装时mysql的默认密码,然后通过mysql ...
- centos7安装MySQL5.7无法设置密码问题
前言 在使用centos7系统yum方式安装MySQL5.7后 不知道默认密码是多少 知道后没办法修改? 一.找到MySQL密码 service mysqld start vim /var/log/ ...
- linux下安装mysql5.7.21
下载 wget https://dev.mysql.com/get/Downloads/MySQL-5.7/mysql-5.7.21-linux-glibc2.12-x86_64.tar.gz 解压 ...
随机推荐
- 8个问题全面了解5G关键技术Massive MIMO
1 什么是Massive MIMO Massive MIMO(大规模天线技术,亦称为Large Scale MIMO)是第五代移动通信(5G)中提高系统容量和频谱利用率的关键技术.它最早由美国贝尔实验 ...
- 导入spark程序的maven依赖包时,无法导入,报错Unable to import maven project: See logs for details
问题:导入spark程序的maven依赖包时,无法导入,且报错:0:23 Unable to import maven project: See logs for details 2019-08-23 ...
- day21-Python运维开发基础(单个字符匹配 / 多字符匹配)
1. 正则表达式(单个字符匹配) # ### 正则表达式 => 单个字符匹配 import re """ lst = re.findall(正则表达式,字符串) & ...
- Openstack----学习笔记
ceph 分布式存储,用于存放新创建的云主机磁盘镜像文件和磁盘 创建云主机流程记录 简易版本: 上图中所有发送的请求都会存放在rabbit_mq(消息队列)中,各个组件会定时取消息队列中与自己相关的请 ...
- Tomcat的部署、虚拟主机及优化
Tomcat的部署.虚拟主机及优化 文章目录 Tomcat的部署.虚拟主机及优化 前言 1.Tomcat的名称由来 2.Apache Tomcat 5-7版本差异 2.1Apache Tomcat5. ...
- iOS开发的调试技巧
关于本文: 1.模拟器的快捷键 2.覆盖安装注意事项 3.给模拟器相册增加照片 4.模拟器中程序的数据 5.安装旧版本的模拟器 6.模拟慢网速 7.异常断点与符号断点 1.模拟器的快捷键 常用的模拟器 ...
- 吴裕雄--天生自然HADOOP操作实验学习笔记:hbase简介
实验目的 了解hbase的概念 通过安装hbase了解hbase的原理 了解hbase与hadoop的关系 复习hadoop和zookeeper的运行 实验原理 hbase是bigtable的开源山寨 ...
- 随机序列[SHOI2016](找规律+线段树)
传送门 这道题的题意就是给你n个数让你在每个数之间插入+.-.*三种运算符中的一种,然后算出一个答案,再把答案加起来. 这题肯定是不能暴力的(题目都告诉你了由3n-1种结果).我们先从小的情况枚举找一 ...
- 指定GPU运行python程序
一.命令行运行python程序时 1.首先查看哪些GPU空闲,nvidia-smi显示当前GPU使用情况. nvidia-smi 2.然后指定空闲的GPU运行python程序. CUDA_VISIBL ...
- Linux centos7 sed工具介绍
一.sed上 grep工具功能只能实现查找,不能把查找的内容替换. sed本身是一个管道命令,主要是以行为单位进行处理,可以将数据行进行查找.删除.替换字符或字符串.调换字符串位置.直接修改文件内容等 ...