Android中EditText显示明文与密文的两种方式
版权声明:本文为HaiyuKing原创文章,转载请注明出处!
前言
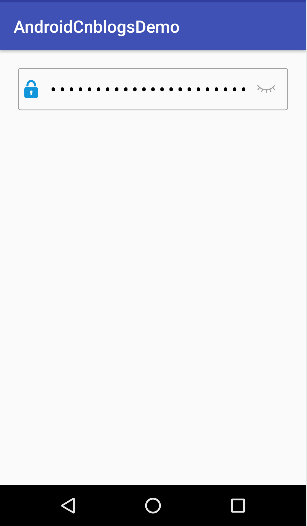
记录输入框显示、隐藏密码的简单布局以及实现方式。
效果图

代码分析
方式一
/**方式一:*/

    private void showOrHiddenPwd(){

        if(! showPwd){

            showPwd = true;

            img_pwdshow.setImageResource(R.drawable.pwd_show);

            //显示密码

            edt_password.setTransformationMethod(HideReturnsTransformationMethod.getInstance());

        }else{

            showPwd = false;

            img_pwdshow.setImageResource(R.drawable.pwd_hidden);

            //隐藏密码

            edt_password.setTransformationMethod(PasswordTransformationMethod.getInstance());

        }

    }
方式二
/**方式二:*/

    private void showOrHiddenPwdWithInputType(){

        if(! showPwd){

            showPwd = true;

            img_pwdshow.setImageResource(R.drawable.pwd_show);

            //显示密码

            edt_password.setInputType(InputType.TYPE_TEXT_VARIATION_VISIBLE_PASSWORD);

        }else{

            showPwd = false;

            img_pwdshow.setImageResource(R.drawable.pwd_hidden);

            //隐藏密码

            edt_password.setInputType(InputType.TYPE_CLASS_TEXT | InputType.TYPE_TEXT_VARIATION_PASSWORD);

        }

    }
使用步骤
一、项目组织结构图
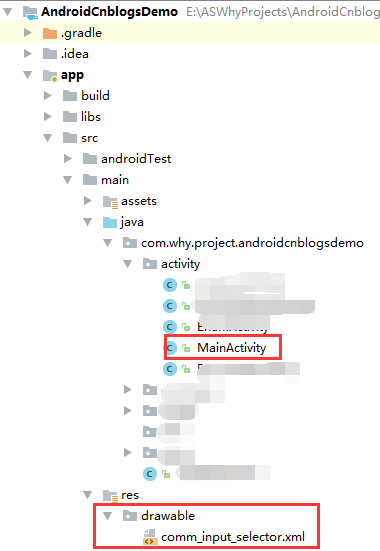
注意事项:
1、 导入类文件后需要change包名以及重新import R文件路径
2、 Values目录下的文件(strings.xml、dimens.xml、colors.xml等),如果项目中存在,则复制里面的内容,不要整个覆盖
二、导入步骤
将comm_input_selector.xml复制到项目中【本来是想作为输入框的背景框,就会实现输入框获取焦点的时候边框变色,但是现在作为LinearLayout的背景,可以实现聚焦的时候变色的效果】
<?xml version="1.0" encoding="utf-8"?>

<!-- 输入框背景图 -->

<selector xmlns:android="http://schemas.android.com/apk/res/android" >

   <!--选中时效果-->

   <!-- <item android:state_focused="true"

        android:drawable="@drawable/input_box_focused" /> -->

   <!--disable效果 windows焦点在前时  注意写法-->

   <!-- <item android:state_window_focused="true" android:state_enabled="false"

        android:drawable="@drawable/input_box_focused" /> -->

   <!--默认时效果-->

   <!-- <item  android:drawable="@drawable/input_box_unfocused" /> -->

    <!-- 选中时效果 -->

    <item android:state_focused="true">

        <shape android:shape="rectangle">

            <!-- 圆角 -->

            <corners android:radius="3dp" />

            <!-- 描边 -->

            <stroke android:width="1dp" android:color="#1296db" />

            <!-- 内边距 -->

            <padding

                android:bottom="5dp"

                android:left="5dp"

                android:right="5dp"

                android:top="5dp" />

            <!-- 填充 -->

            <solid android:color="@android:color/transparent" />

        </shape>

    </item>

    <!-- disable效果 windows焦点在前时  注意写法 -->

    <item android:state_enabled="false" android:state_window_focused="true">

        <shape android:shape="rectangle">

            <!-- 圆角 -->

            <corners android:radius="3dp" />

            <!-- 描边 -->

            <stroke android:width="1dp" android:color="#1296db" />

            <!-- 内边距 -->

            <padding

                android:bottom="5dp"

                android:left="5dp"

                android:right="5dp"

                android:top="5dp" />

            <!-- 填充 -->

            <solid android:color="@android:color/transparent" />

        </shape>

    </item>

    <!-- 默认时效果 -->

    <item>

        <shape android:shape="rectangle">

            <!-- 圆角 -->

            <corners android:radius="3dp" />

            <!-- 描边 -->

            <stroke android:width="1dp" android:color="#9f9f9f" />

            <!-- 内边距 -->

            <padding

                android:bottom="5dp"

                android:left="5dp"

                android:right="5dp"

                android:top="5dp" />

            <!-- 填充 -->

            <solid android:color="@android:color/transparent" />

        </shape>

    </item>

</selector>
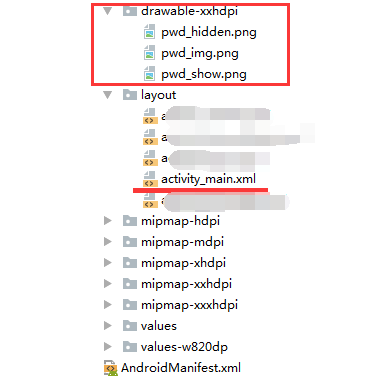
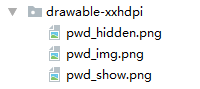
将图片资源复制到项目中【根据实际情况变更】


三、使用方法
布局文件
<?xml version="1.0" encoding="utf-8"?>

<!-- Android中EditText显示明文与密文的两种方式 -->

<RelativeLayout

    xmlns:android="http://schemas.android.com/apk/res/android"

    xmlns:tools="http://schemas.android.com/tools"

    android:id="@+id/activity_main"

    android:layout_width="match_parent"

    android:layout_height="match_parent"

    android:paddingBottom="@dimen/activity_vertical_margin"

    android:paddingLeft="@dimen/activity_horizontal_margin"

    android:paddingRight="@dimen/activity_horizontal_margin"

    android:paddingTop="@dimen/activity_vertical_margin"

    tools:context="com.why.project.androidcnblogsdemo.activity.MainActivity">

    <!--  当之有一个EditText或者AutoCompleteTextView的时候,进入画面时是默认得到焦点的。 要想去除焦点,可以在auto之前加一个0像素的layout,并设置他先得到焦点。 -->

    <LinearLayout

        android:layout_width="0px"

        android:layout_height="0px"

        android:focusable="true"

        android:focusableInTouchMode="true"/>

    <!-- 输入密码区域 -->

    <LinearLayout

        android:layout_width="match_parent"

        android:layout_height="50dp"

        android:orientation="horizontal"

        android:background="@drawable/comm_input_selector"

        android:focusable="true"

        android:clickable="true"

        android:addStatesFromChildren="true"

        android:layout_margin="5dp">

        <EditText

            android:id="@+id/edt_password"

            android:layout_width="0.0dp"

            android:layout_height="match_parent"

            android:layout_weight="1"

            android:background="@null"

            android:hint="请输入密码"

            android:textSize="18sp"

            android:imeOptions="actionGo"

            android:inputType="textPassword"

            android:text=""

            android:textColor="#000000"

            android:textColorHint="#8c8c8c"

            android:drawableLeft="@drawable/pwd_img"

            android:drawablePadding="10dp"

            />

        <!-- 显示隐藏密码图标 -->

        <ImageView

            android:id="@+id/img_pwdshow"

            android:layout_width="wrap_content"

            android:layout_height="match_parent"

            android:src="@drawable/pwd_hidden"

            android:scaleType="fitCenter"

            android:contentDescription="控制密码明文密文显示"

            android:paddingLeft="10dp"

            android:paddingRight="10dp"

            android:focusable="true"

            android:clickable="true"/>

    </LinearLayout>

</RelativeLayout>
Activity中使用
package com.why.project.androidcnblogsdemo.activity;

import android.os.Bundle;

import android.support.v7.app.AppCompatActivity;

import android.text.InputType;

import android.text.method.HideReturnsTransformationMethod;

import android.text.method.PasswordTransformationMethod;

import android.view.View;

import android.widget.EditText;

import android.widget.ImageView;

import com.why.project.androidcnblogsdemo.R;

/**

 * Android中EditText显示明文与密文的两种方式*/

public class MainActivity extends AppCompatActivity {

    private EditText edt_password;

    private ImageView img_pwdshow;

    private boolean showPwd = false;//默认不显示密码

    @Override

    protected void onCreate(Bundle savedInstanceState) {

        super.onCreate(savedInstanceState);

        setContentView(R.layout.activity_main);

        initViews();

        initEvents();

    }

    private void initViews() {

        edt_password = (EditText) findViewById(R.id.edt_password);

        img_pwdshow = (ImageView) findViewById(R.id.img_pwdshow);

    }

    private void initEvents() {

        img_pwdshow.setOnClickListener(new View.OnClickListener() {

            @Override

            public void onClick(View v) {

                showOrHiddenPwdWithInputType();

            }

        });

    }

    /**方式一:*/

    private void showOrHiddenPwd(){

        if(! showPwd){

            showPwd = true;

            img_pwdshow.setImageResource(R.drawable.pwd_show);

            //显示密码

            edt_password.setTransformationMethod(HideReturnsTransformationMethod.getInstance());

        }else{

            showPwd = false;

            img_pwdshow.setImageResource(R.drawable.pwd_hidden);

            //隐藏密码

            edt_password.setTransformationMethod(PasswordTransformationMethod.getInstance());

        }

    }

    /**方式二:*/

    private void showOrHiddenPwdWithInputType(){

        if(! showPwd){

            showPwd = true;

            img_pwdshow.setImageResource(R.drawable.pwd_show);

            //显示密码

            edt_password.setInputType(InputType.TYPE_TEXT_VARIATION_VISIBLE_PASSWORD);

        }else{

            showPwd = false;

            img_pwdshow.setImageResource(R.drawable.pwd_hidden);

            //隐藏密码

            edt_password.setInputType(InputType.TYPE_CLASS_TEXT | InputType.TYPE_TEXT_VARIATION_PASSWORD);

        }

    }

}
混淆配置
无
参考资料
项目demo下载地址
暂时空缺
Android中EditText显示明文与密文的两种方式的更多相关文章
- Android中EditText显示明文与密码的两种方式
效果图如下所述: <?xml version="1.0" encoding="utf-8"?> <LinearLayout xmlns:and ...
- Android手机上监听短信的两种方式
Android手机上监听短信有两种方式: 1. 接受系统的短信广播,操作短信内容. 优点:操作方便,适合简单的短信应用. 缺点:来信会在状态栏显示通知信息. AndroidManifest.xml: ...
- 在eclipse中使用Maven建web工程的两种方式
Eclipse版本:Neon Release (4.6.0) Maven版本:3.3.9 第一种方式: 右键新建maven工程,勾选创建一个简单工程 填入信息,注意打包方式要改为war 点击完成,创建 ...
- Android画图之抗锯齿 paint 和 Canvas 两种方式
在画图的时候,图片如果旋转或缩放之后,总是会出现那些华丽的锯齿.其实Android自带了解决方式. 方法一:给Paint加上抗锯齿标志.然后将Paint对象作为参数传给canvas的绘制方法. ...
- Android中使用Gson解析JSON数据的两种方法
Json是一种类似于XML的通用数据交换格式,具有比XML更高的传输效率;本文将介绍两种方法解析JSON数据,需要的朋友可以参考下 Json是一种类似于XML的通用数据交换格式,具有比XML更高的 ...
- js中构造函数的原型添加成员的两种方式
首先,js中给原型对象添加属性和方法. 方式一:对象的动态特效 给原型对象添加成员 语法:构造函数.prototype.方法名=function (){ } 方式二:替换原型对象(不是覆盖,而是替换, ...
- 安卓中使用OkHttp发送数据请求的两种方式(同、异步的GET、POST) 示例-- Android基础
1.首先看一下最终效果的截图,看看是不是你想要的,这个年代大家都很忙,开门见山很重要! 简要说下,点击不同按钮可以实现通过不同的方式发送OkHttp请求,并返回数据,这里请求的是网页,所以返回的都是些 ...
- 【Android】创建Popwindow弹出菜单的两种方式
方法一的Activity package com.app.test02; import android.app.Activity; import android.os.Bundle; import a ...
- Android为TV端助力 切换fragment的两种方式
使用add方法切换时:载入Fragment1Fragment1 onCreateFragment1 onCreateViewFragment1 onStartFragment1 onResume用以下 ...
随机推荐
- Docker常用名称
#查看容器ID(containedId) $docker ps -a #删除容器 $docker rm containedId #停止运行的容器 $docker stop containedId #修 ...
- 复写的Object常用方法
复写的Object常用方法 在Java中Object类是所有类的父类,其中有几个需要override的方法比如equals,hashCode和toString等方法.每次写这几个方法都要做很多重复性的 ...
- MySQL数据库创建表报错的解决方案
实体类 package com.tao.pojo; public class Student { private String id; private String name; private Str ...
- BZOJ_4813_[Cqoi2017]小Q的棋盘_dfs
BZOJ_4813_[Cqoi2017]小Q的棋盘_dfs Description 小Q正在设计一种棋类游戏.在小Q设计的游戏中,棋子可以放在棋盘上的格点中.某些格点之间有连线,棋子只能 在有连线的格 ...
- ES6知识整理(1)--let和const命令
最近准备在业余空闲时间里一边学习ES6,一边整理相关知识.只有整理过的学习才是有效的学习.也就是学习之后要使用和整理成文,才是正在的学到了... 那么现在开始 LINK START!(首先是第一讲,前 ...
- CentOS7系统操作httpd服务 - 开机启动/重启/查看状态
第一.启动.终止.重启 systemctl start httpd.service #启动 systemctl stop httpd.service #停止 systemctl restart htt ...
- CentOS7 docker试水
CentOS 7.0,无外网直接访问权限,有一台代理服务器. 首先安装docker-ce,参考http://blog.51cto.com/aaronsa/2056882 除非特殊说明,以下操作都用ro ...
- H5移动端项目案例、web手机微商城实战开发
自微信生态圈一步步强大后,关于移动端购物的趋势,逐渐成为大众关心的内容,目前市场上关于移动商城的制定就有大量版本,比如.微商城.移动商城.移动webAPP.微信商城各等各种定义层出不穷,这就对于移动端 ...
- 【移动端web】软键盘兼容问题
软键盘收放事件 这周几天遇到了好几个关于web移动端兼容性的问题.并花了很长时间去研究如何处理这几种兼容问题. 这次我们来说说关于移动端软键盘的js处理吧. 一般情况下,前端是无法监控软键盘到底是弹出 ...
- Windows环境下消息中间件RabbitMq的搭建与应用
前言 消息中间件目前已经在很多大型的项目上得到了运用,我们常见的有 RabbitMq, activitymq,kafka,rocketmq,其中rocketmq是阿里自己在kafka的基础上用java ...