Redis 5.0.5 Install manual
Redis 5.0.5 安装文档(Install manual)
一、单实例安装
| 标题 | 内容 |
|---|---|
| 测试环境 | Centos 7 |
| 虚拟机 | vbox |
| redis版本 | redis 5.0.5 |
1.编译安装redis
#使用wget从官网现在redis数据库tar压缩包

$ wget http://download.redis.io/releases/redis-5.0.5.tar.gz

#使用tar解压tar压缩包

$ tar xzf redis-5.0.5.tar.gz

#进入redis解压后的目录

$ cd redis-5.0.5

#使用make编译安装redis数据库,直接make会报错,详细错误信息查看第5节错误分析内容

$ make MALLOC=libc
2.redis编译测试
#直接make test报错,需要安装相关依赖包,运行测试时候需要tcl-Tool Command Language 包

$ yum install tcl

#执行make test 测试

$ make test
测试结果如下:

3.运行redis数据库
运行完成编译后,在源码文件夹中的src文件夹中会生成redis相关的二进制文件。运行编译好的二进制文件启动redis数据库:
The binaries that are now compiled are available in the src directory. Run Redis with:
#运行redis-server 二进制执行文件,启动redis服务端程序。
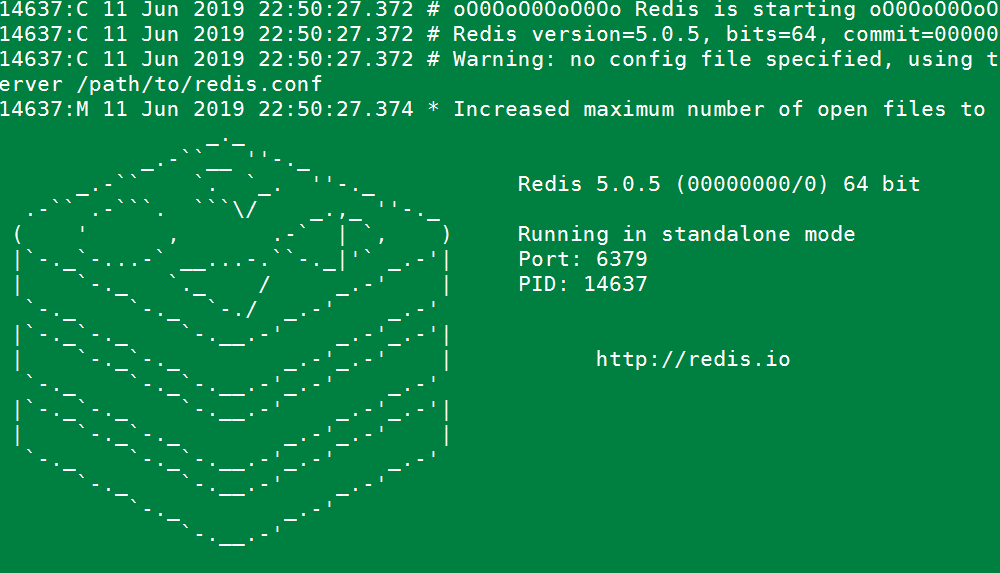
$ src/redis-server
redis server启动如下图:
可以使用redis-cli命令连接数据库与数据库服务端进行交互。
You can interact with Redis using the built-in client:
#运行redis-cli启动数据库客户端,连接默认redis数据库

$ src/redis-cli

#测试redis数据库,插入一个foo bar 键值对

redis> set foo bar

#插入成功

OK

#获取foo key的值

redis> get foo

"bar"
4.redis性能测试
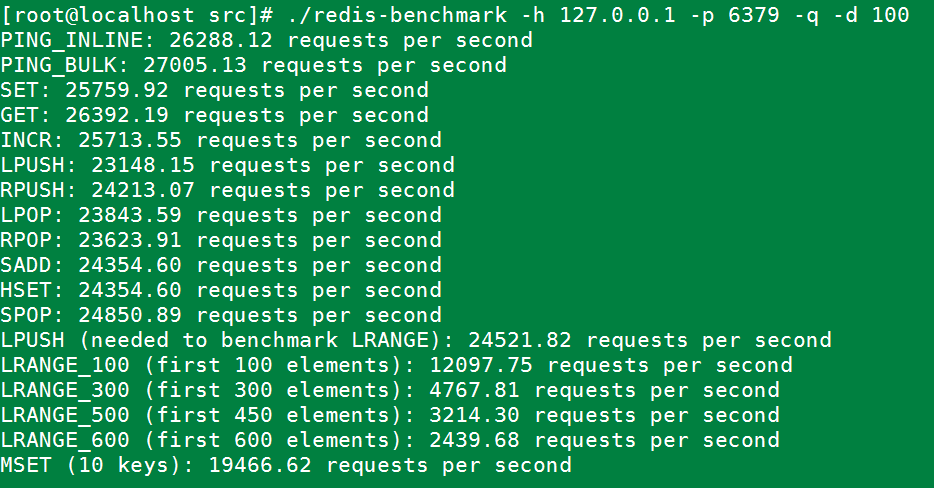
redis 数据库自带性能测试工具,工具名称:redis-benchmark,使用此工具对数据库进行性能测试。
redis-benchmark具体使用参数
Invalid option "-help" or option argument missing

Usage: redis-benchmark [-h <host>] [-p <port>] [-c <clients>] [-n <requests>] [-k <boolean>]

 -h <hostname>      Server hostname (default 127.0.0.1)

 -p <port>          Server port (default 6379)

 -s <socket>        Server socket (overrides host and port)

 -a <password>      Password for Redis Auth

 -c <clients>       Number of parallel connections (default 50)

 -n <requests>      Total number of requests (default 100000)

 -d <size>          Data size of SET/GET value in bytes (default 3)

 --dbnum <db>       SELECT the specified db number (default 0)

 -k <boolean>       1=keep alive 0=reconnect (default 1)

 -r <keyspacelen>   Use random keys for SET/GET/INCR, random values for SADD

  Using this option the benchmark will expand the string __rand_int__

  inside an argument with a 12 digits number in the specified range

  from 0 to keyspacelen-1. The substitution changes every time a command

  is executed. Default tests use this to hit random keys in the

  specified range.

 -P <numreq>        Pipeline <numreq> requests. Default 1 (no pipeline).

 -e                 If server replies with errors, show them on stdout.

                    (no more than 1 error per second is displayed)

 -q                 Quiet. Just show query/sec values

 --csv              Output in CSV format

 -l                 Loop. Run the tests forever

 -t <tests>         Only run the comma separated list of tests. The test

                    names are the same as the ones produced as output.

 -I                 Idle mode. Just open N idle connections and wait.

Examples:

 Run the benchmark with the default configuration against 127.0.0.1:6379:

   $ redis-benchmark

 Use 20 parallel clients, for a total of 100k requests, against 192.168.1.1:

   $ redis-benchmark -h 192.168.1.1 -p 6379 -n 100000 -c 20

 Fill 127.0.0.1:6379 with about 1 million keys only using the SET test:

   $ redis-benchmark -t set -n 1000000 -r 100000000

 Benchmark 127.0.0.1:6379 for a few commands producing CSV output:

   $ redis-benchmark -t ping,set,get -n 100000 --csv

 Benchmark a specific command line:

   $ redis-benchmark -r 10000 -n 10000 eval 'return redis.call("ping")' 0

 Fill a list with 10000 random elements:

   $ redis-benchmark -r 10000 -n 10000 lpush mylist __rand_int__

 On user specified command lines __rand_int__ is replaced with a random integer

 with a range of values selected by the -r option.
use redis-benchmark tools test redis performance .
使用redis-benchmark 测试redis性能
#实例同时执行 1000 个请求来检测性能

./redis-benchmark -n 1000 -q

#测试存取大小为100字节的数据包的性能

redis-benchmark -h 127.0.0.1 -p 6379 -q -d 100
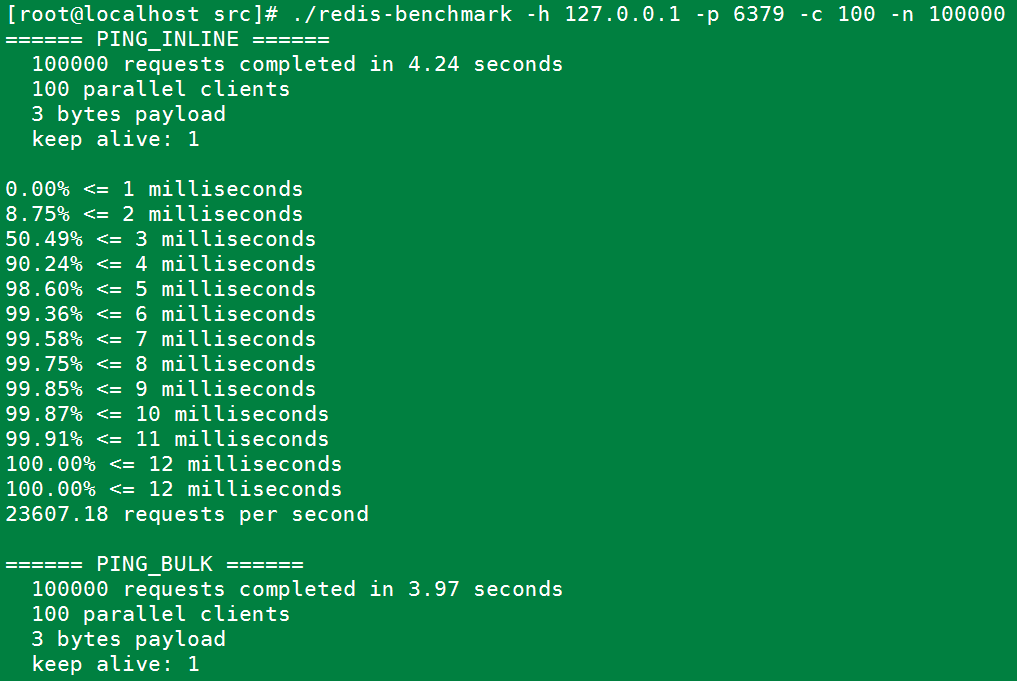
#100个并发连接,100000个请求,检测host为localhost 端口为6379的redis服务器性能

redis-benchmark -h 127.0.0.1 -p 6379 -c 100 -n 100000
5.错误记录与分析
直接make报如下错误:
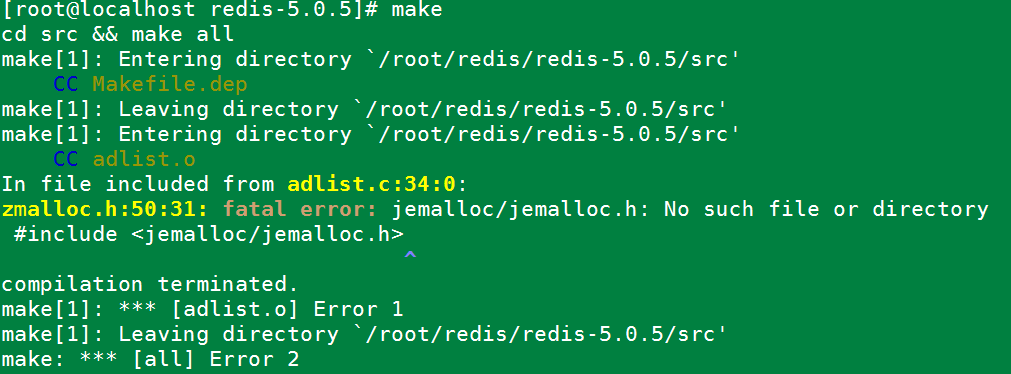
原因是jemalloc重载了Linux下的ANSI C的malloc和free函数。解决办法:make时添加参数。
make MALLOC=libc
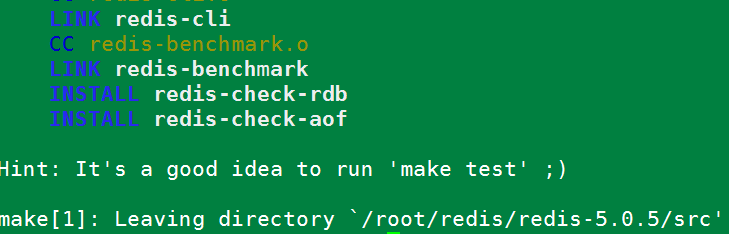
运行后编译成功。如下图:
Redis 5.0.5 Install manual的更多相关文章
- redis 5.0.12 install
redis 5.0.12 install ## check directory ls -l /XXXXXXX ##create dir mkdir -p /XXXXXXX/dataredis mkdi ...
- 009-docker-安装-redis:5.0.3
1.搜索镜像 docker search redis 2.拉取合适镜像 docker pull redis:5.0.3 docker images 3.使用镜像 docker run -p 6379: ...
- 在阿里云centOS7上部署Redis 5.0.5主从 + 哨兵模式
一.在两台服务器上分别安装.配置Redis 5.0.5 ,为一主一从 安装Redis关键命令: 将安装包上传至:/home 目录下解 压:.tar.gz 安装依赖:yum install gcc 安装 ...
- Redis 源码简洁剖析 11 - 主 IO 线程及 Redis 6.0 多 IO 线程
Redis 到底是不是单线程的程序? 多 IO 线程的初始化 IO 线程运行函数 IOThreadMain 如何推迟客户端「读」操作? 如何推迟客户端「写」操作? 如何把待「读」客户端分配给 IO 线 ...
- Redis 3.0 Cluster集群配置
Redis 3.0 Cluster集群配置 安装环境依赖 安装gcc:yum install gcc 安装zlib:yum install zib 安装ruby:yum install ruby 安装 ...
- redis 3.0的集群部署
转载请注明出处:http://hot66hot.iteye.com/admin/blogs/2050676 最近研究redis-cluster,正好搭建了一个环境,遇到了很多坑,系统的总结下,等到re ...
- (转)redis 3.0的集群部署
一:关于redis cluster 1:redis cluster的现状 reids-cluster计划在redis3.0中推出,可以看作者antirez的声明:http://antirez.com/ ...
- Redis 3.0.0 集群部署
简述: 1.0.1:redis cluster的现状 目前redis支持的cluster特性 1):节点自动发现 2):slave->master 选举,集群容错 3):Hot reshardi ...
- Redis 3.0 集群搭建
Redis 3.0 集群搭建 开启两个虚拟机 分别在两个虚拟机上开启3个Redis实例 3主3从两个虚拟机里的实例互为主备 下面分别在两个虚拟机上安装,网络设置参照codis集群的前两个主机 分别关闭 ...
随机推荐
- node的小知识点
今天开始阅读node.js深入浅出这本书,阅读过程中会对某些理解有新的认识,所以特地把这些新认识或者知识点记录在这篇博客中 1.nodejs的优势在于 事件驱动.高并发.异步I/O 不适合cpu密集型 ...
- 爬虫之获取猫眼电影10W评论
第一步 打开一个电影的评论界面: 哪吒之魔童降世:https://maoyan.com/films/1211270 我们发现这里只显示10条评论,而我们需要爬取10w条数据,所以不能从此页面进行抓包, ...
- redis消息提醒设计方案细则
----需求明细: 现有多个角色,角色间需要交互,内容分为申请,审核通过,拒绝,解除合作.每个角色进入自己后台显示查看其他角色的未读消息个数,点击进入显示所有发送来的内容.最开始只存储未读个数,并不知 ...
- CF2B The least round way(贪心+动规)
题目 CF2B The least round way 做法 后面\(0\)的个数,\(2\)和\(5\)是\(10\)分解质因数 则把方格中的每个数分解成\(2\)和\(5\),对\(2\)和\(5 ...
- IdentityServer4入门三:授权模式
在入门一.入门二我们实现了一个完整的API保护的过程.需要保护的API只需在其Controler上应用[Authorize]特性,来显式指定受保护的资源.而我们实现的这个例子,所应用的模式叫“Clie ...
- 研途APP——项目需求分析
研途APP--项目需求分析 1.作业描述 项目 内容 课程 软件工程实践 作业链接 团队作业第二次-需求规格说明书 团队名称 8rookies 作业目标 作业正文 研途APP--项目需求分析 其他参考 ...
- Cesium入门-1-展示一个地球
Cesium 官网教程地址 https://cesium.com/docs/tutorials/getting-started//tutorials/getting-started/ 第一个程序代码: ...
- 使用 If-Then-Else 逻辑进行分支
If-then-else 逻辑看似简单,功能却十分强大,它可以根据不同条件执行不同的操作.If-then-else 逻辑可理解为:如果某个条件为 true (IF),则执行某个操作:如果条件为 fal ...
- PHPStorm 快捷键大全(Win/Linux/Mac)
下面的-符号记得改成 ‘`’,markdown 语法会转义.使用频率是我自己为准.仅供参考 Mac 符号 符号 解释 ⌘ Command ⇧ Shift ⌃ Control ↩ Enter/Ret ...
- SpringMVC源码分析--HandlerMappings
之前分析过SpringMVC中的DispatcherServlet,分析了SpringMVC处理请求的过程.但忽略了一些DispatcherServlet协助请求处理的组件,例如SpringMVC中的 ...