基于Aidlux平台的人脸关键点检测以及换脸算法
第一步:安装APP
手机应用市场下载AidLux
手机和电脑连接同一个Wifi
第二步:配置APP
赋予AidLux各种系统权限,包括:媒体和文件、相机、麦克风、后台弹窗
手机-设置-关于手机-点击操作系统版本号多次,打开开发者模式
重启AidLux,按照提示完成配置
第三步:获取手机IP地址
在手机上点击Cloud_ip蓝色云朵图标,获取IP地址。
第四步:电脑浏览器远程登录Aidlux桌面
在电脑浏览器中输入手机IP地址,远程登录Aidlux桌面
默认密码:aidlux
第五步:玩转Aidlux中的例子中心
运行Aidlux中examples的自带Demo:人脸、人体、手关键点检测、头发语义分割、人像语义分割、人脸检测、图像风格迁移、句子分类等,
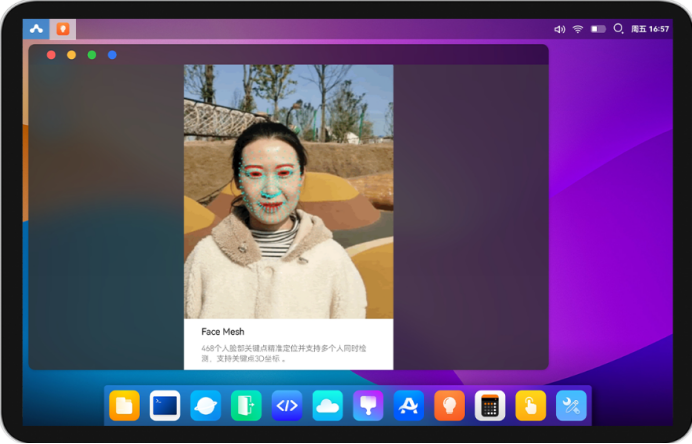
以下展示的是人脸关键点检测以及换脸算法。
Face Mesh
468个人脸部关键点精确定位并支持多个人同时检测,支持关键点3D坐标。
目录位置:cd /home/examples-gpu/face
运行代码:python testmesh.py
import cv2

import math

# import tensorflow as tf

import sys

import numpy as np

from blazeface import *

from cvs import *

import aidlite_gpu

aidlite=aidlite_gpu.aidlite(1)

def preprocess_image_for_tflite32(image, model_image_size=192):

    image = cv2.cvtColor(image, cv2.COLOR_BGR2RGB)

    image = cv2.resize(image, (model_image_size, model_image_size))

    image = np.expand_dims(image, axis=0)

    image = (2.0 / 255.0) * image - 1.0

    image = image.astype('float32')

    return image

def preprocess_img_pad(img,image_size=128):

    # fit the image into a 128x128 square

    # img = cv2.cvtColor(img, cv2.COLOR_BGR2RGB)

    shape = np.r_[img.shape]

    pad_all = (shape.max() - shape[:2]).astype('uint32')

    pad = pad_all // 2

    # print ('pad_all',pad_all)

    img_pad_ori = np.pad(

        img,

        ((pad[0],pad_all[0]-pad[0]), (pad[1],pad_all[1]-pad[1]), (0,0)),

        mode='constant')

    img = cv2.cvtColor(img, cv2.COLOR_BGR2RGB)

    img_pad = np.pad(

        img,

        ((pad[0],pad_all[0]-pad[0]), (pad[1],pad_all[1]-pad[1]), (0,0)),

        mode='constant')

    img_small = cv2.resize(img_pad, (image_size, image_size))

    img_small = np.expand_dims(img_small, axis=0)

    # img_small = np.ascontiguousarray(img_small)

    img_small = (2.0 / 255.0) * img_small - 1.0

    img_small = img_small.astype('float32')

    # img_norm = self._im_normalize(img_small)

    return img_pad_ori, img_small, pad

def plot_detections(img, detections, with_keypoints=True):

        output_img = img

        print(img.shape)

        x_min=0

        x_max=0

        y_min=0

        y_max=0

        print("Found %d faces" % len(detections))

        for i in range(len(detections)):

            ymin = detections[i][ 0] * img.shape[0]

            xmin = detections[i][ 1] * img.shape[1]

            ymax = detections[i][ 2] * img.shape[0]

            xmax = detections[i][ 3] * img.shape[1]

            w=int(xmax-xmin)

            h=int(ymax-ymin)

            h=max(w,h)

            h=h*1.5

            x=(xmin+xmax)/2.

            y=(ymin+ymax)/2.

            xmin=x-h/2.

            xmax=x+h/2.

            # ymin=y-h/2.

            # ymax=y+h/2.

            ymin=y-h/2.-0.08*h

            ymax=y+h/2.-0.08*h

            # ymin-=0.08*h

            # xmin-=0.25*w

            # xmax=xmin+1.5*w;

            # ymax=ymin+1.0*h;

            # x=(xmin+xmax)/2.

            # y=(ymin+ymax)/2

            # xmin=x-h/2.

            # xmax=x+h/2.

            # ymin=y-h/2.

            # ymax=y+h/2.

            # if w<h:

            #     xmin=xmin-(h+0.08*h-w)/2

            #     xmax=xmax+(h+0.08*h-w)/2

            #     ymin-=0.08*h

            #     # ymax-=0.08*h

            # else :

            #     ymin=ymin-(w-h)/2

            #     ymax=ymax+(w-h)/2

            # h=int(ymax-ymin)

            # ymin-=0.08*h

            # landmarks_xywh[:, 2:4] += (landmarks_xywh[:, 2:4] * pad_ratio).astype(np.int32) #adding some padding around detection for landmark detection step.

            # landmarks_xywh[:, 1:2] -= (landmarks_xywh[:, 3:4]*0.08).astype(np.int32)

            x_min=int(xmin)

            y_min=int(ymin)

            x_max=int(xmax)

            y_max=int(ymax)

            p1 = (int(xmin),int(ymin))

            p2 = (int(xmax),int(ymax))

            # print(p1,p2)

            cv2.rectangle(output_img, p1, p2, (0,255,255),2,1)

            # cv2.putText(output_img, "Face found! ", (p1[0]+10, p2[1]-10),cv2.FONT_ITALIC, 1, (0, 255, 129), 2)

            # if with_keypoints:

            #     for k in range(6):

            #         kp_x = int(detections[i, 4 + k*2    ] * img.shape[1])

            #         kp_y = int(detections[i, 4 + k*2 + 1] * img.shape[0])

            #         cv2.circle(output_img,(kp_x,kp_y),4,(0,255,255),4)

        return x_min,y_min,x_max,y_max

def draw_mesh(image, mesh, mark_size=2, line_width=1):

    """Draw the mesh on an image"""

    # The mesh are normalized which means we need to convert it back to fit

    # the image size.

    image_size = image.shape[0]

    mesh = mesh * image_size

    for point in mesh:

        cv2.circle(image, (point[0], point[1]),

                   mark_size, (0, 255, 128), -1)

    # Draw the contours.

    # Eyes

    left_eye_contour = np.array([mesh[33][0:2],

                                 mesh[7][0:2],

                                 mesh[163][0:2],

                                 mesh[144][0:2],

                                 mesh[145][0:2],

                                 mesh[153][0:2],

                                 mesh[154][0:2],

                                 mesh[155][0:2],

                                 mesh[133][0:2],

                                 mesh[173][0:2],

                                 mesh[157][0:2],

                                 mesh[158][0:2],

                                 mesh[159][0:2],

                                 mesh[160][0:2],

                                 mesh[161][0:2],

                                 mesh[246][0:2], ]).astype(np.int32)

    right_eye_contour = np.array([mesh[263][0:2],

                                  mesh[249][0:2],

                                  mesh[390][0:2],

                                  mesh[373][0:2],

                                  mesh[374][0:2],

                                  mesh[380][0:2],

                                  mesh[381][0:2],

                                  mesh[382][0:2],

                                  mesh[362][0:2],

                                  mesh[398][0:2],

                                  mesh[384][0:2],

                                  mesh[385][0:2],

                                  mesh[386][0:2],

                                  mesh[387][0:2],

                                  mesh[388][0:2],

                                  mesh[466][0:2]]).astype(np.int32)

    # Lips

    cv2.polylines(image, [left_eye_contour, right_eye_contour], False,

                  (255, 255, 255), line_width, cv2.LINE_AA)

def draw_landmarks(image, mesh):

    image_size = image.shape[0]

    mesh = mesh * image_size

    landmark_point = []

    for point in mesh:

        landmark_point.append((int(point[0]),int(point[1])))

        # landmark_point.append((point[0],point[1]))

        cv2.circle(image, (int(point[0]),int( point[1])), 2, (255, 255, 0), -1)

    if len(landmark_point) > 0:

        # 参考:https://github.com/tensorflow/tfjs-models/blob/master/facemesh/mesh_map.jpg

        # 左眉毛(55:内側、46:外側)

        cv2.line(image, landmark_point[55], landmark_point[65], (0, 0, 255), 2,-3)

        cv2.line(image, landmark_point[65], landmark_point[52], (0, 0, 255), 2,-3)

        cv2.line(image, landmark_point[52], landmark_point[53], (0, 0, 255), 2,-3)

        cv2.line(image, landmark_point[53], landmark_point[46],(0, 0, 255), 2,-3)

        # 右眉毛(285:内側、276:外側)

        cv2.line(image, landmark_point[285], landmark_point[295], (0, 0, 255),

                2)

        cv2.line(image, landmark_point[295], landmark_point[282], (0, 0, 255),

                2)

        cv2.line(image, landmark_point[282], landmark_point[283], (0, 0, 255),

                2)

        cv2.line(image, landmark_point[283], landmark_point[276], (0, 0, 255),

                2)

        # 左目 (133:目頭、246:目尻)

        cv2.line(image, landmark_point[133], landmark_point[173], (0, 0, 255),

                2)

        cv2.line(image, landmark_point[173], landmark_point[157], (0, 0, 255),

                2)

        cv2.line(image, landmark_point[157], landmark_point[158], (0, 0, 255),

                2)

        cv2.line(image, landmark_point[158], landmark_point[159], (0, 0, 255),

                2)

        cv2.line(image, landmark_point[159], landmark_point[160], (0, 0, 255),

                2)

        cv2.line(image, landmark_point[160], landmark_point[161], (0, 0, 255),

                2)

        cv2.line(image, landmark_point[161], landmark_point[246], (0, 0, 255),

                2)

        cv2.line(image, landmark_point[246], landmark_point[163], (0, 0, 255),

                2)

        cv2.line(image, landmark_point[163], landmark_point[144], (0, 0, 255),

                2)

        cv2.line(image, landmark_point[144], landmark_point[145], (0, 0, 255),

                2)

        cv2.line(image, landmark_point[145], landmark_point[153], (0, 0, 255),

                2)

        cv2.line(image, landmark_point[153], landmark_point[154], (0, 0, 255),

                2)

        cv2.line(image, landmark_point[154], landmark_point[155], (0, 0, 255),

                2)

        cv2.line(image, landmark_point[155], landmark_point[133], (0, 0, 255),

                2)

        # 右目 (362:目頭、466:目尻)

        cv2.line(image, landmark_point[362], landmark_point[398], (0, 0, 255),

                2)

        cv2.line(image, landmark_point[398], landmark_point[384], (0, 0, 255),

                2)

        cv2.line(image, landmark_point[384], landmark_point[385], (0, 0, 255),

                2)

        cv2.line(image, landmark_point[385], landmark_point[386], (0, 0, 255),

                2)

        cv2.line(image, landmark_point[386], landmark_point[387], (0, 0, 255),

                2)

        cv2.line(image, landmark_point[387], landmark_point[388], (0, 0, 255),

                2)

        cv2.line(image, landmark_point[388], landmark_point[466], (0, 0, 255),

                2)

        cv2.line(image, landmark_point[466], landmark_point[390], (0, 0, 255),

                2)

        cv2.line(image, landmark_point[390], landmark_point[373], (0, 0, 255),

                2)

        cv2.line(image, landmark_point[373], landmark_point[374], (0, 0, 255),

                2)

        cv2.line(image, landmark_point[374], landmark_point[380], (0, 0, 255),

                2)

        cv2.line(image, landmark_point[380], landmark_point[381], (0, 0, 255),

                2)

        cv2.line(image, landmark_point[381], landmark_point[382], (0, 0, 255),

                2)

        cv2.line(image, landmark_point[382], landmark_point[362], (0, 0, 255),

                2)

        # 口 (308:右端、78:左端)

        cv2.line(image, landmark_point[308], landmark_point[415], (0, 0, 255),

                2)

        cv2.line(image, landmark_point[415], landmark_point[310], (0, 0, 255),

                2)

        cv2.line(image, landmark_point[310], landmark_point[311], (0, 0, 255),

                2)

        cv2.line(image, landmark_point[311], landmark_point[312], (0, 0, 255),

                2)

        cv2.line(image, landmark_point[312], landmark_point[13], (0, 0, 255), 2)

        cv2.line(image, landmark_point[13], landmark_point[82], (0, 0, 255), 2)

        cv2.line(image, landmark_point[82], landmark_point[81], (0, 0, 255), 2)

        cv2.line(image, landmark_point[81], landmark_point[80], (0, 0, 255), 2)

        cv2.line(image, landmark_point[80], landmark_point[191], (0, 0, 255), 2)

        cv2.line(image, landmark_point[191], landmark_point[78], (0, 0, 255), 2)

        cv2.line(image, landmark_point[78], landmark_point[95], (0, 0, 255), 2)

        cv2.line(image, landmark_point[95], landmark_point[88], (0, 0, 255), 2)

        cv2.line(image, landmark_point[88], landmark_point[178], (0, 0, 255), 2)

        cv2.line(image, landmark_point[178], landmark_point[87], (0, 0, 255), 2)

        cv2.line(image, landmark_point[87], landmark_point[14], (0, 0, 255), 2)

        cv2.line(image, landmark_point[14], landmark_point[317], (0, 0, 255), 2)

        cv2.line(image, landmark_point[317], landmark_point[402], (0, 0, 255),

                2)

        cv2.line(image, landmark_point[402], landmark_point[318], (0, 0, 255),

                2)

        cv2.line(image, landmark_point[318], landmark_point[324], (0, 0, 255),

                2)

        cv2.line(image, landmark_point[324], landmark_point[308], (0, 0, 255),

                2)

    return image

input_shape=[128,128]

inShape =[1 * 128 * 128 *3*4,]

outShape= [1 * 896*16*4,1*896*1*4]

model_path="models/face_detection_front.tflite"

print('==========')

print('gpu:',aidlite.FAST_ANNModel(model_path,inShape,outShape,4,0))

print('=======fast end')

model_path="models/face_landmark.tflite"

aidlite.set_g_index(1)

inShape1 =[1 * 192 * 192 *3*4,]

outShape1= [1 * 1404*4,1*4]

print('cpu:',aidlite.FAST_ANNModel(model_path,inShape1,outShape1,4,0))

anchors = np.load('models/anchors.npy').astype(np.float32)

camid=1

cap=cvs.VideoCapture(camid)

bFace=False

x_min,y_min,x_max,y_max=(0,0,0,0)

fface=0.0

while True:

    frame=cvs.read()

    if frame is None:

        continue

    if camid==1:

        # frame=cv2.resize(frame,(640,480))

        frame=cv2.flip(frame,1)

    start_time = time.time()

    # img = preprocess_image_for_tflite32(frame,128)

    img_pad, img, pad = preprocess_img_pad(frame,128)

    # interpreter.set_tensor(input_details[0]['index'], img[np.newaxis,:,:,:])

    if bFace==False:

        aidlite.set_g_index(0)

        aidlite.setTensor_Fp32(img,input_shape[1],input_shape[1])

        aidlite.invoke()

        raw_boxes = aidlite.getTensor_Fp32(0)

        classificators = aidlite.getTensor_Fp32(1)

        detections = blazeface(raw_boxes, classificators, anchors)[0]

        if len(detections)>0 :

            bFace=True

    if bFace:

        for i in range(len(detections)):

            ymin = detections[i][ 0] * img_pad.shape[0]

            xmin = detections[i][ 1] * img_pad.shape[1]

            ymax = detections[i][ 2] * img_pad.shape[0]

            xmax = detections[i][ 3] * img_pad.shape[1]

            w=int(xmax-xmin)

            h=int(ymax-ymin)

            h=max(w,h)

            h=h*1.5

            x=(xmin+xmax)/2.

            y=(ymin+ymax)/2.

            xmin=x-h/2.

            xmax=x+h/2.

            ymin=y-h/2.

            ymax=y+h/2.

            ymin=y-h/2.-0.08*h

            ymax=y+h/2.-0.08*h

            x_min=int(xmin)

            y_min=int(ymin)

            x_max=int(xmax)

            y_max=int(ymax)

            x_min=max(0,x_min)

            y_min=max(0,y_min)

            x_max=min(img_pad.shape[1],x_max)

            y_max=min(img_pad.shape[0],y_max)

            roi_ori=img_pad[y_min:y_max, x_min:x_max]

            # cvs.imshow(roi)

            # roi_ori=roi_ori[:,:,::-1]

            roi =preprocess_image_for_tflite32(roi_ori,192)

            aidlite.set_g_index(1)

            aidlite.setTensor_Fp32(roi,192,192)

            # start_time = time.time()

            aidlite.invoke()

            mesh = aidlite.getTensor_Fp32(0)

            ffacetmp = aidlite.getTensor_Fp32(1)[0]

            print('fface:',abs(fface-ffacetmp))

            if abs(fface - ffacetmp) > 0.5:

                bFace=False

            fface=ffacetmp

            # print('mesh:',mesh.shape)

            mesh = mesh.reshape(468, 3) / 192

            draw_landmarks(roi_ori,mesh)

            shape=frame.shape

            x,y=img_pad.shape[0]/2,img_pad.shape[1]/2

            frame=img_pad[int(y-shape[0]/2):int(y+shape[0]/2), int(x-shape[1]/2):int(x+shape[1]/2)]

    t = (time.time() - start_time)

    # print('elapsed_ms invoke:',t*1000)

    lbs = 'Fps: '+ str(int(100/t)/100.)+" ~~ Time:"+str(t*1000) +"ms"

    cvs.setLbs(lbs)

    cvs.imshow(frame)

    sleep(1)
Face Swap
超好玩的换脸算法,把明星的脸融合到你的身体上,让你也有星范。

import cv2
import math
import sys
import numpy as np
############################################################################## back_img_path=('models/rs.jpeg','models/wy.jpeg','models/zyx.jpeg','models/monkey.jpg','models/star2.jpg','models/star1.jpg','models/star3.jpg','models/star4.jpg') faceimg=cv2.imread(back_img_path[0])
mod=-1
bfirstframe=True def readPoints(path) :
# Create an array of points.
points = []; # Read points
with open(path) as file :
for line in file :
x, y = line.split()
points.append((int(x), int(y))) return points # Apply affine transform calculated using srcTri and dstTri to src and
# output an image of size.
def applyAffineTransform(src, srcTri, dstTri, size) : # Given a pair of triangles, find the affine transform.
warpMat = cv2.getAffineTransform( np.float32(srcTri), np.float32(dstTri) ) # Apply the Affine Transform just found to the src image
dst = cv2.warpAffine( src, warpMat, (size[0], size[1]), None, flags=cv2.INTER_LINEAR, borderMode=cv2.BORDER_REFLECT_101 ) return dst # Check if a point is inside a rectangle
def rectContains(rect, point) :
if point[0] < rect[0] :
return False
elif point[1] < rect[1] :
return False
elif point[0] > rect[0] + rect[2] :
return False
elif point[1] > rect[1] + rect[3] :
return False
return True #calculate delanauy triangle
def calculateDelaunayTriangles(rect, points):
#create subdiv
subdiv = cv2.Subdiv2D(rect); # Insert points into subdiv ttp=None
for p in points:
try:
subdiv.insert(p)
ttp=p
except:
subdiv.insert(ttp)
continue triangleList = subdiv.getTriangleList(); delaunayTri = [] pt = [] for t in triangleList:
pt.append((t[0], t[1]))
pt.append((t[2], t[3]))
pt.append((t[4], t[5])) pt1 = (t[0], t[1])
pt2 = (t[2], t[3])
pt3 = (t[4], t[5]) if rectContains(rect, pt1) and rectContains(rect, pt2) and rectContains(rect, pt3):
ind = []
#Get face-points (from 68 face detector) by coordinates
for j in range(0, 3):
for k in range(0, len(points)):
if(abs(pt[j][0] - points[k][0]) < 1.0 and abs(pt[j][1] - points[k][1]) < 1.0):
ind.append(k)
# Three points form a triangle. Triangle array corresponds to the file tri.txt in FaceMorph
if len(ind) == 3:
delaunayTri.append((ind[0], ind[1], ind[2])) pt = [] return delaunayTri # Warps and alpha blends triangular regions from img1 and img2 to img
def warpTriangle(img1, img2, t1, t2) : # Find bounding rectangle for each triangle
r1 = cv2.boundingRect(np.float32([t1]))
r2 = cv2.boundingRect(np.float32([t2])) # Offset points by left top corner of the respective rectangles
t1Rect = []
t2Rect = []
t2RectInt = [] for i in range(0, 3):
t1Rect.append(((t1[i][0] - r1[0]),(t1[i][1] - r1[1])))
t2Rect.append(((t2[i][0] - r2[0]),(t2[i][1] - r2[1])))
t2RectInt.append(((t2[i][0] - r2[0]),(t2[i][1] - r2[1]))) # Get mask by filling triangle
mask = np.zeros((r2[3], r2[2], 3), dtype = np.float32)
cv2.fillConvexPoly(mask, np.int32(t2RectInt), (1.0, 1.0, 1.0), 16, 0); # Apply warpImage to small rectangular patches
img1Rect = img1[r1[1]:r1[1] + r1[3], r1[0]:r1[0] + r1[2]]
#img2Rect = np.zeros((r2[3], r2[2]), dtype = img1Rect.dtype) size = (r2[2], r2[3]) img2Rect = applyAffineTransform(img1Rect, t1Rect, t2Rect, size) img2Rect = img2Rect * mask # Copy triangular region of the rectangular patch to the output image
img2[r2[1]:r2[1]+r2[3], r2[0]:r2[0]+r2[2]] = img2[r2[1]:r2[1]+r2[3], r2[0]:r2[0]+r2[2]] * ( (1.0, 1.0, 1.0) - mask ) img2[r2[1]:r2[1]+r2[3], r2[0]:r2[0]+r2[2]] = img2[r2[1]:r2[1]+r2[3], r2[0]:r2[0]+r2[2]] + img2Rect def faceswap(points1,points2,img1,img2): # # Read images
# filename1 ='sabina.jpg'
# filename2 ='bid.jpg' # img1 = cv2.imread(filename1);
# img2 = cv2.imread(filename2);
img1Warped = np.copy(img2); # Read array of corresponding points
# points1 = readPoints('sabina.txt')
# points2 = readPoints('bid.txt') # Find convex hull
hull1 = []
hull2 = [] hullIndex = cv2.convexHull(np.array(points2), returnPoints = False) for i in range(0, len(hullIndex)):
hull1.append(points1[int(hullIndex[i])])
hull2.append(points2[int(hullIndex[i])]) # Find delanauy traingulation for convex hull points
sizeImg2 = img2.shape
rect = (0, 0, sizeImg2[1], sizeImg2[0]) dt = calculateDelaunayTriangles(rect, hull2) if len(dt) == 0:
quit() # Apply affine transformation to Delaunay triangles
for i in range(0, len(dt)):
t1 = []
t2 = [] #get points for img1, img2 corresponding to the triangles
for j in range(0, 3):
t1.append(hull1[dt[i][j]])
t2.append(hull2[dt[i][j]]) warpTriangle(img1, img1Warped, t1, t2) # Calculate Mask
hull8U = []
for i in range(0, len(hull2)):
hull8U.append((hull2[i][0], hull2[i][1])) mask = np.zeros(img2.shape, dtype = img2.dtype) cv2.fillConvexPoly(mask, np.int32(hull8U), (255, 255, 255)) r = cv2.boundingRect(np.float32([hull2])) center = ((r[0]+int(r[2]/2), r[1]+int(r[3]/2))) # Clone seamlessly.
try :
output = cv2.seamlessClone(np.uint8(img1Warped), img2, mask, center, cv2.NORMAL_CLONE)
except:
return None
return output # cv2.imshow("Face Swapped", output)
# cv2.waitKey(0) # cv2.destroyAllWindows() ############################################################################# import sys
import numpy as np
from blazeface import *
from cvs import *
import aidlite_gpu
aidlite=aidlite_gpu.aidlite() def preprocess_image_for_tflite32(image, model_image_size=192):
image = cv2.cvtColor(image, cv2.COLOR_BGR2RGB)
image = cv2.resize(image, (model_image_size, model_image_size))
image = np.expand_dims(image, axis=0)
image = (2.0 / 255.0) * image - 1.0
image = image.astype('float32') return image def preprocess_img_pad(img,image_size=128):
# fit the image into a 128x128 square
# img = cv2.cvtColor(img, cv2.COLOR_BGR2RGB)
shape = np.r_[img.shape]
pad_all = (shape.max() - shape[:2]).astype('uint32')
pad = pad_all // 2
# print ('pad_all',pad_all)
img_pad_ori = np.pad(
img,
((pad[0],pad_all[0]-pad[0]), (pad[1],pad_all[1]-pad[1]), (0,0)),
mode='constant')
img = cv2.cvtColor(img, cv2.COLOR_BGR2RGB)
img_pad = np.pad(
img,
((pad[0],pad_all[0]-pad[0]), (pad[1],pad_all[1]-pad[1]), (0,0)),
mode='constant')
img_small = cv2.resize(img_pad, (image_size, image_size))
img_small = np.expand_dims(img_small, axis=0)
# img_small = np.ascontiguousarray(img_small)
img_small = (2.0 / 255.0) * img_small - 1.0
img_small = img_small.astype('float32')
# img_norm = self._im_normalize(img_small) return img_pad_ori, img_small, pad def plot_detections(img, detections, with_keypoints=True):
output_img = img
print(img.shape)
x_min=0
x_max=0
y_min=0
y_max=0
print("Found %d faces" % len(detections))
for i in range(len(detections)):
ymin = detections[i][ 0] * img.shape[0]
xmin = detections[i][ 1] * img.shape[1]
ymax = detections[i][ 2] * img.shape[0]
xmax = detections[i][ 3] * img.shape[1]
w=int(xmax-xmin)
h=int(ymax-ymin)
h=max(w,h)
h=h*1.5 x=(xmin+xmax)/2.
y=(ymin+ymax)/2. xmin=x-h/2.
xmax=x+h/2.
# ymin=y-h/2.
# ymax=y+h/2.
ymin=y-h/2.-0.08*h
ymax=y+h/2.-0.08*h x_min=int(xmin)
y_min=int(ymin)
x_max=int(xmax)
y_max=int(ymax)
p1 = (int(xmin),int(ymin))
p2 = (int(xmax),int(ymax))
# print(p1,p2)
cv2.rectangle(output_img, p1, p2, (0,255,255),2,1) # cv2.putText(output_img, "Face found! ", (p1[0]+10, p2[1]-10),cv2.FONT_ITALIC, 1, (0, 255, 129), 2) # if with_keypoints:
# for k in range(6):
# kp_x = int(detections[i, 4 + k*2 ] * img.shape[1])
# kp_y = int(detections[i, 4 + k*2 + 1] * img.shape[0])
# cv2.circle(output_img,(kp_x,kp_y),4,(0,255,255),4) return x_min,y_min,x_max,y_max def draw_mesh(image, mesh, mark_size=2, line_width=1):
"""Draw the mesh on an image"""
# The mesh are normalized which means we need to convert it back to fit
# the image size.
image_size = image.shape[0]
mesh = mesh * image_size
for point in mesh:
cv2.circle(image, (point[0], point[1]),
mark_size, (0, 255, 128), -1) # Draw the contours.
# Eyes
left_eye_contour = np.array([mesh[33][0:2],
mesh[7][0:2],
mesh[163][0:2],
mesh[144][0:2],
mesh[145][0:2],
mesh[153][0:2],
mesh[154][0:2],
mesh[155][0:2],
mesh[133][0:2],
mesh[173][0:2],
mesh[157][0:2],
mesh[158][0:2],
mesh[159][0:2],
mesh[160][0:2],
mesh[161][0:2],
mesh[246][0:2], ]).astype(np.int32)
right_eye_contour = np.array([mesh[263][0:2],
mesh[249][0:2],
mesh[390][0:2],
mesh[373][0:2],
mesh[374][0:2],
mesh[380][0:2],
mesh[381][0:2],
mesh[382][0:2],
mesh[362][0:2],
mesh[398][0:2],
mesh[384][0:2],
mesh[385][0:2],
mesh[386][0:2],
mesh[387][0:2],
mesh[388][0:2],
mesh[466][0:2]]).astype(np.int32)
# Lips
cv2.polylines(image, [left_eye_contour, right_eye_contour], False,
(255, 255, 255), line_width, cv2.LINE_AA) def getkeypoint(image, mesh,landmark_point):
image_size = image.shape[0]
mesh = mesh * image_size
# landmark_point = []
for point in mesh:
landmark_point.append((point[0], point[1]))
return image
# cv2.circle(image, (point[0], point[1]), 2, (255, 255, 0), -1) def draw_landmarks(image, mesh,landmark_point):
image_size = image.shape[0]
mesh = mesh * image_size
# landmark_point = []
for point in mesh:
landmark_point.append((point[0], point[1]))
cv2.circle(image, (point[0], point[1]), 2, (255, 255, 0), -1) if len(landmark_point) > 0:
# 参考:https://github.com/tensorflow/tfjs-models/blob/master/facemesh/mesh_map.jpg # 左眉毛(55:内側、46:外側)
cv2.line(image, landmark_point[55], landmark_point[65], (0, 0, 255), 2,-3)
cv2.line(image, landmark_point[65], landmark_point[52], (0, 0, 255), 2,-3)
cv2.line(image, landmark_point[52], landmark_point[53], (0, 0, 255), 2,-3)
cv2.line(image, landmark_point[53], landmark_point[46],(0, 0, 255), 2,-3) # 右眉毛(285:内側、276:外側)
cv2.line(image, landmark_point[285], landmark_point[295], (0, 0, 255),
2)
cv2.line(image, landmark_point[295], landmark_point[282], (0, 0, 255),
2)
cv2.line(image, landmark_point[282], landmark_point[283], (0, 0, 255),
2)
cv2.line(image, landmark_point[283], landmark_point[276], (0, 0, 255),
2) # 左目 (133:目頭、246:目尻)
cv2.line(image, landmark_point[133], landmark_point[173], (0, 0, 255),
2)
cv2.line(image, landmark_point[173], landmark_point[157], (0, 0, 255),
2)
cv2.line(image, landmark_point[157], landmark_point[158], (0, 0, 255),
2)
cv2.line(image, landmark_point[158], landmark_point[159], (0, 0, 255),
2)
cv2.line(image, landmark_point[159], landmark_point[160], (0, 0, 255),
2)
cv2.line(image, landmark_point[160], landmark_point[161], (0, 0, 255),
2)
cv2.line(image, landmark_point[161], landmark_point[246], (0, 0, 255),
2) cv2.line(image, landmark_point[246], landmark_point[163], (0, 0, 255),
2)
cv2.line(image, landmark_point[163], landmark_point[144], (0, 0, 255),
2)
cv2.line(image, landmark_point[144], landmark_point[145], (0, 0, 255),
2)
cv2.line(image, landmark_point[145], landmark_point[153], (0, 0, 255),
2)
cv2.line(image, landmark_point[153], landmark_point[154], (0, 0, 255),
2)
cv2.line(image, landmark_point[154], landmark_point[155], (0, 0, 255),
2)
cv2.line(image, landmark_point[155], landmark_point[133], (0, 0, 255),
2) # 右目 (362:目頭、466:目尻)
cv2.line(image, landmark_point[362], landmark_point[398], (0, 0, 255),
2)
cv2.line(image, landmark_point[398], landmark_point[384], (0, 0, 255),
2)
cv2.line(image, landmark_point[384], landmark_point[385], (0, 0, 255),
2)
cv2.line(image, landmark_point[385], landmark_point[386], (0, 0, 255),
2)
cv2.line(image, landmark_point[386], landmark_point[387], (0, 0, 255),
2)
cv2.line(image, landmark_point[387], landmark_point[388], (0, 0, 255),
2)
cv2.line(image, landmark_point[388], landmark_point[466], (0, 0, 255),
2) cv2.line(image, landmark_point[466], landmark_point[390], (0, 0, 255),
2)
cv2.line(image, landmark_point[390], landmark_point[373], (0, 0, 255),
2)
cv2.line(image, landmark_point[373], landmark_point[374], (0, 0, 255),
2)
cv2.line(image, landmark_point[374], landmark_point[380], (0, 0, 255),
2)
cv2.line(image, landmark_point[380], landmark_point[381], (0, 0, 255),
2)
cv2.line(image, landmark_point[381], landmark_point[382], (0, 0, 255),
2)
cv2.line(image, landmark_point[382], landmark_point[362], (0, 0, 255),
2) # 口 (308:右端、78:左端)
cv2.line(image, landmark_point[308], landmark_point[415], (0, 0, 255),
2)
cv2.line(image, landmark_point[415], landmark_point[310], (0, 0, 255),
2)
cv2.line(image, landmark_point[310], landmark_point[311], (0, 0, 255),
2)
cv2.line(image, landmark_point[311], landmark_point[312], (0, 0, 255),
2)
cv2.line(image, landmark_point[312], landmark_point[13], (0, 0, 255), 2)
cv2.line(image, landmark_point[13], landmark_point[82], (0, 0, 255), 2)
cv2.line(image, landmark_point[82], landmark_point[81], (0, 0, 255), 2)
cv2.line(image, landmark_point[81], landmark_point[80], (0, 0, 255), 2)
cv2.line(image, landmark_point[80], landmark_point[191], (0, 0, 255), 2)
cv2.line(image, landmark_point[191], landmark_point[78], (0, 0, 255), 2) cv2.line(image, landmark_point[78], landmark_point[95], (0, 0, 255), 2)
cv2.line(image, landmark_point[95], landmark_point[88], (0, 0, 255), 2)
cv2.line(image, landmark_point[88], landmark_point[178], (0, 0, 255), 2)
cv2.line(image, landmark_point[178], landmark_point[87], (0, 0, 255), 2)
cv2.line(image, landmark_point[87], landmark_point[14], (0, 0, 255), 2)
cv2.line(image, landmark_point[14], landmark_point[317], (0, 0, 255), 2)
cv2.line(image, landmark_point[317], landmark_point[402], (0, 0, 255),
2)
cv2.line(image, landmark_point[402], landmark_point[318], (0, 0, 255),
2)
cv2.line(image, landmark_point[318], landmark_point[324], (0, 0, 255),
2)
cv2.line(image, landmark_point[324], landmark_point[308], (0, 0, 255),
2) return image class MyApp(App): def __init__(self, *args):
super(MyApp, self).__init__(*args) def idle(self):
self.aidcam0.update() def main(self):
#creating a container VBox type, vertical (you can use also HBox or Widget)
main_container = VBox(width=360, height=680, style={'margin':'0px auto'}) self.aidcam0 = OpencvVideoWidget(self, width=340, height=400)
self.aidcam0.style['margin'] = '10px' i=0
exec("self.aidcam%(i)s = OpencvVideoWidget(self)" % {'i': i})
exec("self.aidcam%(i)s.identifier = 'aidcam%(i)s'" % {'i': i})
eval("main_container.append(self.aidcam%(i)s)" % {'i': i}) # self.aidcam0.identifier="myimage_receiver"
main_container.append(self.aidcam0) self.lbl = Label('点击图片选择你喜欢的明星脸:')
main_container.append(self.lbl) bottom_container = HBox(width=360, height=130, style={'margin':'0px auto'})
self.img1 = Image('/res:'+os.getcwd()+'/'+back_img_path[0], height=80, margin='10px')
self.img1.onclick.do(self.on_img1_clicked)
bottom_container.append(self.img1) self.img2 = Image('/res:'+os.getcwd()+'/'+back_img_path[1], height=80, margin='10px')
self.img2.onclick.do(self.on_img2_clicked)
bottom_container.append(self.img2) self.img3 = Image('/res:'+os.getcwd()+'/'+back_img_path[2], height=80, margin='10px')
self.img3.onclick.do(self.on_img3_clicked)
bottom_container.append(self.img3) self.img4 = Image('/res:'+os.getcwd()+'/'+back_img_path[3], height=80, margin='10px')
self.img4.onclick.do(self.on_img4_clicked)
bottom_container.append(self.img4) bt_container = HBox(width=360, height=130, style={'margin':'0px auto'})
self.img11 = Image('/res:'+os.getcwd()+'/'+back_img_path[4], height=80, margin='10px')
self.img11.onclick.do(self.on_img11_clicked)
bt_container.append(self.img11) self.img22 = Image('/res:'+os.getcwd()+'/'+back_img_path[5], height=80, margin='10px')
self.img22.onclick.do(self.on_img22_clicked)
bt_container.append(self.img22) self.img33 = Image('/res:'+os.getcwd()+'/'+back_img_path[6], height=80, margin='10px')
self.img33.onclick.do(self.on_img33_clicked)
bt_container.append(self.img33) self.img44 = Image('/res:'+os.getcwd()+'/'+back_img_path[7], height=80, margin='10px')
self.img44.onclick.do(self.on_img44_clicked)
bt_container.append(self.img44) # self.bt1 = Button('抠图模式', width=100, height=30, margin='10px')
# self.bt1.onclick.do(self.on_button_pressed1) # self.bt2 = Button('渲染模式', width=100, height=30, margin='10px')
# self.bt2.onclick.do(self.on_button_pressed2) # self.bt3 = Button('着色模式', width=100, height=30, margin='10px')
# self.bt3.onclick.do(self.on_button_pressed3) main_container.append(bottom_container) main_container.append(bt_container)
# main_container.append(self.bt1)
# main_container.append(self.bt2)
# main_container.append(self.bt3) return main_container def on_img1_clicked(self, widget):
global faceimg
bgnd=cv2.imread(back_img_path[0])
faceimg=bgnd
# global bfirstframe
# bfirstframe=True
global mod
mod=0 def on_img2_clicked(self, widget):
global faceimg
bgnd=cv2.imread(back_img_path[1])
faceimg=bgnd
# global bfirstframe
# bfirstframe=True
global mod
mod=1 def on_img3_clicked(self, widget):
global faceimg
bgnd=cv2.imread(back_img_path[2])
faceimg=bgnd
# global bfirstframe
# bfirstframe=True
global mod
mod=2 def on_img4_clicked(self, widget):
global faceimg
bgnd=cv2.imread(back_img_path[3])
faceimg=bgnd
# global bfirstframe
# bfirstframe=True
global mod
mod=3 def on_img11_clicked(self, widget):
global faceimg
bgnd=cv2.imread(back_img_path[4])
faceimg=bgnd
# global bfirstframe
# bfirstframe=True
global mod
mod=4 def on_img22_clicked(self, widget):
global faceimg
bgnd=cv2.imread(back_img_path[5])
faceimg=bgnd
# global bfirstframe
# bfirstframe=True
global mod
mod=5 def on_img33_clicked(self, widget):
global faceimg
bgnd=cv2.imread(back_img_path[6])
faceimg=bgnd
# global bfirstframe
# bfirstframe=True
global mod
mod=6 def on_img44_clicked(self, widget):
global faceimg
bgnd=cv2.imread(back_img_path[7])
faceimg=bgnd
# global bfirstframe
# bfirstframe=True
global mod
mod=7 def on_button_pressed1(self, widget):
global mod
mod=0 def on_button_pressed2(self, widget):
global mod
mod=1 def on_button_pressed3(self, widget):
global mod
mod=2 def process(): cvs.setCustomUI() input_shape=[128,128]
inShape =[1 * 128 * 128 *3*4,]
outShape= [1 * 896*16*4,1*896*1*4]
model_path="models/face_detection_front.tflite"
print('gpu:',aidlite.ANNModel(model_path,inShape,outShape,4,0))
model_path="models/face_landmark.tflite"
aidlite.set_g_index(1)
inShape1 =[1 * 192 * 192 *3*4,]
outShape1= [1 * 1404*4,1*4]
print('cpu:',aidlite.ANNModel(model_path,inShape1,outShape1,4,0)) anchors = np.load('models/anchors.npy').astype(np.float32)
camid=1
cap=cvs.VideoCapture(camid)
bFace=False
x_min,y_min,x_max,y_max=(0,0,0,0)
fface=0.0
global bfirstframe
bfirstframe=True
facepath="Biden.jpeg"
# facepath="rs.jpeg"
# faceimg=bgnd_mat
global faceimg
faceimg=cv2.resize(faceimg,(256,256))
#
roi_orifirst=faceimg
padfaceimg=faceimg
fpoints=[]
spoints=[]
# mcap=cv2.VideoCapture('test.mp4')
global mod
mod=-1 while True: frame= cvs.read() # _,mframe=mcap.read()
if frame is None:
continue
if camid==1:
frame=cv2.flip(frame,1) if mod>-1 or bfirstframe:
x_min,y_min,x_max,y_max=(0,0,0,0)
faceimg=cv2.resize(faceimg,(256,256))
frame=faceimg
bFace=False
roi_orifirst=faceimg
padfaceimg=faceimg
bfirstframe=True
fpoints=[]
spoints=[] start_time = time.time() # img = preprocess_image_for_tflite32(frame,128)
img_pad, img, pad = preprocess_img_pad(frame,128) # interpreter.set_tensor(input_details[0]['index'], img[np.newaxis,:,:,:])
if bFace==False:
aidlite.set_g_index(0)
aidlite.setTensor_Fp32(img,input_shape[1],input_shape[1]) aidlite.invoke() raw_boxes = aidlite.getTensor_Fp32(0)
classificators = aidlite.getTensor_Fp32(1) detections = blazeface(raw_boxes, classificators, anchors)[0] if len(detections)>0 :
bFace=True
if bFace:
for i in range(len(detections)):
ymin = detections[i][ 0] * img_pad.shape[0]
xmin = detections[i][ 1] * img_pad.shape[1]
ymax = detections[i][ 2] * img_pad.shape[0]
xmax = detections[i][ 3] * img_pad.shape[1]
w=int(xmax-xmin)
h=int(ymax-ymin)
h=max(w,h)
h=h*1.5 x=(xmin+xmax)/2.
y=(ymin+ymax)/2. xmin=x-h/2.
xmax=x+h/2.
ymin=y-h/2.
ymax=y+h/2.
ymin=y-h/2.-0.08*h
ymax=y+h/2.-0.08*h
x_min=int(xmin)
y_min=int(ymin)
x_max=int(xmax)
y_max=int(ymax) x_min=max(0,x_min)
y_min=max(0,y_min)
x_max=min(img_pad.shape[1],x_max)
y_max=min(img_pad.shape[0],y_max)
roi_ori=img_pad[y_min:y_max, x_min:x_max]
# cvs.imshow(roi)
# roi_ori=roi_ori[:,:,::-1]
roi =preprocess_image_for_tflite32(roi_ori,192) aidlite.set_g_index(1)
aidlite.setTensor_Fp32(roi,192,192)
# start_time = time.time()
aidlite.invoke()
mesh = aidlite.getTensor_Fp32(0)
ffacetmp = aidlite.getTensor_Fp32(1)[0]
print('fface:',abs(fface-ffacetmp))
if abs(fface - ffacetmp) > 0.5:
bFace=False
fface=ffacetmp spoints=[]
# print('mesh:',mesh.shape)
mesh = mesh.reshape(468, 3) / 192
if bfirstframe :
getkeypoint(roi_ori,mesh,fpoints)
roi_orifirst=roi_ori.copy()
bfirstframe=False
mod=-1
# padfaceimg=img_pad
else:
getkeypoint(roi_ori,mesh,spoints)
roi_ori=faceswap(fpoints,spoints,roi_orifirst,roi_ori)
if roi_ori is None:
continue
img_pad[y_min:y_max, x_min:x_max]=roi_ori shape=frame.shape
x,y=img_pad.shape[0]/2,img_pad.shape[1]/2
# frame=roi_ori
frame=img_pad[int(y-shape[0]/2):int(y+shape[0]/2), int(x-shape[1]/2):int(x+shape[1]/2)] t = (time.time() - start_time)
# print('elapsed_ms invoke:',t*1000)
lbs = 'Fps: '+ str(int(100/t)/100.)+" ~~ Time:"+str(t*1000) +"ms"
cvs.setLbs(lbs) cvs.imshow(frame)
sleep(1) if __name__ == '__main__': initcv(startcv, MyApp)
process()
效果演示视频:
人脸关键点检测:https://www.bilibili.com/video/BV1Zk4y137c8/
换脸算法:https://www.bilibili.com/video/BV1K14y1B7Jk/
基于Aidlux平台的人脸关键点检测以及换脸算法的更多相关文章
- OpenCV实战:人脸关键点检测(FaceMark)
Summary:利用OpenCV中的LBF算法进行人脸关键点检测(Facial Landmark Detection) Author: Amusi Date: 2018-03-20 ...
- OpenCV Facial Landmark Detection 人脸关键点检测
Opencv-Facial-Landmark-Detection 利用OpenCV中的LBF算法进行人脸关键点检测(Facial Landmark Detection) Note: OpenCV3.4 ...
- dlib人脸关键点检测的模型分析与压缩
本文系原创,转载请注明出处~ 小喵的博客:https://www.miaoerduo.com 博客原文(排版更精美):https://www.miaoerduo.com/c/dlib人脸关键点检测的模 ...
- 用keras实现人脸关键点检测(2)
上一个代码只能实现小数据的读取与训练,在大数据训练的情况下.会造内存紧张,于是我根据keras的官方文档,对上一个代码进行了改进. 用keras实现人脸关键点检测 数据集:https://pan.ba ...
- keras实现简单CNN人脸关键点检测
用keras实现人脸关键点检测 改良版:http://www.cnblogs.com/ansang/p/8583122.html 第一步:准备好需要的库 tensorflow 1.4.0 h5py ...
- 机器学习进阶-人脸关键点检测 1.dlib.get_frontal_face_detector(构建人脸框位置检测器) 2.dlib.shape_predictor(绘制人脸关键点检测器) 3.cv2.convexHull(获得凸包位置信息)
1.dlib.get_frontal_face_detector() # 获得人脸框位置的检测器, detector(gray, 1) gray表示灰度图, 2.dlib.shape_predict ...
- Opencv与dlib联合进行人脸关键点检测与识别
前言 依赖库:opencv 2.4.9 /dlib 19.0/libfacedetection 本篇不记录如何配置,重点在实现上.使用libfacedetection实现人脸区域检测,联合dlib标记 ...
- opencv+python+dlib人脸关键点检测、实时检测
安装的是anaconde3.python3.7.3,3.7环境安装dlib太麻烦, 在anaconde3中新建环境python3.6.8, 在3.6环境下安装dlib-19.6.1-cp36-cp36 ...
- Facial landmark detection - 人脸关键点检测
Facial landmark detection (Facial keypoints detection) OpenSourceLibrary: DLib Project Home: http: ...
- 级联MobileNet-V2实现CelebA人脸关键点检测(转)
https://blog.csdn.net/u011995719/article/details/79435615
随机推荐
- 如何利用Requestly提升前端开发与测试的效率,让你事半功倍?
痛点 前端测试 在进行前端页面开发或者测试的时候,我们会遇到这一类场景: 在开发阶段,前端想通过调用真实的接口返回响应 在开发或者生产阶段需要验证前端页面的一些 异常场景 或者 临界值 时 在测试阶段 ...
- 分布式搜索引擎Elasticsearch基础入门学习
一.Elasticsearch介绍 Elasticsearch介绍 Elasticsearh 是 elastic.co 公司开发的分布式搜索引擎. Elasticsearch(简称ES)是一个开源的分 ...
- selenium web控件的交互进阶
Action ActionChains: 执行PC端的鼠标点击,双击,右键,拖曳等事件 TouchActions: 模拟PC和移动端的点击,滑动,拖曳,多点触控等多种手势操作 动作链接 ActionC ...
- flask接口参数校验 jsonschema 的使用
开头 flask接口开发中参数校验可以用到的方法有很多,但是我比较喜欢跟前端的js检验类似,故选用到了 jsonschema 这个参数校验的库 Demo 下面是一个比较全的参数校验的接口,日后方便参考 ...
- 2020-08-31:描述HTTP的版本之间的区别,主要是1.0/1.1/2.0三个版本的区别。
福哥答案2020-08-31: HTTP1.0与HTTP1.1的主要区别 1.长连接HTTP1.0:需要使用keep-alive参数来告知服务器端要建立一个长连接.HTTP1.1:默认支持长连接.2. ...
- 2020-10-03:java中satb和tlab有什么区别?
福哥答案2020-10-03:#福大大架构师每日一题# 简单回答:satb: snapshot-at-the-beginning,快照.tlab:thread local allocation buf ...
- [NISACTF 2022]bingdundun~
[NISACTF 2022]bingdundun~ 考点 文件上传.Phar://伪协议 一.题目 打开题目,发现是一道文件上传的题目,因为提示了可以压缩包,所以尝试直接上传zip文件,然后利用PHP ...
- 2023-05-23:如果交换字符串 X 中的两个不同位置的字母,使得它和字符串 Y 相等, 那么称 X 和 Y 两个字符串相似。如果这两个字符串本身是相等的,那它们也是相似的。 例如,“tars“
2023-05-23:如果交换字符串 X 中的两个不同位置的字母,使得它和字符串 Y 相等, 那么称 X 和 Y 两个字符串相似.如果这两个字符串本身是相等的,那它们也是相似的. 例如,"t ...
- web自动化03-xpath定位
目标: Xpath方法 1.定位一组元素的方法 element = driver.find_elements_by_*("*") * 可以是name,tag_ ...
- 【lwip】13-TCP协议分析之源码篇
前言 上一年就写好了,一直没时间整理出来,现在不整理了,直接放出来. 链接:https://www.cnblogs.com/lizhuming/p/17438682.html TCP RAW接口分析 ...