S2SH框架集成详解(Struts 2.3.16 + Spring 3.2.6 + Hibernate 3.6.10)
近期集成了一次较新版本的s2sh,出现了不少问题,网上资料也是良莠不齐,有的甚至就是扯淡,简单的把jar包扔进去就以为是集成成功了,在这里整理一下详细的步骤,若哪位有什么不同看法,可以留言,欢迎批评改正。
首先说下集成的环境,Eclipse 4.4,Tomcat 7.0.54,Struts2.3.16,Hibernate3.6.10,Spring3.2.6
相关JAR包已上传至百度云:http://pan.baidu.com/s/1pJluA5l
- 搭建Struts2框架
1. 创建Java Web工程SSH
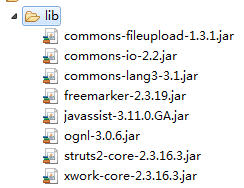
2. 添加struts2.3.16的8个基本类库,可能以前版本是6个,但是2.3.16版本本人测试是8个,大家可以自己测试下
3. 在src下创建config.struts包,并创建struts2的配置文件struts.xml
4. 在web.xml文件中添加过滤器,如果strtus2配置文件放在src下无需添加init-param标签。
 <filter>

     <filter-name>struts2</filter-name>

     <filter-class>

       org.apache.struts2.dispatcher.ng.filter.StrutsPrepareAndExecuteFilter

     </filter-class>

     <init-param>

         <param-name>config</param-name>

         <param-value>

             struts-default.xml,struts-plugin.xml,config/struts/struts.xml

         </param-value>

     </init-param>

 </filter>

 <filter-mapping>

     <filter-name>struts2</filter-name>

     <url-pattern>/*</url-pattern>

 </filter-mapping>
5. 向struts.xml中添加如下代码
<?xml version="1.0" encoding="UTF-8"?>

<!DOCTYPE struts PUBLIC

    "-//Apache Software Foundation//DTD Struts Configuration 2.3//EN"

    "http://struts.apache.org/dtds/struts-2.3.dtd">

<struts>

    <package name="ssh" namespace="/" extends="struts-default">

        <action name="" class="" method="">

            <result name=""></result>

        </action>

    </package>

</struts>
6. 创建以下路径用于测试
WebContent/Web-INF/jsp/index.jsp
(Web-INF为安全目录,无法直接访问)
7. 在src目录下创建action包,用于放置Struts2的Action,然后创建MainAction,用于测试,以及以后的页面跳转,并添加如下代码:
 package action;

 public class MainAction {

     public String start(){

         return "start";

     }

 }
8. 在struts.xml中进行配置
 <struts>

     <package name="ssh" namespace="/" extends="struts-default">

         <default-action-ref name="index" />

         <action name="index" class="action.MainAction" method="start">

             <result name="start">WEB-INF/jsp/index.jsp</result>

         </action>

     </package>

 </struts>
9. 启动web服务器,测试http://localhost:8080/SSH/
- 集成struts2和spring
1. 添加spring类库

2. 添加strut2集成spring类库:struts2-spring-plugin-2.3.16.3.jar
3. 添加spring配置文件applicationContext.xml,并添加如下信息
<?xml version="1.0" encoding="UTF-8"?>

<!DOCTYPE beans PUBLIC "-//SPRING//DTD BEAN//EN" "http://www.springframework.org/dtd/spring-beans.dtd">

<beans>

</beans>
4. 在web.xml文件中添加spring监听器,在filter标签外,context-param标签是为了自定义spring配置文件的位置
 <listener>

   <listener-class>

     org.springframework.web.context.ContextLoaderListener

     </listener-class>

 </listener>

 <context-param>

     <param-name>contextConfigLocation</param-name>

     <param-value>classpath:config/spring/applicationContext.xml </param-value>

 </context-param>
5. 启动Tomcat测试
6. spring管理struts2中Action,在spring文件中配置
<bean id="mainAction" class="action.MainAction"></bean>
7. 修改struts对应配置文件信息,换成spring配置文件中<bean id="mainAction">
<struts>
   <constant name="struts.objectFactory" value="spring" />

     <package name="ssh" namespace="/" extends="struts-default">

         <default-action-ref name="index" />

         <action name="index" class="mainAction" method="start">

             <result name="start">WEB-INF/jsp/index.jsp</result>

         </action>

     </package>

</struts>
8. 重启tomcat测试是否可用
- 集成hibernate
1. 添加hibernate必须的jar包

2. 添加hibernate配置文件,位置设置在config/hibernate/cfg目录下,文件名:hibernate.cfg.xml,并向其中添加如下配置
<?xml version="1.0" encoding="UTF-8"?>

<!DOCTYPE hibernate-configuration PUBLIC

    "-//Hibernate/Hibernate Configuration DTD 3.0//EN"

    "http://www.hibernate.org/dtd/hibernate-configuration-3.0.dtd">

<hibernate-configuration>

  <session-factory></session-factory>

</hibernate-configuration
3. 创建包hibernate.hbm,用于存放hibernate的映射文件,创建User.hbm.xml并添加如下信息
<?xml version="1.0" encoding="UTF-8"?>

<!DOCTYPE hibernate-mapping PUBLIC

    "-//Hibernate/Hibernate Mapping DTD 3.0//EN"

    "http://www.hibernate.org/dtd/hibernate-mapping-3.0.dtd">

<hibernate-mapping>

</hibernate-mapping>
4. 配置spring的数据源,添加Tomcat JDBC POOL连接池类库

5. 在spring配置文件中配置连接池,在src目录下创建properties包,用于存属性文件,并创建文件db.properties,用于保存数据库连接池的配置属性之后向db.properties中添加数据库连接池的属性数据,包括:url、driver、username、password、initialSize、maxActive、maxIdle、minIdle、maxWait、removeAbandoned、 removeAbandonedTimeOut等
<bean id="PropertyPlaceholderConfigurer" class="org.springframework.beans.factory.config.PropertyPlaceholderConfigurer">

  <property name="location" value="classpath:config/properties/datasource.properties" />

</bean>

<bean id="dataSource" class="org.apache.tomcat.jdbc.pool.DataSource" >

  <property name="driverClassName" value="${driver}" />

  <property name="url" value="${url}" />

  <property name="username" value="${username}" />

  <property name="password" value="${password}" />

  <property name="initialSize" value="${initialSize}" />

  <property name="maxActive" value="${maxActive}" />

  <property name="maxIdle" value="${maxIdle}" />

  <property name="minIdle" value="${minIdle}" />

  <property name="maxWait" value="${maxWait}" />

  <property name="removeAbandoned" value="${removeAbandoned}" />

  <property name="removeAbandonedTimeout" value="${removeAbandonedTimeout}" />

</bean>
6. 在spring中完全管理hibernate配置,删除hibernate.cfg.xml,在spring配置文件中创建id为sessionFactory的bean
<bean id="sessionFactory" class="org.springframework.orm.hibernate3.LocalSessionFactoryBean">

  <property name="dataSource" ref="dataSource" />

  <property name="hibernateProperties">

    <props>

      <prop key="hibernate.dialect">

        org.hibernate.dialect.MySQLDialect

      </prop>

      <prop key="hibernate.format_sql">true</prop>

      <prop key="hibernate.show_sql">true</prop>
    </props>

  </property>

  <property name="mappingLocations">

    <list>

      <value>classpath:config/hibernate/User.hbm.xml</value>

    </list>

  </property>

</bean>
7. 创建User实体类,UserDao、jsp等,并在spring中配置提供注入,进行测试
附:sping事务配置(基于tx、aop声明式)
1. 在spring配置文件中添加声明
<beans xmlns="http://www.springframework.org/schema/beans"

    xmlns:xsi="http://www.w3.org/2001/XMLSchema-instance"

    xmlns:p="http://www.springframework.org/schema/p"

    xmlns:context="http://www.springframework.org/schema/context"

    xmlns:aop="http://www.springframework.org/schema/aop"

    xmlns:tx="http://www.springframework.org/schema/tx"

    xsi:schemaLocation="http://www.springframework.org/schema/beans

        classpath:/org/springframework/beans/factory/xml/spring-beans-3.2.xsd

        http://www.springframework.org/schema/context

        classpath:/org/springframework/context/config/spring-context-3.2.xsd

        http://www.springframework.org/schema/tx

        classpath:/org/springframework/transaction/config/spring-tx-3.2.xsd

        http://www.springframework.org/schema/aop

        classpath:/org/springframework/aop/config/spring-aop-3.2.xsd">
2. 添加事务配置,bean标签之外,beans标签之内
<tx:advice id="txAdvice" transaction-manager="transactionManager">

  <tx:attributes>

    <tx:method name="find*" read-only="false"/>

    <tx:method name="add*" rollback-for="Exception"/>

  </tx:attributes>

</tx:advice>

<aop:config>

  <aop:pointcut id="serviceMethod" expression="execution(* action.*.*(..))"/>

  <aop:advisor pointcut-ref="serviceMethod" advice-ref="txAdvice"/>

</aop:config>
S2SH框架集成详解(Struts 2.3.16 + Spring 3.2.6 + Hibernate 3.6.10)的更多相关文章
- 转: javascript模块加载框架seajs详解
javascript模块加载框架seajs详解 SeaJS是一个遵循commonJS规范的javascript模块加载框架,可以实现javascript的模块化开发和模块化加载(模块可按需加载或全部加 ...
- Quartz学习——SSMM(Spring+SpringMVC+Mybatis+Mysql)和Quartz集成详解(四)
当任何时候觉你得难受了,其实你的大脑是在进化,当任何时候你觉得轻松,其实都在使用以前的坏习惯. 通过前面的学习,你可能大致了解了Quartz,本篇博文为你打开学习SSMM+Quartz的旅程!欢迎上车 ...
- Quartz学习——SSMM(Spring+SpringMVC+Mybatis+Mysql)和Quartz集成详解(转)
通过前面的学习,你可能大致了解了Quartz,本篇博文为你打开学习SSMM+Quartz的旅程!欢迎上车,开始美好的旅程! 本篇是在SSM框架基础上进行的. 参考文章: 1.Quartz学习——Qua ...
- (转) Quartz学习——SSMM(Spring+SpringMVC+Mybatis+Mysql)和Quartz集成详解(四)
http://blog.csdn.net/u010648555/article/details/60767633 当任何时候觉你得难受了,其实你的大脑是在进化,当任何时候你觉得轻松,其实都在使用以前的 ...
- Hadoop 新 MapReduce 框架 Yarn 详解
Hadoop 新 MapReduce 框架 Yarn 详解: http://www.ibm.com/developerworks/cn/opensource/os-cn-hadoop-yarn/ Ap ...
- 测试框架mochajs详解
测试框架mochajs详解 章节目录 关于单元测试的想法 mocha单元测试框架简介 安装mocha 一个简单的例子 mocha支持的断言模块 同步代码测试 异步代码测试 promise代码测试 不建 ...
- Android热门网络框架Volley详解[申明:来源于网络]
Android热门网络框架Volley详解[申明:来源于网络] 地址:http://www.cnblogs.com/caobotao/p/5071658.html
- 【python3+request】python3+requests接口自动化测试框架实例详解教程
转自:https://my.oschina.net/u/3041656/blog/820023 [python3+request]python3+requests接口自动化测试框架实例详解教程 前段时 ...
- python+requests接口自动化测试框架实例详解
python+requests接口自动化测试框架实例详解 转自https://my.oschina.net/u/3041656/blog/820023 摘要: python + requests实 ...
随机推荐
- Linux redhat
挂载U盘 fdisk -l 可以列出所有的分区,包括没有挂上的分区和usb设备.我一般用这个来查找需要挂载的分区的位置,比如挂上u盘. mount /dev/sdb1 usb/
- tab选项卡-jQuery
上次用原生的js写了个tab选项卡 这次按照一样的思路用jQuery写了一个 ,直接看代码: /*布局*/ <div id="div1"> <input cl ...
- thinkphp 中js 实现刷新
<input name="Button5" value="返回" id="Button5" style="width:56p ...
- 理解CSS Clip属性及用法
应用Clip属性实现的一个简单效果图: 样式写法: .my-element { position: absolute; clip: rect(10px 350px 170px 0); /* IE ...
- MVC架构模式
MVC是一个框架模式,它强制性的使应用程序的输入.处理和输出分开.使用MVC应用程序被分成三个核心部件:模型.视图.控制器. V页面传递数据给C,C调用模型处理返回数据给V 最典型的MVC就是JSP ...
- CMD模块定义规范
CMD 模块定义规范 在 Sea.js 中,所有 JavaScript 模块都遵循 CMD(Common Module Definition) 模块定义规范.该规范明确了模块的基本书写格式和基本交互规 ...
- c# 基础连接已经关闭: 连接被意外关闭,错误的解决
原文:c# 基础连接已经关闭: 连接被意外关闭,错误的解决 调试一个使用HttpWebRequest模拟提交表单的程序的时候频繁出现上述错误提示,google了一下发现了几个解决方案.1.在appli ...
- The Cow Lexicon(dp)
Time Limit: 2000MS Memory Limit: 65536K Total Submissions: 7290 Accepted: 3409 Description Few k ...
- COJ 0967 WZJ的数据结构(负三十三)
WZJ的数据结构(负三十三) 难度级别:E: 运行时间限制:7000ms: 运行空间限制:262144KB: 代码长度限制:2000000B 试题描述 请你设计一个数据结构,完成以下功能: 给定一个大 ...
- 「Poetize9」礼物运送
3055: 礼物运送 Time Limit: 3 Sec Memory Limit: 128 MBSubmit: 18 Solved: 12[Submit][Status] Description ...