S2SH框架集成详解(Struts 2.3.16 + Spring 3.2.6 + Hibernate 3.6.10)
近期集成了一次较新版本的s2sh,出现了不少问题,网上资料也是良莠不齐,有的甚至就是扯淡,简单的把jar包扔进去就以为是集成成功了,在这里整理一下详细的步骤,若哪位有什么不同看法,可以留言,欢迎批评改正。
首先说下集成的环境,Eclipse 4.4,Tomcat 7.0.54,Struts2.3.16,Hibernate3.6.10,Spring3.2.6
相关JAR包已上传至百度云:http://pan.baidu.com/s/1pJluA5l
- 搭建Struts2框架
1. 创建Java Web工程SSH
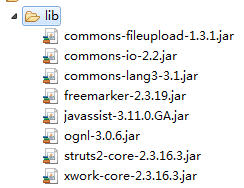
2. 添加struts2.3.16的8个基本类库,可能以前版本是6个,但是2.3.16版本本人测试是8个,大家可以自己测试下
3. 在src下创建config.struts包,并创建struts2的配置文件struts.xml
4. 在web.xml文件中添加过滤器,如果strtus2配置文件放在src下无需添加init-param标签。
 <filter>

     <filter-name>struts2</filter-name>

     <filter-class>

       org.apache.struts2.dispatcher.ng.filter.StrutsPrepareAndExecuteFilter

     </filter-class>

     <init-param>

         <param-name>config</param-name>

         <param-value>

             struts-default.xml,struts-plugin.xml,config/struts/struts.xml

         </param-value>

     </init-param>

 </filter>

 <filter-mapping>

     <filter-name>struts2</filter-name>

     <url-pattern>/*</url-pattern>

 </filter-mapping>
5. 向struts.xml中添加如下代码
<?xml version="1.0" encoding="UTF-8"?>

<!DOCTYPE struts PUBLIC

    "-//Apache Software Foundation//DTD Struts Configuration 2.3//EN"

    "http://struts.apache.org/dtds/struts-2.3.dtd">

<struts>

    <package name="ssh" namespace="/" extends="struts-default">

        <action name="" class="" method="">

            <result name=""></result>

        </action>

    </package>

</struts>
6. 创建以下路径用于测试
WebContent/Web-INF/jsp/index.jsp
(Web-INF为安全目录,无法直接访问)
7. 在src目录下创建action包,用于放置Struts2的Action,然后创建MainAction,用于测试,以及以后的页面跳转,并添加如下代码:
 package action;

 public class MainAction {

     public String start(){

         return "start";

     }

 }
8. 在struts.xml中进行配置
 <struts>

     <package name="ssh" namespace="/" extends="struts-default">

         <default-action-ref name="index" />

         <action name="index" class="action.MainAction" method="start">

             <result name="start">WEB-INF/jsp/index.jsp</result>

         </action>

     </package>

 </struts>
9. 启动web服务器,测试http://localhost:8080/SSH/
- 集成struts2和spring
1. 添加spring类库

2. 添加strut2集成spring类库:struts2-spring-plugin-2.3.16.3.jar
3. 添加spring配置文件applicationContext.xml,并添加如下信息
<?xml version="1.0" encoding="UTF-8"?>

<!DOCTYPE beans PUBLIC "-//SPRING//DTD BEAN//EN" "http://www.springframework.org/dtd/spring-beans.dtd">

<beans>

</beans>
4. 在web.xml文件中添加spring监听器,在filter标签外,context-param标签是为了自定义spring配置文件的位置
 <listener>

   <listener-class>

     org.springframework.web.context.ContextLoaderListener

     </listener-class>

 </listener>

 <context-param>

     <param-name>contextConfigLocation</param-name>

     <param-value>classpath:config/spring/applicationContext.xml </param-value>

 </context-param>
5. 启动Tomcat测试
6. spring管理struts2中Action,在spring文件中配置
<bean id="mainAction" class="action.MainAction"></bean>
7. 修改struts对应配置文件信息,换成spring配置文件中<bean id="mainAction">
<struts>
   <constant name="struts.objectFactory" value="spring" />

     <package name="ssh" namespace="/" extends="struts-default">

         <default-action-ref name="index" />

         <action name="index" class="mainAction" method="start">

             <result name="start">WEB-INF/jsp/index.jsp</result>

         </action>

     </package>

</struts>
8. 重启tomcat测试是否可用
- 集成hibernate
1. 添加hibernate必须的jar包

2. 添加hibernate配置文件,位置设置在config/hibernate/cfg目录下,文件名:hibernate.cfg.xml,并向其中添加如下配置
<?xml version="1.0" encoding="UTF-8"?>

<!DOCTYPE hibernate-configuration PUBLIC

    "-//Hibernate/Hibernate Configuration DTD 3.0//EN"

    "http://www.hibernate.org/dtd/hibernate-configuration-3.0.dtd">

<hibernate-configuration>

  <session-factory></session-factory>

</hibernate-configuration
3. 创建包hibernate.hbm,用于存放hibernate的映射文件,创建User.hbm.xml并添加如下信息
<?xml version="1.0" encoding="UTF-8"?>

<!DOCTYPE hibernate-mapping PUBLIC

    "-//Hibernate/Hibernate Mapping DTD 3.0//EN"

    "http://www.hibernate.org/dtd/hibernate-mapping-3.0.dtd">

<hibernate-mapping>

</hibernate-mapping>
4. 配置spring的数据源,添加Tomcat JDBC POOL连接池类库

5. 在spring配置文件中配置连接池,在src目录下创建properties包,用于存属性文件,并创建文件db.properties,用于保存数据库连接池的配置属性之后向db.properties中添加数据库连接池的属性数据,包括:url、driver、username、password、initialSize、maxActive、maxIdle、minIdle、maxWait、removeAbandoned、 removeAbandonedTimeOut等
<bean id="PropertyPlaceholderConfigurer" class="org.springframework.beans.factory.config.PropertyPlaceholderConfigurer">

  <property name="location" value="classpath:config/properties/datasource.properties" />

</bean>

<bean id="dataSource" class="org.apache.tomcat.jdbc.pool.DataSource" >

  <property name="driverClassName" value="${driver}" />

  <property name="url" value="${url}" />

  <property name="username" value="${username}" />

  <property name="password" value="${password}" />

  <property name="initialSize" value="${initialSize}" />

  <property name="maxActive" value="${maxActive}" />

  <property name="maxIdle" value="${maxIdle}" />

  <property name="minIdle" value="${minIdle}" />

  <property name="maxWait" value="${maxWait}" />

  <property name="removeAbandoned" value="${removeAbandoned}" />

  <property name="removeAbandonedTimeout" value="${removeAbandonedTimeout}" />

</bean>
6. 在spring中完全管理hibernate配置,删除hibernate.cfg.xml,在spring配置文件中创建id为sessionFactory的bean
<bean id="sessionFactory" class="org.springframework.orm.hibernate3.LocalSessionFactoryBean">

  <property name="dataSource" ref="dataSource" />

  <property name="hibernateProperties">

    <props>

      <prop key="hibernate.dialect">

        org.hibernate.dialect.MySQLDialect

      </prop>

      <prop key="hibernate.format_sql">true</prop>

      <prop key="hibernate.show_sql">true</prop>
    </props>

  </property>

  <property name="mappingLocations">

    <list>

      <value>classpath:config/hibernate/User.hbm.xml</value>

    </list>

  </property>

</bean>
7. 创建User实体类,UserDao、jsp等,并在spring中配置提供注入,进行测试
附:sping事务配置(基于tx、aop声明式)
1. 在spring配置文件中添加声明
<beans xmlns="http://www.springframework.org/schema/beans"

    xmlns:xsi="http://www.w3.org/2001/XMLSchema-instance"

    xmlns:p="http://www.springframework.org/schema/p"

    xmlns:context="http://www.springframework.org/schema/context"

    xmlns:aop="http://www.springframework.org/schema/aop"

    xmlns:tx="http://www.springframework.org/schema/tx"

    xsi:schemaLocation="http://www.springframework.org/schema/beans

        classpath:/org/springframework/beans/factory/xml/spring-beans-3.2.xsd

        http://www.springframework.org/schema/context

        classpath:/org/springframework/context/config/spring-context-3.2.xsd

        http://www.springframework.org/schema/tx

        classpath:/org/springframework/transaction/config/spring-tx-3.2.xsd

        http://www.springframework.org/schema/aop

        classpath:/org/springframework/aop/config/spring-aop-3.2.xsd">
2. 添加事务配置,bean标签之外,beans标签之内
<tx:advice id="txAdvice" transaction-manager="transactionManager">

  <tx:attributes>

    <tx:method name="find*" read-only="false"/>

    <tx:method name="add*" rollback-for="Exception"/>

  </tx:attributes>

</tx:advice>

<aop:config>

  <aop:pointcut id="serviceMethod" expression="execution(* action.*.*(..))"/>

  <aop:advisor pointcut-ref="serviceMethod" advice-ref="txAdvice"/>

</aop:config>
S2SH框架集成详解(Struts 2.3.16 + Spring 3.2.6 + Hibernate 3.6.10)的更多相关文章
- 转: javascript模块加载框架seajs详解
javascript模块加载框架seajs详解 SeaJS是一个遵循commonJS规范的javascript模块加载框架,可以实现javascript的模块化开发和模块化加载(模块可按需加载或全部加 ...
- Quartz学习——SSMM(Spring+SpringMVC+Mybatis+Mysql)和Quartz集成详解(四)
当任何时候觉你得难受了,其实你的大脑是在进化,当任何时候你觉得轻松,其实都在使用以前的坏习惯. 通过前面的学习,你可能大致了解了Quartz,本篇博文为你打开学习SSMM+Quartz的旅程!欢迎上车 ...
- Quartz学习——SSMM(Spring+SpringMVC+Mybatis+Mysql)和Quartz集成详解(转)
通过前面的学习,你可能大致了解了Quartz,本篇博文为你打开学习SSMM+Quartz的旅程!欢迎上车,开始美好的旅程! 本篇是在SSM框架基础上进行的. 参考文章: 1.Quartz学习——Qua ...
- (转) Quartz学习——SSMM(Spring+SpringMVC+Mybatis+Mysql)和Quartz集成详解(四)
http://blog.csdn.net/u010648555/article/details/60767633 当任何时候觉你得难受了,其实你的大脑是在进化,当任何时候你觉得轻松,其实都在使用以前的 ...
- Hadoop 新 MapReduce 框架 Yarn 详解
Hadoop 新 MapReduce 框架 Yarn 详解: http://www.ibm.com/developerworks/cn/opensource/os-cn-hadoop-yarn/ Ap ...
- 测试框架mochajs详解
测试框架mochajs详解 章节目录 关于单元测试的想法 mocha单元测试框架简介 安装mocha 一个简单的例子 mocha支持的断言模块 同步代码测试 异步代码测试 promise代码测试 不建 ...
- Android热门网络框架Volley详解[申明:来源于网络]
Android热门网络框架Volley详解[申明:来源于网络] 地址:http://www.cnblogs.com/caobotao/p/5071658.html
- 【python3+request】python3+requests接口自动化测试框架实例详解教程
转自:https://my.oschina.net/u/3041656/blog/820023 [python3+request]python3+requests接口自动化测试框架实例详解教程 前段时 ...
- python+requests接口自动化测试框架实例详解
python+requests接口自动化测试框架实例详解 转自https://my.oschina.net/u/3041656/blog/820023 摘要: python + requests实 ...
随机推荐
- YZOI回忆录&&YZOI3.0介绍&&某些资源的分享
“那段时光就像块透明的琉璃,美得那么虚幻.飘渺.可是它毕竟在我生命里闪现,哪怕如萤光一样微弱,却照亮了我整个心房.”1.前序伴随着yzoi2.0版本离我而去的是我半年的OI生涯,在这半年内我步入了一个 ...
- 关于考虑浏览器兼容性时间的工具demo
//支持跨浏览器的添加事件. var btn = document.getElementById("btn"); function showMes() { alert(" ...
- HTML5拖放API
拖放事件事件提供了拖放可以控制几乎所有方面的拖放操作.棘手的部分是确定每个事件触发:在拖项目火:别人火下降的目标.拖动项时,以下事件(按照这个顺序): 拖曳开始拖dragend此刻你把鼠标按钮和开始移 ...
- 关于DEDECMS自定义模型当中添加自定义字段后在后台添加内容后不显示解决方案
用DEDECMS的时间也不长,最近在做一个站时,就遇到了这个问题(自定义字段在后台不显示内容)中添加自定义字段后在后台编辑打开后发现我之前添加的内容不显示,如果是只是看看不单击确定的话,那么在前台数据 ...
- UFLDL实验报告2:Sparse Autoencoder
Sparse Autoencoder稀疏自编码器实验报告 1.Sparse Autoencoder稀疏自编码器实验描述 自编码神经网络是一种无监督学习算法,它使用了反向传播算法,并让目标值等于输入值, ...
- AdminLTE
AdminLTE搭建前端 0 Asp.Net Core 项目实战之权限管理系统(0) 无中生有 1 Asp.Net Core 项目实战之权限管理系统(1) 使用AdminLTE搭建前端 2 Asp ...
- java分页查询
很多数据库自身都提供了分页机制,如SQL Server中提供的top关键字,MySQL数据库中提供的limit关键字,它们都可以设置数据返回的记录数. 通过各种数据库的分页机制实现分页查询,其优点是减 ...
- BZOJ 2432 兔农
Description 农夫栋栋近年收入不景气,正在他发愁如何能多赚点钱时,他听到隔壁的小朋友在讨论兔子繁殖的问题. 问题是这样的:第一个月初有一对刚出生的小兔子,经过两个月长大后,这对兔子从第三个月 ...
- Instagram的技术架构
http://blogread.cn/it/article/5497 Instagram 被 Facebook 以10亿美金收购.团队规模:13 人.而在被Facebook收购前的一个月,整个团队才7 ...
- DB2 SQL RR/RS/CS/UR四个级别《转载》
1.RR隔离级别:在此隔离级别下, DB2会锁住所有相关的纪录.在一个SQL语句执行期间,所有执行此语句扫描过的纪录都会被加上相应的锁.具体的锁的类型还是由操作的类型来决定,如果是读取,则加共享锁:如 ...