Nginx+uwsgi安装配置
一、安装基础开发包
yum groupinstall "Development tools"

yum install zlib-devel bzip2-devel pcre-devel openssl-devel ncurses-devel sqlite-devel readline-devel tk-devel
二、安装Python包管理
cd ~

wget https://pypi.python.org/packages/source/d/distribute/distribute-0.6.49.tar.gz

tar xf distribute-0.6.49.tar.gz

cd distribute-0.6.49

python2.7 setup.py install

easy_install --version
pip包: https://pypi.python.org/pypi/pip

安装pip的好处是可以 pip list、pip uninstall 管理Python包, easy_install 没有这个功能,只有uninstall
三、安装uwsgi
uwsgi:https://pypi.python.org/pypi/uWSGI

uwsgi参数详解:http://uwsgi-docs.readthedocs.org/en/latest/Options.html

pip install uwsgi

uwsgi --version    #查看 uwsgi 版本
测试uwsgi是否正常:
新建test.py文件,内容如下:
def application(env, start_response):

    start_response('200 OK', [('Content-Type','text/html')])

    return [b"Hello World"]
四、uwsgi配置:

然后在终端运行:
uwsgi --http 192.168.14.23:8086 --wsgi-file test.py

五、安装 Django
pip install django
六、配置django setting
设置settings.py,使用的数据库,如果使用mysql则需要设置数据库的地址和端口,如果设置sqlit则不需要进行更多设置
七:更新数据库:
python manage.py makemigrations

python manage.py migrate
八、运作django
python manage.py runserver XXXXXX:XXX

九、安装 Nginx
cd ~

wget http://nginx.org/download/nginx-1.5.6.tar.gz

tar xf nginx-1.5.6.tar.gz

cd nginx-1.5.6

./configure --prefix=/usr/local/nginx-1.5.6 \

--with-http_stub_status_module \

--with-http_gzip_static_module

make && make install
十、编译安装
[root@bogon nginx-1.6.2]#./configure --prefix=/usr/local/nginx --with-http_stub_status_module --with-http_ssl_module --with-pcre=/usr/local/src/pcre-8.38
[root@bogon nginx-1.6.2]#make
[root@bogon nginx-1.6.2]#make install
十一、查看nginx版本
[root@bogon nginx-1.6.2]# /usr/local/webserver/nginx/sbin/nginx -v
十二、Nginx 配置
[root@bogon conf]# /usr/sbin/groupadd www

[root@bogon conf]# /usr/sbin/useradd -g www www
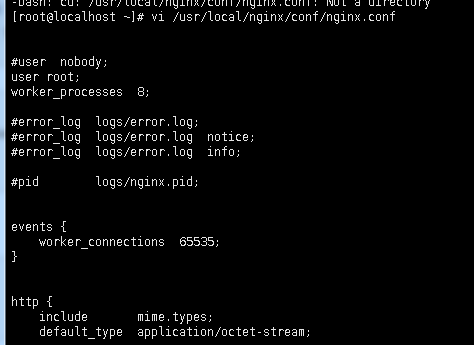
配置nginx.conf ,将/usr/local/nginx/conf/nginx.conf替换为以下内容
#user  nobody;

#user root;

user www www;

worker_processes  8;

error_log /usr/local/nginx/logs/nginx_error.log crit; #日志位置和日志级别

#error_log  logs/error.log;

#error_log  logs/error.log  notice;

#error_log  logs/error.log  info;

#pid        logs/nginx.pid;

pid /usr/local/nginx/nginx.pid;

worker_rlimit_nofile 65535;

events {

    use epoll;

    worker_connections  65535;

}

http {

    include       mime.types;

    default_type  application/octet-stream;

    log_format  main  '$remote_addr - $remote_user [$time_local] "$request" '

                      '$status $body_bytes_sent "$http_referer" '

                      '"$http_user_agent" "$http_x_forwarded_for"';

    #access_log  logs/access.log  main;

    server_names_hash_bucket_size 128;

    client_header_buffer_size 32k;

    large_client_header_buffers 4 32k;

    client_max_body_size 8m;

    sendfile        on;

    tcp_nopush     on;

    #keepalive_timeout  0;

    keepalive_timeout  65;

    tcp_nodelay on;

    fastcgi_connect_timeout 300;

    fastcgi_send_timeout 300;

    fastcgi_read_timeout 300;

    fastcgi_buffer_size 64k;

    fastcgi_buffers 4 64k;

    fastcgi_busy_buffers_size 128k;

    fastcgi_temp_file_write_size 128k;

    gzip on;

    gzip_min_length 1k;

    gzip_buffers 4 16k;

    gzip_http_version 1.0;

    gzip_comp_level 2;

    gzip_types text/plain application/x-javascript text/css application/xml;

    gzip_vary on;

    #gzip  on;

    server {

        listen       8091;

        server_name  localhost;

        #charset koi8-r;

        #access_log  logs/host.access.log  main;

        access_log /data/guest-master/access_log;

    error_log /data/guest-master/error_log;

    # max upload size

    client_max_body_size 75M;   # adjust to taste

        location / {

        autoindex on;

        autoindex_exact_size off;

            autoindex_localtime on;

            #include ip_allow on;

           # root   html;

        root  /data/guest-master;

            #index  index.html index.htm;

        uwsgi_pass 192.168.14.23:8086;

            include uwsgi_params;

        #include    /etc/nginx/uwsgi_params; # the uwsgi_params file you installed

        access_log off;

        }

    location /static {

        alias /data/guest-master/sign/static; # your Django project's static files - amend as required

        #root /data/guest-master;

    }

    location ~.*.(gif|jpg|png|ico|jpeg|bmp|swf)$ {

        expires 3d;

    }

    location ~.*.(css|js)$ {

        expires 12h;

    }

       #error_page  404              /404.html;

        # redirect server error pages to the static page /50x.html

        #

        error_page   500 502 503 504  /50x.html;

        location = /50x.html {

            root   html;

        }

        # proxy the PHP scripts to Apache listening on 127.0.0.1:80

        #

        #location ~ \.php$ {

        #    proxy_pass   http://127.0.0.1;

        #}

        # pass the PHP scripts to FastCGI server listening on 127.0.0.1:9000

        #

        #location ~ \.php$ {

        #    root           html;

        #    fastcgi_pass   127.0.0.1:9000;

        #    fastcgi_index  index.php;

        #    fastcgi_param  SCRIPT_FILENAME  /scripts$fastcgi_script_name;

        #    include        fastcgi_params;

        #}

        # deny access to .htaccess files, if Apache's document root

        # concurs with nginx's one

        #

        #location ~ /\.ht {

        #    deny  all;

        #}

    }

    # another virtual host using mix of IP-, name-, and port-based configuration

    #

    #server {

    #    listen       8000;

    #    listen       somename:8080;

    #    server_name  somename  alias  another.alias;

    #    location / {

    #        root   html;

    #        index  index.html index.htm;

    #    }

    #}

    # HTTPS server

    #

    #server {

    #    listen       443 ssl;

    #    server_name  localhost;

    #    ssl_certificate      cert.pem;

    #    ssl_certificate_key  cert.key;

    #    ssl_session_cache    shared:SSL:1m;

    #    ssl_session_timeout  5m;

    #    ssl_ciphers  HIGH:!aNULL:!MD5;

    #    ssl_prefer_server_ciphers  on;

    #    location / {

    #        root   html;

    #        index  index.html index.htm;

    #    }

    #}

}
检查配置文件ngnix.conf的正确性命令:
[root@bogon conf]# /usr/local/nginx/sbin/nginx -t

十三、启动 Nginx
[root@bogon conf]# /usr/local/nginx/sbin/nginx
访问站点
Nginx+uwsgi安装配置的更多相关文章
- 吴裕雄--天生自然Django框架开发笔记:Django Nginx+uwsgi 安装配置
Django Nginx+uwsgi 安装配置 使用 python manage.py runserver 来运行服务器.这只适用测试环境中使用. 正式发布的服务,需要一个可以稳定而持续的服务器,比如 ...
- Django Nginx+uwsgi 安装配置
使用 python manage.py runserver 来运行服务器.这只适用测试环境中使用. 正式发布的服务,我们需要一个可以稳定而持续的服务器,比如apache, Nginx, lighttp ...
- python Django Nginx+ uWSGI 安装配置
环境: CentOS7.python-3.5.3.Nignx 1.10.3 .Django 1.10.6.uWSGI 2.0.14 django项目目录:/var/webRoot/p1 项目结构: 基 ...
- ubuntu配置Python-Django Nginx+uwsgi 安装配置
安装Nginx sudo apt-get install nginx ubantu安装完Nginx后,文件结构大致为: 所有的配置文件都在 /etc/nginx下: 启动程序文件在 /usr/sbin ...
- linux下Django Nginx+uwsgi 安装配置
原文链接 在前面的章节中我们使用 python manage.py runserver 来运行服务器.这只适用测试环境中使用. 正式发布的服务,我们需要一个可以稳定而持续的服务器,比如apache, ...
- webpy+nginx+uwsgi安装配置
转:(1)安装Nginx1.1 下载nginx-1.0.5.tar.gz并解压1.2 ./configure (也可以增加--prefix= path指定安装路径)此时有可能会提示缺少pcre支持,如 ...
- nginx初级安装配置
nginx初级安装配置 转自:(lykyl原创)http://www.cnblogs.com/lykyl/archive/2012/11/21/2781077.html 实验环境:系统 CENTOS5 ...
- nginx+tomcat安装配置
nginx+tomcat安装配置 # nginx+tomcat安装配置 #创建网站目录 mkdir -p /www/wwwroot cd /www #安装配置 wget http://mirrors. ...
- gerrit+nginx+centos安装配置
安装环境 centos 6.8 gerrit-full-2.5.2.war 下载地址:https://gerrit-releases.storage.googleapis.com/gerrit-ful ...
随机推荐
- Linux C编程学习之C语言简介---预处理、宏、文件包含……
C的简介 C语言的结构极其紧凑,C语言是一种模块化的编程语言,整个程序可以分割为几个相对独立的功能模块,模块之间的相互调用和数据传递是非常方便的 C语言的表达能力十分强大.C语言兼顾了高级语言和汇编语 ...
- C语言头文件组织与包含原则
转自:http://www.cnblogs.com/clover-toeic/p/3728026.html 说明 本文假定读者已具备基本的C编译知识. 如非特殊说明,文中“源文件”指*.c文件,“头文 ...
- iOS APP提交上架最新流程(转)
时隔1年又让我鼓捣iOS,刚接手就是上架,经验值为0的我,虽然内心是拒绝的,但还是要接受这项任务滴!也就是在被拒后重新审核,再改在提交...这样 反复的过程中也对上架流程熟悉了好多,写篇帖子送给同为菜 ...
- 常用CSS居中
1.flex方法: .center_fix { display:flex; align-items:center; justify-content: center; } 具体flex方法教程:可以参见 ...
- suse最小化安装
Open suse 图形安装 用虚拟机vmware70 或者是Oracle VM VirtualBox安装 .镜像文件就是SLED-10-x86_64-DVD1 根据虚拟机设置吧镜像文件装入虚拟机中 ...
- IC解密DS2431芯片解密DS2432、DS2433解密多少钱?
IC解密DS2431芯片解密DS2432.DS2433解密多少钱? DS24系列可成功芯片解密的型号: DS2430A | DS2431 | DS2432 | DS2433 | DS2434 | DS ...
- linux 使用命令笔记
这篇随笔用来记载常用的 linux 终端命令 1. 重命名 方案a. mv old.c new.c //正规命令,把old.c 重命名为: new.c 方案b. cp old.c new.c ...
- [工作中的设计模式]享元模式模式FlyWeight
一.模式解析 Flyweight在拳击比赛中指最轻量级,即“蝇量级”或“雨量级”,这里选择使用“享元模式”的意译,是因为这样更能反映模式的用意.享元模式是对象的结构模式.享元模式以共享的方式高效地支持 ...
- PHP遍历、删除文件夹中的所有文件
<?php header("Content-type:text/html;charset=utf-8"); /** * getDirFile 遍历文件夹中的所有文件 * @p ...
- BZOJ3069: [Pa2011]Hard Choice 艰难的选择
Description Byteasar是一个很纠结的人.每次他经过Bytetown的时候都知道有至少2条不同的路径可以选择,这导致他必须花很长时间来决定走哪条路.Byteasar最近听说了Bytet ...