
源码编译配置lnmp部署zabbix
环境说明:
[root@wcy ~]# cat /etc/redhat-release

CentOS release 6.9 (Final)

[root@wcy ~]# uname -a

Linux wcy.admin 2.6.32-696.30.1.el6.x86_64 #1 SMP Tue May 22 03:28:18 UTC 2018 x86_64 x86_64 x86_64 GNU/Linux

[root@wcy ~]# ip a | grep inet

inet 127.0.0.1/8 scope host lo

inet6 ::1/128 scope host

inet 192.168.233.10/24 brd 192.168.233.255 scope global eth0

inet6 fe80::20c:29ff:fe79:1b0f/64 scope link
下载文件:
mysql-5.6.40.tar.gz     http://ftp.ntu.edu.tw/MySQL/Downloads/MySQL-5.6/

nginx-1.10.2.tar.gz     https://nginx.org/en/download.html

php-5.6.36.tar.gz       https://secure.php.net/downloads.php
安装nginx:
[root@wcy ~]# rpm -qa | grep -E "httpd|nginx|mysqld"    确保没有rpm格式的同文件

[root@wcy ~]# yum -y install pcre-devel zlib-devel          安装依赖

[root@wcy ~]# useradd -M -s /sbin/nologin nginx

[root@wcy ~]# tar xf nginx-1.10.2.tar.gz -C /usr/src/

[root@wcy ~]# cd /usr/src/nginx-1.10.2/

[root@wcy nginx-1.10.2]# ./configure --prefix=/usr/local/nginx --user=nginx --group=nginx --with-http_stub_status_module --with-file-aio --with-http_gzip_static_module --with-http_flv_module --with-http_ssl_module --with-pcre
编译过程中有报错如下:
./configure: error: SSL modules require the OpenSSL library.

You can either do not enable the modules, or install the OpenSSL library

into the system, or build the OpenSSL library statically from the source

with nginx by using --with-openssl=<path> option.
执行:
[root@wcy nginx-1.10.2]# yum -y install openssl openssl-devel
编译、安装
[root@wcy nginx-1.10.2]# make && make install
做个软链接
[root@wcy nginx-1.10.2]# ln -s /usr/local/nginx/sbin/* /usr/local/bin/
启动服务,测试服务
[root@wcy nginx-1.10.2]# nginx

[root@wcy nginx-1.10.2]# curl -I http://localhost

HTTP/1.1 200 OK

Server: nginx/1.10.2

Date: Wed, 01 Aug 2018 14:49:58 GMT

Content-Type: text/html

Content-Length: 612

Last-Modified: Wed, 01 Aug 2018 14:48:33 GMT

Connection: keep-alive

ETag: "5b61c841-264"

Accept-Ranges: bytes
安装php
[root@wcy ~]# tar xf php-5.6.36.tar.gz -C /usr/src/

[root@wcy ~]# cd /usr/src/php-5.6.36/

[root@wcy php-5.6.36]# ./configure --prefix=/usr/local/php56 \

> --with-mysql --with-pdo-mysql \

> --with-mysqli --with-openssl \

> --enable-fpm --enable-sockets \

> --enable-sysvshm --enable-mbstring \

> --with-freetype-dir --with-jpeg-dir \

> --with-png-dir --with-zlib-dir \

> --with-libxml-dir=/usr --enable-xml \

> --with-mhash --with-mcrypt \

> --with-config-file-path=/etc \

> --with-config-file-scan-dir=/etc/php.d \

> --with-bz2 --with-curl \

> --enable-ftp \

> --disable-ipv6 \

> --with-gd \

> --enable-gd-native-ttf \

> --with-iconv-dir=/usr \

> --enable-calendar \

> --with-gettext \

> --with-zlib \

> --enable-dom --with-libdir=lib64 \

> --enable-bcmath
编译过程所遇报错及解决办法,兵来将挡水来土掩
报错:

configure: error: xml2-config not found. Please check your libxml2 installation.

解决:

[root@wcy ~]# yum -y install libxml2-devel libxml2

报错:

checking for BZip2 in default path... not found

解决:

[root@wcy ~]# yum -y install bzip2 bzip2-devel

报错:

configure: error: Please reinstall the libcurl distribution -

easy.h should be in <curl-dir>/include/curl/

解决:

[root@wcy ~]# yum -y install curl-devel

报错:

configure: error: jpeglib.h not found.

解决:

[root@wcy ~]# yum -y install libjpeg-devel

报错:

configure: error: png.h not found.

解决:

[root@wcy ~]# yum install libpng-devel

报错:

configure: error: freetype-config not found.

解决:

[root@wcy ~]# yum install freetype-devel

报错:

configure: error: mcrypt.h not found. Please reinstall libmcrypt.

解决:

[root@wcy ~]# yum install -y libmcrypt-devel
踩过最深的坑就是编译安装PHP,坑出了新高度。。。
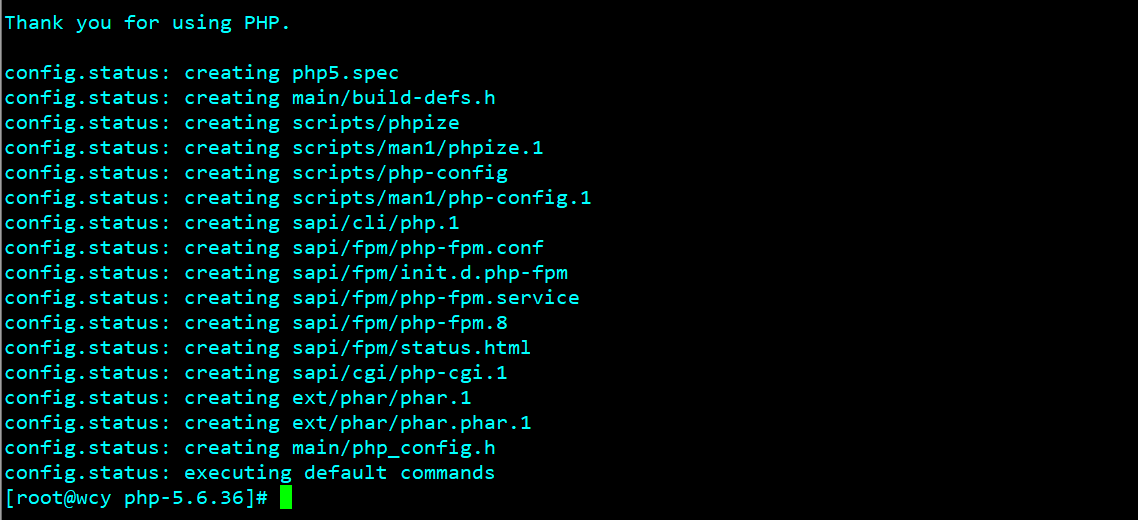
编译安装
[root@wcy php-5.6.36]# make && make install
参数说明:
./configure --prefix=/usr/local/php56#安装位置

--with-mysql#支持mysql

--with-pdo-mysql#支持pdo模块

--with-mysqli#支持mysqli模块

--with-openssl#支持openssl模块

--enable-fpm#支持fpm模式

--enable-sockets#启用socket支持

--enable-sysvshm#启用系统共享内存支持

--enable-mbstring#使多字节字符串的支持

--with-freetype-dir#设置FreeType安装前缀路径

--with-jpeg-dir#设置libjpeg安装前缀路径

--with-png-dir#设置libpng安装前缀路径

--with-zlib-dir#设置libz安装前缀路径

--with-libxml-dir=/usr#设置libxml2安装路径

--enable-xml

--with-mhash#支持mhash

--with-config-file-path=/etc#配置文件路径

--with-config-file-scan-dir=/etc/php.d#配置文件扫描路径

--with-bz2#支持BZip2

--with-curl#支持curl

--enable-ftp#启用FTP

--disable-ipv6#禁用ipV6

--with-gd#支持gd库

--enable-gd-native-ttf#支持TrueType字符串函数库

--with-iconv-dir=/usr#用于 PHP 编译时指定 iconv 在系统里的路径,否则会扫描默认路径。

--enable-calendar#打开日历扩展功能

--with-gettext#打开gnu 的gettext 支持,编码库用到

--with-zlib#支持zlib库

--enable-dom --with-libdir=lib64

--enable-bcmath#打开图片大小调整,用到zabbix监控的时候用到了这个模块
配置PHP:
[root@wcy php-5.6.36]# cp php.ini-production /etc/php.ini

[root@wcy php-5.6.36]# cp sapi/fpm/init.d.php-fpm /etc/init.d/php-fpm

[root@wcy php-5.6.36]# chmod +x /etc/init.d/php-fpm

[root@wcy php-5.6.36]# chkconfig --add php-fpm

[root@wcy php-5.6.36]# chkconfig php-fpm on

[root@wcy php-5.6.36]# chkconfig --list php-fpm

php-fpm 0:关闭	1:关闭	2:启用	3:启用	4:启用	5:启用	6:关闭

[root@wcy php-5.6.36]# cp /usr/local/php56/etc/php-fpm.conf.default /usr/local/php56/etc/php-fpm.conf

[root@wcy php-5.6.36]# vim /etc/php.ini

  936 date.timezone = Asia/Shanghai

  660 post_max_size = 32M

  372 max_execution_time = 300

  382 max_input_time = 300

  702 always_populate_raw_post_data = -1
建议修改完后重启一下机器
重启完成后启动nginx和php-fpm
[root@wcy ~]# nginx

[root@wcy ~]# /etc/init.d/php-fpm start      启动php-fpm时有错误

Starting php-fpm [02-Aug-2018 00:54:59] ERROR: unable to bind listening socket for address '127.0.0.1:9000': Address already in use (98)

[02-Aug-2018 00:54:59] ERROR: FPM initialization failed

failed

[root@wcy ~]# vim /usr/local/php56/etc/php-fpm.conf     修改php-fpm.conf里的监听地址为本机IP即可

listen = 192.168.233.10:9000

修改完成后再次启动并查看监听端口

[root@wcy ~]# /etc/init.d/php-fpm start

Starting php-fpm done

[root@wcy ~]# netstat -anpt | grep 9000

tcp  0  0  192.168.233.10:9000  0.0.0.0:*  LISTEN 1542/php-fpm

tcp  0  0  127.0.0.1:9000       0.0.0.0:*  LISTEN 1375/php-fpm
建立网站根目录
[root@wcy ~]# cd /usr/local/nginx/html/

[root@wcy html]# mkdir www

[root@wcy html]# chown -R nginx:nginx /usr/local/nginx/

[root@wcy html]# cp ../conf/nginx.conf{,.bak}

[root@wcy html]# vim ../conf/nginx.conf

nginx的配置文件,里面自定义优化,这里只写nginx调用PHP

location / {

root html/www;

index index.php index.html index.htm;

}

location ~\.php$ {

root html/www;

fastcgi_pass 192.168.233.10:9000;

fastcgi_index index.php;

fastcgi_param SCRIPT_FILENAME $document_root$fastcgi_script_name;

include fastcgi_params;

index index.php index.html index.htm;

}
nginx检查配置文件
[root@wcy html]# nginx -t

nginx: the configuration file /usr/local/nginx/conf/nginx.conf syntax is ok

nginx: configuration file /usr/local/nginx/conf/nginx.conf test is successful
创建PHP页面
[root@wcy html]# cd www/

[root@wcy www]# vim index.php

<?php

phpinfo();

?>
重新加载nginx
[root@wcy www]# killall -HUP nginx
关闭iptables或selinux或开放80端口
[root@wcy www]# service iptables stop

iptables:将链设置为政策 ACCEPT:filter [确定]

iptables:清除防火墙规则:              [确定]

iptables:正在卸载模块:                [确定]

[root@wcy www]# setenforce 0
浏览器输入 http://IP
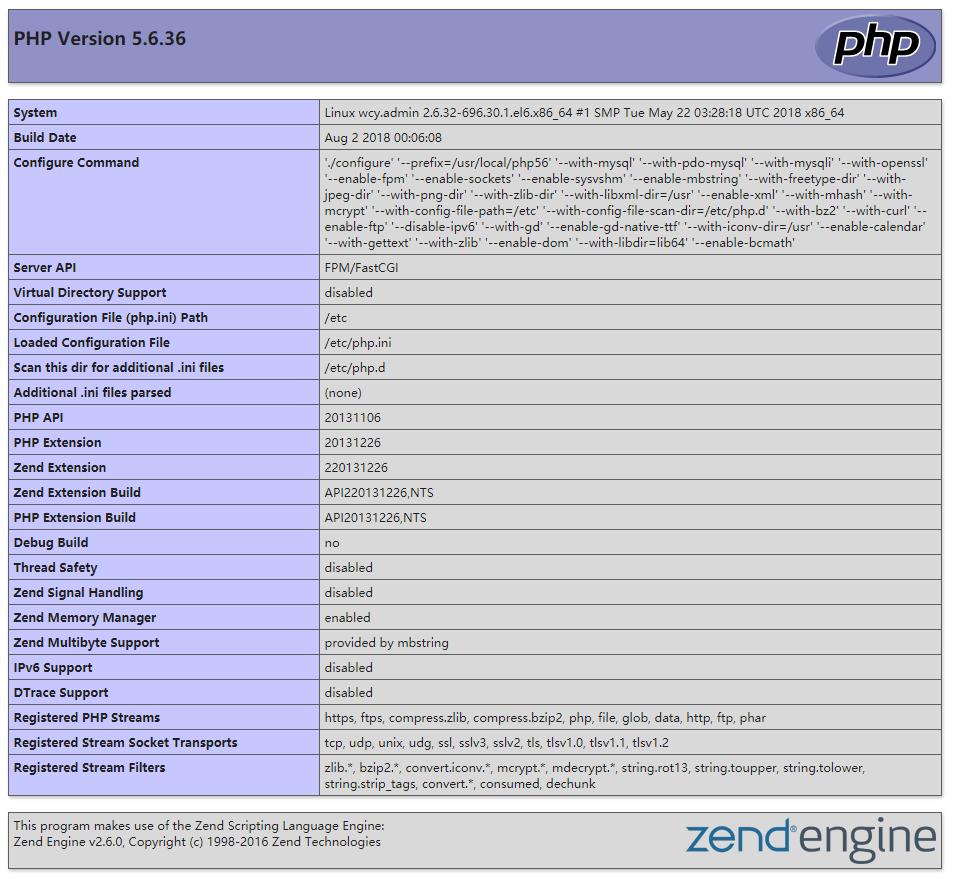
到此nginx已经可以调用PHP
配置mysql
[root@wcy ~]# rpm -qa | grep mysql

mysql-libs-5.1.73-8.el6_8.x86_64

[root@wcy ~]# rpm -e mysql-libs --nodeps

[root@wcy ~]# useradd -M -s /sbin/nologin mysql

[root@wcy ~]# yum -y install cmake bison-devel ncurses-devel

[root@wcy ~]# tar xf mysql-5.6.40.tar.gz -C /usr/src/

[root@wcy ~]# cd /usr/src/mysql-5.6.40/

[root@wcy mysql-5.6.40]# cmake \

> -DCMAKE_INSTALL_PREFIX=/usr/local/mysql \

> -DMYSQL_DATADIR=/usr/local/mysql/data \

> -DSYSCONFDIR=/etc \

> -DWITH_MYISAM_STORAGE_ENGINE=1 \

> -DWITH_INNOBASE_STORAGE_ENGINE=1 \

> -DWITH_MEMORY_STORAGE_ENGINE=1 \

> -DWITH_READLINE=1 \

> -DMYSQL_UNIX_ADDR=/var/lib/mysql/mysql.sock \

> -DMYSQL_TCP_PORT=3306 \

> -DENABLED_LOCAL_INFILE=1 \

> -DWITH_PARTITION_STORAGE_ENGINE=1 \

> -DEXTRA_CHARSETS=all \

> -DDEFAULT_CHARSET=utf8 \

> -DDEFAULT_COLLATION=utf8_general_ci \

> -DMYSQL_USER=mysql \

> -DWITH_DEBUG=0 \

> -DWITH_SSL=system

[root@wcy mysql-5.6.40]# make && make install
mysql编译详细参数见:
https://dev.mysql.com/doc/refman/5.5/en/source-configuration-options.html
配置mysql
[root@wcy mysql-5.6.40]# chmod +w /usr/local/mysql/

[root@wcy mysql-5.6.40]# chown -R mysql:mysql /usr/local/mysql/

[root@wcy mysql-5.6.40]# cp support-files/my-default.cnf /etc/my.cnf

执行初始化脚本

[root@wcy mysql-5.6.40]# /usr/local/mysql/scripts/mysql_install_db --defaults-file=/etc/my.cnf --basedir=/usr/local/mysql --datadir=/usr/local/mysql/data --user=mysql

[root@wcy mysql-5.6.40]# cp support-files/mysql.server /etc/init.d/mysqld

[root@wcy mysql-5.6.40]# chmod +x /etc/init.d/mysqld

[root@wcy mysql-5.6.40]# chkconfig --add mysqld

[root@wcy mysql-5.6.40]# chkconfig mysqld on

[root@wcy mysql-5.6.40]# vim /etc/my.cnf

[mysqld]

innodb_file_per_table

启动mysql时报错:

[root@wcy mysql-5.6.40]# service mysqld start

Starting MySQL.Logging to '/usr/local/mysql/data/wcy.admin.err'.

180802 01:53:45 mysqld_safe Directory '/var/lib/mysql' for UNIX socket file don't exists.

ERROR! The server quit without updating PID file (/usr/local/mysql/data/wcy.admin.pid).

解决办法:

在/var/lib下创建mysql目录,并执行:

[root@wcy lib]# cd /var/lib/

[root@wcy lib]# chown -R mysql:mysql mysql/

启动mysql

[root@wcy ~]# /etc/init.d/mysqld start

Starting MySQL. SUCCESS!

[root@wcy ~]# ln -s /usr/local/mysql/bin/* /usr/bin/

设置mysql密码:

[root@wcy ~]# /usr/local/mysql/bin/mysqladmin -uroot -p password "mysqlpasswd"

Enter password:

Warning: Using a password on the command line interface can be insecure.

添加环境变量

[root@wcy ~]# vim /etc/profile

在文件末尾添加

PATH=/usr/local/mysql/bin:$PATH

export PATH

[root@wcy ~]# source /etc/profile  立即生效
安装zabbix
[root@wcy ~]# mysql -uroot -p

Enter password:

Welcome to the MySQL monitor. Commands end with ; or \g.

Your MySQL connection id is 7

Server version: 5.6.40 Source distribution

Copyright (c) 2000, 2018, Oracle and/or its affiliates. All rights reserved.

Oracle is a registered trademark of Oracle Corporation and/or its

affiliates. Other names may be trademarks of their respective

owners.

Type 'help;' or '\h' for help. Type '\c' to clear the current input statement.

mysql> CREATE DATABASE zabbix CHARACTER SET utf8 COLLATE utf8_bin;

Query OK, 1 row affected (0.04 sec)

mysql> GRANT ALL PRIVILEGES ON zabbix.* TO zabbix@localhost IDENTIFIED BY 'zabbix';

Query OK, 0 rows affected (0.00 sec)

mysql> flush privileges;

Query OK, 0 rows affected (0.00 sec)

[root@wcy ~]# tar xf zabbix-3.2.0.tar.gz -C /usr/src/

[root@wcy ~]# cd /usr/src/zabbix-3.2.0/

[root@wcy zabbix-3.2.0]# mysql -uzabbix -p zabbix < database/mysql/schema.sql

Enter password:

[root@wcy zabbix-3.2.0]# mysql -uzabbix -p zabbix < database/mysql/images.sql

Enter password:

[root@wcy zabbix-3.2.0]# mysql -uzabbix -p zabbix < database/mysql/data.sql

Enter password:

[root@wcy zabbix-3.2.0]# ./configure --prefix=/usr/local/zabbix --sysconfdir=/etc/zabbix/ --enable-server --enable-agent --with-net-snmp --with-libcurl --with-mysql --with-libxml2

 报错:

configure: error: Invalid Net-SNMP directory - unable to find net-snmp-config

解决:

[root@wcy zabbix-3.2.0]# yum -y install net-snmp*

[root@wcy zabbix-3.2.0]# make && make install

[root@wcy zabbix-3.2.0]# vim /etc/zabbix/zabbix_server.conf

 77 DBHost=localhost

 87 DBName=zabbix

103 DBUser=zabbix

111 DBPassword=zabbix

299 ListenIP=192.168.233.10

配置防火墙:

[root@wcy zabbix-3.2.0]# iptables -I INPUT -p tcp -m multiport --dports 10050:10051 -j ACCEPT

[root@wcy zabbix-3.2.0]# service iptables save &&service iptables restart

建立软链接:

[root@wcy zabbix-3.2.0]# ln -s /usr/local/zabbix/sbin/* /usr/sbin/

[root@wcy zabbix-3.2.0]# cp misc/init.d/fedora/core/zabbix_* /etc/init.d/

[root@wcy zabbix-3.2.0]# chmod +x /etc/init.d/zabbix_*

[root@wcy zabbix-3.2.0]# sed -i "s@BASEDIR=/usr/local@BASEDIR=/usr/local/zabbix@g" /etc/init.d/zabbix_server

[root@wcy zabbix-3.2.0]# rm -rf /usr/local/nginx/html/www/*

[root@wcy zabbix-3.2.0]# cp -r frontends/php/* /usr/local/nginx/html/www/

[root@wcy zabbix-3.2.0]# chown -R nginx:nginx /usr/local/nginx/html/www/

[root@wcy zabbix-3.2.0]# killall -HUP nginx

启动zabbix报错:

[root@wcy bin]# /etc/init.d/zabbix_server start

Starting zabbix_server: /usr/local/zabbix/sbin/zabbix_server: error while loading shared libraries: libmysqlclient.so.18: cannot open shared object file: No such file or directory

[失败]

解决:

[root@wcy bin]# ln -s /usr/local/mysql/lib/libmysqlclient.so.18 /usr/lib64

再报错:

[root@wcy bin]# /etc/init.d/zabbix_server start

Starting zabbix_server: zabbix_server [14628]: user zabbix does not exist

zabbix_server [14628]: cannot run as root!

[失败]

再解决:

[root@wcy bin]# useradd -M -s /sbin/nologin zabbix

[root@wcy bin]# /etc/init.d/zabbix_server start

Starting zabbix_server: [确定]

[root@wcy bin]# netstat -anpt | grep zabbix

tcp 0 0 192.168.233.10:10051 0.0.0.0:* LISTEN 14649/zabbix_server

[root@wcy bin]# netstat -anpt | grep nginx

tcp 0 0 0.0.0.0:80 0.0.0.0:* LISTEN 14780/nginx
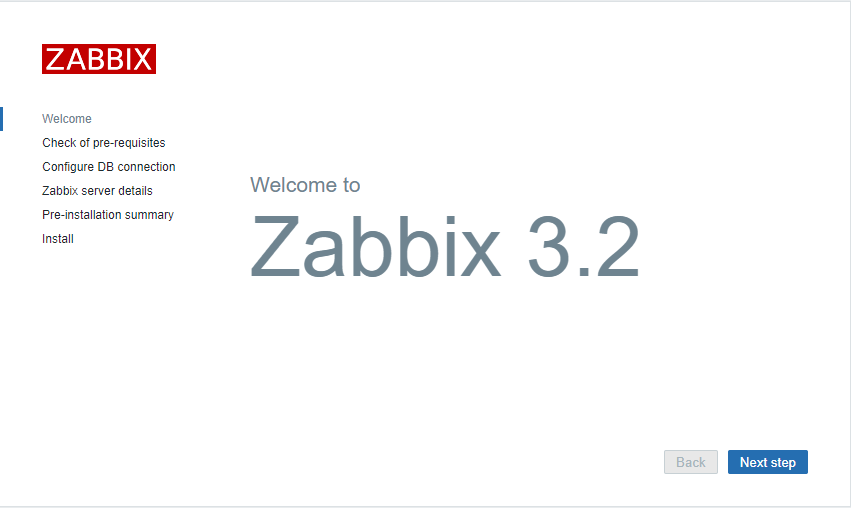
到此zabbix安装结束。。。
本文主要是 源码编译配置 LNMP环境,web界面配置zabbix的步骤请见其他几篇文章!
源码编译配置lnmp部署zabbix的更多相关文章
- WordPress安装篇(5):源码编译安装LNMP并部署WordPress
与YUM方式安装相比,源码编译安装方式更灵活,安装过程中能自定义功能和参数,特别是在批量部署服务器又要求软件版本及配置一致时,源码编译安装的优势很明显.本文介绍如何通过源码编译方式安装Nginx1.1 ...
- 源码编译搭建LNMP环境
LNMP源码编译 1.LNMP介绍 LNMP=Linux Nginx Mysql PHP Nginx ("engine x") 是一个高性能的 HTTP 和 反向代理 服务器.Ng ...
- 基于源码编译的lnmp架构实现论坛的搭建及memcache的应用
系统环境: RHEL6 x86-64 selinux and iptables disabled LNMP代表的就是:Linux系统下Nginx+MySQL+PHP这种网站服务器架构 Linux是一类 ...
- 源码编译安装lnmp环境
一.源码编译安装步骤 首先说明源码安装的好处 速度快,可自定义路径 主要有三步:1.配置 进入源码安装包 ./configure --prefix=/uer/local/nginx 可指定参数 ...
- 源码编译安装LNMP环境及配置基于域名访问的多虚拟主机
实验环境及软件版本: CentOS版本: 6.6(2.6.32.-504.el6.x86_64) nginx版本: nginx-1.6.2 mysql版本: Mysql-5.6.23 php版本: ...
- CentOS 6.5 源码编译搭建LNMP(三台独立主机实现)
搭建前准备: 1.三台独立主机 nginx:192.168.1.102 php-fpm:192.168.1.105 mysql:192.168.1.103 2.相关软件的源码包 nginx:nginx ...
- centos6源码编译安装lnmp环境
操作系统 版本 64位 CentOS-6.6 10.0.0.20 安装环境所需依赖包 yum -y install gcc automake autoconf libtool make gcc- ...
- spark 源码编译 standalone 模式部署
本文介绍如何编译 spark 的源码,并且用 standalone 的方式在单机上部署 spark. 步骤如下: 1. 下载 spark 并且解压 本文选择 spark 的最新版本 2.2.0 (20 ...
- centos7源码编译安装LNMP+ZABBIX4.0LTS(1)——nginx
环境:192.168.117.132--zabbix server192.168.117.133--zabbix proxy 安装路径为/zabbix 安装nginx 1.安装包下载http://ng ...
随机推荐
- Innodb间隙锁,细节讲解(转)
关于innodb间隙锁,网上有很多资料,在此不做赘述,我们讲解一下关于innodb的间隙锁什么情况下会产生的问题. 网上有些资料说innodb的间隙锁是为了防止幻读,这个论点真的是误人子弟.了解inn ...
- iOS从当前隐藏导航界面push到下一个显示导航界面出现闪一下的问题
本文转载至 http://blog.csdn.net/woaifen3344/article/details/41284319 navios 如果有朋友遇到从当前隐藏导航界面push到下一个显示导航界 ...
- acdream1415(dij+优先队列+桥)
这题好坑,卡SPFA... 无奈只能用dij+优先队列了. 因为好久没有写过代码了,所以今天写dij时候突然觉得复杂度不对,dij+优先队列的复杂度是(n+m)logn,这种复杂度对于稠密图是非常慢! ...
- 【BZOJ4552】[Tjoi2016&Heoi2016]排序 二分+线段树
[BZOJ4552][Tjoi2016&Heoi2016]排序 Description 在2016年,佳媛姐姐喜欢上了数字序列.因而他经常研究关于序列的一些奇奇怪怪的问题,现在他在研究一个难题 ...
- angualar入门学习-- 自定义指令 指令编译执行过程
3个阶段: 一.加载阶段 加载angular.js的源码,找到ng-app确定应用边界范围. 二.编译阶段 compile 查找所有指令,保存在一个列表中 对所有指令按优先级(property属性值) ...
- 160815、mysql主从复制/读写分离
mysql主从复制主服务器IP:192.168.99.10从服务器IP:192.168.99.20(一)安装mysql(主从服务器操作相同)yum -y install gcc gcc-c++ ncu ...
- centos6.5上搭建gitlab服务器(亲测可用哦)
最近的版本控制中,git可谓是脱缰的野马,一发不可收拾.当然git的设计模式也是愈发的成熟,让人刮目相看,完美解决了svn上的不足之处.在目前分布式横行的天下,git可谓是占得了一席之地. 废话少说, ...
- 手动爬虫之报头及代理封装类(python3)
本人刚刚学习爬虫,见每次都需要添加报头比较繁琐,故将该过程封装为Url_ProxyHelper类,代码如下 import urllib.request as ur class Url_ProxyHel ...
- 巨蟒python全栈开发-第10天 函数进阶
一.今日主要内容总览(重点) 1.动态传参(重点) *,** *: 形参:聚合 位置参数*=>元组 关键字**=>字典 实参:打散 列表,字符串,元组=>* 字典=>** 形参 ...
- AI篇6====>第一讲
1.人工智能 小米:小爱 百度:AI云平台 科大讯飞AI平台 2.百度语音合成 # Author: studybrother sun from aip import AipSpeech #从文本到声音 ...