SpringBoot自动装配-Import
1. 简介
@Import导入的类会被Spring加载到IOC容器中。而@Import提供4中用法:
导入Bean
导入配置类
导入 ImportSelector 实现类。一般用于加载配置文件中的类
导入 ImportBeanDefinitionRegistrar 实现类。
2. 定义
@Import注解定义如下,其内部只有一个参数为Class对象数组
@Target(ElementType.TYPE)

@Retention(RetentionPolicy.RUNTIME)

@Documented

public @interface Import {

  Class<?>[] value();

}
3. 使用说明
通过一个简单的小例子测试一下@Import是不是真的能实现Bean的注入
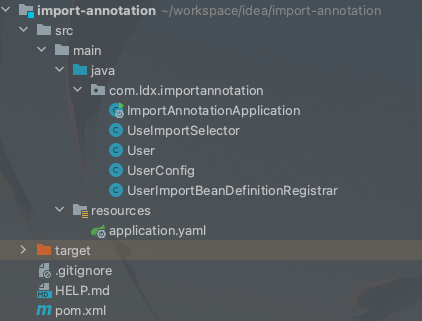
3.1 创建项目
3.1.1 导入依赖
这里我们除了springboot依赖,再添加个lombok依赖
<?xml version="1.0" encoding="UTF-8"?>

<project xmlns="http://maven.apache.org/POM/4.0.0" xmlns:xsi="http://www.w3.org/2001/XMLSchema-instance"

         xsi:schemaLocation="http://maven.apache.org/POM/4.0.0 https://maven.apache.org/xsd/maven-4.0.0.xsd">

    <modelVersion>4.0.0</modelVersion>

    <parent>

        <groupId>org.springframework.boot</groupId>

        <artifactId>spring-boot-starter-parent</artifactId>

        <version>2.5.3</version>

        <relativePath/> <!-- lookup parent from repository -->

    </parent>

    <groupId>com.ldx</groupId>

    <artifactId>import-annotation</artifactId>

    <version>0.0.1-SNAPSHOT</version>

    <name>import-annotation</name>

    <description>Demo project for Spring Boot</description>

    <properties>

        <java.version>1.8</java.version>

    </properties>

    <dependencies>

        <dependency>

            <groupId>org.springframework.boot</groupId>

            <artifactId>spring-boot-starter</artifactId>

        </dependency>

        <dependency>

            <groupId>org.projectlombok</groupId>

            <artifactId>lombok</artifactId>

            <optional>true</optional>

        </dependency>

    </dependencies>

    <build>

        <plugins>

            <plugin>

                <groupId>org.springframework.boot</groupId>

                <artifactId>spring-boot-maven-plugin</artifactId>

                <configuration>

                    <excludes>

                        <exclude>

                            <groupId>org.projectlombok</groupId>

                            <artifactId>lombok</artifactId>

                        </exclude>

                    </excludes>

                </configuration>

            </plugin>

        </plugins>

    </build>

</project>
3.1.2 创建User类
package com.ldx.importannotation;

import lombok.AllArgsConstructor;

import lombok.Data;

/**

 * 用户信息实体

 * @author ludangxin

 * @date 2021/8/1

 */

@Data

@AllArgsConstructor

public class User {

   public User() {

      this.name = "李四";

      this.age = 13;

   }

   private String name;

   private Integer age;

}
3.2 测试导入Bean
3.2.1 修改启动类
import lombok.extern.slf4j.Slf4j;

import org.springframework.boot.SpringApplication;

import org.springframework.boot.autoconfigure.SpringBootApplication;

import org.springframework.context.ConfigurableApplicationContext;

import org.springframework.context.annotation.Import;

@Slf4j

// 注入UserBean

@Import(value = User.class)

@SpringBootApplication

public class ImportAnnotationApplication {

   public static void main(String[] args) {

      ConfigurableApplicationContext applicationContext = SpringApplication.run(ImportAnnotationApplication.class, args);

      User user = applicationContext.getBean(User.class);

      log.info("user info ==={}",user);

   }

}
3.2.2 启动测试
UserBean注入成功。
  .   ____          _            __ _ _

 /\\ / ___'_ __ _ _(_)_ __  __ _ \ \ \ \

( ( )\___ | '_ | '_| | '_ \/ _` | \ \ \ \

 \\/  ___)| |_)| | | | | || (_| |  ) ) ) )

  '  |____| .__|_| |_|_| |_\__, | / / / /

 =========|_|==============|___/=/_/_/_/

 :: Spring Boot ::                (v2.5.3)

2021-08-01 19:36:55.243  INFO 49498 --- [           main] c.l.i.ImportAnnotationApplication        : Starting ImportAnnotationApplication using Java 1.8.0_261 on ludangxindeMacBook-Pro.local with PID 49498 (/Users/ludangxin/workspace/idea/import-annotation/target/classes started by ludangxin in /Users/ludangxin/workspace/idea/import-annotation)

2021-08-01 19:36:55.245  INFO 49498 --- [           main] c.l.i.ImportAnnotationApplication        : No active profile set, falling back to default profiles: default

2021-08-01 19:36:55.731  INFO 49498 --- [           main] c.l.i.ImportAnnotationApplication        : Started ImportAnnotationApplication in 0.893 seconds (JVM running for 1.417)

2021-08-01 19:36:55.735  INFO 49498 --- [           main] c.l.i.ImportAnnotationApplication        : user info ===User(name=李四, age=13)
3.3 测试导入配置类
3.3.1 创建UserConfig类
import org.springframework.context.annotation.Bean;

/**

 * 用户配置类

 * @author ludangxin

 * @date 2021/8/1

 */

public class UserConfig {

   @Bean

   public User getUser(){

      return new User();

   }

}
3.3.2 修改启动类
将启动类上的@Import的value指向UserConfig类
@Import(value = UserConfig.class)
3.3.3 启动测试
UserBean注入成功。
3.4 测试导入ImportSelector
3.4.1 创建UseImportSelector类
import org.springframework.context.annotation.ImportSelector;

import org.springframework.core.type.AnnotationMetadata;

/**

 * 用户Bean选择器配置类

 * @author ludangxin

 * @date 2021/8/1

 */

public class UseImportSelector implements ImportSelector {

   @Override

   public String[] selectImports(AnnotationMetadata importingClassMetadata) {

      // 指定User类的全限类名

      return new String[]{"com.ldx.importannotation.User"};

   }

}
3.4.2 修改启动类
将启动类上的@Import的value指向UseImportSelector类
@Import(value = UseImportSelector.class)
3.4.3 启动测试
UserBean注入成功。
3.5 测试导入ImportBeanDefinitionRegistrar类
3.5.1 创建UserImportBeanDefinitionRegistrar
package com.ldx.importannotation;

import org.springframework.beans.factory.config.BeanDefinition;

import org.springframework.beans.factory.support.BeanDefinitionBuilder;

import org.springframework.beans.factory.support.BeanDefinitionRegistry;

import org.springframework.context.annotation.ImportBeanDefinitionRegistrar;

import org.springframework.core.type.AnnotationMetadata;

/**

 * 用户Bean定义注册配置类

 * @author ludangxin

 * @date 2021/8/1

 */

public class UserImportBeanDefinitionRegistrar implements ImportBeanDefinitionRegistrar {

   @Override

   public void registerBeanDefinitions(AnnotationMetadata importingClassMetadata, BeanDefinitionRegistry registry) {

      // 创建User类型的Bean的定义

      BeanDefinition beanDefinition = BeanDefinitionBuilder.rootBeanDefinition(User.class).getBeanDefinition();

      // 将创建的UserBean定义注册到SpringRegistry中,其名称为user

      registry.registerBeanDefinition("user", beanDefinition);

   }

}
3.5.2 修改启动类
将启动类上的@Import的value指向UserImportBeanDefinitionRegistrar类
@Import(value = UserImportBeanDefinitionRegistrar.class)
3.5.3 启动测试
UserBean注入成功。
3.6 小结
简介中介绍的四种方式都可以注入UserBean。
好处:
- 导入指定的Bean或配置类。例如:由于业务需要将包路径或者需要加载的Bean类不在
@ComponentScan的扫描范围内,这时候我们就可以通过@Import来实现Bean的注入。 - ImportSelector方式是制定需要加载类的全限类名。这时候我们就可以将我们的需要装载的类写到配置文件中,比如某个txt中,然后项目启动的时候读取txt中的全限类名,实现Bean的装载。SpringBoot就是使用这种方式实现的自动装配。
4. 改进
上面的例子通过使用@Import注解实现了spring bean的自动注入。但是装载Bean每次都得指定Bean的类或者配置类,在生产环境中我们在使用第三方Jar的时候根本不知道应该使用哪个配置文件或者压根就不知道配置文件的名称。这时我们其实可以扩展一个注解来优化这个问题。
4.1 创建注解
package com.ldx.importannotation;

import org.springframework.context.annotation.Import;

import java.lang.annotation.*;

/**

 * 启用User配置信息注解

 * @author ludangxin

 * @date 2021/8/1

 */

@Target(ElementType.TYPE)

@Retention(RetentionPolicy.RUNTIME)

@Documented

// 指定需要导入的UserBean的配置类

@Import(UseImportSelector.class)

public @interface EnableUser {}
4.2 修改启动类
注掉之前的@Import,使用刚创建的@EnableUser注解
import lombok.extern.slf4j.Slf4j;

import org.springframework.boot.SpringApplication;

import org.springframework.boot.autoconfigure.SpringBootApplication;

import org.springframework.context.ConfigurableApplicationContext;

import org.springframework.context.annotation.Import;

@Slf4j

//@Import(value = UserImportBeanDefinitionRegistrar.class)

@EnableUser

@SpringBootApplication

public class ImportAnnotationApplication {

   public static void main(String[] args) {

      ConfigurableApplicationContext applicationContext = SpringApplication.run(ImportAnnotationApplication.class, args);

      User user = applicationContext.getBean(User.class);

      log.info("user info ==={}",user);

   }

}
4.3 启动测试
UserBean注入成功。
思考
SpringBoot项目中能不能直接获取或者使用Jar包中的Bean呢?
5. 验证
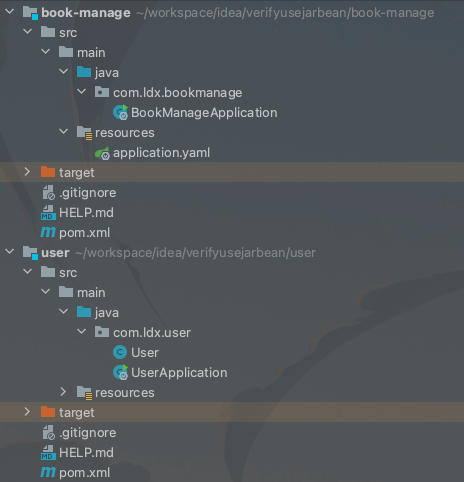
5.1 创建项目
user模块为Bean的提供者,book-manage通过引入user模块Jar,来验证项目中能不能直接使用Jar中的Bean
5.2 创建user模块
5.2.1 导入依赖
没啥特别的依赖
<?xml version="1.0" encoding="UTF-8"?>

<project xmlns="http://maven.apache.org/POM/4.0.0" xmlns:xsi="http://www.w3.org/2001/XMLSchema-instance"

   xsi:schemaLocation="http://maven.apache.org/POM/4.0.0 https://maven.apache.org/xsd/maven-4.0.0.xsd">

   <modelVersion>4.0.0</modelVersion>

   <parent>

      <groupId>org.springframework.boot</groupId>

      <artifactId>spring-boot-starter-parent</artifactId>

      <version>2.5.3</version>

      <relativePath/> <!-- lookup parent from repository -->

   </parent>

   <groupId>com.ldx</groupId>

   <artifactId>user</artifactId>

   <version>0.0.1-SNAPSHOT</version>

   <name>user</name>

   <description>Demo project for Spring Boot</description>

   <properties>

      <java.version>1.8</java.version>

   </properties>

   <dependencies>

      <dependency>

         <groupId>org.springframework.boot</groupId>

         <artifactId>spring-boot-starter</artifactId>

      </dependency>

      <dependency>

         <groupId>org.projectlombok</groupId>

         <artifactId>lombok</artifactId>

         <optional>true</optional>

      </dependency>

   </dependencies>

   <build>

      <plugins>

         <plugin>

            <groupId>org.springframework.boot</groupId>

            <artifactId>spring-boot-maven-plugin</artifactId>

            <configuration>

               <excludes>

                  <exclude>

                     <groupId>org.projectlombok</groupId>

                     <artifactId>lombok</artifactId>

                  </exclude>

               </excludes>

            </configuration>

         </plugin>

      </plugins>

   </build>

</project>
5.2.2 创建User类
package com.ldx.user;

import lombok.AllArgsConstructor;

import lombok.Data;

import lombok.NoArgsConstructor;

import java.util.ArrayList;

import java.util.List;

/**

 * 用户信息类

 * @author ludangxin

 * @date 2021/8/1

 */

@Data

@NoArgsConstructor

@AllArgsConstructor

public class User {

   private Integer id;

   private String name;

   /**

    * 角色状态吗 1.管理员 2.老师 3.学生

    */

   private Character role;

   private Integer age;

   public User getUserInfo() {

      return new User(66, "张三", '3', 21);

   }

   /**

    * 获取其任课老师信息

    */

   public List<User> getTeachers() {

      List<User> users = new ArrayList<>();

      User user = new User();

      user.setId(2);

      user.setName("王麻子");

      user.setAge(45);

      user.setRole('2');

      User user1 = new User();

      user1.setId(3);

      user1.setName("李四");

      user1.setAge(35);

      user1.setRole('2');

      users.add(user);

      users.add(user1);

      return users;

   }

}
5.2.3 修改启动类
import lombok.extern.slf4j.Slf4j;

import org.springframework.boot.SpringApplication;

import org.springframework.boot.autoconfigure.SpringBootApplication;

import org.springframework.context.ConfigurableApplicationContext;

import org.springframework.context.annotation.Bean;

@Slf4j

@SpringBootApplication

public class UserApplication {

  public static void main(String[] args) {

    ConfigurableApplicationContext applicationContext = SpringApplication.run(UserApplication.class, args);

    User user = applicationContext.getBean(User.class);

    user.getTeachers().forEach(obj ->

      log.info("user teacher info ==={} ", obj)

    );

  }

  @Bean

  public User getUser() {

    return new User();

  }

}
5.2.4 启动测试
在user模块中先验证下User Bean注册的正确性,log如下:
  .   ____          _            __ _ _

 /\\ / ___'_ __ _ _(_)_ __  __ _ \ \ \ \

( ( )\___ | '_ | '_| | '_ \/ _` | \ \ \ \

 \\/  ___)| |_)| | | | | || (_| |  ) ) ) )

  '  |____| .__|_| |_|_| |_\__, | / / / /

 =========|_|==============|___/=/_/_/_/

 :: Spring Boot ::                (v2.5.3)

2021-08-01 21:09:54.666  INFO 51037 --- [           main] com.ldx.user.UserApplication             : Starting UserApplication using Java 1.8.0_261 on ludangxindeMacBook-Pro.local with PID 51037 (/Users/ludangxin/workspace/idea/verifyusejarbean/user/target/classes started by ludangxin in /Users/ludangxin/workspace/idea/verifyusejarbean)

2021-08-01 21:09:54.669  INFO 51037 --- [           main] com.ldx.user.UserApplication             : No active profile set, falling back to default profiles: default

2021-08-01 21:09:55.151  INFO 51037 --- [           main] com.ldx.user.UserApplication             : Started UserApplication in 0.818 seconds (JVM running for 1.317)

2021-08-01 21:09:55.155  INFO 51037 --- [           main] com.ldx.user.UserApplication             : user teacher info ===User(id=2, name=王麻子, role=2, age=45)

2021-08-01 21:09:55.156  INFO 51037 --- [           main] com.ldx.user.UserApplication             : user teacher info ===User(id=3, name=李四, role=2, age=35)
user bean 注册成功。
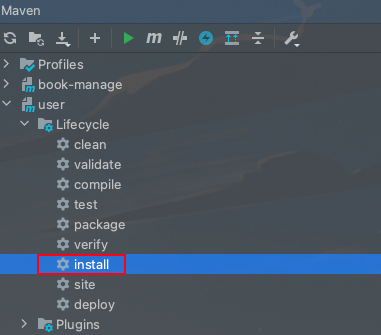
5.2.5 装载Jar
点击idea maven插件的install将jar装载到本地仓库
5.3 创建book-manage模块
5.3.1 导入依赖
<?xml version="1.0" encoding="UTF-8"?>

<project xmlns="http://maven.apache.org/POM/4.0.0" xmlns:xsi="http://www.w3.org/2001/XMLSchema-instance"

   xsi:schemaLocation="http://maven.apache.org/POM/4.0.0 https://maven.apache.org/xsd/maven-4.0.0.xsd">

   <modelVersion>4.0.0</modelVersion>

   <parent>

      <groupId>org.springframework.boot</groupId>

      <artifactId>spring-boot-starter-parent</artifactId>

      <version>2.5.3</version>

      <relativePath/> <!-- lookup parent from repository -->

   </parent>

   <groupId>com.ldx</groupId>

   <artifactId>book-manage</artifactId>

   <version>0.0.1-SNAPSHOT</version>

   <name>book-manage</name>

   <description>Demo project for Spring Boot</description>

   <properties>

      <java.version>1.8</java.version>

   </properties>

   <dependencies>

      <dependency>

         <groupId>org.springframework.boot</groupId>

         <artifactId>spring-boot-starter</artifactId>

      </dependency>

      <dependency>

         <groupId>org.projectlombok</groupId>

         <artifactId>lombok</artifactId>

         <optional>true</optional>

      </dependency>

      <!-- user模块依赖 -->

      <dependency>

         <groupId>com.ldx</groupId>

         <artifactId>user</artifactId>

         <version>0.0.1-SNAPSHOT</version>

      </dependency>

   </dependencies>

   <build>

      <plugins>

         <plugin>

            <groupId>org.springframework.boot</groupId>

            <artifactId>spring-boot-maven-plugin</artifactId>

            <configuration>

               <excludes>

                  <exclude>

                     <groupId>org.projectlombok</groupId>

                     <artifactId>lombok</artifactId>

                  </exclude>

               </excludes>

            </configuration>

         </plugin>

      </plugins>

   </build>

</project>
5.3.2 修改启动类
直接获取User Bean 并调用getUserInfo方法
import com.ldx.user.User;

import lombok.extern.slf4j.Slf4j;

import org.springframework.boot.SpringApplication;

import org.springframework.boot.autoconfigure.SpringBootApplication;

import org.springframework.context.ConfigurableApplicationContext;

@Slf4j

@SpringBootApplication

public class BookManageApplication {

  public static void main(String[] args) {

    ConfigurableApplicationContext applicationContext = SpringApplication.run(BookManageApplication.class, args);

    User user = applicationContext.getBean(User.class);

    log.info("user info === {}", user.getUserInfo());

  }

}
5.3.3 启动测试
启动报错,没有可用的User Bean
  .   ____          _            __ _ _

 /\\ / ___'_ __ _ _(_)_ __  __ _ \ \ \ \

( ( )\___ | '_ | '_| | '_ \/ _` | \ \ \ \

 \\/  ___)| |_)| | | | | || (_| |  ) ) ) )

  '  |____| .__|_| |_|_| |_\__, | / / / /

 =========|_|==============|___/=/_/_/_/

 :: Spring Boot ::                (v2.5.3)

2021-08-01 21:15:09.219  INFO 51124 --- [           main] c.ldx.bookmanage.BookManageApplication   : Starting BookManageApplication using Java 1.8.0_261 on ludangxindeMacBook-Pro.local with PID 51124 (/Users/ludangxin/workspace/idea/verifyusejarbean/book-manage/target/classes started by ludangxin in /Users/ludangxin/workspace/idea/verifyusejarbean)

2021-08-01 21:15:09.221  INFO 51124 --- [           main] c.ldx.bookmanage.BookManageApplication   : No active profile set, falling back to default profiles: default

2021-08-01 21:15:09.623  INFO 51124 --- [           main] c.ldx.bookmanage.BookManageApplication   : Started BookManageApplication in 0.707 seconds (JVM running for 1.133)

Exception in thread "main" org.springframework.beans.factory.NoSuchBeanDefinitionException: No qualifying bean of type 'com.ldx.user.User' available

	at org.springframework.beans.factory.support.DefaultListableBeanFactory.getBean(DefaultListableBeanFactory.java:351)

	at org.springframework.beans.factory.support.DefaultListableBeanFactory.getBean(DefaultListableBeanFactory.java:342)

	at org.springframework.context.support.AbstractApplicationContext.getBean(AbstractApplicationContext.java:1172)

	at com.ldx.bookmanage.BookManageApplication.main(BookManageApplication.java:15)
6. 改进
在5.0章节中我们验证了直接使用jar包中的bean时不可取的,那有什么办法能解决么?
这时候我们就可以使用4.0中的Enable注解来解决这个问题。
6.1 在user模块中添加Enable注解
import org.springframework.context.annotation.Import;

import java.lang.annotation.*;

/**

 * 启用User配置信息注解

 * @author ludangxin

 * @date 2021/8/1

 */

@Target(ElementType.TYPE)

@Retention(RetentionPolicy.RUNTIME)

@Documented

@Import(User.class)

public @interface EnableUser {}
6.2 修改book-manage模块中的启动类
在book-manage模块的启动类上加上@EnableUser注解
6.3 启动验证
user bean 注入成功。
  .   ____          _            __ _ _

 /\\ / ___'_ __ _ _(_)_ __  __ _ \ \ \ \

( ( )\___ | '_ | '_| | '_ \/ _` | \ \ \ \

 \\/  ___)| |_)| | | | | || (_| |  ) ) ) )

  '  |____| .__|_| |_|_| |_\__, | / / / /

 =========|_|==============|___/=/_/_/_/

 :: Spring Boot ::                (v2.5.3)

2021-08-01 21:18:55.686  INFO 51193 --- [           main] c.ldx.bookmanage.BookManageApplication   : Starting BookManageApplication using Java 1.8.0_261 on ludangxindeMacBook-Pro.local with PID 51193 (/Users/ludangxin/workspace/idea/verifyusejarbean/book-manage/target/classes started by ludangxin in /Users/ludangxin/workspace/idea/verifyusejarbean)

2021-08-01 21:18:55.688  INFO 51193 --- [           main] c.ldx.bookmanage.BookManageApplication   : No active profile set, falling back to default profiles: default

2021-08-01 21:18:56.145  INFO 51193 --- [           main] c.ldx.bookmanage.BookManageApplication   : Started BookManageApplication in 0.762 seconds (JVM running for 1.223)

2021-08-01 21:18:56.148  INFO 51193 --- [           main] c.ldx.bookmanage.BookManageApplication   : user info === User(id=66, name=张三, role=3, age=21)
7. 小结
- 不能直接在当前项目中使用Jar中的Bean(SpringBoot默认使用
ImportSelector的方式加载META-INF/spring.factories中指定的配置类,会导致只需要导入相应的第三方Jar就可以使用其环境中的Bean) - 可以在当前项目中使用Jar包中提供的Enable注解来导入Jar的Bean配置
SpringBoot自动装配-Import的更多相关文章
- springboot自动装配
Spring Boot自动配置原理 springboot自动装配 springboot配置文件 Spring Boot的出现,得益于“习惯优于配置”的理念,没有繁琐的配置.难以集成的内容(大多数流行第 ...
- 一步步从Spring Framework装配掌握SpringBoot自动装配
目录 Spring Framework模式注解 Spring Framework@Enable模块装配 Spring Framework条件装配 SpringBoot 自动装配 本章总结 Spring ...
- SpringBoot启动流程分析(五):SpringBoot自动装配原理实现
SpringBoot系列文章简介 SpringBoot源码阅读辅助篇: Spring IoC容器与应用上下文的设计与实现 SpringBoot启动流程源码分析: SpringBoot启动流程分析(一) ...
- SpringBoot自动装配原理解析
本文包含:SpringBoot的自动配置原理及如何自定义SpringBootStar等 我们知道,在使用SpringBoot的时候,我们只需要如下方式即可直接启动一个Web程序: @SpringBoo ...
- Spring Boot之从Spring Framework装配掌握SpringBoot自动装配
Spring Framework模式注解 模式注解是一种用于声明在应用中扮演“组件”角色的注解.如 Spring Framework 中的 @Repository 标注在任何类上 ,用于扮演仓储角色的 ...
- springboot自动装配原理
最近开始学习spring源码,看各种文章的时候看到了springboot自动装配实现原理.用自己的话简单概括下. 首先打开一个基本的springboot项目,点进去@SpringBootApplica ...
- springboot自动装配原理,写一个自己的start
springboot自动装配原理 第一次使用springboot的时候,都感觉很神奇.只要加入一个maven的依赖,写几行配置,就能注入redisTemple,rabbitmqTemple等对象. 这 ...
- 【Springboot】Springboot自动装配原理
1.核心注解就是 EnableAutoConfiguration 该注解会激活SpringBoot的自动装配功能: 代码如下: @Target(ElementType.TYPE) @Retentio ...
- SpringBoot自动装配-自定义Start
SpringBoot自动装配 在没有使用SpringBoot之前,使用ssm时配置redis需要在XML中配置端口号,地址,账号密码,连接池等等,而使用了SpringBoot后只需要在applicat ...
随机推荐
- Windows的静态库与动态库
Windows的静态库与动态库 1.静态库 1.1 静态库特点 运行不存在 静态库源码被链接到调用程序中 目标程序的归档 1.2 C语言静态库 C静态库的创建 创建一个静态库项目. 添加库程序,源文件 ...
- 『无为则无心』Python基础 — 12、Python运算符详细介绍
目录 1.表达式介绍 2.运算符 (1)运算符的分类 (2)算数运算符 (3)赋值运算符 (4)复合赋值运算符 (5)比较运算符 3.逻辑运算符 拓展1:数字之间的逻辑运算 拓展2:Python中逻辑 ...
- CORS跨源资源共享概念及配置(Kubernetes Ingress和Spring Cloud Gateway)
我最新最全的文章都在南瓜慢说 www.pkslow.com,欢迎大家来喝茶! 1 跨源资源共享CORS 跨源资源共享 (CORS) (或通俗地译为跨域资源共享)是一种基于HTTP 头的机制,该机制通过 ...
- 深度学习的优化器(各类 optimizer 的原理、优缺点及数学推导)
深度学习优化器 深度学习中的优化器均采用了梯度下降的方式进行优化,所谓炼丹我觉得优化器可以当作灶,它控制着火量的大小.形式与时间等. 初级的优化器 首先我们来一下看最初级的灶台(100 - 1000 ...
- Devexpress-WPF初体验
最近使用wpf devexpress做一个wpf小项目,中间遇到了一些问题,这里记录下,同时也跟大家分享分享 1.devexpress安装 devexpress提供了很多控件,特别是各种形式的数据列表 ...
- 9、SpringBoot整合之SpringBoot整合SpringSecurity
SpringBoot整合SpringSecurity 一.创建项目,选择依赖 选择Spring Web.Thymeleaf即可 二.在pom文件中导入相关依赖 <!-- 导入SpringSecu ...
- MySQL忘记密码怎么办-MySQL修改密码(亲测可用)
前言: 最近要用到本地的MySQL,结果把密码忘记了. ERROR 1045 (28000): Access denied for user 'root'@'localhost' (using pas ...
- Springboot:单元测试多模块项目不同模块组件不能@autowired问题
博主在写springboot单元测试的时候使用@Autowired失效,显示为null 下面是项目架构 api为接口模块,service为实现类模块,测试类写在service模块下. 这是测试类,使用 ...
- 笔记 BAT 面试题 及部分答案
题目出自:https://www.jianshu.com/p/c70989bd5f29本文出自 AWeiLoveAndroid的博客 2018年2月20日星期二 随笔 笔记 BAT 面试题 一.jav ...
- SpringCloud的Ribbon自定义负载均衡算法
1.Ribbon默认使用RoundRobinRule策略轮询选择server 策略名 策略声明 策略描述 实现说明 BestAvailableRule public class BestAvailab ...