
centos7 安装zabbix
一、安装mysql
1.[root@iZ28gvqe4biZ ~]# rpm -Uvh http://dev.mysql.com/get/mysql-community-release-el7-5.noarch.rpm
准备中... ################################# [100%]
正在升级/安装...
1:mysql-community-release-el7-5 ################################# [100%]
mysql-connectors-community/x86_64 MySQL Connectors Community 60
mysql-tools-community/x86_64 MySQL Tools Community 69
mysql56-community/x86_64 MySQL 5.6 Community Server 412
 systemctl start mysqld

6.重置密码
[root@iZ28gvqe4biZ ~]# mysql_secure_installation NOTE: RUNNING ALL PARTS OF THIS SCRIPT IS RECOMMENDED FOR ALL MySQL
SERVERS IN PRODUCTION USE! PLEASE READ EACH STEP CAREFULLY! In order to log into MySQL to secure it, we'll need the current
password for the root user. If you've just installed MySQL, and
you haven't set the root password yet, the password will be blank,
so you should just press enter here. Enter current password for root (enter for none):
OK, successfully used password, moving on... Setting the root password ensures that nobody can log into the MySQL
root user without the proper authorisation. Set root password? [Y/n] y [设置root用户密码]
New password:
Re-enter new password:
Password updated successfully!
Reloading privilege tables..
... Success! By default, a MySQL installation has an anonymous user, allowing anyone
to log into MySQL without having to have a user account created for
them. This is intended only for testing, and to make the installation
go a bit smoother. You should remove them before moving into a
production environment. Remove anonymous users? [Y/n] y [删除匿名用户]
... Success! Normally, root should only be allowed to connect from 'localhost'. This
ensures that someone cannot guess at the root password from the network. Disallow root login remotely? [Y/n] n [禁止root远程登录]
... skipping. By default, MySQL comes with a database named 'test' that anyone can
access. This is also intended only for testing, and should be removed
before moving into a production environment. Remove test database and access to it? [Y/n] y [删除test数据库]
- Dropping test database...
ERROR (HY000) at line : Can't drop database 'test'; database doesn't exist
... Failed! Not critical, keep moving...
- Removing privileges on test database...
... Success! Reloading the privilege tables will ensure that all changes made so far
will take effect immediately. Reload privilege tables now? [Y/n] y [刷新权限]
... Success! All done! If you've completed all of the above steps, your MySQL
installation should now be secure. Thanks for using MySQL! Cleaning up...
二、 安装zabbix
1. 下载zabbix yum 源
rpm -i https://repo.zabbix.com/zabbix/3.4/rhel/7/x86_64/zabbix-release-3.4-2.el7.noarch.rpm
2.安装zabbix-agent和zabbix-server
yum install zabbix-server-mysql zabbix-web-mysql zabbix-agent
3.zabbix数据导入mysql数据库
zcat /usr/share/doc/zabbix-server-mysql*/create.sql.gz | mysql -uzabbix -p zabbix
4.Edit file /etc/zabbix/zabbix_server.conf
DBPassword=zabbix
5.Configure PHP for Zabbix frontend
Edit file /etc/httpd/conf.d/zabbix.conf, uncomment and set the right timezone for you.
php_value date.timezone Asia/Shanghai
6.启动zabbix-server和zabbix-agent服务
# systemctl restart zabbix-server zabbix-agent httpd
7.开机启动 zabbix-server和zabbix-agent 、httpd
systemctl enable zabbix-server zabbix-agent httpd
8.查看端口
[root@zabbix conf]# netstat -lntup
Active Internet connections (only servers)
Proto Recv-Q Send-Q Local Address           Foreign Address         State       PID/Program name
tcp        0      0 0.0.0.0:111             0.0.0.0:*               LISTEN      1/systemd
tcp        0      0 192.168.122.1:53        0.0.0.0:*               LISTEN      1819/dnsmasq
tcp        0      0 0.0.0.0:22              0.0.0.0:*               LISTEN      1624/sshd
tcp        0      0 127.0.0.1:631           0.0.0.0:*               LISTEN      1617/cupsd
tcp        0      0 0.0.0.0:10050           0.0.0.0:*               LISTEN      15512/zabbix_agentd
tcp        0      0 0.0.0.0:10051           0.0.0.0:*               LISTEN      15432/zabbix_server
tcp        0      0 127.0.0.1:9000          0.0.0.0:*               LISTEN      127795/php-fpm: mas
tcp6       0      0 :::111                  :::*                    LISTEN      1/systemd
tcp6       0      0 :::80                   :::*                    LISTEN      15535/httpd
tcp6       0      0 :::22                   :::*                    LISTEN      1624/sshd
tcp6       0      0 ::1:631                 :::*                    LISTEN      1617/cupsd
tcp6       0      0 :::443                  :::*                    LISTEN      15535/httpd
tcp6       0      0 :::10050                :::*                    LISTEN      15512/zabbix_agentd
tcp6       0      0 :::10051                :::*                    LISTEN      15432/zabbix_server
tcp6       0      0 :::3306                 :::*                    LISTEN      109944/mysqld
udp        0      0 0.0.0.0:47631           0.0.0.0:*                           1191/avahi-daemon:
udp        0      0 192.168.122.1:53        0.0.0.0:*                           1819/dnsmasq
udp        0      0 0.0.0.0:67              0.0.0.0:*                           1819/dnsmasq
udp        0      0 0.0.0.0:68              0.0.0.0:*                           12200/dhclient
udp        0      0 0.0.0.0:5353            0.0.0.0:*                           1191/avahi-daemon:
udp        0      0 0.0.0.0:39777           0.0.0.0:*                           12200/dhclient
udp6       0      0 :::19528                :::*                                12200/dhclient
9.在浏览器输入
http://server_ip_or_name/zabbix
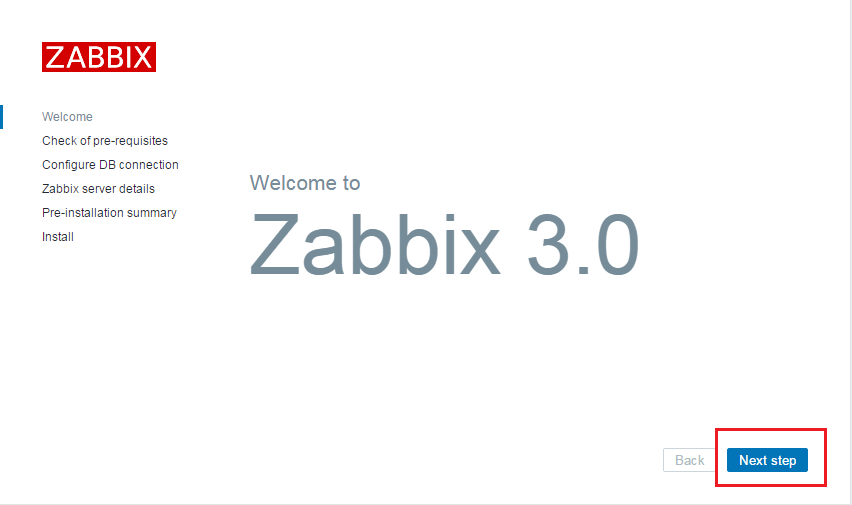
10 快速在配置zabbix
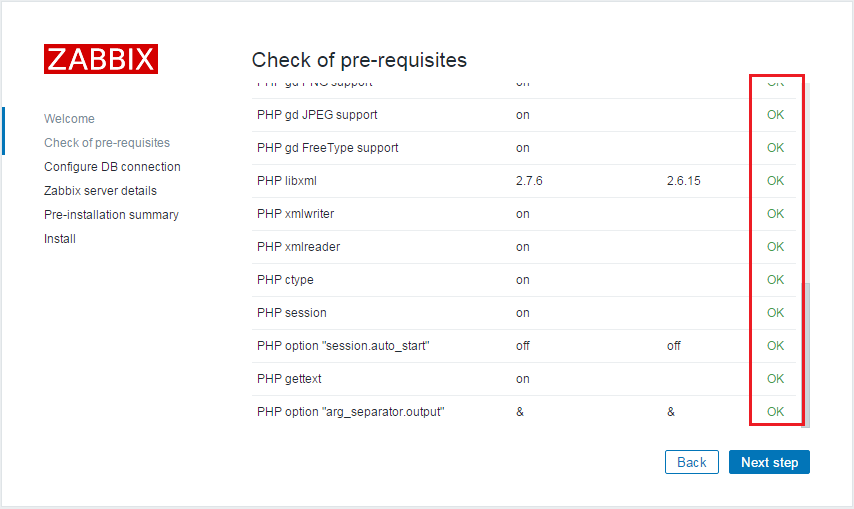
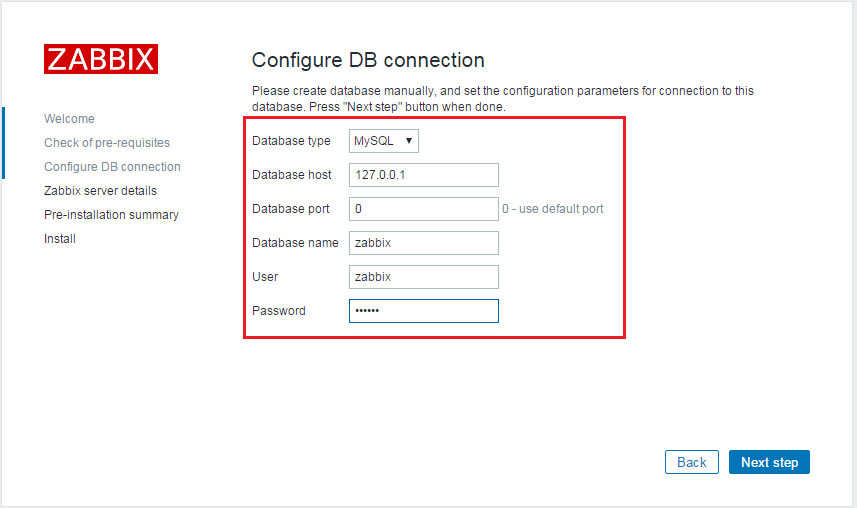
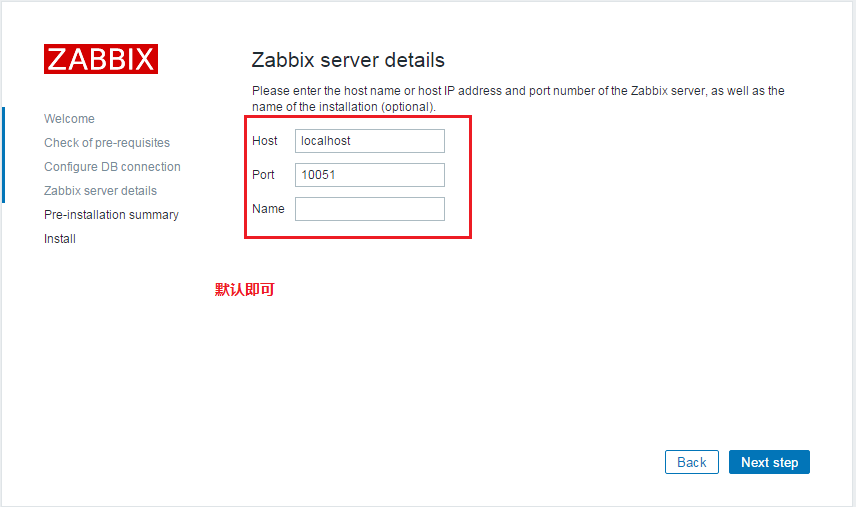
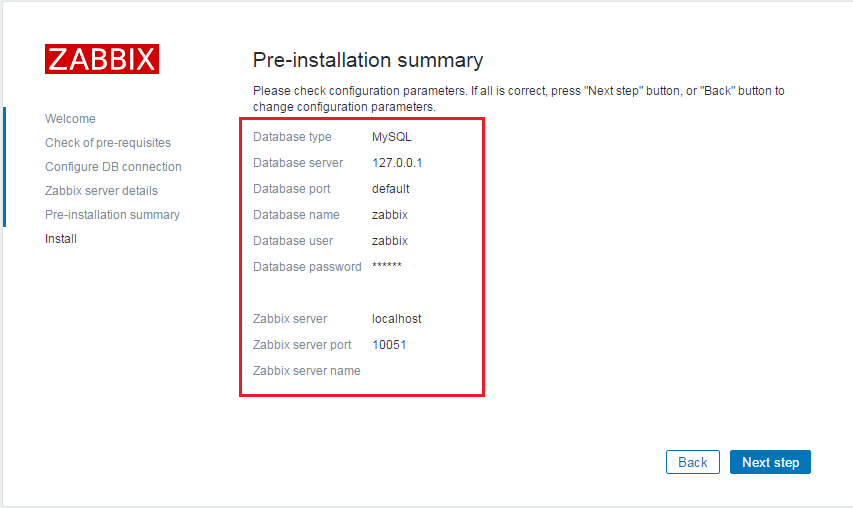

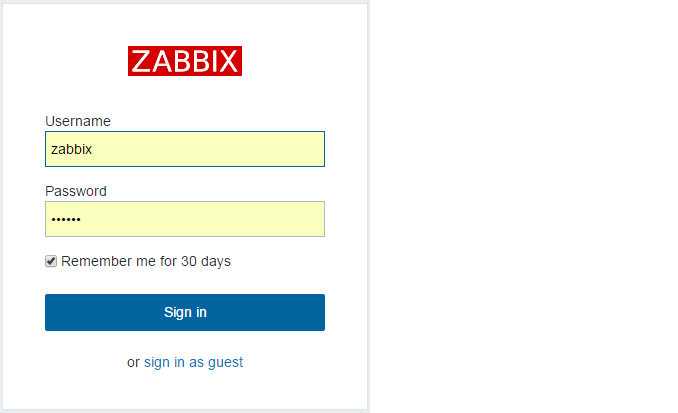
默认用户admin, 密码zabbix
修改中文
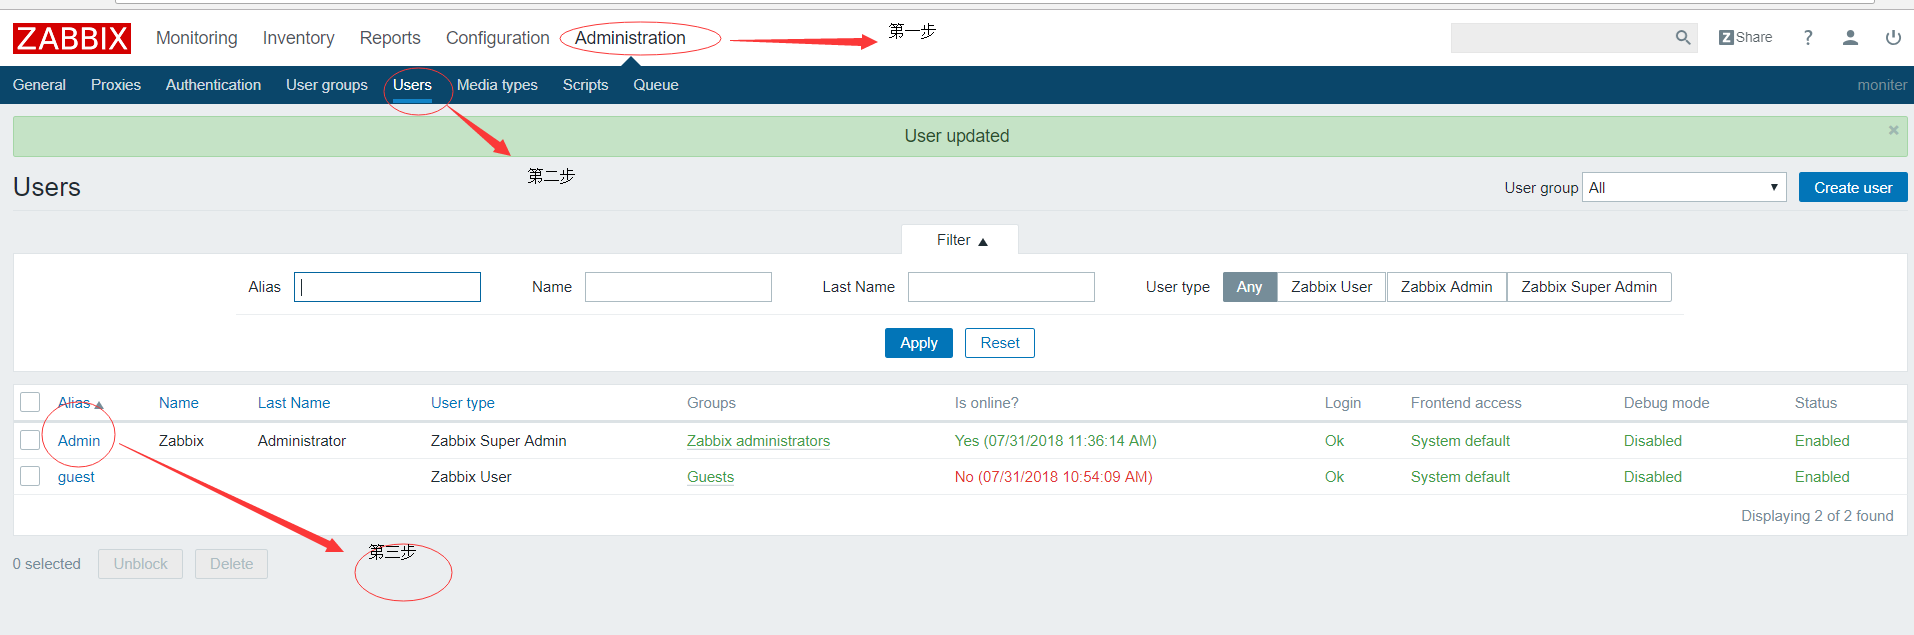
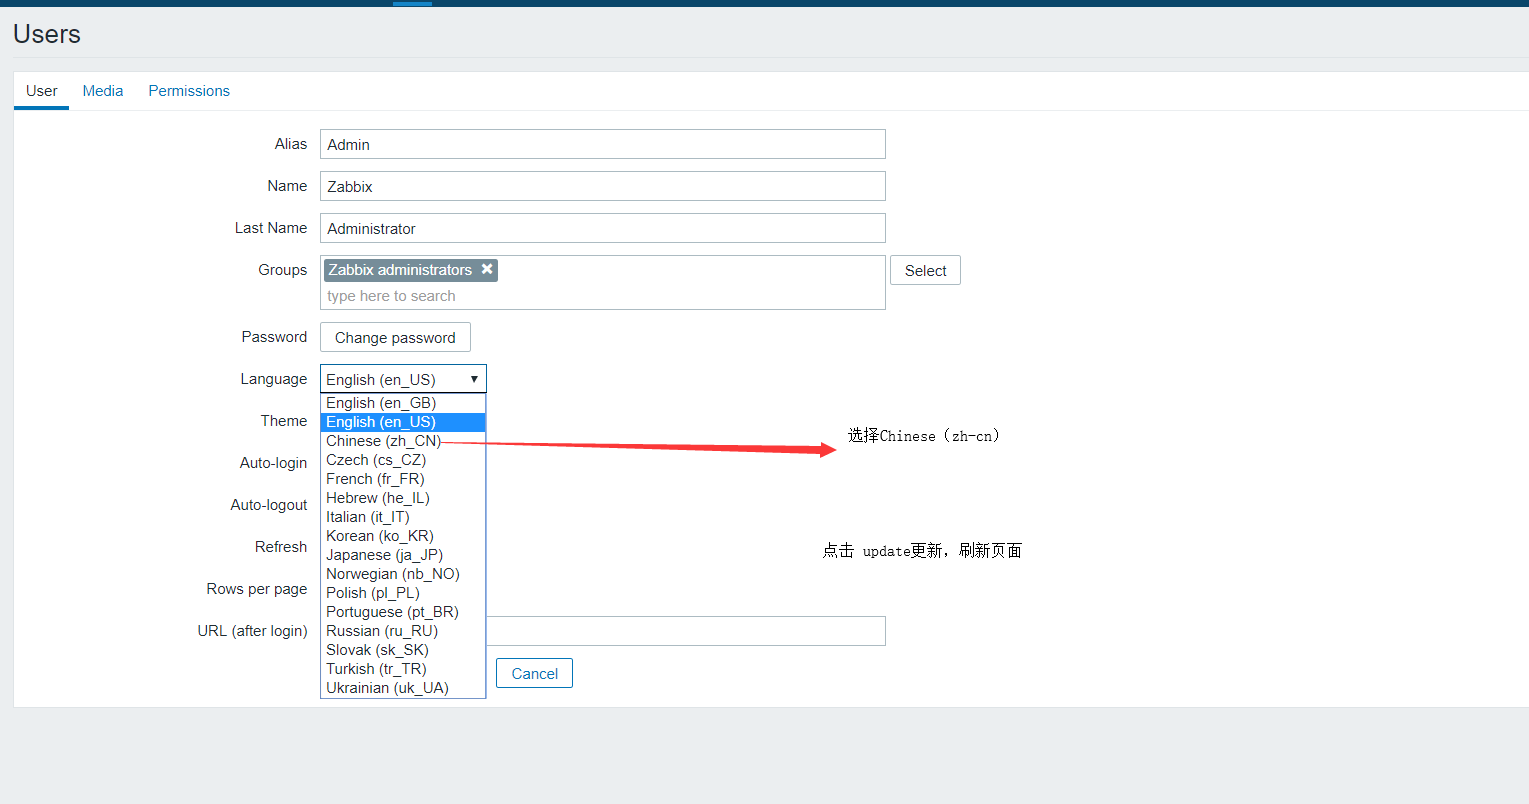
常见问题:
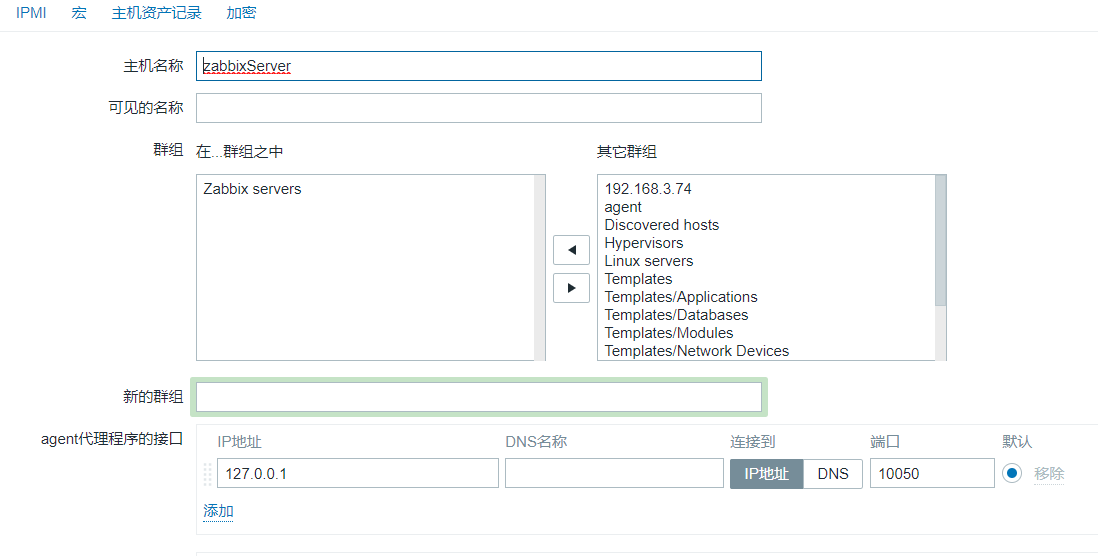
主机名没有发现

配置文件:
设置主机名命令:
hostnamectl set-hostname zabbixServer
vim zabbix_agentd.conf
ServerActive=192.168.1.28,zabbixServer
Hostname=zabbixServer
解决乱码问:
https://www.cnblogs.com/momoshouhu/p/8053631.html
centos7 安装zabbix的更多相关文章
- CentOS7安装Zabbix
一.Zabbix简介 Zabbix是一个基于WEB界面的提供分布式系统监视以及网络监视功能的企业级的开源解决方案. Zabbix能监视各种网络参数,保证服务器系统的安全运营:并提供灵活的通知机制以让系 ...
- centos7安装zabbix server5.0
安装zabbix源 1.rpm -Uvh https://repo.zabbix.com/zabbix/5.0/rhel/7/x86_64/zabbix-release-5.0-1.el7.noarc ...
- Centos7 安装 Zabbix Server 4.0
官方参考URL:https://www.zabbix.com/documentation/4.0/start 1. 安装 Apache 2.4(略) 注意系统时间/时区ntp server是否定时同步 ...
- centos7安装ZABBIX 3.0+ 邮件报警【OK】
设置主机名: vi /etc/hosts 10.0.0.252 zabbix-server hostnamectl set-hostname 关闭防火墙: systemctl stop firew ...
- RHEL7/CentOS7 安装Zabbix
1.添加 Zabbix 软件仓库 rpm -ivh http://repo.zabbix.com/zabbix/4.0/rhel/7/x86_64/zabbix-release-4.0-1.el7.n ...
- centos7安装zabbix server
1.参照下列网址方法,打开端口:80,3306,443,22,10050,10051(可能实际不需要打开这么多) https://www.cnblogs.com/lw-2019forlinuxpyth ...
- centos7安装zabbix客户端并监控
zabbxi-agent安装及配置 1.安装zabbxi-agent yum install zabbix-agent -y 2.配置zabbxi-agent grep -n '^'[a-Z] /et ...
- (二)centos7安装zabbix agentd端
关闭防火墙和selinux systemctl stop firewalld systemctl disable firewalld sed -ri '/^SELINUX=/cSELINUX=disa ...
- Centos7 安装 zabbix 4.0
参考文档: https://www.zabbix.com/download?zabbix=4.0&os_distribution=centos&os_version=7&db= ...
随机推荐
- Linux学习和ROS安装(1)
参考文档:https://www.cnblogs.com/liu-fa/p/5779206.html#undefined 系统环境:Window7 64bit+VMware11 ubuntu-gnom ...
- 安装OpenSSL中出现的问题及解决
1.报错:install-record.txt --single-version-externally-managed --compile" failed with error code 1 ...
- OpenShift nfs 持久化
创建PV { "apiVersion": "v1", "kind": "PersistentVolume", " ...
- es6 数组..... ==和===的区别 es6的递归方式 es6find函数 timer setTimeout v-html的用法,-
相当于push了 find函数来找到某个值 如果新建一个 setTimeout 的timer 首先得清除这个timer. v-html用法之一就是加载后台传过来的模板
- PHP学习路径及练手项目合集
PHP 技术路径中包含入门知识.PHP 编程基础.PHP Web 框架.项目实战和项目进阶五个模块.模块中的课程将带着你逐步深入,学会如何使用 PHP 实现项目一个博客,聊天室,MVC框架及搜索系统等 ...
- Util.FSUtils: Waiting for dfs to exit safe mode
有好几次,启动Hadoop和HBase之后,执行jps命令,已经看到有HMaster的进程, 但是进入到HBase的shell,执行一个命令,会出现下面的错误: ERROR: org.apache.h ...
- Tensorflow检验GPU是否安装成功 及 使用GPU训练注意事项
1. 已经安装cuda但是tensorflow仍然使用cpu加速的问题 电脑上同时安装了GPU和CPU版本的TensorFlow,本来想用下面代码测试一下GPU程序,但无奈老是没有调用GPU. imp ...
- hdu4784
题意: 给了一个图 从1号节点走到N号节点,然后,每个地方有买卖盐的差价,然后求 到达N的最大价值,一旦走到N这个点就不能再走了,或者走到不能再别的世界走1和N这两个点,然后接下来 用一个 四维的数组 ...
- UIView的背景颜色
一个UIColor代表一种颜色,通过UIColor的类方法,可以获得很多常用的颜色 + (UIColor *)blackColor; // 0.0 white 黑色 + (UIColor * ...
- 20155228 基于VirtualBox安装Ubuntu和学习linux命令的学习经历和心得
一.虚拟机VirtualBox的下载安装 基于VirtualBox虚拟机安装Ubuntu图文教程 虽然娄老师的教程对于VirtualBox的下载安装讲的很简单,可以说是一笔带过,但是我在下载安装的过程 ...