Java Web系列:Spring Boot 基础
Spring Boot 项目(参考1) 提供了一个类似ASP.NET MVC的默认模板一样的标准样板,直接集成了一系列的组件并使用了默认的配置。使用Spring Boot 不会降低学习成本,甚至增加了学习成本,但显著降低了使用成本并提高了开发效率。如果没有Spring基础不建议直接上手。
1.基础项目
这里只关注基于Maven的项目构建,使用Spring Boot CLI命令行工具和Gradle构建方式请参考官网。
(1)创建项目:
创建类型为quickstart的Maven项目,删除默认生成的.java文件保持默认的Maven目录即可。
(2)修改/pom.xml
 <?xml version="1.0" encoding="UTF-8"?>

 <project xmlns="http://maven.apache.org/POM/4.0.0" xmlns:xsi="http://www.w3.org/2001/XMLSchema-instance"

     xsi:schemaLocation="http://maven.apache.org/POM/4.0.0 http://maven.apache.org/xsd/maven-4.0.0.xsd">

     <modelVersion>4.0.0</modelVersion>

     <groupId>com.example</groupId>

     <artifactId>myproject</artifactId>

     <version>0.0.1-SNAPSHOT</version>

     <properties>

         <java.version>1.8</java.version>

     </properties>

     <parent>

         <groupId>org.springframework.boot</groupId>

         <artifactId>spring-boot-starter-parent</artifactId>

         <version>1.3.1.RELEASE</version>

     </parent>

     <dependencies>

         <dependency>

             <groupId>org.springframework.boot</groupId>

             <artifactId>spring-boot-starter-web</artifactId>

         </dependency>

     </dependencies>

 </project>
(3)添加/src/main/sample/controller/HomeController.java文件:
 package simple.controller;

 import org.springframework.web.bind.annotation.*;

 @RestController

 public class HomeController {

     @RequestMapping("/")

     public String index() {

         return "Hello World!";

     }

 }
(4)添加/src/main/sample/Application.java文件:
 package simple;

 import org.springframework.boot.*;

 import org.springframework.boot.autoconfigure.*;

 import simple.controller.*;

 @EnableAutoConfiguration

 public class Application {

     public static void main(String[] args) throws Exception {

         SpringApplication.run(new Object[] { Application.class, HomeController.class }, args);

     }

 }
在浏览器中输入http://localhost:8080/,即可直接看到"Hello World"运行结果。
2. 添加数据访问支持
(1)修改pom,添加spring-boot-starter-data-jpa和h2依赖:
 <?xml version="1.0" encoding="UTF-8"?>

 <project xmlns="http://maven.apache.org/POM/4.0.0" xmlns:xsi="http://www.w3.org/2001/XMLSchema-instance"

     xsi:schemaLocation="http://maven.apache.org/POM/4.0.0 http://maven.apache.org/xsd/maven-4.0.0.xsd">

     <modelVersion>4.0.0</modelVersion>

     <groupId>com.example</groupId>

     <artifactId>myproject</artifactId>

     <version>0.0.1-SNAPSHOT</version>

     <properties>

         <java.version>1.8</java.version>

     </properties>

     <parent>

         <groupId>org.springframework.boot</groupId>

         <artifactId>spring-boot-starter-parent</artifactId>

         <version>1.3.1.RELEASE</version>

     </parent>

     <dependencies>

         <dependency>

             <groupId>org.springframework.boot</groupId>

             <artifactId>spring-boot-starter-web</artifactId>

         </dependency>

         <dependency>

             <groupId>org.springframework.boot</groupId>

             <artifactId>spring-boot-starter-data-jpa</artifactId>

         </dependency>

         <dependency>

             <groupId>com.h2database</groupId>

             <artifactId>h2</artifactId>

             <scope>runtime</scope>

         </dependency>

     </dependencies>

 </project>
如果需要在控制台查看生成SQL语句,可以添加/src/main/resources/application.properties
 spring.h2.console.enabled=true

 logging.level.org.hibernate.SQL=debug
(2)添加实体
添加User、Role、Category和Post实体。
User:
 package simple.domain;

 import java.util.*;

 import javax.persistence.*;

 @Entity

 public class User {

     @Id

     @GeneratedValue

     private Long id;

     private String userName;

     private String password;

     private String Email;

     @javax.persistence.Version

     private Long Version;

     @ManyToMany(cascade = CascadeType.ALL)

     private List<Role> roles = new ArrayList<Role>();

     public Long getId() {

         return id;

     }

     public void setId(Long id) {

         this.id = id;

     }

     public String getUserName() {

         return userName;

     }

     public void setUserName(String userName) {

         this.userName = userName;

     }

     public String getPassword() {

         return password;

     }

     public void setPassword(String password) {

         this.password = password;

     }

     public String getEmail() {

         return Email;

     }

     public void setEmail(String email) {

         Email = email;

     }

     public List<Role> getRoles() {

         return roles;

     }

     public void setRoles(List<Role> roles) {

         this.roles = roles;

     }

     public Long getVersion() {

         return Version;

     }

     public void setVersion(Long version) {

         Version = version;

     }

 }
Role:
 package simple.domain;

 import java.util.*;

 import javax.persistence.*;

 @Entity

 public class Role {

     @Id

     @GeneratedValue

     private Long id;

     private String roleName;

     @ManyToMany(cascade = CascadeType.ALL)

     private List<User> users = new ArrayList<User>();

     public Long getId() {

         return id;

     }

     public void setId(Long id) {

         this.id = id;

     }

     public String getRoleName() {

         return roleName;

     }

     public void setRoleName(String roleName) {

         this.roleName = roleName;

     }

     public List<User> getUsers() {

         return users;

     }

     public void setUsers(List<User> users) {

         this.users = users;

     }

 }
Category:
 package simple.domain;

 import java.util.*;

 import javax.persistence.*;

 @Entity

 public class Category {

     @Id

     @GeneratedValue

     private Long id;

     private String Name;

     @OneToMany

     private List<Post> posts = new ArrayList<Post>();

     public Long getId() {

         return id;

     }

     public void setId(Long id) {

         this.id = id;

     }

     public String getName() {

         return Name;

     }

     public void setName(String name) {

         Name = name;

     }

     public List<Post> getPosts() {

         return posts;

     }

     public void setPosts(List<Post> posts) {

         this.posts = posts;

     }

 }
Post:
 package simple.domain;

 import java.util.*;

 import javax.persistence.*;

 @Entity

 public class Post {

     @Id

     @GeneratedValue

     private Long id;

     private String Name;

     private String Html;

     private String Text;

     private Date CreateAt;

     @ManyToOne

     private Category category;

     public Long getId() {

         return id;

     }

     public void setId(Long id) {

         this.id = id;

     }

     public String getName() {

         return Name;

     }

     public void setName(String name) {

         Name = name;

     }

     public String getHtml() {

         return Html;

     }

     public void setHtml(String html) {

         Html = html;

     }

     public String getText() {

         return Text;

     }

     public void setText(String text) {

         Text = text;

     }

     public Date getCreateAt() {

         return CreateAt;

     }

     public void setCreateAt(Date createAt) {

         CreateAt = createAt;

     }

     public Category getCategory() {

         return category;

     }

     public void setCategory(Category category) {

         this.category = category;

     }

 }
(3)添加资源库
添加UserRepository、RoleRepository、CategoryRepository和PostRepository接口,无需实现。
UserRepository:
 package simple.repository;

 import org.springframework.data.repository.*;

 import simple.domain.*;

 public interface UserRepository extends CrudRepository<User, Long> {

 }
RoleRepository
 package simple.repository;

 import org.springframework.data.repository.*;

 import simple.domain.*;

 public interface RoleRepository extends CrudRepository<Role, Long> {

 }
CategoryRepository
 package simple.repository;

 import org.springframework.data.repository.*;

 import simple.domain.*;

 public interface CategoryRepository extends CrudRepository<Category, Long> {

 }
PostRepository
package simple.repository;

import org.springframework.data.repository.*;

import simple.domain.*;

public interface PostRepository extends CrudRepository<User, Long> {

}
(4)在控制器中注入资源库接口
 package simple.controller;

 import org.springframework.beans.factory.annotation.*;

 import org.springframework.web.bind.annotation.*;

 import simple.repository.*;

 @RestController

 public class HomeController {

     private UserRepository userRepository;

     private RoleRepository roleRepository;

     private CategoryRepository categoryRepository;

     private PostRepository postReppository;

     @Autowired

     public HomeController(UserRepository userRepository, RoleRepository roleRepository,

             CategoryRepository categoryRepository, PostRepository postReppository) {

         this.userRepository = userRepository;

         this.roleRepository = roleRepository;

         this.categoryRepository = categoryRepository;

         this.postReppository = postReppository;

     }

     @RequestMapping("/")

     public long index() {

         return userRepository.count();

     }

 }
使用事务时在方法上应用注解@Transactional
3.添加验证和授权支持
(1)添加spring-boot-starter-security依赖
 <?xml version="1.0" encoding="UTF-8"?>

 <project xmlns="http://maven.apache.org/POM/4.0.0" xmlns:xsi="http://www.w3.org/2001/XMLSchema-instance"

     xsi:schemaLocation="http://maven.apache.org/POM/4.0.0 http://maven.apache.org/xsd/maven-4.0.0.xsd">

     <modelVersion>4.0.0</modelVersion>

     <groupId>com.example</groupId>

     <artifactId>myproject</artifactId>

     <version>0.0.1-SNAPSHOT</version>

     <properties>

         <java.version>1.8</java.version>

     </properties>

     <parent>

         <groupId>org.springframework.boot</groupId>

         <artifactId>spring-boot-starter-parent</artifactId>

         <version>1.3.1.RELEASE</version>

     </parent>

     <dependencies>

         <dependency>

             <groupId>org.springframework.boot</groupId>

             <artifactId>spring-boot-starter-web</artifactId>

         </dependency>

         <dependency>

             <groupId>org.springframework.boot</groupId>

             <artifactId>spring-boot-starter-data-jpa</artifactId>

         </dependency>

         <dependency>

             <groupId>com.h2database</groupId>

             <artifactId>h2</artifactId>

             <scope>runtime</scope>

         </dependency>

         <dependency>

             <groupId>org.springframework.boot</groupId>

             <artifactId>spring-boot-starter-security</artifactId>

         </dependency>

     </dependencies>

 </project>
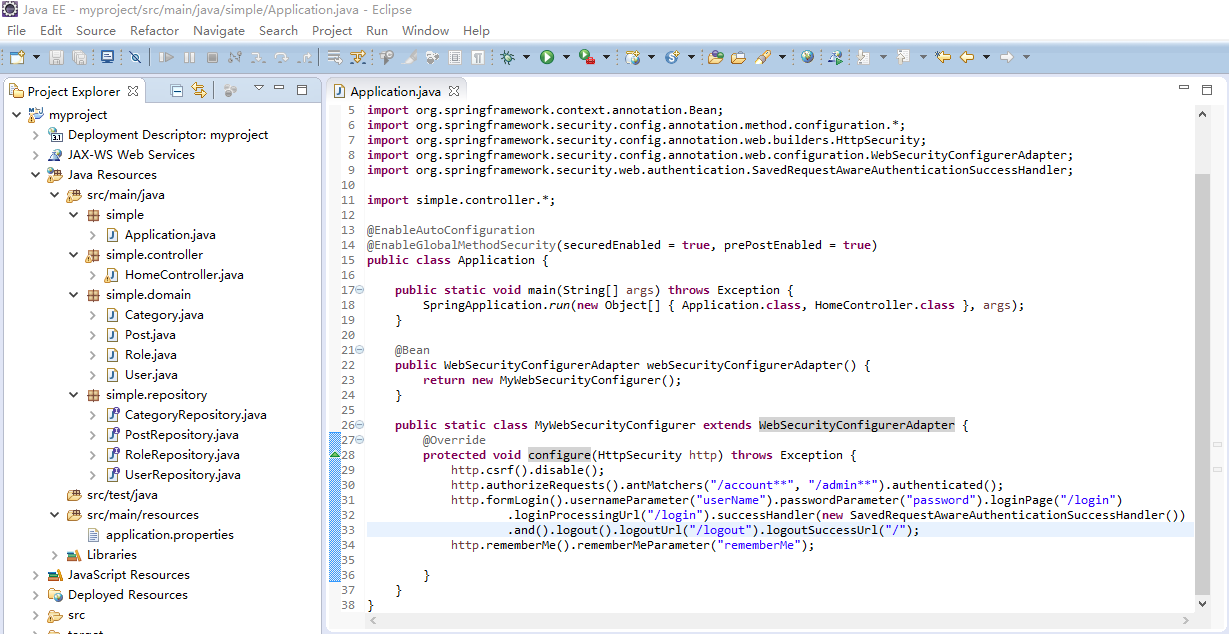
(2)修改Application.java
 package simple;

 import org.springframework.boot.*;

 import org.springframework.boot.autoconfigure.*;

 import org.springframework.context.annotation.Bean;

 import org.springframework.security.config.annotation.method.configuration.*;

 import org.springframework.security.config.annotation.web.builders.HttpSecurity;

 import org.springframework.security.config.annotation.web.configuration.WebSecurityConfigurerAdapter;

 import org.springframework.security.web.authentication.SavedRequestAwareAuthenticationSuccessHandler;

 import simple.controller.*;

 @EnableAutoConfiguration

 @EnableGlobalMethodSecurity(securedEnabled = true, prePostEnabled = true)

 public class Application {

     public static void main(String[] args) throws Exception {

         SpringApplication.run(new Object[] { Application.class, HomeController.class }, args);

     }

     @Bean

     public WebSecurityConfigurerAdapter webSecurityConfigurerAdapter() {

         return new MyWebSecurityConfigurer();

     }

     public static class MyWebSecurityConfigurer extends WebSecurityConfigurerAdapter {

         @Override

         protected void configure(HttpSecurity http) throws Exception {

             http.csrf().disable();

             http.authorizeRequests().antMatchers("/account**", "/admin**").authenticated();

             http.formLogin().usernameParameter("userName").passwordParameter("password").loginPage("/login")

                     .loginProcessingUrl("/login").successHandler(new SavedRequestAwareAuthenticationSuccessHandler())

                     .and().logout().logoutUrl("/logout").logoutSuccessUrl("/");

             http.rememberMe().rememberMeParameter("rememberMe");

         }

     }

 }
访问http://localhost:8080/account会自动跳转到login登录页。Spring Security的具体使用前文已有所述。
参考:
(1)https://github.com/spring-projects/spring-boot
(2)http://projects.spring.io/spring-boot/
(3)https://github.com/qibaoguang/Spring-Boot-Reference-Guide/blob/master/SUMMARY.md
Java Web系列:Spring Boot 基础的更多相关文章
- 传统Java Web(非Spring Boot)、非Java语言项目接入Spring Cloud方案
技术架构在向spring Cloud转型时,一定会有一些年代较久远的项目,代码已变成天书,这时就希望能在不大规模重构的前提下将这些传统应用接入到Spring Cloud架构体系中作为一个服务以供其它项 ...
- 传统Java Web(非Spring Boot)、非Java语言项目接入Spring Cloud方案--temp
技术架构在向spring Cloud转型时,一定会有一些年代较久远的项目,代码已变成天书,这时就希望能在不大规模重构的前提下将这些传统应用接入到Spring Cloud架构体系中作为一个服务以供其它项 ...
- Java Web系列:JDBC 基础
ADO.NET在Java中的对应技术是JDBC,企业库DataAccessApplicationBlock模块在Java中的对应是spring-jdbc模块,EntityFramework在Java中 ...
- Java Web系列:Hibernate 基础
从以下5个方面学习hibernate ORM. (1)配置文件:hibernate.cfg.xml XML文件和hibernate.properties属性文件 (2)实体映射:1对多.多对多 (3) ...
- Java Web系列:Spring Security 基础
Spring Security虽然比JAAS进步很大,但还是先天不足,达不到ASP.NET中的认证和授权的方便快捷.这里演示登录.注销.记住我的常规功能,认证上自定义提供程序避免对数据库的依赖,授权上 ...
- Spring Boot 基础,理论,简介
Spring Boot 基础,理论,简介 1.SpringBoot自动装配 1.1 Spring装配方式 1.2 Spring @Enable 模块驱动 1.3 Spring 条件装配 2.自动装配正 ...
- Spring Boot 基础
Spring Boot 基础 Spring Boot 项目(参考1) 提供了一个类似ASP.NET MVC的默认模板一样的标准样板,直接集成了一系列的组件并使用了默认的配置.使用Spring Boot ...
- spring boot基础学习教程
Spring boot 标签(空格分隔): springboot HelloWorld 什么是spring boot Spring Boot是由Pivotal团队提供的全新框架,其设计目的是用来简化新 ...
- spring boot基础 入门
spring boot基础 spring boot 的简单搭建 spring boot 的基本用法 spring boot 基本用法 自动配置 技术集成 性能监控 源码解析 工程的构建 创建一个mav ...
- 第64节:Java中的Spring Boot 2.0简介笔记
Java中的Spring Boot 2.0简介笔记 spring boot简介 依赖java8的运行环境 多模块项目 打包和运行 spring boot是由spring framework构建的,sp ...
随机推荐
- Begin to record my bologs....
after work for almost two years, I have realize the truth notes can help a lot for us. avoiding my l ...
- NOIP2008 普及组T2 排座椅 解题报告-S.B.S
题目描述 上课的时候总会有一些同学和前后左右的人交头接耳,这是令小学班主任十分头疼的一件事情.不过,班主任小雪发现了一些有趣的现象,当同学们的座次确定下来之后,只有有限的D对同学上课时会交头接耳.同学 ...
- 《TCP/IP详解 卷一》读书笔记-----DNS
1.DNS是一个分布式数据库系统用来提供主机名和IP地址之间的映射,之所以称为分布式原因的原因是因特网上没有一台主机知道这类映射的全部信息,当然也不可能做到,因为数据量实在太大了 2.应用程序通过一个 ...
- 深搜+回溯 POJ 2676 Sudoku
POJ 2676 Sudoku Time Limit: 2000MS Memory Limit: 65536K Total Submissions: 17627 Accepted: 8538 ...
- UVALive 6263 The Dragon and the knights --统计,直线分平面
题意:给n条直线,将一个平面分成很多个部分,再给m个骑士的坐标,在一个部分内只要有一个骑士即可保护该部分,问给出的m个骑士是不是保护了所有部分. 解法:计算每个骑士与每条直线的位置关系(上面还是下面) ...
- 2014 Super Training #9 F A Simple Tree Problem --DFS+线段树
原题: ZOJ 3686 http://acm.zju.edu.cn/onlinejudge/showProblem.do?problemCode=3686 这题本来是一个比较水的线段树,结果一个ma ...
- sql 入门经典(第五版) Ryan Stephens 学习笔记 (第一,二,三,,四,五章)
SQL - Structured Query Language (结构化查询语言) 1/ SQL 命令的类型 : 数据定义语言: DDL 数据操作语言: DML 数据查询语言: DQL 数据控制语言 ...
- <a href="javascript:void(0)" onclick="ff()" ></a> 用法解析
javascript:void(0) 仅仅表示一个死链接 如果是个# javascript:void(#),就会出现跳到顶部的情况,搜集了一下解决方法 1:<a href="####& ...
- 第三方登录 ----转载自简书,作者 <<碧霄问鼎>>
这几天遇到一个需求:做第三方登录和分享.遇到了一些坑,把整个过程整理记录下来,方便他人,同时也捋一下思路. 当时考虑过把每个平台的SDK下载下来,一个一个弄,一番取舍后决定还是用ShareSDK.这里 ...
- YII获取刚插入数据的id主键
单条数据时model->attributes['id']; 循环插入时使用 Yii::app()->db->getLastInsertID() 获取 循环插入时需要每次插入后重置 m ...