前后端分离djangorestframework—— 接入第三方的验证码平台
关于验证码部分,在我这篇文章里说的挺详细的了:Python高级应用(3)—— 为你的项目添加验证码
这里还是再给一个前后端分离的实例,因为极验官网给的是用session作为验证的,而我们做前后端分离的用的是token,而不是session,所以对于目前来说就不适用了,所以需要根据具体业务逻辑来改动。当然,大佬可以直接忽略
djangorestframework+redis+jquery
好的,直接上例子:
还是用的 Python高级应用(3)—— 为你的项目添加验证码 这文章最后的LoginAuth例子,这里改成使用djangorestframework的项目:
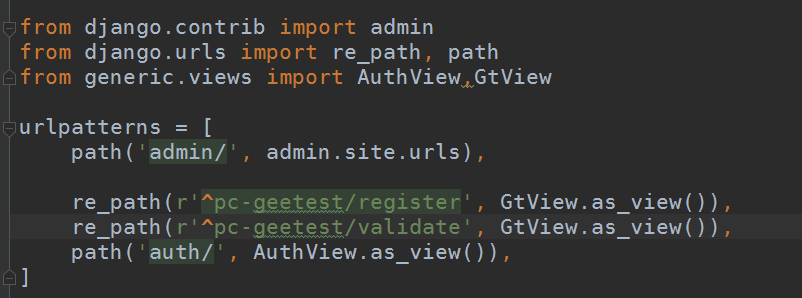
url没变:
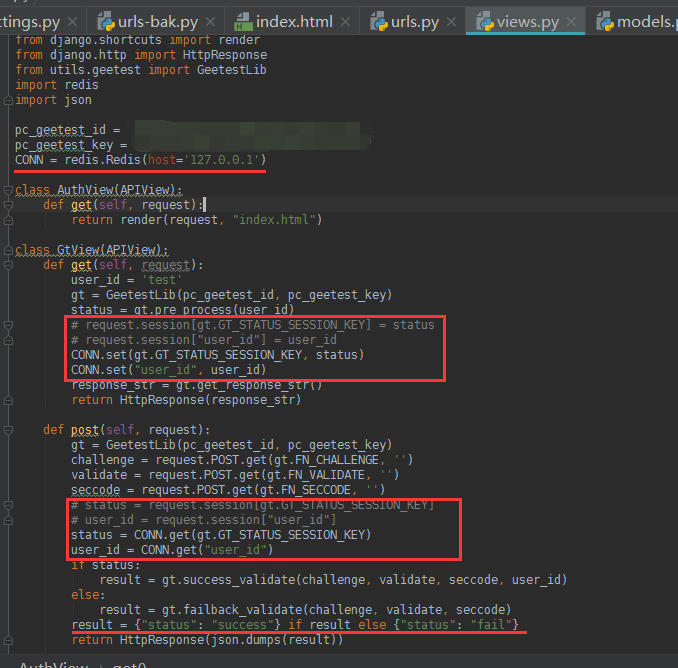
view也只是做了稍微的小改动,改动部分就是我标记出来的部分,因为不能用session,所以这里采用redis存储数据并获取数据,有关redis配置请移步:数据库之redis篇(3)—— Python操作redis
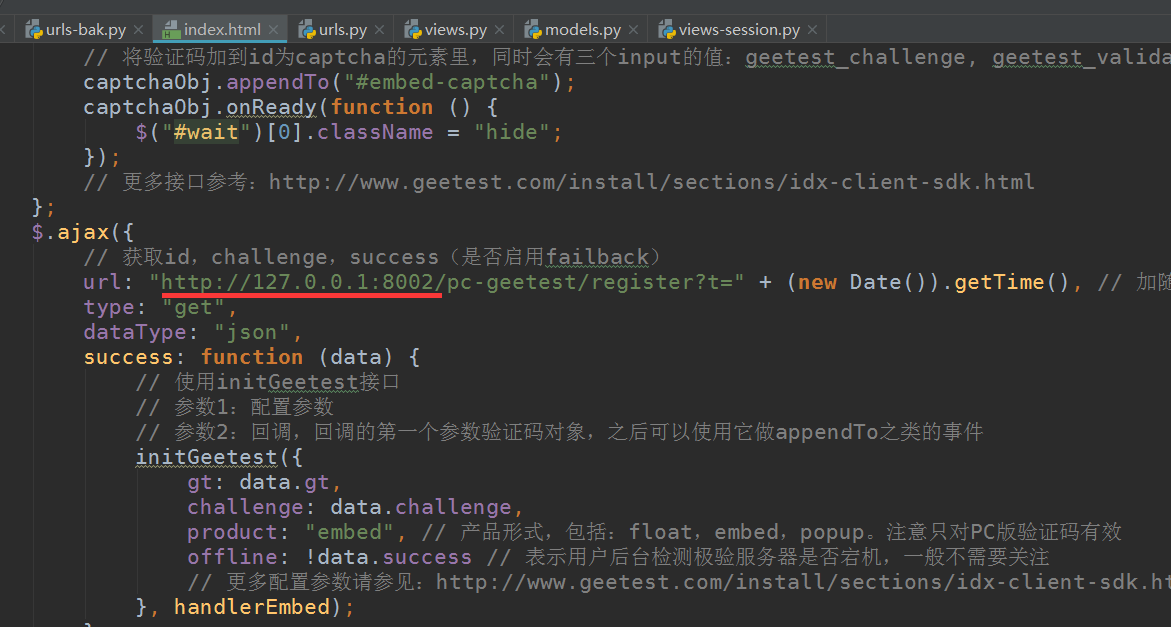
html,只改了两处的请求地址,写成了绝对地址
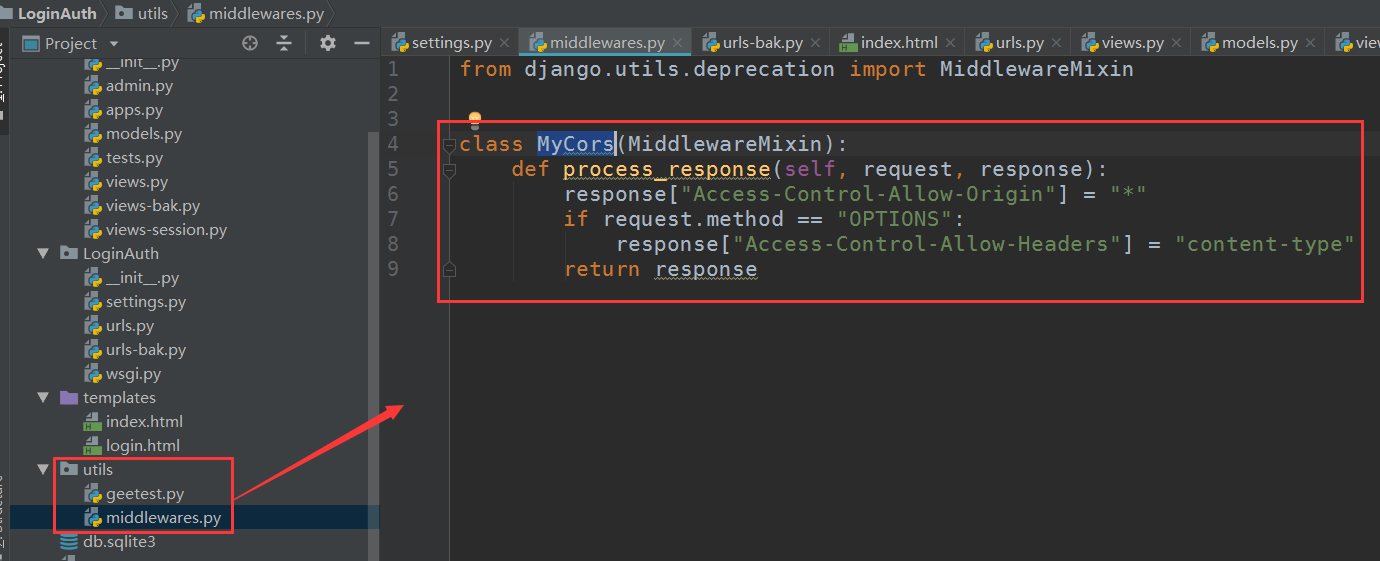
在启动项目之前,需要设置一个中间件,不然会有跨域请求问题,有跨域请求解决问题,请移步:前后端分离djangorestframework——解决跨域请求 这里就不多介绍了
在utils目录下创建一个中间件,定义类名Mycors
配置文件里导入:

注意,由于已经设置了中间件添加允许请求头,那个csrf的中间件就可以不用管,当然你注释掉也没有问题
启动项目:
然后再pycharm下,单独对html文件启动,作为一个客户端来访问: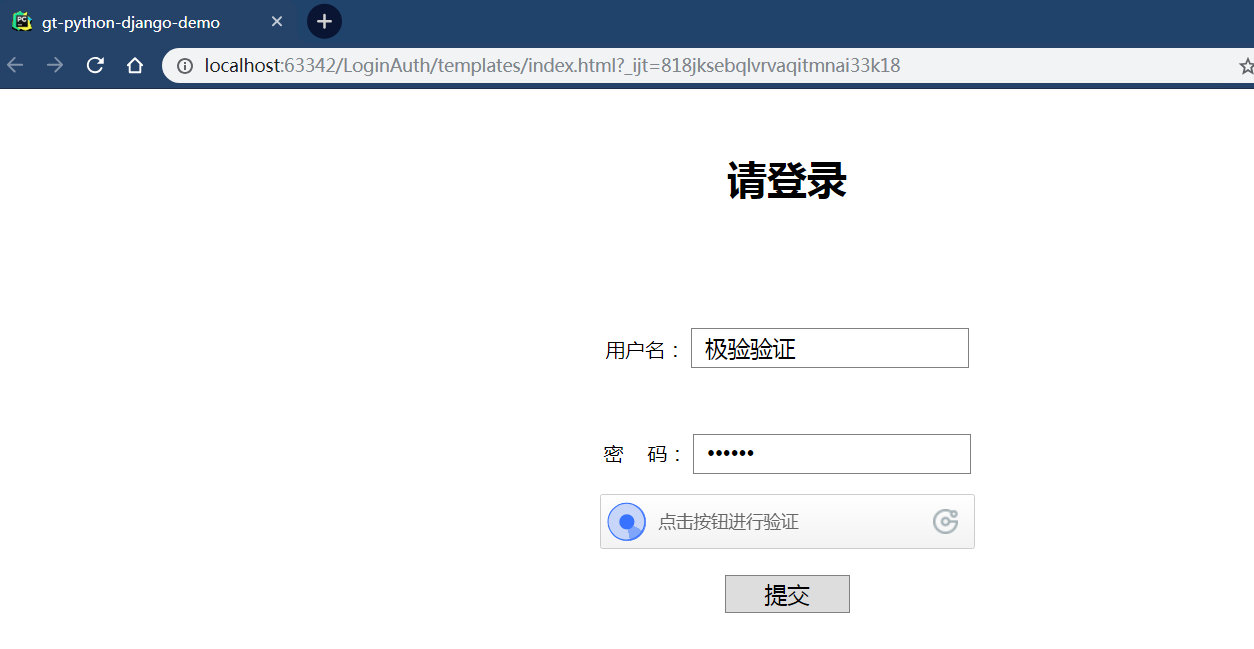
点击验证码:
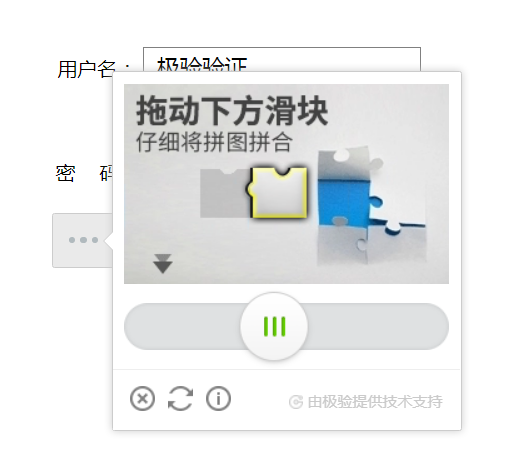
没有问题
相关代码:
from django.contrib import admin
from django.urls import re_path, path
from generic.views import AuthView,GtView

urlpatterns = [
    path('admin/', admin.site.urls),

    re_path(r'^pc-geetest/register', GtView.as_view()),
    re_path(r'^pc-geetest/validate', GtView.as_view()),
    path('auth/', AuthView.as_view()),
]
urls
# coding:utf-8
from rest_framework.views import APIView
from django.shortcuts import render
from django.http import HttpResponse
from utils.geetest import GeetestLib
import redis
import json

pc_geetest_id = "b46d1900d0a894591916ea94ea91bd2c"
pc_geetest_key = "36fc3fe98530eea08dfc6ce76e3d24c4"
CONN = redis.Redis(host='127.0.0.1')  # 前提自己安装上redis并配置好可以连接

class AuthView(APIView):
    def get(self, request):
        return render(request, "index.html")

class GtView(APIView):
    def get(self, request):
        user_id = 'test'
        gt = GeetestLib(pc_geetest_id, pc_geetest_key)
        status = gt.pre_process(user_id)
        # request.session[gt.GT_STATUS_SESSION_KEY] = status
        # request.session["user_id"] = user_id
        CONN.set(gt.GT_STATUS_SESSION_KEY, status)
        CONN.set("user_id", user_id)
        response_str = gt.get_response_str()
        return HttpResponse(response_str)

    def post(self, request):
        gt = GeetestLib(pc_geetest_id, pc_geetest_key)
        challenge = request.POST.get(gt.FN_CHALLENGE, '')
        validate = request.POST.get(gt.FN_VALIDATE, '')
        seccode = request.POST.get(gt.FN_SECCODE, '')
        # status = request.session[gt.GT_STATUS_SESSION_KEY]
        # user_id = request.session["user_id"]
        status = CONN.get(gt.GT_STATUS_SESSION_KEY)
        user_id = CONN.get("user_id")
        if status:
            result = gt.success_validate(challenge, validate, seccode, user_id)
        else:
            result = gt.failback_validate(challenge, validate, seccode)
        result = {"status": "success"} if result else {"status": "fail"}
        return HttpResponse(json.dumps(result))
views
<!DOCTYPE html>
<html>
<head>
<meta charset="UTF-8">
<meta name="viewport" content="width=device-width, initial-scale=1">
<title>gt-python-django-demo</title>
<style>
body {
margin: 50px 0;
text-align: center;
}
.inp {
border: 1px solid gray;
padding: 0 10px;
width: 200px;
height: 30px;
font-size: 18px;
}
.btn {
border: 1px solid gray;
width: 100px;
height: 30px;
font-size: 18px;
cursor: pointer;
}
#embed-captcha {
width: 300px;
margin: 0 auto;
}
.show {
display: block;
}
.hide {
display: none;
}
#notice {
color: red;
}
</style>
</head>
<body>
<h1>请登录</h1>
<br><br>
<!-- 为使用方便,直接使用jquery.js库,如您代码中不需要,可以去掉 -->
<script src="http://code.jquery.com/jquery-1.12.3.min.js"></script>
<!-- 引入封装了failback的接口--initGeetest -->
<script src="http://static.geetest.com/static/tools/gt.js"></script>
<form class="popup" action="http://127.0.0.1:8002/pc-geetest/validate" method="post">
<br>
<p>
<label for="username2">用户名:</label>
<input class="inp" id="username2" type="text" value="极验验证">
</p>
<br>
<p>
<label for="password2">密 码:</label>
<input ">
</p>
<div id="embed-captcha"></div>
<p id="wait" class="show">正在加载验证码......</p>
<p id="notice" class="hide">请先拖动验证码到相应位置</p>
<br>
<input class="btn" id="embed-submit" type="submit" value="提交">
</form>
<script>
var handlerEmbed = function (captchaObj) {
$("#embed-submit").click(function (e) {
var validate = captchaObj.getValidate();
if (!validate) {
$("#notice")[0].className = "show";
setTimeout(function () {
$("#notice")[0].className = "hide";
}, 2000);
e.preventDefault();
}
});
// 将验证码加到id为captcha的元素里,同时会有三个input的值:geetest_challenge, geetest_validate, geetest_seccode
captchaObj.appendTo("#embed-captcha");
captchaObj.onReady(function () {
$("#wait")[0].className = "hide";
});
// 更多接口参考:http://www.geetest.com/install/sections/idx-client-sdk.html
};
$.ajax({
// 获取id,challenge,success(是否启用failback)
url: "http://127.0.0.1:8002/pc-geetest/register?t=" + (new Date()).getTime(), // 加随机数防止缓存
type: "get",
dataType: "json",
success: function (data) {
// 使用initGeetest接口
// 参数1:配置参数
// 参数2:回调,回调的第一个参数验证码对象,之后可以使用它做appendTo之类的事件
initGeetest({
gt: data.gt,
challenge: data.challenge,
product: "embed", // 产品形式,包括:float,embed,popup。注意只对PC版验证码有效
offline: !data.success // 表示用户后台检测极验服务器是否宕机,一般不需要关注
// 更多配置参数请参见:http://www.geetest.com/install/sections/idx-client-sdk.html#config
}, handlerEmbed);
}
});
</script>
</body>
</html>
html
from django.utils.deprecation import MiddlewareMixin

class MyCors(MiddlewareMixin):
    def process_response(self, request, response):
        response["Access-Control-Allow-Origin"] = "*"
        if request.method == "OPTIONS":
            response["Access-Control-Allow-Headers"] = "content-type"
        return response
middleware中间件
djangorestframework++redis+vue
在以后可能用的较多的还是vue的,所以这里再把前端部分换成vue看看,同时再换一个验证码方式看看,用的模板中的弹出式的:

同样的,除了html文件,其他没做多大改动:
url:

redis自行配置
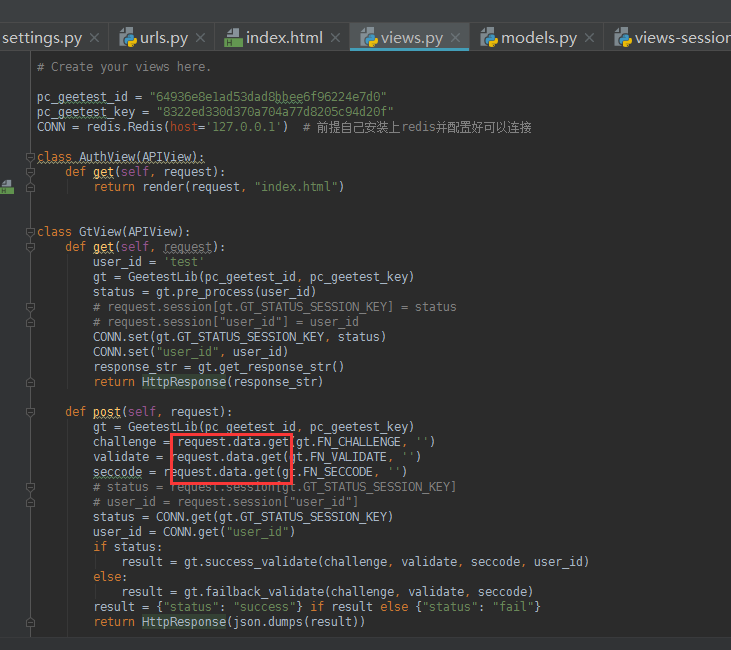
view部分:
注意这里有个小坑:
极验官方给的例子里用的是request.POST,而我们用了djangorestframework之后,前端传来的数据已经不再是用request.GET或者request.POST了,而都是request.data里面,所以需要调整下,上面面的jquery例子里都没注意到,因为上面我没有做登录成功之后的验证,所以其实上面的例子里也需要改成request.data
html:
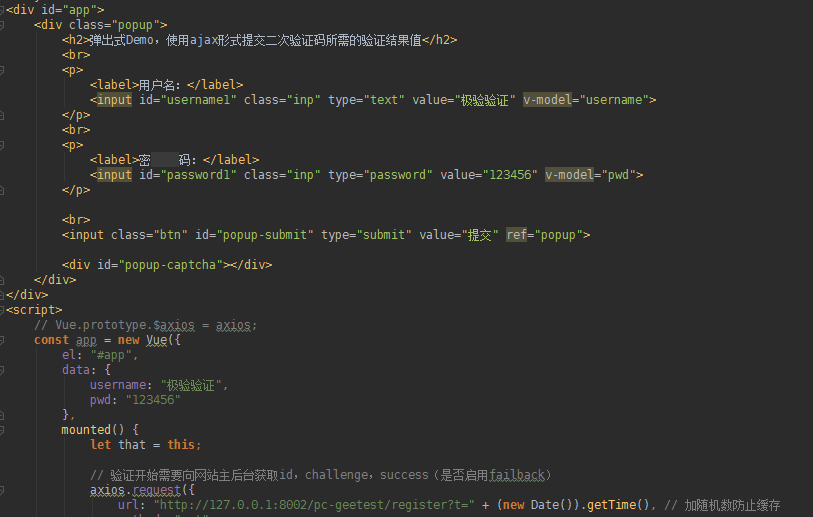

启动项目,解释一下,不知道是不是我的浏览器显示比例的问题,我只要用自己的id和key,它这个验证码按钮就会跑到左边去,我试了用官方给的示例id和key就正常,如果你们也遇到就自己去调试css了,这里暂且这样了
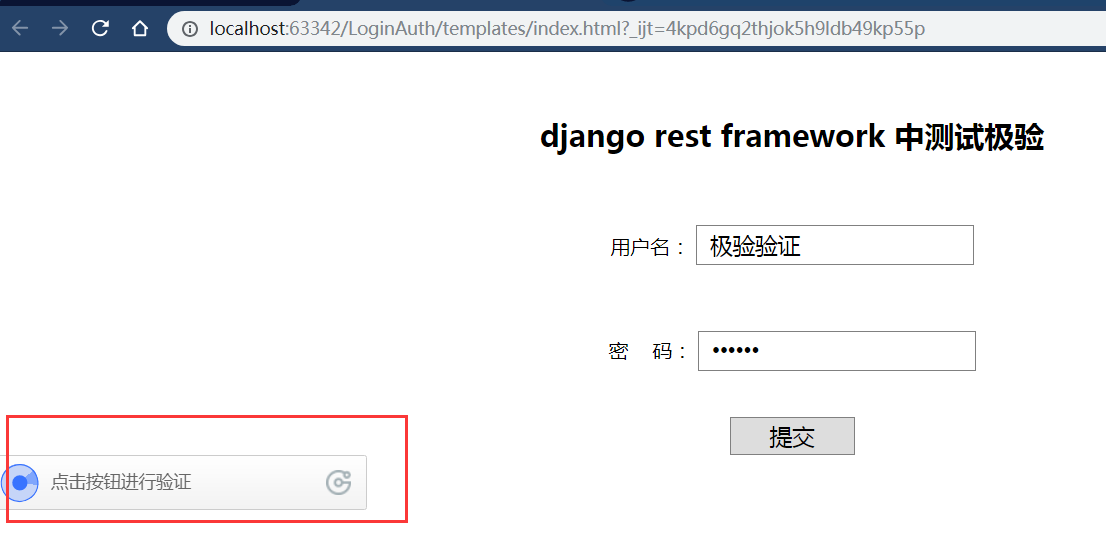
点击验证:
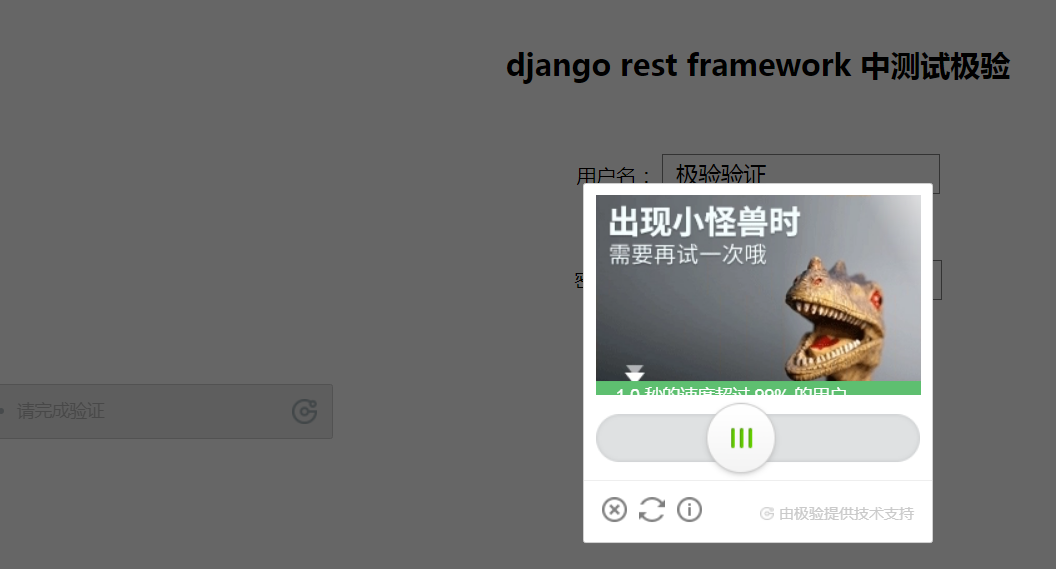
没有问题:

相关代码:
from django.shortcuts import render
from rest_framework.views import APIView
import redis
from utils.geetest import GeetestLib
from django.http import HttpResponse
import json

# Create your views here.

pc_geetest_id = "b46d1900d0a894591916ea94ea91bd2c"
pc_geetest_key = "36fc3fe98530eea08dfc6ce76e3d24c4"
CONN = redis.Redis(host='127.0.0.1')  # 前提自己安装上redis并配置好可以连接

class AuthView(APIView):
    def get(self, request):
        return render(request, "index.html")

class GtView(APIView):
    def get(self, request):
        user_id = 'test'
        gt = GeetestLib(pc_geetest_id, pc_geetest_key)
        status = gt.pre_process(user_id)
        # request.session[gt.GT_STATUS_SESSION_KEY] = status
        # request.session["user_id"] = user_id
        CONN.set(gt.GT_STATUS_SESSION_KEY, status)
        CONN.set("user_id", user_id)
        response_str = gt.get_response_str()
        return HttpResponse(response_str)

    def post(self, request):
        gt = GeetestLib(pc_geetest_id, pc_geetest_key)
        challenge = request.data.get(gt.FN_CHALLENGE, '')
        validate = request.data.get(gt.FN_VALIDATE, '')
        seccode = request.data.get(gt.FN_SECCODE, '')
        # status = request.session[gt.GT_STATUS_SESSION_KEY]
        # user_id = request.session["user_id"]
        status = CONN.get(gt.GT_STATUS_SESSION_KEY)
        user_id = CONN.get("user_id")
        if status:
            result = gt.success_validate(challenge, validate, seccode, user_id)
        else:
            result = gt.failback_validate(challenge, validate, seccode)
        result = {"status": "success"} if result else {"status": "fail"}
        return HttpResponse(json.dumps(result))
view
<!DOCTYPE html>
<html lang="en">
<head>
<meta charset="UTF-8">
<meta http-equiv="X-UA-Compatible" content="IE=edge">
<meta name="viewport" content="width=device-width, initial-scale=1">
<title>Title</title>
<script src="https://cdn.jsdelivr.net/npm/vue/dist/vue.js"></script>
<script src="http://static.geetest.com/static/tools/gt.js"></script>
<script src="https://cdn.bootcss.com/axios/0.19.0-beta.1/axios.js"></script>
<style>
body {
margin: 50px 0;
text-align: center;
}
.inp {
border: 1px solid gray;
padding: 0 10px;
width: 200px;
height: 30px;
font-size: 18px;
}
.btn {
border: 1px solid gray;
width: 100px;
height: 30px;
font-size: 18px;
cursor: pointer;
}
#embed-captcha {
width: 300px;
margin: 0 auto;
}
.show {
display: block;
}
.hide {
display: none;
}
#notice {
color: red;
}
/* 以下遮罩层为demo.用户可自行设计实现 */
#mask {
display: none;
position: fixed;
text-align: center;
left: 0;
top: 0;
width: 100%;
height: 100%;
background-color: rgba(0, 0, 0, 0.5);
overflow: auto;
}
/* 可自行设计实现captcha的位置大小 */
.popup-mobile {
position: relative;
}
#popup-captcha-mobile {
position: fixed;
display: none;
left: 50%;
top: 50%;
transform: translate(-50%, -50%);
-webkit-transform: translate(-50%, -50%);
z-index: 9999;
}
</style>
</head>
<body>
<div id="app">
<div class="popup">
<h2>django rest framework 中测试极验 </h2>
<br>
<p>
<label>用户名:</label>
<input id="username1" class="inp" type="text" value="极验验证" v-model="username">
</p>
<br>
<p>
<label>密 码:</label>
<input id=" v-model="pwd">
</p>
<br>
<input class="btn" id="popup-submit" type="submit" value="提交" ref="popup">
<div id="popup-captcha"></div>
</div>
</div>
<script>
// Vue.prototype.$axios = axios;
const app = new Vue({
el: "#app",
data: {
username: "极验验证",
pwd: "
},
mounted() {
let that = this;
// 验证开始需要向网站主后台获取id,challenge,success(是否启用failback)
axios.request({
url: "http://127.0.0.1:8002/pc-geetest/register?t=" + (new Date()).getTime(), // 加随机数防止缓存
method: "get",
}).then(function (data) {
console.log(data.data);
// 使用initGeetest接口
// 参数1:配置参数
// 参数2:回调,回调的第一个参数验证码对象,之后可以使用它做appendTo之类的事件
initGeetest({
gt: data.data.gt,
challenge: data.data.challenge,
product: "popup", // 产品形式,包括:float,embed,popup。注意只对PC版验证码有效
offline: !data.data.success, // 表示用户后台检测极验服务器是否宕机,一般不需要关注
new_captcha: true
// 更多配置参数请参见:http://www.geetest.com/install/sections/idx-client-sdk.html#config
}, function (captchaObj) {
// 成功的回调
console.log("进入成功的回调");
captchaObj.onSuccess(function () {
let validate = captchaObj.getValidate();
axios.request({
url: "http://127.0.0.1:8002/pc-geetest/ajax_validate", // 进行二次验证
method: "post",
data: {
username: that.username,
password: that.pwd,
geetest_challenge: validate.geetest_challenge,
geetest_validate: validate.geetest_validate,
geetest_seccode: validate.geetest_seccode
}
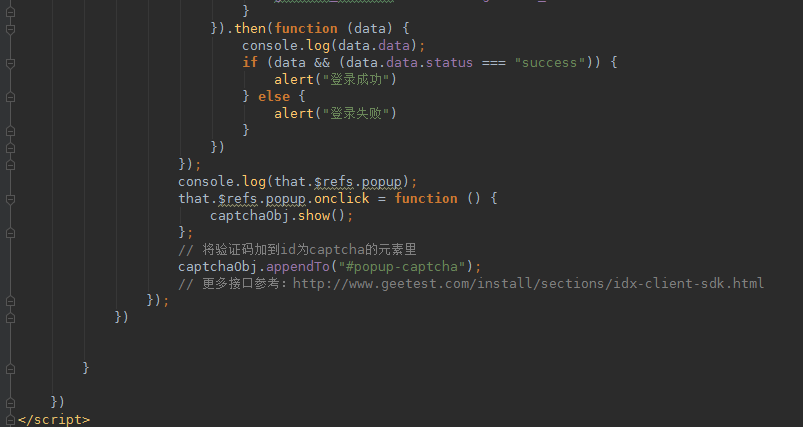
}).then(function (data) {
console.log(data.data);
if (data && (data.data.status === "success")) {
alert("登录成功")
} else {
alert("登录失败")
}
})
});
console.log(that.$refs.popup);
that.$refs.popup.onclick = function () {
captchaObj.show();
};
// 将验证码加到id为captcha的元素里
captchaObj.appendTo("#popup-captcha");
// 更多接口参考:http://www.geetest.com/install/sections/idx-client-sdk.html
});
})
}
})
</script>
</body>
</html>
html
(其他没做任何改动,同上)
好的,完事儿了。感兴趣的可以把极验给的三个验证码demo都由之前的jquery改成vue试试,哈哈
总结:
说白了还是那一套官方给你的案例,根据自己实际情况改来改去就行了,不过得看得懂极验给的demo才可以随意改动
前后端分离djangorestframework—— 接入第三方的验证码平台的更多相关文章
- 前后端分离djangorestframework—— 接入微信模板消息推送
微信 什么是微信也不多说,跟前面的支付宝一样的 微信支付 微信支付也有个沙箱环境,沙箱环境官方文档 由文档中那句很显眼的话所得,即使是测试环境也需要真实的商户号,所以这个就没法想支付宝那样用沙箱账号来 ...
- 前后端分离djangorestframework—— 接入支付宝支付平台
支付宝 简介 支付宝是什么不用多说了,本次教程适合初学者 前提准备 话不多说,干就完了 1.注册开发者账号,设置公钥私钥 首先进入支付宝开发者平台:传送门 ,有账号直接登录,没账号用你平时用来付款收钱 ...
- 前后端分离djangorestframework—— 在线视频平台接入第三方加密防盗录视频
加密视频 在以后的开发项目中,很可能有做在线视频的,而在线视频就有个问题,因为在线播放,就很有可能视频数据被抓包,如果这个在线视频平台有付费视频的话,这样就会有人做点倒卖视频的生意了,针对这个问题,目 ...
- 前后端分离djangorestframework——分页组件
Pagination 为什么要分页也不用多说了,大家都懂,DRF也自带了分页组件 这次用 前后端分离djangorestframework——序列化与反序列化数据 文章里用到的数据,数据库用的my ...
- 前后端分离djangorestframework——路由组件
在文章前后端分离djangorestframework——视图组件 中,见识了DRF的视图组件强大,其实里面那个url也是可以自动生成的,就是这么屌 DefaultRouter urls文件作如下调整 ...
- 前后端分离djangorestframework——视图组件
CBV与FBV CBV之前说过就是在view.py里写视图类,在序列化时用过,FBV就是常用的视图函数,两者的功能都可以实现功能,但是在restful规范方面的话,CBV更方便,FBV还要用reque ...
- 前后端分离djangorestframework——序列化与反序列化数据
我们写好后端的代码,要把数据交给前端的展示的,这个数据以什么类型给前端呢?学到这里,我们已经知道这个数据最好是json字符串才行,因为网络间的传输,只认字符串或者二进制,字符串就是我们的数据,二进制就 ...
- 前后端分离,SpringBoot如何实现验证码操作
验证码的功能是防止非法用户恶意去访问登录接口而设置的一个功能,今天我们就来看看在前后端分离的项目中,SpringBoot是如何提供服务的. SpringBoot版本 本文基于的Spring Boot的 ...
- 前后端分离djangorestframework——认证组件
authentication 认证是干嘛的已经不需要多说.而前后端未分离的认证基本是用cookie或者session,前后端分离的一般用token 全局认证 先创建一个django项目,项目名为drf ...
随机推荐
- github pages绑定域名
网上很多人问 github 绑定域名要不要备案,很多人的回答是: 国内主机需要备案,国外主机不用 这个说法是没错的,但是却没有直接回答出 github pages 是否需要备案! 首先声明 githu ...
- Python内置函数(5)——bin
英文文档: bin(x) Convert an integer number to a binary string. The result is a valid Python expression. ...
- 带着萌新看springboot源码03
上一节讲到了快速新建一个springboot应用,以及springboot的自动配置类起作用的时机,并且一起看了一个自动配置类的源码. 这一节我们来粗略看看当用户在浏览器输入一个url,怎么样返回一个 ...
- Flow 常用知识点整理
Flow入门初识 Flow是facebook出品的JavaScript静态类型检查工具. 由于JavaScript是动态类型语言,它的灵活性也会造成一些代码隐患,使用Flow可以在编译期尽早发现由类型 ...
- 老代码多=过度耦合=if else?阿里巴巴工程师这样捋直老代码
简介 在业务开发的过程中,往往存在平台代码和业务代码耦合严重难以分离.业务和业务之间代码交织缺少拆解的现象.平台和业务代码交织导致不易修改,不同业务的代码交织增加了不同负责团队之间的协同成本.因此不论 ...
- 在数据采集器中用TensorFlow进行实时机器学习
最新DataOps平台的真正价值,只有在业务用户和应用程序能够从各种数据源来访问原始数据和聚合数据,并且及时地产生数据驱动的认识时,才能够实现.利用机器学习(Machine Learning),分析师 ...
- Linux 进程管理工具 supervisord 安装及使用
Supervisor是用Python实现的一款非常实用的进程管理工具 1.安装过程非常简单 安装python 安装meld3-0.6.8.tar.gz 安装supervisor-3.0a12.tar. ...
- Docker最全教程——从理论到实战(三)
往期链接: https://www.cnblogs.com/codelove/p/10030439.html https://www.cnblogs.com/codelove/p/10036608.h ...
- Ubuntu18 的超详细常用软件安装
心血来潮,在笔记本安装了Ubuntu 18 用于日常学习,于是有了下面的安装记录. Gnome-Tweak-Tool gnome-tweak-tool可以打开隐藏的设置,可以详细的对系统进行配置,以及 ...
- 大前端的自动化工厂(2)—— SB Family
原文链接:https://bbs.huaweicloud.com/blogs/53c0c3509b7a11e89fc57ca23e93a89f 我坦白我是标题党,SB只是SCSS-Bourbon的简写 ...