浅析websocket的基本应用spring boot + vue +C# + WPF
1.基本概念
首先websocket是基于H5的一种通信。在网页中如果定时获取服务器端的实时数据,我们常采用long poll 和ajax轮询的方式。但是在轮询过程中,由于根本没有新数据的改变,而造成一种资源的浪费,同时也不能够保证数据的实时性。long poll是一种保持长连接的方式获取数据,但是需要进行头文件的各种校验,也是一种资源的浪费。
websocket完美的解决了这种两种方式的不足,首先能够保证数据的实时性,同时保证资源的完整利用,是网页和服务端的全双工通信,即可以接收来自网页端的消息,同时可以发送通知网页端。websocket还支持多种方式,本篇讨论java,C#(WPF)和vue,即服务端为java,客户端分别为vue和WPF来进行验证。
2.基本原理
websocket是基于TCP的一种通信,所以在建立通信之前首先需要建立TCP的一系列连接(三次握手等)。
服务端采用Springboot来实现,首先在pom.xml中添加WebSocect的依赖
      <dependency>

            <groupId>org.springframework.boot</groupId>

            <artifactId>spring-boot-starter-websocket</artifactId>

        </dependency>
接下来建立WebSocket并实现ServerEndPoint 我这里采用注解的方式
package com.koalin.rpc.websocket;

import com.utils.DateTimeUtils;
import org.springframework.stereotype.Component;

import javax.websocket.OnClose;
import javax.websocket.OnMessage;
import javax.websocket.OnOpen;
import javax.websocket.Session;
import javax.websocket.server.PathParam;
import javax.websocket.server.ServerEndpoint;
import java.util.Date;
import java.util.HashMap;
import java.util.Map;
import java.util.concurrent.CopyOnWriteArraySet;

/**
 * @version 1.0
 * @ClassName WebSocket
 * @Author koalin
 * @Description //TODO WebSocket的描述
 * @Date 2019/12/24 23:27
 */
@ServerEndpoint("/koalin/websocket/{userName}")
@Component
public class WebSocket {
    private Session session;
    private static CopyOnWriteArraySet<WebSocket> webSockets = new CopyOnWriteArraySet<>();

    private static Map<String, Session> sessionPool = new HashMap<String, Session>();
    volatile static boolean isRunning = false;
    private String userName;

    @OnOpen
    public void onOpen(Session session, @PathParam(value = "userName") String userName) {
        this.session = session;
        this.userName = userName;
        webSockets.add(this);
        sessionPool.put(session.getId(), session);
        System.out.println(userName + "【websocket消息】有新的连接,总数为:" + webSockets.size());

        if (webSockets.size()==1) {
            isRunning = true;
            new Runnable() {
                @Override
                public void run() {
                    while (true) {
                        try {
                            for (WebSocket client :
                                    webSockets) {
                                String msg = "Hello I am WebSocekt " + client.userName + "我的时间:" + DateTimeUtils.DateTimeYYYYMMDDHHMMSS(new Date());
                                client.session.getAsyncRemote().sendText(msg);
                                System.out.println(msg);

                                Thread.sleep(2000);
                            }
                        } catch (InterruptedException e) {
                            e.printStackTrace();
                            isRunning=false;
                        }

                    }
                }
            }.run();
        }
    }

    @OnClose
    public void onClose() {
       if (webSockets.contains(this) ){
        webSockets.remove(this);
        System.out.println(this.userName+"【websocket消息】连接断开,总数为:" + webSockets.size());
       }

    }

    @OnMessage
    public void onMessage(String message,Session session) {
        //System.out.println("【websocket消息】收到客户端消息:" + message);
        System.out.println("【websocket消息】收到客户端消息:" + message);
    }

    // 此为广播消息
    public void sendAllMessage(String message) {
        for (WebSocket webSocket : webSockets) {
            System.out.println("【websocket消息】广播消息:" + message);
            try {
                webSocket.session.getAsyncRemote().sendText(message);
            } catch (Exception e) {
                e.printStackTrace();
            }
        }
    }

    // 此为单点消息
    public void sendOneMessage(String userName, String message) {
        System.out.println("【websocket消息】单点消息:" + message);
        Session session = sessionPool.get(userName);
        if (session != null) {
            try {
                session.getAsyncRemote().sendText(message);
            } catch (Exception e) {
                e.printStackTrace();
            }
        }
    }

}
添加WebSocketConfig 创建默认的EndPointServer
package com.koalin.rpc.websocket;

import org.springframework.context.annotation.Bean;

import org.springframework.context.annotation.Configuration;

import org.springframework.web.socket.server.standard.ServerEndpointExporter;

/**

 * @version 1.0

 * @ClassName WebSocketConfig

 * @Author koalin

 * @Description //TODO WebSocketConfig的描述

 * @Date 2019/12/24 23:36

 */

@Configuration

public class WebSocketConfig {

    /**

     * @return

     * @Author koalin

     * @Description //TODO这个bean会自动注册使用了@ServerEndpoint注解声明的Websocket endpoint

     * @Date 22:47 2019/12/24

     * @Param

     **/

    @Bean

    public ServerEndpointExporter serverEndpointExporter() {

        return new ServerEndpointExporter();

    }

}
以上完成服务端代码
接下来先验证C#客户端
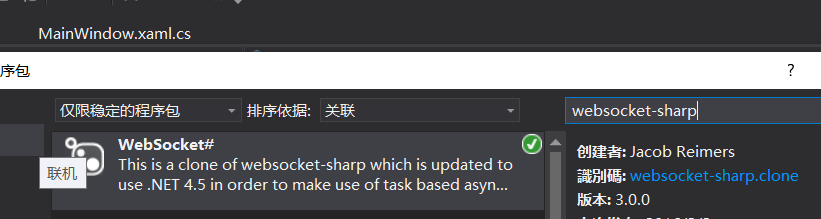
首选在nuget中下载websocket-sharp
创建WebSocketClient
using System;

using System.Collections.Generic;

using System.Linq;

using System.Text;

using System.Threading;

using System.Threading.Tasks;

using WebSocketSharp;

namespace WebSocketLib

{

    public class WebSocketClient

    {

        private WebSocket ws;

        private string url = "";

        CancellationToken token = new CancellationToken();

        public WebSocketClient(string url)

        {

            this.url = url;

        }

        public void Start()

        {

            try

            {

                ws = new WebSocket(url, token, 102392,

                      () =>

                      {//OnOpen

                          return Task.Run(() =>

                          {

                              Console.WriteLine("websocket连接正常....");

                          });

                      },

                      (e) =>

                      {//OnClose

                          return Task.Run(() =>

                          {

                              Console.WriteLine("websocket关闭正常...");

                          });

                      },

                      (e) =>

                      {//OnMessage

                          return Task.Run(() =>

                          {

                              Console.WriteLine("接收到服务端的消息" + e.Text.ReadToEnd());

                          });

                      },

                      (e) =>

                      {//OnError

                          return Task.Run(() =>

                          {

                              Console.WriteLine("连接异常..." + e.Message);

                          });

                      }

                      );

                ws.Connect();

            }

            catch (Exception e)

            {

                Console.WriteLine(e.ToString());

            }

        }
{
{
await Task.Delay(1000);
while (true)
{
try
{
if (ws != null )
{
}
}
catch (Exception ex)
{
}
await Task.Delay(2000);
}
});
}
public void Close()

        {

            if (ws!=null)

            {

                ws.Close();

                ws.Dispose();

            }

        }

    }

}
简单的建立wpf窗体应用程序然后添加引用
using System;

using System.Collections.Generic;

using System.Linq;

using System.Text;

using System.Threading.Tasks;

using System.Windows;

using System.Windows.Controls;

using System.Windows.Data;

using System.Windows.Documents;

using System.Windows.Input;

using System.Windows.Media;

using System.Windows.Media.Imaging;

using System.Windows.Navigation;

using System.Windows.Shapes;

namespace WebSocketDemo

{

    /// <summary>

    /// MainWindow.xaml 的交互逻辑

    /// </summary>

    public partial class MainWindow : Window

    {

        public MainWindow()

        {

            InitializeComponent();

        }

        WebSocketLib.WebSocketClient client = null;

        private void Test()

        {

          client = new WebSocketLib.WebSocketClient("ws://www.koalin.com:8081/koalin/websocket/test");

            client.Start();

            client.StartSendMessage();

        }

        private void Button_Click(object sender, RoutedEventArgs e)

        {

            Test();

        }

        protected override void OnClosed(EventArgs e)

        {

            if (client!=null)

            {

                client.Close();

            }

            base.OnClosed(e);

        }

    }

}
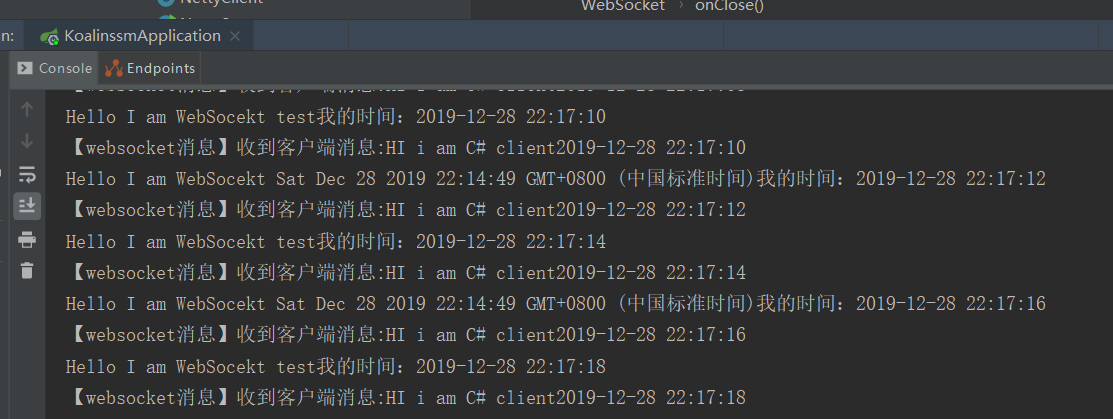
启动服务和客户端进行简单的验证

建立vue工程,然后添加如下websockt关键代码
initWebSocket () {

        // 连接错误

        this.websocket.onerror = this.setErrorMessage

        // 连接成功

        this.websocket.onopen = this.setOnopenMessage

        // 收到消息的回调

        this.websocket.onmessage = this.setOnmessageMessage

        // 连接关闭的回调

        this.websocket.onclose = this.setOncloseMessage

        // 监听窗口关闭事件,当窗口关闭时,主动去关闭websocket连接,防止连接还没断开就关闭窗口,server端会抛异常。

        window.onbeforeunload = this.onbeforeunload

      },

      setErrorMessage () {

        console.log('WebSocket连接发生错误   状态码:' + this.websocket.readyState)

      },

      setOnopenMessage () {

        console.log('WebSocket连接成功    状态码:' + this.websocket.readyState)

      },

      setOnmessageMessage (event) {

        // 根据服务器推送的消息做自己的业务处理

        console.log('服务端返回:' + event.data)

      },

      setOncloseMessage () {

        console.log('WebSocket连接关闭    状态码:' + this.websocket.readyState)

      },

      onbeforeunload () {

        this.closeWebSocket()

      },

      closeWebSocket () {

        this.websocket.close()

      }

      },

  mounted() {

    this.restaurants = this.loadAll();

// WebSocket

      if ('WebSocket' in window) {

      // var url='ws://www.koalin.com:8081/koalin/websocket/' + new Date();

        this.websocket = new WebSocket('ws://www.koalin.com:8081/koalin/websocket/' + new Date());

       console.log(  this.websocket);

        this.initWebSocket();

      } else {

        alert('当前浏览器 Not support websocket')

      }

  },

  beforeDestroy () {

      this.onbeforeunload()

    }
启动vue服务。然后在网页中输入对应的链接。
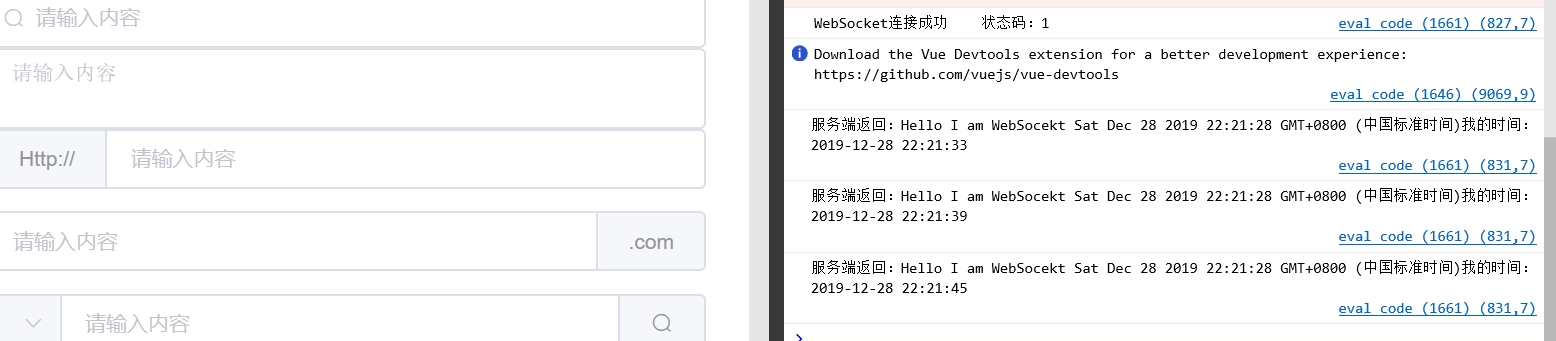
完成简单的客户端与服务端的通信
浅析websocket的基本应用spring boot + vue +C# + WPF的更多相关文章
- spring boot+vue实现H5聊天室客服功能
spring boot+vue实现H5聊天室客服功能 h5效果图 vue效果图 功能实现 spring boot + webSocket 实现 官方地址 https://docs.spring.io/ ...
- spring boot + vue + element-ui全栈开发入门——开篇
最近经常看到很多java程序员朋友还在使用Spring 3.x,Spring MVC(struts),JSP.jQuery等这样传统技术.其实,我并不认为这些传统技术不好,而我想表达的是,技术的新旧程 ...
- spring boot + vue + element-ui全栈开发入门——基于Electron桌面应用开发
前言 Electron是由Github开发,用HTML,CSS和JavaScript来构建跨平台桌面应用程序的一个开源库. Electron通过将Chromium和Node.js合并到同一个运行时环 ...
- spring boot + vue + element-ui全栈开发入门
今天想弄弄element-ui 然后就在网上找了个例子 感觉还是可以用的 第一步是完成了 果断 拿过来 放到我这里这 下面直接是连接 点进去 就可以用啊 本想着不用vue 直接导入连接 ...
- 一个实际的案例介绍Spring Boot + Vue 前后端分离
介绍 最近在工作中做个新项目,后端选用Spring Boot,前端选用Vue技术.众所周知现在开发都是前后端分离,本文就将介绍一种前后端分离方式. 常规的开发方式 采用Spring Boot 开发项目 ...
- spring boot + vue + element-ui
spring boot + vue + element-ui 一.页面 1.布局 假设,我们要开发一个会员列表的页面. 首先,添加vue页面文件“src\pages\Member.vue” 参照文档h ...
- 喜大普奔,两个开源的 Spring Boot + Vue 前后端分离项目可以在线体验了
折腾了一周的域名备案昨天终于搞定了. 松哥第一时间想到赶紧把微人事和 V 部落部署上去,我知道很多小伙伴已经等不及了. 1. 也曾经上过线 其实这两个项目当时刚做好的时候,我就把它们部署到服务器上了, ...
- 部署spring boot + Vue遇到的坑(权限、刷新404、跨域、内存)
部署spring boot + Vue遇到的坑(权限.刷新404.跨域.内存) 项目背景是采用前后端分离,前端使用vue,后端使用springboot. 工具 工欲善其事必先利其器,我们先找一个操作L ...
- 给大家整理了几个开源免费的 Spring Boot + Vue 学习资料
最近抽空在整理前面的文章案例啥的,顺便把手上的几个 Spring Boot + Vue 的学习资料推荐给各位小伙伴.这些案例有知识点的讲解,也有项目实战,正在做这一块的小伙伴们可以收藏下. 案例学习 ...
随机推荐
- C#取消正在运行的Task
更新记录 本文迁移自Panda666原博客,原发布时间:2021年6月29日. 一.说明 Task默认就依托于底层线程池中的线程,使用.NET为我们定义好的CancellationTokenSourc ...
- python亲密数设计
'''亲密数 (如果a的所有正因子和等于b,b的所有正因子和等于a,因子包括1但不包括本身,且a不等于b,则称a,b为亲密数对.一般通过叠代编程求出相应的亲密数对)'''n = 3000def fun ...
- 基于slate构建文档编辑器
基于slate构建文档编辑器 slate.js是一个完全可定制的框架,用于构建富文本编辑器,在这里我们使用slate.js构建专注于文档编辑的富文本编辑器. 描述 Github | Editor DE ...
- svn提交报错Unexpected HTTP status 413 'Request Entity Too Large' on
问题原因:nginx的client_max_body_size设置过小,默认 1M,如果请求的正文数据大于client_max_body_size,HTTP协议会报错 413 Request Enti ...
- Linux YUM制作自己的yum repository
Linux YUM制作自己的yum repository 配置步骤: 1.通过网络发布自己的package目录 2.创建本地repository 3.配置自己的yum源 操作实现: 1 安装creat ...
- NC18979 毒瘤xor
NC18979 毒瘤xor 题目 题目描述 小a有 \(N\) 个数 \(a_1, a_2, ..., a_N\) ,给出 \(q\) 个询问,每次询问给出区间 \([L, R]\) ,现在请你找到一 ...
- k8s之有状态服务部署基石(基础知识)
PV&PVC&HeadlessService 4.1.什么是无状态/有状态服务? 无状态服务: 1.没有实时的数据需要存储 (即使有,也是静态数据) 2.服务集群网络中,拿掉一个服务后 ...
- 在 Windows 上使用压缩文件 安装 MySQL
在 Windows 上使用压缩文件 安装 MySQL 1. 下载 MySQL mysql-5.7.27-win32.zip:二进制文件; 服务器类型: mysqld 2. 解压 mysql-5.7.2 ...
- Spring Bean 标签解析
上一篇文章讲到了标签在 parseDefaultElement 方法中进行解析,本篇文章将讲解这部分内容 bean 标签解析 查看 processBeanDefinition 方法,针对各个操作作具体 ...
- IP核的使用(Vivado中的调用,product guide的查询阅读 ,引脚的设置(位宽,个数,算法等),coe文件的初始化 )
IP核:Intellectual Property core ,即知识产权核.每个IP核可以实现特定功能,我们在设计一个东西时可以直接调用某个IP核来辅助实现功能. 存在形式:HDL语言形式,网表形式 ...