speex编译
首先去官网
https://www.speex.org/downloads/
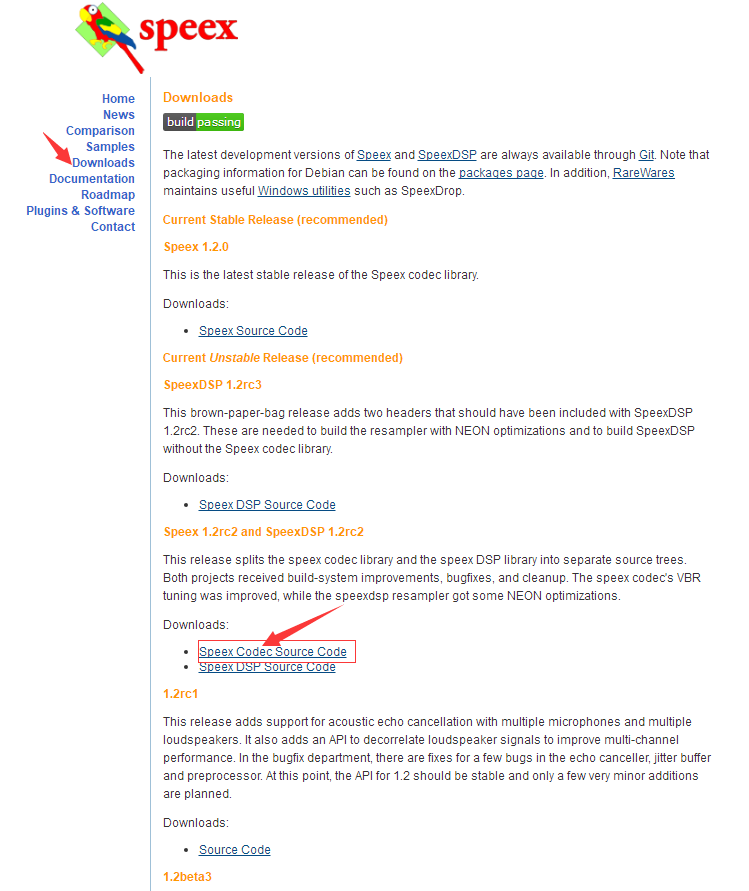
下载解压

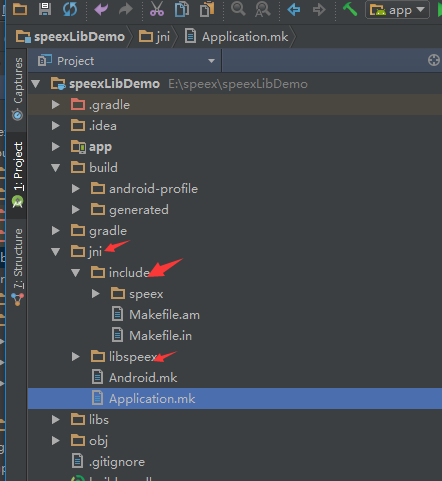
将include、libspeex文件夹复制到自己新建工程的jni目录下
speex有关的类
package com.speex.lib;

public class Speex {

    /* quality

     * 1 : 4kbps (very noticeable artifacts, usually intelligible)

     * 2 : 6kbps (very noticeable artifacts, good intelligibility)

     * 4 : 8kbps (noticeable artifacts sometimes)

     * 6 : 11kpbs (artifacts usually only noticeable with headphones)

     * 8 : 15kbps (artifacts not usually noticeable)

     */

    private static final int DEFAULT_COMPRESSION = 4;

    public Speex() {

    }

    public void init() {

        load();

        open(DEFAULT_COMPRESSION);

    }

    private void load() {

        try {

            System.loadLibrary("speex");

        } catch (Throwable e) {

            e.printStackTrace();

        }

    }

    public native int open(int compression);

    public native int getFrameSize();

    public native int decode(byte encoded[], short lin[], int size);

    public native int encode(short lin[], int offset, byte encoded[], int size);

    public native void close();

}
对应的C的源码speex_jni.cpp的源码
////

#include <jni.h>

#include <string.h>

#include <unistd.h>

#include <speex/speex.h>

static int codec_open = ;

static int dec_frame_size;

static int enc_frame_size;

static SpeexBits ebits, dbits;

void *enc_state;

void *dec_state;

static JavaVM *gJavaVM;

extern "C"

JNIEXPORT jint JNICALL Java_com_speex_lib_Speex_open

        (JNIEnv *env, jobject obj, jint compression) {

    int tmp;

    if (codec_open++ != )

        return (jint);

    speex_bits_init(&ebits);

    speex_bits_init(&dbits);

    enc_state = speex_encoder_init(&speex_nb_mode);

    dec_state = speex_decoder_init(&speex_nb_mode);

    tmp = compression;

    speex_encoder_ctl(enc_state, SPEEX_SET_QUALITY, &tmp);

    speex_encoder_ctl(enc_state, SPEEX_GET_FRAME_SIZE, &enc_frame_size);

    speex_decoder_ctl(dec_state, SPEEX_GET_FRAME_SIZE, &dec_frame_size);

    return (jint);

}

extern "C"

JNIEXPORT jint JNICALL Java_com_speex_lib_Speex_encode

        (JNIEnv *env, jobject obj, jshortArray lin, jint offset, jbyteArray encoded, jint size) {

    jshort buffer[enc_frame_size];

    jbyte output_buffer[enc_frame_size];

    int nsamples = (size-)/enc_frame_size + ;

    int i, tot_bytes = ;

    if (!codec_open)

        return ;

    speex_bits_reset(&ebits);

    for (i = ; i < nsamples; i++) {

        env->GetShortArrayRegion(lin, offset + i*enc_frame_size, enc_frame_size, buffer);

        speex_encode_int(enc_state, buffer, &ebits);

    }

    tot_bytes = speex_bits_write(&ebits, (char *)output_buffer,

                                 enc_frame_size);

    env->SetByteArrayRegion(encoded, , tot_bytes,

                            output_buffer);

    return (jint)tot_bytes;

}

extern "C"

JNIEXPORT jint JNICALL Java_com_speex_lib_Speex_decode

        (JNIEnv *env, jobject obj, jbyteArray encoded, jshortArray lin, jint size) {

    jbyte buffer[dec_frame_size];

    jshort output_buffer[dec_frame_size];

    jsize encoded_length = size;

    if (!codec_open)

        return ;

    env->GetByteArrayRegion(encoded, , encoded_length, buffer);

    speex_bits_read_from(&dbits, (char *)buffer, encoded_length);

    speex_decode_int(dec_state, &dbits, output_buffer);

    env->SetShortArrayRegion(lin, , dec_frame_size,

                             output_buffer);

    return (jint)dec_frame_size;

}

extern "C"

JNIEXPORT jint JNICALL Java_com_speex_lib_Speex_getFrameSize

        (JNIEnv *env, jobject obj) {

    if (!codec_open)

        return ;

    return (jint)enc_frame_size;

}

extern "C"

JNIEXPORT void JNICALL Java_com_speex_lib_Speex_close

        (JNIEnv *env, jobject obj) {

    if (--codec_open != )

        return;

    speex_bits_destroy(&ebits);

    speex_bits_destroy(&dbits);

    speex_decoder_destroy(dec_state);

    speex_encoder_destroy(enc_state);

}
在jni目录下新增Android.mk文件,复制如下内容,Android.mk中记录了待编译的源文件的路
LOCAL_PATH := $(call my-dir)

include $(CLEAR_VARS)

LOCAL_MODULE    := libspeex

LOCAL_CFLAGS = -DFIXED_POINT -DUSE_KISS_FFT -DEXPORT="" -UHAVE_CONFIG_H

LOCAL_C_INCLUDES := $(LOCAL_PATH)/include

#LOCAL_SRC_FILES :=

LOCAL_SRC_FILES :=speex_jni.cpp \

        ./libspeex/bits.c \

        ./libspeex/cb_search.c \

        ./libspeex/exc_10_16_table.c \

        ./libspeex/exc_10_32_table.c \

        ./libspeex/exc_20_32_table.c \

        ./libspeex/exc_5_256_table.c \

        ./libspeex/exc_5_64_table.c \

        ./libspeex/exc_8_128_table.c \

        ./libspeex/filters.c \

        ./libspeex/gain_table_lbr.c \

        ./libspeex/gain_table.c \

        ./libspeex/hexc_10_32_table.c \

        ./libspeex/hexc_table.c \

        ./libspeex/high_lsp_tables.c \

        ./libspeex/kiss_fft.c \

        ./libspeex/kiss_fftr.c \

        ./libspeex/lpc.c \

        ./libspeex/lsp_tables_nb.c \

        ./libspeex/lsp.c \

        ./libspeex/ltp.c \

        ./libspeex/modes_wb.c \

        ./libspeex/modes.c \

        ./libspeex/nb_celp.c \

        ./libspeex/quant_lsp.c \

        ./libspeex/sb_celp.c \

        ./libspeex/smallft.c \

        ./libspeex/speex_callbacks.c \

        ./libspeex/speex_header.c \

        ./libspeex/speex.c \

        ./libspeex/stereo.c \

        ./libspeex/vbr.c \

        ./libspeex/vorbis_psy.c \

        ./libspeex/vq.c \

        ./libspeex/window.c \

include $(BUILD_SHARED_LIBRARY)
在jni下创建Application.mk,并添加如下内容,编译所有平台下的so文件
APP_ABI := all
在jni/include/speex/目录下新增speex_config_types.h文件,复制内容如下
#ifndef __SPEEX_TYPES_H__

#define __SPEEX_TYPES_H__

typedef short spx_int16_t;

typedef unsigned short spx_uint16_t;

typedef int spx_int32_t;

typedef unsigned int spx_uint32_t;

#endif
在命令行输入ndk-build
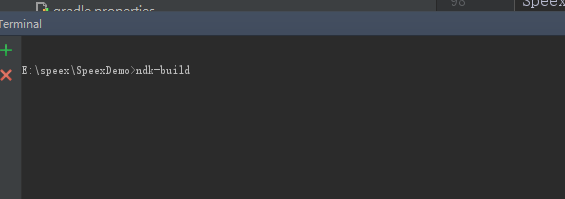
开始编译
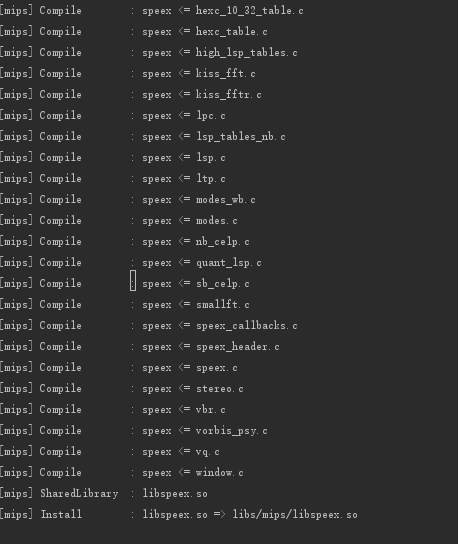
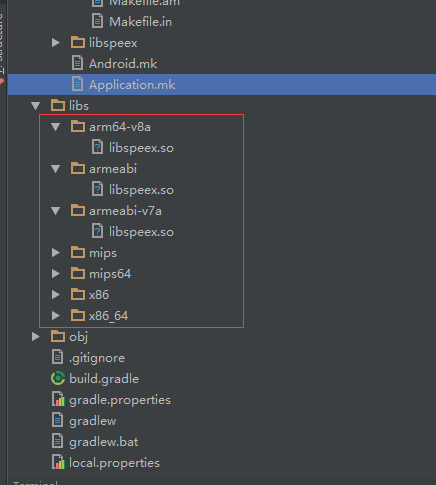
在libs目录下面生成
speex编译的更多相关文章
- 编译Speex生成so库文件(android-speex)
项目中需要用音频格式转换,之前使用VoAacEncoder,部分手机总是莫名崩溃,所以决定不再使用VoAacEncoder,换做Speex来完成格式转换,但是没有找到Speex的库文件,网上介绍的都是 ...
- speex进行音频去噪
应用speex进行音频去噪,speex功能很强大,因为opus的出现,用speex进行编码/解码的人几乎没有了,但是用speex来进行降噪,去除回声,增益还是很多. 这里用speex进行音频去噪,主要 ...
- [原]如何用Android NDK编译FFmpeg
我们知道在Ubuntu下直接编译FFmpeg是很简单的,主要是先执行./configure,接着执行make命令来编译,完了紧接着执行make install执行安装.那么如何使用Android的ND ...
- android源码编译1
一.环境说明: 1.liunx系统:Ubuntu12.04 2.jdk:sun-java6-jdk 3.g++4.5 gcc4.5 二.android源码的目录结构 |-- Makefile |-- ...
- Android - 基于 Speex 的高度封装语音库,0 耦合使用
作者:林冠宏 / 指尖下的幽灵 掘金:https://juejin.im/user/587f0dfe128fe100570ce2d8 博客:http://www.cnblogs.com/linguan ...
- 使用speex动态链接库过程中遇到问题及解决方法
本以为speex的应用程序很容易就能跑起来,可是,实际操作中才发现,这里面暴露 的问题还真不少.看来以后不能眼高手低了,知行合一,这个一定要牢记在心中. speex安装成功后,可以一直无法调用动态链接 ...
- 工欲善其事,必先利其器 软件工具开发关键词 protractor自动化测试工具 RegexBuddy正则 CodeSmith,LightSwitch:代码生成 CheatEngine:玩游戏修改内存值必备神器 ApkIDE:Android反编译工具 Reflector:反编译dll动态链接库
工欲善其事,必先利其器 本文版权归翟士丹(Stan Zhai)和博客园共有,欢迎转载,但未经作者同意必须保留此段声明,且在文章页面明显位置给出原文链接,否则保留追究法律责任的权利. 原文地址:http ...
- Android 基于 Speex 的高度封装语音库,0 耦合,没三方jar包
作者:林冠宏 / 指尖下的幽灵 掘金:https://juejin.im/user/587f0dfe128fe100570ce2d8 博客:http://www.cnblogs.com/linguan ...
- 音频压缩(Speex使用&Opus简介)--转
博客地址:http://blog.csdn.net/kevindgk GitHub地址:https://github.com/KevinDGK/MyAudioDemo 一简介 二局域网语音配置 三Sp ...
随机推荐
- Luogu 3625 [APIO2009]采油区域
想了很久的dp,看了一眼题解之后感觉自己被安排了. 发现从一个矩形中选择三个不相交的正方形一共只有六种取法. 那么我们可以处理出四个值: $f_{i, j}$分别表示以$(i, j)$为右下角,左下角 ...
- 2015年阿里实习生面试Java研发工程师 小记
5月5日,广州,阿里实习生面试,Java研发工程师,完全被虐orz 几乎没有Java项目开发经验,接近零基础,去水了一发,毫无悬念的被刷了..RP也是杠杠的,准备过的题目一个都没被问到,算法题也是一条 ...
- 存储过程自动更新ID
DECLARE @i int --更新题序编号 UPDATE UserAnswer SET @i=@i+,TestOrder=@i WHERE UserScoreID=' //根据ID 累加更新
- [haut] 1281: 邪能炸弹 dp
题目描述 正在入侵艾泽拉斯的古尔丹偶然间得到了一颗邪能炸弹,经过研究,他发现这是一颗威力极其巨大且难以控制的炸弹.但是精通邪能的古尔丹突然有了一个大胆的想法,他对炸弹进行了一些小小的改造.这使得炸弹需 ...
- 「十二省联考 2019」异或粽子——tire树+堆
题目 [题目描述] 小粽是一个喜欢吃粽子的好孩子.今天她在家里自己做起了粽子. 小粽面前有 $n$ 种互不相同的粽子馅儿,小粽将它们摆放为了一排,并从左至右编号为 $1$ 到 $n$.第 $i$ 种馅 ...
- luogu2658 GCD(莫比乌斯反演/欧拉函数)
link 给定整数N,求1<=x,y<=N且Gcd(x,y)为素数的数对(x,y)有多少对. 1<=N<=10^7 (1)莫比乌斯反演法 发现就是YY的GCD,左转YY的GCD ...
- 数据结构42:n个结点构造多少种树
本节要讨论的是当给定 n(n>=0)个结点时,可以构建多少种形态不同的树. 如果两棵树中各个结点的位置都一一对应,可以说这两棵树相似.如果两棵树不仅相似,而且对应结点上的数据也相同,就可以说这两 ...
- There is no row in position 0
更改程序池 管道模式 ---->经典 常见设置问题: 32位启用
- 02 Django web开发-html简介
软件开发和网络 HTML是用于创建网页的标准标记语言 -HTML指的是超文本标记语言 -HTML不是一种编程语言,二十一种标记语言 -是用来描述网页的一种语言 -HTML描述使用标记的网页的结构 -是 ...
- Vue-Router路由Vue-CLI脚手架和模块化开发 之 路由的动态跳转
在上一篇的博文中,实现的跳转是在页面中进行实现的 利用vue-router实例方法,使用js对路由进行动态跳转: 1.router.push:参数为路由对象,跳转到指定路由,跳转后会产生历史记录: & ...