varnish安装和配置
实验环境:CentOS7
Varnish是高性能开源的反向代理服务器和HTTP缓存服务器。
#varnish服务器:172.16.252.142

[root@varnish localhost]#yum -y install varnish

[root@varnish localhost]#cd /etc/varnish

[root@varnish localhost]#ls

default.vcl  secret  varnish.params

#varnish的配置文件

[root@varnish localhost]#vim varnish.params

#varnish需要缓存的服务器端口:

VARNISH_LISTEN_PORT=80

#管理varnish配置文件的工具的端口和地址

VARNISH_ADMIN_LISTEN_ADDRESS=127.0.0.1

VARNISH_ADMIN_LISTEN_PORT=6082

#varnish缓存的两种方式:

VARNISH_STORAGE="malloc,256M"

#VARNISH_STORAGE="file,/data/cache/varnish_cache.bin,2G"
#单服务器的缓存配置:
#
[root@varnish localhost]#vim default.vcl
vcl 4.0; # Default backend definition. Set this to point to your content server.
#定义后端主机
backend default {
.host = "172.16.254.47";
.port = "80";
}
定义purger的访问控制
acl purgers {
"127.0.0.1"/8;
# "127.16.0.0"/16;
} sub vcl_recv {
#被允许的purger才允许清除缓存,否则,提示没有权限
if (req.method == "PURGE")
{
if (client.ip ~ purgers)
{
return(purge);
}
else
{
return(synth(405,"Purge not allowed" + client.ip));
}
} #定义/admin等文件不允许缓存
if (req.url ~ "(?i)^/(admin|login)")
{
return(pass);
}
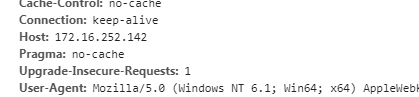
#将客户端的ip访问记录在后端服务器
if (req.restarts == 0)
{
if (req.http.X-Forwarded-For)
{
set req.http.X-Forwarded-For = req.http.X-Forwarded-For+", "+ client.ip;
}
else
{
set req.http.X-Forwarded-For = client.ip;
}
}
}
#图片等静态资源的缓存

sub vcl_backend_response {

    if (beresp.http.cache-control !~ "s-maxage")

    {

        if (bereq.url ~ "(?i)\.(jpg|jpeg|png|txt|gif|css|js)$")

        {

            unset beresp.http.Set-Cookie;

            set beresp.ttl = 3600s;

        }

    }

}

#执行purge操作

sub vcl_purge {

    return(synth(200,"Purged"));

}

#首部添加信息

sub vcl_deliver {

    if (obj.hits>0)

    {

        set resp.http.X-Cache = "Hit via" + server.ip;

        }

    else

     {

        set resp.http.X-Cache = "Miss from" + server.ip;

        }
#后端服务器:

[root@html localhost]#yum -y install httpd

[root@html localhost]#vim /etc/httpd/conf/httpd.conf

#将客户端ip计入访问日志

    LogFormat "%{X-Forwarded-For}i %l %u %t \"%r\" %>s %b \"%{Referer}i\" \"%{User-Agent}i\"" combined

[root@html localhost]#pwd

/var/www/html

[root@html localhost]#ls

#在以下每个目录下新建index.html

admin  index.html  login  test
#启动varnish的配置文件:
[root@~ localhost]#cd /etc/varnish/

[root@varnish localhost]#ls

default.vcl  secret  varnish.params

[root@varnish localhost]#varnishadm -S secret -T 127.0.0.1:6082

200

-----------------------------

Varnish Cache CLI 1.0

-----------------------------

Linux,3.10.0-514.el7.x86_64,x86_64,-smalloc,-smalloc,-hcritbit

varnish-4.0.4 revision 386f712

Type 'help' for command list.

Type 'quit' to close CLI session.

#列出使用的配置文件

vcl.list

200

available       0 boot

active          0 test1

help

200

help [<command>]

ping [<timestamp>]

auth <response>

quit

banner

status

start

stop

vcl.load <configname> <filename>

vcl.inline <configname> <quoted_VCLstring>

vcl.use <configname>

vcl.discard <configname>

vcl.list

param.show [-l] [<param>]

param.set <param> <value>

panic.show

panic.clear

storage.list

#重载新的配置,并命名为test3

vcl.load test3 default.vcl

200

VCL compiled.

#重载成功之后,使用

vcl.use test3

200

VCL 'test3' now active

vcl.list

200

available       0 boot

available       0 test1

active          0 test3
#测试:
#用curl测试purge,配置中允许127.0.0.1的主机进行purge操作

[root@varnish localhost]#curl -X PURGE http://127.0.0.1/index.html

<!DOCTYPE html>

<html>

  <head>

    <title>200 Purged</title>

  </head>

  <body>

    <h1>Error 200 Purged</h1>

    <p>Purged</p>

    <h3>Guru Meditation:</h3>

    <p>XID: 75</p>

    <hr>

    <p>Varnish cache server</p>

  </body>

</html>

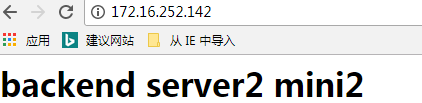
#varnish反代两台服务器时:
[root@varnish localhost]#vim default.vcl

#导入varnish的模块:

import directors;

#定义后端服务器的健康状态检查;

probe healthychk {

#检查的页面地址

    .url = "/index.html";

    .timeout = 5s;

    .window = 8;

    .interval = 2s;

    .threshold = 5;

}

#后端服务器1的命名:default

backend default {

    .host = "172.16.254.47";

    .port = "80";

#引用前面定义的检查策略

    .probe = healthychk;

}

#后端服务器2的命名:imgsrv

backend imgsrv {

    .host = "172.16.253.177";

    .port = "80";

    .probe = healthychk;

}

#启动模块的初始化,添加后端服务器

sub vcl_init {

    new staticsrvs = directors.round_robin();

    staticsrvs.add_backend(default);

    staticsrvs.add_backend(imgsrv);

}

#静态资源的调用设置:

sub vcl_recv {

    if (req.url ~ "(?i)\.(jpg|jpeg|png|gif)$")

    {

        set req.backend_hint = imgsrv;

    } else

    {

        set req.backend_hint = staticsrvs.backend();

    }

#静态资源撤销cookie设置,以便缓存

sub vcl_backend_response {

    if (beresp.http.cache-control !~ "s-maxage")

    {

        if (bereq.url ~ "(?i)\.(jpg|jpeg|png|txt|gif|css|js)$")

        {

            unset beresp.http.Set-Cookie;

            set beresp.ttl = 3600s;

        }

    }

#撤销服务器的私有ip地址以及版本等信息

sub vcl_deliver {

    unset resp.http.Via;

    unset resp.http.X-Varnish;

    unset resp.http.X-Cache;

}

#启动配置文件:

varnish> vcl.load 3 default.vcl

200

VCL compiled.

vcl.use 3

200

VCL '3' now active

vcl.list

200

available       0 boot

available       0 test1

available       0 test3

available       0 1

available       0 2

active          0 3

backend.list

200

Backend name                   Refs   Admin      Probe

default(172.16.254.47,,80)     6      probe      Healthy 8/8

imgsrv(172.16.253.177,,80)     3      probe      Healthy 8/8
#default.vcl文件信息:
#

# This is an example VCL file for Varnish.

#

# It does not do anything by default, delegating control to the

# builtin VCL. The builtin VCL is called when there is no explicit

# return statement.

#

# See the VCL chapters in the Users Guide at https://www.varnish-cache.org/docs/

# and http://varnish-cache.org/trac/wiki/VCLExamples for more examples.

# Marker to tell the VCL compiler that this VCL has been adapted to the

# new 4.0 format.

vcl 4.0;

import directors;

probe healthychk {

    .url = "/index.html";

    .timeout = 5s;

    .window = 8;

    .interval = 2s;

    .threshold = 5;

}

# Default backend definition. Set this to point to your content server.

backend default {

    .host = "172.16.254.47";

    .port = "80";

    .probe = healthychk;

}

backend imgsrv {

    .host = "172.16.253.177";

    .port = "80";

    .probe = healthychk;

}

acl purgers {

    "127.0.0.1"/8;

#    "127.16.0.0"/16;

}

sub vcl_init {

    new staticsrvs = directors.round_robin();

    staticsrvs.add_backend(default);

    staticsrvs.add_backend(imgsrv);

}

sub vcl_recv {

    if (req.url ~ "(?i)\.(jpg|jpeg|png|gif)$")

    {

        set req.backend_hint = imgsrv;

    } else

    {

        set req.backend_hint = staticsrvs.backend();

    }

       if (req.method == "PURGE")

           {

              if (client.ip ~ purgers)

                   {

                           return(purge);

                }

    else

                           {

                              return(synth(405,"Purge not allowed" + client.ip));

             }

 }

    if (req.url ~ "(?i)^/(admin|login)")

     {

        return(pass);

     }

    if (req.restarts == 0)

    {

        if (req.http.X-Forwarded-For)

        {

            set req.http.X-Forwarded-For = req.http.X-Forwarded-For+", "+ client.ip;

        }

        else

        {

            set req.http.X-Forwarded-For = client.ip;

        }

        }

    }

#    if (req.method == "PURGE")

#    {

#        if (client.ip ~ purgers)

#        {

#            return(purge);

#        else

#            {

#                return(synth(405,"Purge not allowed" + client.ip));         }

#        }

#    }

    # Happens before we check if we have this in cache already.

    #

    # Typically you clean up the request here, removing cookies you don't need,

    # rewriting the request, etc.

#}

sub vcl_backend_response {

    if (beresp.http.cache-control !~ "s-maxage")

    {

        if (bereq.url ~ "(?i)\.(jpg|jpeg|png|txt|gif|css|js)$")

        {

            unset beresp.http.Set-Cookie;

            set beresp.ttl = 3600s;

        }

    }

    # Happens after we have read the response headers from the backend.

    #

    # Here you clean the response headers, removing silly Set-Cookie headers

    # and other mistakes your backend does.

    unset beresp.http.Server;

    unset beresp.http.X-Powered-By;

}

sub vcl_purge {

    return(synth(200,"Purged"));

}

sub vcl_deliver {

    if (obj.hits>0)

    {

        set resp.http.X-Cache = "Hit via" + server.ip;

        }

    else

     {

        set resp.http.X-Cache = "Miss from" + server.ip;

        }

    unset resp.http.Via;

    unset resp.http.X-Varnish;

    unset resp.http.X-Cache;

    # Happens when we have all the pieces we need, and are about to send the

    # response to the client.

    #

    # You can do accounting or modifying the final object here.

}
#测试:


varnish安装和配置的更多相关文章
- 高性能HTTP加速器Varnish安装与配置
导读 Varnish是一款高性能且开源的反向代理服务器和HTTP加速器,它采用了全新的软件体系结构,和现在的硬件体系配合紧密.下面就由我给大家简单说说他的安装与配置. 安装 安装pcre 如果没有安装 ...
- 高性能HTTP加速器Varnish安装与配置(包含常见错误)
Varnish是一款高性能的开源HTTP加速器.挪威最大的在线报纸Verdens Gang使用3台Varnish取代了原来的12台Squid,性能竟然比曾经更好.Varnish 的作者Poul-Hen ...
- Varnish安装使用(初学)
本人对varnish也是新手,这里记录一下安装步骤! 环境:centos6.6 varnish安装包下载:wget https://repo.varnish-cache.org/source/varn ...
- 01 . Varnish简介,原理,配置缓存
简介 Varnish是高性能开源的反向代理服务器和HTTP缓存服务器,其功能与Squid服务器相似,都可以用来做HTTP缓存.可以安装 varnish 在任何web前端,同时配置它缓存内容.与传统的 ...
- JDK安装与配置
JDK安装与配置 一.下载 JDK是ORACLE提供免费下载使用的,官网地址:https://www.oracle.com/index.html 一般选择Java SE版本即可,企业版的选择Java ...
- Node.js 教程 01 - 简介、安装及配置
系列目录: Node.js 教程 01 - 简介.安装及配置 Node.js 教程 02 - 经典的Hello World Node.js 教程 03 - 创建HTTP服务器 Node.js 教程 0 ...
- 烂泥:redis3.2.3安装与配置
本文由ilanniweb提供友情赞助,首发于烂泥行天下 想要获得更多的文章,可以关注我的微信ilanniweb 前一段时间写过一篇codis集群的文章,写那篇文章主要是因为当时的项目不支持redis自 ...
- mysql源码包手动安装、配置以及测试(亲测可行)
笔记编者:小波/qq463431476博客首页:http://www.cnblogs.com/xiaobo-Linux/ 记下这篇mysql笔记,望日后有用! redhat6采用centos yum源 ...
- 环境搭建系列-系统安装之centos 6.5安装与配置
按照国际惯例,系列目录先奉上: 系列一:系统安装之centos 6.5安装与配置 系列二:准备工作之Java环境安装 系列三:数据为先之MySQL读写集群搭建 系列四:谈分布式之RabbitMQ集群搭 ...
随机推荐
- 我的Java开发学习之旅------>Java 格式化类(java.util.Formatter)基本用法
本文参考: http://docs.oracle.com/javase/1.5.0/docs/api/java/util/Formatter.html http://www.blogjava.net/ ...
- android ui篇 自己写界面
对于一些较为简单的界面则自己进行写. 在这里就需要了解xml文件中一些基本的属性以及android手机的知识. 一.目前手机屏幕像素密度基本有5种情况.(以下像素密度简称密度) 密度 ldpi mdp ...
- html5 canvas做的图表插件
用highchart的时候发现它是用svg来画图的,那么用canvas来做怎么样的. 以前做AS图表插件的时候,绘制图画主要用容器的Graphics对象来绘制,而canvas的context和Grap ...
- windows下SecureCRT无法使用backspace(空格键)和上下左右键
在使用SecureCRT登陆liunx(我的为CenterOS)系统,发现删除(backspace)键.和上下左右键不起作用,郁闷了很久没有找到解决办法, 今天终于看到了一篇有用的文章,在此记录一下! ...
- golang 获取指定目录下的子文件列表
GO语言按照深度遍历文件 原创 2016年07月20日 09:45:19 标签: go语言 / 遍历 / string 1971 常规方法不使用pathfilepath包 go的filepath包 g ...
- 第二天----列表、深浅拷贝、元组、字符串、算数运算、字典、while
列表 列表是最常用的Python数据类型,它可以作为一个方括号内的逗号分隔值出现. 基本操作: 索引切片追加删除长度切片循环包含 创建.查看列表: 列表中的数字不要加引号,列表的索引从0开始: lis ...
- ios9 3dtouch 博客
http://my.oschina.net/u/2340880/blog/511509#OSC_h3_3
- linux基本使用
(待完善,想到哪就写到哪,目前内容大幅度参考中文man手册) 最重要的命令(man) 在 Linux 下遇到问题,最重要的是要自己寻求帮助, google是个好东西 man 是 Linux 的帮助手册 ...
- 用用OGRE1.74搭建游戏框架(转载)
用OGRE1.74搭建游戏框架(一) 新版的OGRE出来了,不知什么原因抛弃了CEGUI.国内的教程好像也更新比较少了,在官网上还是发现不少资料的,现在参考官网上的一些资料来搭建一个游戏的框架. 参考 ...
- python第六篇:Python复制超大文件、复制二进制文件
Python文件复制 # 写程序实现复制文件的功能 # 要求: # 1. 源文件路径和目标文件路径需要手动输入 # 2. 要考虑文件关闭的问题 # 3. 要考虑复制超大文件的问题 # 4. 要能复制二 ...