python的requests初步使用
转自:http://my.oschina.net/yangyanxing/blog/280029
早就听说requests的库的强大,只是还没有接触,今天接触了一下,发现以前使用urllib,urllib2等方法真是太搓了……
这里写些简单的使用初步作为一个记录
一、安装 http://cn.python-requests.org/en/latest/user/install.html#install
二、发送无参数的get请求
|
1
2
3
4
5
6
7
8
9
10
11
12
13
14
15
|
>>> print r.text{ "args": {}, "headers": { "Accept": "*/*", "Accept-Encoding": "gzip, deflate", "Connection": "close", "Host": "httpbin.org", "User-Agent": "python-requests/2.3.0 CPython/2.6.6 Windows/7", "X-Request-Id": "8a28bbea-55cd-460b-bda3-f3427d66b700" }, "origin": "124.192.129.84", } |
三、发送带参数的get请求,将key与value放入一个字典中,通过params参数来传递,其作用相当于urllib.urlencode
|
1
2
3
4
5
|
>>> import requests>>> pqyload = {'q':'杨彦星'}>>> r.url |
四、发送post请求,通过data参数来传递,
|
1
2
3
4
5
6
7
8
9
10
11
12
13
14
15
16
17
18
19
20
21
22
23
24
25
26
|
>>> payload = {'a':'杨','b':'hello'}>>> print r.text{ "args": {}, "data": "", "files": {}, "form": { "a": "\u6768", "b": "hello" }, "headers": { "Accept": "*/*", "Accept-Encoding": "gzip, deflate", "Connection": "close", "Content-Length": "19", "Content-Type": "application/x-www-form-urlencoded", "Host": "httpbin.org", "User-Agent": "python-requests/2.3.0 CPython/2.6.6 Windows/7", "X-Request-Id": "c81cb937-04b8-4a2d-ba32-04b5c0b3ba98" }, "json": null, "origin": "124.192.129.84", }>>> |
可以看到,post参数已经传到了form里,data不光可以接受字典类型的数据,还可以接受json等格式
|
1
2
3
|
>>> payload = {'a':'杨','b':'hello'}>>> import json |
五、发送文件的post类型,这个相当于向网站上传一张图片,文档等操作,这时要使用files参数
|
1
2
3
|
>>> files = {'file': open('touxiang.png', 'rb')}>>> r = requests.post(url, files=files) |
5.1 定制headers,使用headers参数来传递
|
1
2
3
4
5
6
|
>>> import json>>> payload = {'some': 'data'}>>> headers = {'content-type': 'application/json'}>>> r = requests.post(url, data=json.dumps(payload), headers=headers) |
六、响应内容
6.1 响应状态码
r = requests.get('http://httpbin.org/get')
print r.status_code
6.2 响应头
|
1
2
|
>>> print r.headers{'content-length': '519', 'server': 'gunicorn/18.0', 'connection': 'keep-alive', 'date': 'Sun, 15 Jun 2014 14:19:52 GMT', 'access-control-allow-origin': '*', 'content-type': 'application/json'} |
也可以取到这个个别的响应头用来做一些判断,这里的参数是不区分大小写的
r.headers[‘Content-Type’]
r.headers.get(‘Content-Type’)
6.3 响应内容,前面已经在应用了
r.text
r.content
七、获取响应中的cookies
|
1
2
3
|
>>> r.cookies['BAIDUID']'D5810267346AEFB0F25CB0D6D0E043E6:FG=1' |
也可以自已定义请求的COOKIES
|
1
2
3
4
5
6
7
8
9
10
11
|
>>> cookies = {'cookies_are':'working'}>>> r = requests.get(url,cookies = cookies)>>> >>> print r.text{ "cookies": { "cookies_are": "working" }}>>> |
cookies还有很多,因为目前我也还不是很多,以后再扩充吧
八、使用timeout参数设置超时时间
>>> requests.get('http://github.com', timeout=1)
<Response [200]>
如果将时间设置成非常小的数,如requests.get('http://github.com', timeout=0.001),那么如果在timeout的时间内没有连接,那么将会抛出一个Timeout的异常
九、访问中使用session
先初始化一个session对象,s = requests.Session()
然后使用这个session对象来进行访问,r = s.post(url,data = user)
参考文章 http://blog.csdn.net/iloveyin/article/details/21444613 基本上都是从这扒的代码
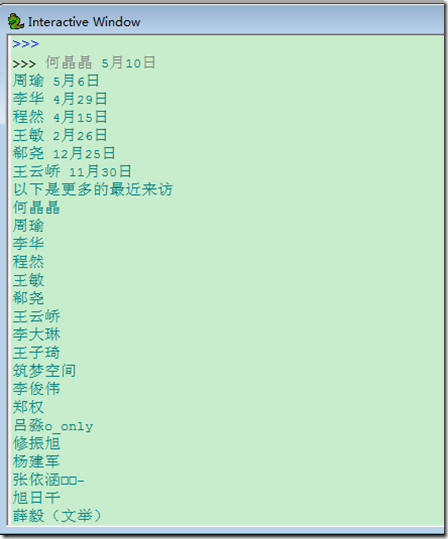
以下通过访问人人网来获取首页中的最近来访问,然后再访问查看更多的来访来读取更多的最近来访
更多的来访就是以带session的访问http://www.renren.com/myfoot.do
|
1
2
3
4
5
6
7
8
9
10
11
12
13
14
15
16
17
18
19
20
21
22
23
24
25
26
27
28
29
|
#coding:utf-8import requestsimport reuser = {'email':'email','password':'pass'}s = requests.Session()r = s.post(url,data = user)html = r.textvisit = []first = re.compile(r'</span><span class="time-tip first-tip"><span class="tip-content">(.*?)</span>')second = re.compile(r'</span><span class="time-tip"><span class="tip-content">(.*?)</span>')third = re.compile(r'</span><span class="time-tip last-second-tip"><span class="tip-content">(.*?)</span>')last = re.compile(r'</span><span class="time-tip last-tip"><span class="tip-content">(.*?)</span>')visit.extend(first.findall(html))visit.extend(second.findall(html))visit.extend(third.findall(html))visit.extend(last.findall(html))for i in visit: print iprint '以下是更多的最近来访'fm = re.compile(r'"name":"(.*?)"')visitmore = fm.findall(vm.text)for i in visitmore: print i |
python的requests初步使用的更多相关文章
- Python爬虫之使用Fiddler+Postman+Python的requests模块爬取各国国旗
介绍 本篇博客将会介绍一个Python爬虫,用来爬取各个国家的国旗,主要的目标是为了展示如何在Python的requests模块中使用POST方法来爬取网页内容. 为了知道POST方法所需要传 ...
- Python——安装requests第三方库
使用pip安装 在cmd下cd到这个目录下C:\Python27\Scripts,然后执行pip install requests 在cmd 命令行执行 E: 进入e盘 cd Python\pr ...
- 关于Python ,requests的小技巧
版权声明:本文为博主原创文章,未经博主允许不得转载. https://blog.csdn.net/xie_0723/article/details/52790786 关于 Python Request ...
- Python之Requests的高级用法
# 高级用法 本篇文档涵盖了Requests的一些更加高级的特性. ## 会话对象 会话对象让你能够跨请求保持某些参数.它也会在同一个Session实例发出的所有请求之间保持cookies. 会话对象 ...
- python的requests快速上手、高级用法和身份认证
https://blog.csdn.net/qq_25134989/article/details/78800209 快速上手 迫不及待了吗?本页内容为如何入门 Requests 提供了很好的指引.其 ...
- Python 安装requests和MySQLdb
Python 安装requests和MySQLdb 2017年10月02日 0.系统版本 0.1 查看系统版本 [root@localhost ~]# uname -a Linux localhost ...
- 【转】使用Python的Requests库进行web接口测试
原文地址:使用Python的Requests库进行web接口测试 1.Requests简介 Requests 是使用 Apache2 Licensed 许可证的 HTTP 库.用 Python 编写, ...
- 转来的——python webdriver自动化测试初步印象——转来的
python webdriver自动化测试初步印象 以下示例演示启动firefox,浏览google.com,搜索Cheese,等待搜索结果,然后打印出搜索结果页的标题 from selenium i ...
- Python+Unittest+Requests+PyMysql+HTMLReport 接口自动化框架
整体框架使用的是:Python+Unittest+Requests+PyMysql+HTMLReport 多线程并发模式 主要依赖模块 Unittest.Requests.PyMysql.HTMLR ...
随机推荐
- POJ1273 Drainage Ditches (网络流)
Drainage Ditches Time Limit: 1000MS Memor ...
- [BZOJ3237][AHOI2013]连通图(分治并查集)
3237: [Ahoi2013]连通图 Time Limit: 20 Sec Memory Limit: 512 MBSubmit: 1736 Solved: 655[Submit][Status ...
- Tiny 6410的Linux学习总结!
1.Tiny6410的Linux系统修改IP地址: vi /etc/eth0-setting 2.Ubuntu14.04自动以root身份登录系统: /etc/lightdm/lig ...
- 在VisualStudio 工具箱中隐藏用户控件
当我们创建一个用户控件后,VisualStudio会自动将其添加到工具箱中,本来这是一个比较贴心的设计.但是,有的时候,我们并不想将用户控件放到工具箱中. 例如:在WPF中,为了避免一个页面的控件过多 ...
- mysql的三大范式
关系数据库的几种设计范式介绍: 第一范式:确保每列的原子性(强调的是列的原子性,即列不能够再分成其他几列). 如果每列(或者每个属性)都是不可再分的最小数据单元(也称为最小的原子单元),则满足第一范式 ...
- [Erlang危机](4.1)作业控制模式
原创文章,转载请注明出处:服务器非业余研究http://blog.csdn.net/erlib 作者Sunface 联系邮箱:cto@188.com Job Control Mode 作业控制模式 T ...
- Spring整合Hibernate的时候使用hibernate.cfg.xml
Spring整合Hibernate其实也就是把Hibernate的SessionFactory对象封装成:org.springframework.orm.hibernate3.LocalSession ...
- 了解Linux实时内核
了解Xenomai过程中,对现阶段的RTOS进行总结如下: 把现阶段的RTOS分成两个阵营: 非Linux阵营:VxWorks,RTEMS Linux阵营 :RT-linux,Preempt-rt,W ...
- Shell--Bash shell的操作环境
一.路径与命令查找顺序 1.以相对/绝对路径执行命令,例如“/bin/ls”或“./ls”; 2.由alias找到该命令来执行 3.由bash内置的(builtin)命令来执行 4.通过$PATH这个 ...
- ASIHttpRequest请求时的默认编码
在ASIHttpRequest.m文件 中的 - (id)initWithURL:(NSURL *)newURL方法中找到 [self setDefaultResponseEncoding:NSISO ...