12_CXF入门
【CXF】
Apache CXF = Celtix + Xfire,开始叫 Apache CeltiXfire,后来更名为 Apache CXF 了,以下简称为 CXF。Apache CXF 是一个开源的 web Services 框架,CXF 帮助您构建和开发 web Services ,它支持多种协议,比如:SOAP1.1,1,2、XML/HTTP、RESTful HTTP 或者 CORBA。
CXF是基于SOA总线结构的,依靠Spring完成模块的集成,实现SOA方式。
灵活的部署:可以运行有Tomcat、Jboss、Jetty(内置)、WebLogic上面。
【环境配置】
下载apache-cxf-2.7.18版本

环境变量配置:
CXF_HOME= D:\Program Files\apache-cxf-2.7.18

Path =    %CXF_HOME%\bin;

CLASSPATH=%CXF_HOME%\lib\cxf-manifest.jar
【创建CXF工程流程】
第一步:创建java工程
第二步:将CXF的jar包加入工程
第三步:创建服务接口和服务实现类(创建服务接口和服务类的方法同上篇的描述,编写SEI及SEI的实现)
【第一个CXF程序】
【服务端工程截图】

【WeatherModel.java】
package com.Higgin.ws.pojo;

import java.util.Date;

public class WeatherModel {

    //天气概况

    private String detail;

    //日期

    private Date date;

    //最高温度

    private  int  temperature_max;

    //最低温度

    private int temperature_min;

    //忽略get/set方法

}
【WeatherInterface.java】
注意:CXF开发SEI需要将@WebService注解放在接口中(之前是在接口实现类中)
package com.Higgin.ws.service;

import java.util.List;

import javax.jws.WebParam;

import javax.jws.WebResult;

import javax.jws.WebService;

import javax.xml.ws.BindingType;

import com.Higgin.ws.pojo.WeatherModel;

@WebService(

        targetNamespace="http://weather.Higgin.com/",//指定wsdl的命名空间

        name="WeatherInterface",                    //指定portType的名称

        portName="WeatherInterfacePort",            //指定port的名称

        serviceName="WeatherService"                //服务视图的名称

        //endpointInterface="com.Higgin.ws.service.WeatherInterface" //指定哪个接口中方法要发布成WebService,此时接口中也要加上@WebService注解

)

public interface WeatherInterface {

    public @WebResult(name="result") List<WeatherModel> queryWeather(@WebParam(name="cityName") String cityName);

}
【WeatherInterfaceImpl.java】
package com.Higgin.ws.service;

import java.util.ArrayList;

import java.util.Calendar;

import java.util.Date;

import java.util.List;

import com.Higgin.ws.pojo.WeatherModel;

//这里没有@WebService注解!!!!!

public class WeatherInterfaceImpl implements WeatherInterface{

    @Override

    public List<WeatherModel> queryWeather(String cityName) {

        //构造三天天气

        List<WeatherModel> list =new ArrayList<WeatherModel>();

        Calendar calendar=Calendar.getInstance();

        int day=calendar.get(Calendar.DATE);

        WeatherModel weatherModel_1=new WeatherModel();

        weatherModel_1.setDetail("晴天");

        weatherModel_1.setDate(new Date());

        weatherModel_1.setTemperature_max(10);

        weatherModel_1.setTemperature_min(-10);

        WeatherModel weatherModel_2=new WeatherModel();

        weatherModel_2.setDetail("阴天");

        calendar.set(Calendar.DATE, day+1);

        weatherModel_2.setDate(calendar.getTime());

        weatherModel_2.setTemperature_max(6);

        weatherModel_2.setTemperature_min(-2);

        WeatherModel weatherModel_3=new WeatherModel();

        weatherModel_3.setDetail("晴天");

        calendar.set(Calendar.DATE, day+2);

        weatherModel_3.setDate(calendar.getTime());

        weatherModel_3.setTemperature_max(30);

        weatherModel_3.setTemperature_min(3);

        list.add(weatherModel_1);

        list.add(weatherModel_2);

        list.add(weatherModel_3);

        return list;

    }

}
【WeatherServer.java】发布服务代码
package com.Higgin.ws.service;

import org.apache.cxf.jaxws.JaxWsServerFactoryBean;

public class WeatherServer {

    public static void main(String[] args) {

        //Endpoint.publish("http://127.0.0.1:12345/weather", new WeatherInterfaceImpl());

        //使用jaxWs发布SOAP协议的WebService

        JaxWsServerFactoryBean jaxWsServerFactoryBean=new JaxWsServerFactoryBean();

        //指定WebService地址

        jaxWsServerFactoryBean.setAddress("http://127.0.0.1:12345/weather");

        //指定portType

        jaxWsServerFactoryBean.setServiceClass(WeatherInterface.class);

        //指定服务类对象

        jaxWsServerFactoryBean.setServiceBean(new WeatherInterfaceImpl());

        //发布服务

        jaxWsServerFactoryBean.create();

    }

}
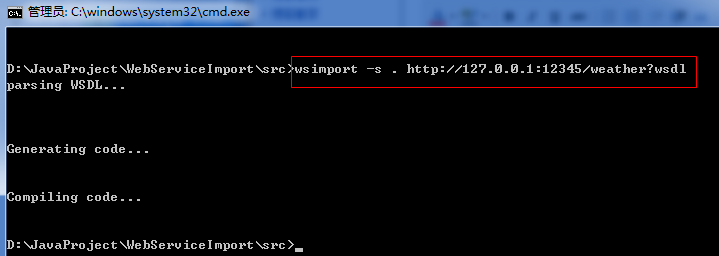
【运行服务代码之后,使用Wsimport生成客户端代码,并导入客户端】
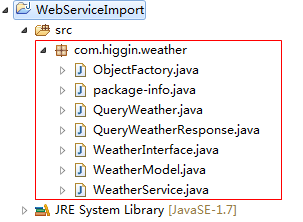
【客户端工程截图】

【WeatherClient.java】
package com.higgin.weather.client;

import java.text.SimpleDateFormat;

import java.util.Date;

import java.util.List;

import org.apache.cxf.jaxws.JaxWsProxyFactoryBean;

import com.higgin.weather.WeatherInterface;

import com.higgin.weather.WeatherModel;

public class WeatherClient {

    public static void main(String[] args) {

        //jaxWsProxyFactoryBean调用WebService服务端

        JaxWsProxyFactoryBean jaxWsProxyFactoryBean=new JaxWsProxyFactoryBean();

        //调用地址

        jaxWsProxyFactoryBean.setAddress("http://127.0.0.1:12345/weather?wsdl");

        //设置portType

        jaxWsProxyFactoryBean.setServiceClass(WeatherInterface.class);

        //创建portType

        WeatherInterface weatherInterface=(WeatherInterface) jaxWsProxyFactoryBean.create();

        //调用portType方法

        List<WeatherModel> list=weatherInterface.queryWeather("杭州");

        for(WeatherModel weatherModel:list){

            System.out.println(weatherModel.getDetail());

            Date date=weatherModel.getDate().toGregorianCalendar().getTime();

            System.out.println(new SimpleDateFormat("yyyy-MM-dd").format(date));

            System.out.println(weatherModel.getTemperatureMax());

            System.out.println(weatherModel.getTemperatureMin());

        }

    }

}
【运行结果】

12_CXF入门的更多相关文章
- Angular2入门系列教程7-HTTP(一)-使用Angular2自带的http进行网络请求
上一篇:Angular2入门系列教程6-路由(二)-使用多层级路由并在在路由中传递复杂参数 感觉这篇不是很好写,因为涉及到网络请求,如果采用真实的网络请求,这个例子大家拿到手估计还要自己写一个web ...
- ABP入门系列(1)——学习Abp框架之实操演练
作为.Net工地搬砖长工一名,一直致力于挖坑(Bug)填坑(Debug),但技术却不见长进.也曾热情于新技术的学习,憧憬过成为技术大拿.从前端到后端,从bootstrap到javascript,从py ...
- Oracle分析函数入门
一.Oracle分析函数入门 分析函数是什么?分析函数是Oracle专门用于解决复杂报表统计需求的功能强大的函数,它可以在数据中进行分组然后计算基于组的某种统计值,并且每一组的每一行都可以返回一个统计 ...
- Angular2入门系列教程6-路由(二)-使用多层级路由并在在路由中传递复杂参数
上一篇:Angular2入门系列教程5-路由(一)-使用简单的路由并在在路由中传递参数 之前介绍了简单的路由以及传参,这篇文章我们将要学习复杂一些的路由以及传递其他附加参数.一个好的路由系统可以使我们 ...
- Angular2入门系列教程5-路由(一)-使用简单的路由并在在路由中传递参数
上一篇:Angular2入门系列教程-服务 上一篇文章我们将Angular2的数据服务分离出来,学习了Angular2的依赖注入,这篇文章我们将要学习Angualr2的路由 为了编写样式方便,我们这篇 ...
- Angular2入门系列教程4-服务
上一篇文章 Angular2入门系列教程-多个组件,主从关系 在编程中,我们通常会将数据提供单独分离出来,以免在编写程序的过程中反复复制粘贴数据请求的代码 Angular2中提供了依赖注入的概念,使得 ...
- wepack+sass+vue 入门教程(三)
十一.安装sass文件转换为css需要的相关依赖包 npm install --save-dev sass-loader style-loader css-loader loader的作用是辅助web ...
- wepack+sass+vue 入门教程(二)
六.新建webpack配置文件 webpack.config.js 文件整体框架内容如下,后续会详细说明每个配置项的配置 webpack.config.js直接放在项目demo目录下 module.e ...
- wepack+sass+vue 入门教程(一)
一.安装node.js node.js是基础,必须先安装.而且最新版的node.js,已经集成了npm. 下载地址 node安装,一路按默认即可. 二.全局安装webpack npm install ...
随机推荐
- python3使用PyMysql连接mysql数据库
python语言的3 x完全不向前兼容,导致我们在python2 x中可以正常使用的库,到了python3就用不了了 比如说mysqldb目前MySQLdb并不支持python3 python语言的3 ...
- 在线性级别时间内找出无序序列中的第k个元素
在一个无序序列中找出第k个元素,对于k很小或者很大时可以采取特殊的方法,比如用堆排序来实现 .但是对于与序列长度N成正比的k来说,就不是一件容易的事了,可能最容易想到的就是先将无序序列排序再遍历即可找 ...
- ZZTHX-注意点
遇到刷卡器加密错误和后台解密不了的问题确实不太好解决,也有加密后的数据返回,可是后台总是解密不了.在这里我首先要感谢一下我的同事,在他们的帮助下,项目顺利完成了.有以下注意点现汇总如下: 1.密码加密 ...
- Upcase 将edit1中的每个字符串改为首字母大写
//将edit1中的每个字符串改为首字母大写 procedure TForm1.Edit1KeyPress(Sender: TObject; var Key: Char);begin with ...
- CentOS命令行无线上网
(1)首先关闭开发板的有线网卡[root@FriendlyARM /]# ifconfig eth0 down(2)加载USB WiFi无线网卡[root@FriendlyARM /]# ifconf ...
- IOS开发之——颜色设置
颜色设置: 指定RGB,參数是:红.绿.黄.透明度,范围是0-1 + (UIColor *)colorWithRed:(CGFloat)red green:(CGFloat)green blue:(C ...
- C 栈顺序存储
// seqstack.h #ifndef _MY_SEQSTACK_H_ #define _MY_SEQSTACK_H_ typedef void SeqStack; SeqStack* SeqSt ...
- Python built-in函数的源码实现定位
http://blog.nsfocus.net/locate-python-built-in-function/
- java_Cookie_example(你上次访问的时间)
public void doGet(HttpServletRequest request, HttpServletResponse response) throws ServletException, ...
- cocos2dx 公告效果
第一种方法: http://blog.csdn.net/jackystudio/article/details/12991977 [玩转cocos2d-x之十六]滚动字幕和公告 第二种方法: http ...