Python—Pytorch学习-RNN(一)
前言
有好几个月没搞神经网络代码了,期间也就是回顾了两边之前的文字。
不料,对nn,cnn的理解反而更深入了-_-!。
修改
《零基础学习人工智能—Python—Pytorch学习(四)》,关于Linear的理解是错误的,已修改。
RNN
RNN是Recurrent Neural Network的缩写。中文叫循环神经网络。
RNN是在NN的基础上的扩展。
我们知道在训练NN的时候,要传递一个待训练的tensor。RNN简单来说就是在传递tensor的同时,再传递一个hidden。
这个hidden是哪来的?它是上一轮训练时,返回y_predict的同时,返回的(我们之前写NN只会返回y_predict,现在要多返回一个hidden)。
如果没有上一轮,那hidden就等于空的tensor。
代码实现
定义RNN
class RNN(nn.Module):

    # implement RNN from scratch rather than using nn.RNN

    def __init__(self, input_size, hidden_size, output_size):

        super(RNN, self).__init__()

        self.hidden_size = hidden_size

        self.i2h = nn.Linear(input_size + hidden_size, hidden_size)

        self.i2o = nn.Linear(input_size + hidden_size, output_size)

        self.softmax = nn.LogSoftmax(dim=1)

    def forward(self, input_tensor, hidden_tensor):

        combined = torch.cat((input_tensor, hidden_tensor), 1)

        hidden = self.i2h(combined) #input to hidden=i2h

        output = self.i2o(combined) #input to output=i2o

        output = self.softmax(output)

        return output, hidden

    def init_hidden(self):

        return torch.zeros(1, self.hidden_size)
代码分析
init
init函数增加了一个参数hidden_size。我们知道init函数是接受x的列和y_predict的列的,x的列是input,y_predict的列是输出。
现在我们增加了hidden_size,他是hidden层的tensor的列。
我们在使用linear的时候,会把input_size和hidden_size相加,因为,我们后面再前向传播的时候,也会把x的tensor和hidden的tensor组合成一个向量。
forward
forward函数,我们先看return。
return多返回了一个对象——hidden,hidden是一个tensor,是执行linear(i2h)时的output,他也是根据x进行线性变换后的tensor,因为不是最后输出的tensor,所以他叫做hidden,而最后输出的output的tensor叫做y_predict。
我们在看forward的第一行,combined = torch.cat((input_tensor, hidden_tensor), 1)。
这是把tensor变量input_tensor和hidden_tensor给合并成了一个tensor,使用的是torch.cat函数。参数1是指按列的方向合并。
即input_tensor如果是(3,5),hidden_tensor是(3,2),我们将得到一个(3,7),相当与把hidden的每一行的值取出来,添加进相同行的input_tensor里。
所以我们上面的init里,初始化linear的第一个参数(x的列)是input_size + hidden_size。
定义工具函数
import io

import os

import unicodedata

import string

import glob

import torch

import random

# alphabet small + capital letters + " .,;'"

ALL_LETTERS = string.ascii_letters + " .,;'"

N_LETTERS = len(ALL_LETTERS)

# Turn a Unicode string to plain ASCII, thanks to https://stackoverflow.com/a/518232/2809427

def unicode_to_ascii(s):

    return ''.join(

        c for c in unicodedata.normalize('NFD', s)

        if unicodedata.category(c) != 'Mn'

        and c in ALL_LETTERS

    )

def load_data():

    # Build the category_lines dictionary, a list of names per language

    category_lines = {}

    all_categories = []

    def find_files(path):

        return glob.glob(path)

    # Read a file and split into lines

    def read_lines(filename):

        lines = io.open(filename, encoding='utf-8').read().strip().split('\n')

        return [unicode_to_ascii(line) for line in lines]

    for filename in find_files('data/names/*.txt'):

        category = os.path.splitext(os.path.basename(filename))[0]

        all_categories.append(category)

        lines = read_lines(filename)

        category_lines[category] = lines

    return category_lines, all_categories

"""

To represent a single letter, we use a “one-hot vector” of

size <1 x n_letters>. A one-hot vector is filled with 0s

except for a 1 at index of the current letter, e.g. "b" = <0 1 0 0 0 ...>.

To make a word we join a bunch of those into a

2D matrix <line_length x 1 x n_letters>.

That extra 1 dimension is because PyTorch assumes

everything is in batches - we’re just using a batch size of 1 here.

"""

# Find letter index from all_letters, e.g. "a" = 0

def letter_to_index(letter):

    return ALL_LETTERS.find(letter)

# Just for demonstration, turn a letter into a <1 x n_letters> Tensor

def letter_to_tensor(letter):

    tensor = torch.zeros(1, N_LETTERS)

    tensor[0][letter_to_index(letter)] = 1

    return tensor

# Turn a line into a <line_length x 1 x n_letters>,

# or an array of one-hot letter vectors

def line_to_tensor(line):

    tensor = torch.zeros(len(line), 1, N_LETTERS)

    for i, letter in enumerate(line):

        tensor[i][0][letter_to_index(letter)] = 1

    return tensor

def random_training_example(category_lines, all_categories):

    def random_choice(a):

        random_idx = random.randint(0, len(a) - 1)

        return a[random_idx]

    category = random_choice(all_categories)

    line = random_choice(category_lines[category])

    category_tensor = torch.tensor([all_categories.index(category)], dtype=torch.long)

    line_tensor = line_to_tensor(line)

    return category, line, category_tensor, line_tensor

if __name__ == '__main__':

    print(ALL_LETTERS)

    print(unicode_to_ascii('Ślusàrski'))

    category_lines, all_categories = load_data()

    print(category_lines['Italian'][:5])

    print(letter_to_tensor('J')) # [1, 57]

    print(line_to_tensor('Jones').size()) # [5, 1, 57]
代码分析
string.ascii_letters 是一个字符串常量,它包含了所有 ASCII 字母,即小写字母 'abcdefghijklmnopqrstuvwxyz' 和大写字母 'ABCDEFGHIJKLMNOPQRSTUVWXYZ' 的组合
letter_to_tensor函数:是把入参的字母转成tensor,tensor的shape是(1,57),后面我们使用该向量做神经网络的输入。
one-hot 向量
letter_to_tensor函数输出是tensor被称为one-hot向量,直译就是一个热点向量,即向量里就一个值是有意义的值。
【one-hot向量】就是一行N列的向量,列的值为1时,该列的位置,就是字母在字符串的位置。
如果我们有以下字母表,共27个字符(26个字母 + 空格):
ALL_LETTERS = "abcdefghijklmnopqrstuvwxyz "
转成one-hot 向量,就会如下图模式分配。

load_data函数:查询一个文件夹下的全部文件,然后把文件名全部取出来,组成集合,然后把文件的内容取出来,结合文件的名字,组成字典。
glob.glob:系统函数,查询指定目录下的指定文件。
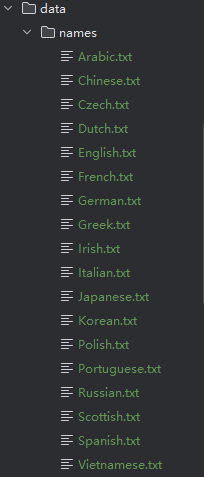
data.names文件夹如下:
RNN前向传播
category_lines, all_categories = load_data()

n_categories = len(all_categories)

n_hidden = 128

print("N_LETTERS",N_LETTERS)

rnn = RNN(N_LETTERS, n_hidden, n_categories) # RNN(57,128,18) 18是18个国家即18个类别

input_tensor = letter_to_tensor('A') # 把A转成tensor(1,57)

hidden_tensor = rnn.init_hidden()

output, next_hidden = rnn(input_tensor, hidden_tensor)

input_tensor = line_to_tensor('Albert')

hidden_tensor = rnn.init_hidden()

output, next_hidden = rnn(input_tensor[0], hidden_tensor)

def category_from_output(output):

    category_idx = torch.argmax(output).item()

    return all_categories[category_idx]

print(category_from_output(output))
代码分析
torch.argmax(output).item()是取出tensor里的最大值,其最大值的索引。
这里,我们通过整个RNN的前向传播,得到了一个output,即通过线性转换,我们得到y_predict,然后我们找到y_predict里最大的值的索引,我们认为,我们这个索引对应国家集合里对应索引的国家名,就是我们预测的我们输入的名字(实际输入的是字母)的所属国家。
完整代码:
import threading

import torch

import torch.nn as nn

from utils import ALL_LETTERS, N_LETTERS

from utils import load_data, letter_to_tensor, line_to_tensor, random_training_example

def category_from_output(output):

    category_idx = torch.argmax(output).item()

    return all_categories[category_idx]

class RNN(nn.Module):

    # implement RNN from scratch rather than using nn.RNN

    def __init__(self, input_size, hidden_size, output_size):

        super(RNN, self).__init__()

        self.hidden_size = hidden_size

        self.i2h = nn.Linear(input_size + hidden_size, hidden_size)

        self.i2o = nn.Linear(input_size + hidden_size, output_size)

        self.softmax = nn.LogSoftmax(dim=1)

    def forward(self, input_tensor, hidden_tensor):

        combined = torch.cat((input_tensor, hidden_tensor), 1)

        hidden = self.i2h(combined) #input to hidden=i2h

        output = self.i2o(combined) #input to output=i2o

        output = self.softmax(output)

        return output, hidden

    def init_hidden(self):

        return torch.zeros(1, self.hidden_size)

category_lines, all_categories = load_data()

n_categories = len(all_categories)

n_hidden = 128

print("N_LETTERS",N_LETTERS)

rnn = RNN(N_LETTERS, n_hidden, n_categories) # RNN(57,128,18) 18是18个国家即18个类别

input_tensor = letter_to_tensor('A') # 把A转成tensor(1,57)

hidden_tensor = rnn.init_hidden()

output, next_hidden = rnn(input_tensor, hidden_tensor)

print(category_from_output(output))

input_tensor = line_to_tensor('Albert')

hidden_tensor = rnn.init_hidden()

output, next_hidden = rnn(input_tensor[0], hidden_tensor)

print(category_from_output(output))
使用RNN训练及预测
定义训练函数
def train(line_tensor, category_tensor):

    hidden = rnn.init_hidden()

    for i in range(line_tensor.size()[0]):

        output, hidden = rnn(line_tensor[i], hidden)

    loss = criterion(output, category_tensor)

    optimizer.zero_grad()

    loss.backward()

    optimizer.step()

    return output, loss.item()
代码分析
入参line_tensor是一个tesnor,shape是(n,1,57),即,是一个字符串转成n个one-hot向量。他是一个名字的字符串。
入参category_tensor是真实的y值,这里他的shape是tensor(1),即,这个名字的真实国家的索引。
然后我们通过循环执行output, hidden = rnn(line_tensor[i], hidden),把每个字母都在rnn里进行线性变换,这里每次都会把hidden返回,然后下次调用rnn,会把hideen传递过去,形成循环网络。
最后输出的output是个1行18列的tensor,1行是因为我们输出的x是1行,18列是因为我们创建rnn时,指定了18列的输出。
然后我们执行损失函数,loss = criterion(output, category_tensor),计算损失值,损失函数有很多种。(我们可以简单这样理解损失函数的运行逻辑,上面通过线性计算把X转成了tensor(1,18),这个tensor是y_predict,现在我们计算y_predicd与真y的差,在把结果平方,在求平均数,反正就是计算出一个数,这个数如果是2,3,那就代表我们的模型错的很离谱)
损失值求完,我们就可以使用损失值进行逆向传播了loss.backward()。这里loss是触发逆向传播的,也就是计算梯度,也就是求偏导数,之所以是loss触发,是因为loss本身是通过函数计算出来的,而我们求梯度,是对这个求loss的函数偏导,但是loss值,并不参与求偏导,所以loss是触发逆向传播的启点。
完整代码
import threading

import torch

import torch.nn as nn

import matplotlib.pyplot as plt

from utils import ALL_LETTERS, N_LETTERS

from utils import load_data, letter_to_tensor, line_to_tensor, random_training_example

def category_from_output(output):

    category_idx = torch.argmax(output).item()

    return all_categories[category_idx]

class RNN(nn.Module):

    # implement RNN from scratch rather than using nn.RNN

    def __init__(self, input_size, hidden_size, output_size):

        super(RNN, self).__init__()

        self.hidden_size = hidden_size

        self.i2h = nn.Linear(input_size + hidden_size, hidden_size)

        self.i2o = nn.Linear(input_size + hidden_size, output_size)

        self.softmax = nn.LogSoftmax(dim=1)

    def forward(self, input_tensor, hidden_tensor):

        combined = torch.cat((input_tensor, hidden_tensor), 1)

        hidden = self.i2h(combined) #input to hidden=i2h

        output = self.i2o(combined) #input to output=i2o

        output = self.softmax(output)

        return output, hidden

    def init_hidden(self):

        return torch.zeros(1, self.hidden_size)

category_lines, all_categories = load_data()

# print("category_lines",category_lines)

# print("all_categories",all_categories)

n_categories = len(all_categories)

n_hidden = 128

rnn = RNN(N_LETTERS, n_hidden, n_categories)

criterion = nn.NLLLoss()

learning_rate = 0.005

optimizer = torch.optim.SGD(rnn.parameters(), lr=learning_rate)

def train(line_tensor, category_tensor):

    hidden = rnn.init_hidden()

    for i in range(line_tensor.size()[0]):

        output, hidden = rnn(line_tensor[i], hidden)

    loss = criterion(output, category_tensor)

    optimizer.zero_grad()

    loss.backward()

    optimizer.step()

    return output, loss.item()

current_loss = 0

all_losses = []

plot_steps, print_steps = 1000, 5000

n_iters = 100000

for i in range(n_iters):

    category, line, category_tensor, line_tensor = random_training_example(category_lines, all_categories) # category=国家名 line=这个国家下的随机一个名字 category_tensor=国家名索引值转换成的tensor(1) line_tensor=名字转换成的tensor(n,1,57)

    output, loss = train(line_tensor, category_tensor)

    current_loss += loss

    if (i+1) % plot_steps == 0:

        all_losses.append(current_loss / plot_steps)

        current_loss = 0

    if (i+1) % print_steps == 0:

        guess = category_from_output(output)

        correct = "CORRECT" if guess == category else f"WRONG ({category})"

        print(f"{i+1} {(i+1)/n_iters*100} {loss:.4f} {line} / {guess} {correct}")

def show():

    plt.figure()

    plt.plot(all_losses)

    plt.show()

show()

def predict(input_line):

    print(f"\n> {input_line}")

    with torch.no_grad():

        line_tensor = line_to_tensor(input_line)

        hidden = rnn.init_hidden()

        for i in range(line_tensor.size()[0]):

            output, hidden = rnn(line_tensor[i], hidden)

        guess = category_from_output(output)

        print("guess:",guess)

while True:

    sentence = input("Input:")

    if sentence == "quit":

        break

    predict(sentence)
到此,Python—Pytorch学习-RNN(一)就介绍完了。
参考网站:https://github.com/patrickloeber/pytorch-examples/tree/master/rnn-name-classification
注:此文章为原创,任何形式的转载都请联系作者获得授权并注明出处!

若您觉得这篇文章还不错,请点击下方的【推荐】,非常感谢!
https://www.cnblogs.com/kiba/p/18844861
Python—Pytorch学习-RNN(一)的更多相关文章
- 7大python 深度学习框架的描述及优缺点绍
Theano https://github.com/Theano/Theano 描述: Theano 是一个python库, 允许你定义, 优化并且有效地评估涉及到多维数组的数学表达式. 它与GPUs ...
- 新手必备 | 史上最全的PyTorch学习资源汇总
目录: PyTorch学习教程.手册 PyTorch视频教程 PyTorch项目资源 - NLP&PyTorch实战 - CV&PyTorch实战 PyTorch论 ...
- Day1 Python基础学习
一.编程语言分类 1.简介 机器语言:站在计算机的角度,说计算机能听懂的语言,那就是直接用二进制编程,直接操作硬件 汇编语言:站在计算机的角度,简写的英文标识符取代二进制去编写程序,本质仍然是直接操作 ...
- Day1 Python基础学习——概述、基本数据类型、流程控制
一.Python基础学习 一.编程语言分类 1.简介 机器语言:站在计算机的角度,说计算机能听懂的语言,那就是直接用二进制编程,直接操作硬件 汇编语言:站在计算机的角度,简写的英文标识符取代二进制去编 ...
- 【深度学习】Pytorch学习基础
目录 pytorch学习 numpy & Torch Variable 激励函数 回归 区分类型 快速搭建法 模型的保存与提取 批训练 加速神经网络训练 Optimizer优化器 CNN MN ...
- Pytorch学习记录-torchtext和Pytorch的实例( 使用神经网络训练Seq2Seq代码)
Pytorch学习记录-torchtext和Pytorch的实例1 0. PyTorch Seq2Seq项目介绍 1. 使用神经网络训练Seq2Seq 1.1 简介,对论文中公式的解读 1.2 数据预 ...
- Pytorch学习--编程实战:猫和狗二分类
Pytorch学习系列(一)至(四)均摘自<深度学习框架PyTorch入门与实践>陈云 目录: 1.程序的主要功能 2.文件组织架构 3. 关于`__init__.py` 4.数据处理 5 ...
- Python基础学习之环境搭建
Python如今成为零基础编程爱好者的首选学习语言,这和Python语言自身的强大功能和简单易学是分不开的.今天我们将带领Python零基础的初学者完成入门的第一步——环境搭建.本文会先来区分几个在P ...
- [深度学习] Pytorch学习(一)—— torch tensor
[深度学习] Pytorch学习(一)-- torch tensor 学习笔记 . 记录 分享 . 学习的代码环境:python3.6 torch1.3 vscode+jupyter扩展 #%% im ...
- 【原】Learning Spark (Python版) 学习笔记(三)----工作原理、调优与Spark SQL
周末的任务是更新Learning Spark系列第三篇,以为自己写不完了,但为了改正拖延症,还是得完成给自己定的任务啊 = =.这三章主要讲Spark的运行过程(本地+集群),性能调优以及Spark ...
随机推荐
- JMeter非GUI模式执行,jtl文件请求与响应数据为空?这里有答案!
JMeter非GUI模式执行,jtl文件请求与响应数据为空?这里有答案! 问题描述 在使用JMeter进行性能测试时,很多用户会选择非GUI(图形用户界面)模式来执行测试,因为这样可以减少客户端的负担 ...
- Nmap 概述及端口状态解析
Nmap 概述及端口状态解析 Nmap概述 Nmap是一款功能强大的网络探测和安全扫描工具,它允许系统管理员和网络安全专家对网络进行详尽的扫描,以获取关于网络主机及其所提供服务的详细信息. Nmap不 ...
- .NET周刊【2月第1期 2025-02-02】
国内文章 dotnet 9 已知问题 默认开启 CET 导致进程崩溃 https://www.cnblogs.com/lindexi/p/18700406 本文记录 dotnet 9 的一个已知且当前 ...
- Spring单元测试(一)入门与实践
问题:如何快速测试,而不是每次测试都要重启应用? 目标:尽量只测试局部代码 不同的测试 软件工程中分为:单元测试.集成测试.功能测试.系统测试.其中功能测试和系统测试一般是测试人员的责任,但单元测试和 ...
- Paxos算法:如何解决分布式系统中的共识问题?
背景 Paxos 算法是 Leslie Lamport(莱斯利·兰伯特)在 1990 年提出了一种分布式系统 共识 算法.这也是第一个被证明完备的共识算法(前提是不存在拜占庭将军问题,也就是没有恶意节 ...
- 【COM3D2Mod 制作教程(6)】实战!制作身体部分(下)
[COM3D2Mod 制作教程(6)]实战!制作身体部分(下) 有了上一章制作帽子的经验,此时做头发很多就不必再重复赘述了,但如果用完全一样的流程和方法,把头发做好后直接装扮就会导致游戏报错,这就是我 ...
- Hbase - hbase hbck介绍
原文地址:https://bbs.huaweicloud.com/blogs/353332 HBaseFsck(hbck)是一种命令行工具,可检查hbase集群的region一致性和表完整性的问题,同 ...
- AI 实践|零成本生成SEO友好的TDK落地方案
之前写过一篇文章「Google搜索成最大入口,简单谈下个人博客的SEO」,文章里介绍了网页的描述信息TDK(Title.Description和Keywords)对SEO的重要作用,尽管已经意识到了T ...
- Basics of using bash, and shell tools for covering several of the most common tasks
Basics of using bash, and shell tools for covering several of the most common tasks Introduction M ...
- linux ssh 免密登录
1.服务器端开启密钥登录模式 $ vim /etc/ssh/sshd_config # 是否允许 root 远程登录 PermitRootLogin yes # 密码登录是否打开 PasswordAu ...