python Django 学习笔记(六)—— 写一个简单blog做增删改练手
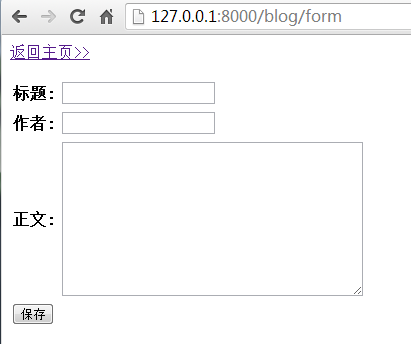
简单效果图

1,创建一个项目myblog 可参考这里
myblog/

  manage.py

  myblog/

      __init__.py

      settings.py

      urls.py

      wsgi.py
2,创建blogs app 可参考这里
myblog/myblog/blogs/

    __init__.py

    models.py

    tests.py

    views.py
- 编写models.py
#vim: set fileencoding=utf-8:

from django.db import models

# Create your models here.

class Blog(models.Model):

    title     = models.CharField(u'标题', max_length=50)

    author     = models.CharField(u'作者', max_length=10)

    content   = models.CharField(u'正文', max_length=2000)

    post_date  = models.DateTimeField(u'发布时间',auto_now_add=True)

    class Meta:

        ordering = ['-post_date']
- 模型安装(修改settings.py)
import os.path #加载模版需要导入库

#数据库连接

DATABASES = {

    'default': {

        'ENGINE': 'django.db.backends.mysql', # Add 'postgresql_psycopg2', 'mysql', 'sqlite3' or 'oracle'.

        'NAME': 'myblog',                      # Or path to database file if using sqlite3.

        # The following settings are not used with sqlite3:

        'USER': 'root',

        'PASSWORD': 'root',

        'HOST': '127.0.0.1',                      # Empty for localhost through domain sockets or '127.0.0.1' for localhost through TCP.

        'PORT': '',                      # Set to empty string for default.

    }

}

#模型安装

INSTALLED_APPS = (

    'django.contrib.auth',

    'django.contrib.contenttypes',

    'django.contrib.sessions',

    'django.contrib.sites',

    'django.contrib.messages',

    'django.contrib.staticfiles',

    # Uncomment the next line to enable the admin:

    'django.contrib.admin',

    'myblog.blogs',

    # Uncomment the next line to enable admin documentation:

    # 'django.contrib.admindocs',

)

#加载模版

TEMPLATE_DIRS = (

    # Put strings here, like "/home/html/django_templates" or "C:/www/django/templates".

    # Always use forward slashes, even on Windows.

    # Don't forget to use absolute paths, not relative paths.

     os.path.join(os.path.dirname(__file__), 'templates').replace('\\','/'),

)

MIDDLEWARE_CLASSES = (

'django.middleware.common.CommonMiddleware',

'django.contrib.sessions.middleware.SessionMiddleware',

'django.middleware.csrf.CsrfViewMiddleware',  #csrf防御,post提交跨站请求伪造

'django.contrib.auth.middleware.AuthenticationMiddleware',

'django.contrib.messages.middleware.MessageMiddleware',

# Uncomment the next line for simple clickjacking protection:

# 'django.middleware.clickjacking.XFrameOptionsMiddleware',

)

#settings.py基本修改就这些了
采用 python manage.py validate 检查模型的语法和逻辑是否正确。
没有错误则执行 python manage.py syncdb创建数据表。
3,编写forms.py
myblog/myblog/forms.py
#vim: set fileencoding=utf-8:

from django import forms

class BlogForm(forms.Form):

    title =  forms.CharField(label='标题')

    author = forms.CharField(label='作者')

    content = forms.CharField(label='正文',widget=forms.Textarea)
4,编写views.py
myblog/myblog/views.py
#vim: set fileencoding=utf-8:

from django.http import HttpResponseRedirect

from django.shortcuts import render_to_response

from myblog.blogs.models import Blog

from myblog import forms

from django.template import RequestContext

def blog_list(request):

    blog_list = Blog.objects.all()

    return render_to_response('blog_list.html',{'blog_list':blog_list})

def blog_form(request):

    if request.method == 'POST':

        form = forms.BlogForm(request.POST)

        if form.is_valid():

            data = form.cleaned_data

            if 'id' not in data:

                blog = Blog(title=data['title'],author=data['author'],content=data['content'])

                blog.save()

            else:

                blog = Blog.object.get(id=data.id)

                blog.title = data['title']

                blog.author = data['author']

                blog.content = data['content']

                blog.save()

            return HttpResponseRedirect('/blog/list')

    else:

        form = forms.BlogForm()

        return render_to_response('blog_form.html',{'form':form},context_instance=RequestContext(request))

def blog_del(request):

    errors = []

    if 'id' in request.GET:

        bid_ = request.GET['id']

        Blog.objects.filter(id=bid_).delete()

        return HttpResponseRedirect('/blog/list')

    else:

        errors.append("参数异常请刷新后重试")

        return render_to_response('blog_list.html', {'errors': errors})

def blog_view(request):

    errors = []

    if 'id' in request.GET:

        bid_ = request.GET['id']

        blog = Blog.objects.get(id=bid_)

        return render_to_response('blog_view.html',{'blog':blog})

    else:

        errors.append("参数异常请刷新后重试")

        return render_to_response("blog_list.hmtl",{'errors':errors})

def blog_edit(request):

    errors = []

    if 'id' in request.GET:

        bid_ = request.GET['id']

        blog = Blog.objects.get(id=bid_)

        form = forms.BlogForm(

                initial = {'id':blog.id,'title':blog.title,'author':blog.author,'content':blog.content}

        )

        return render_to_response('blog_form.html',{'form':form},context_instance=RequestContext(request))

    else:

        errors.append("参数异常请刷新后重试")

        return render_to_response("blog_list.html",{'errors':errors})
5,创建模版文件
myblog/myblog/templates/
blog_form.html
blog_list.html
blog_view.html
#blog_form.html
<html>
<meta http-equiv="Content-type" content="text/html; charset=utf-8">
<title>博客编辑</title>
<head></head>
<body>
{% if errors %}
<ul>
{% for error in errors %}
<li style="color: red;">{{error}}</li>
{% endfor %}
</ul>
{% endif %}
<a href="/blog/list">返回主页>></a><p/>
<form action="/blog/form" method="post">
{% csrf_token %}
<table>
{{ form.as_table }}
</table>
<input type="submit" value="保存">
</form> </body>
</html> #blog_list.html
<html>
<meta http-equiv="Content-type" content="text/html; charset=utf-8">
<title>主页-博客列表</title>
<head></head>
<body>
{% if errors %}
<ul>
{% for error in errors %}
<li style="color: red;">{{error}}</li>
{% endfor %}
</ul>
{% endif %}
<a href="/blog/form">去写博客>></a><p/>
<table cellpadding="0" cellpadding="0" width="100%" border="1" >
<tr height="20">
<td>编号</td>
<td>标题</td>
<td>作者</td>
<td>发布时间</td>
<td>操作</td>
</tr>
{% for blog in blog_list %}
<tr>
<td>{{forloop.counter}}</td>
<td><a href="/blog/view?id={{blog.id}}">{{blog.title}}</a></td>
<td>{{blog.author}}</td>
<td>{{blog.post_date | date:"Y-m-d H:i:s"}}</td>
<td><a href="/blog/edit?id={{blog.id}}">修改</a> <a href="/blog/delete?id={{blog.id}}">删除</a></td>
</tr>
{% empty %}
<tr><td colspan="4">还没有添加博客内容</td></tr>
{% endfor %} </table>
</body>
</html> #blog_view.html
<html>
<meta http-equiv="Content-type" content="text/html; charset=utf-8">
<title>{{blog.title}}</title>
<head></head>
<body>
{% if errors %}
<ul>
{% for error in errors %}
<li style="color: red;">{{error}}</li>
{% endfor %}
</ul>
{% endif %}
<a href="/blog/list">返回主页>></a><p/> <h2>{{blog.title}}</h2>
<p>作者:{{blog.author}} {{blog.post_date | date:'Y-m-d H:i:s'}}<p>
<p>{{blog.content}}</p>
</body>
</html>
6,修改urls.py
from django.conf.urls import patterns, include, url

from myblog import views

# Uncomment the next two lines to enable the admin:

# from django.contrib import admin

# admin.autodiscover()

urlpatterns = patterns('',

    # Examples:

    # url(r'^$', 'myblog.views.home', name='home'),

    # url(r'^myblog/', include('myblog.foo.urls')),

    # Uncomment the admin/doc line below to enable admin documentation:

    # url(r'^admin/doc/', include('django.contrib.admindocs.urls')),

    # Uncomment the next line to enable the admin:

    # url(r'^admin/', include(admin.site.urls)),

    url(r'^blog/list$', views.blog_list),

    url(r'^blog/form$', views.blog_form),

    url(r'^blog/delete$', views.blog_del),

    url(r'^blog/view$', views.blog_view),

    url(r'^blog/edit$', views.blog_edit),

)
7,启动开发服务器 http://127.0.0.1:8000/blog/list
8,遇到的问题
1,CSRF verification failed. Request aborted.
Forbidden (403)

CSRF verification failed. Request aborted.

Help

Reason given for failure:

    CSRF token missing or incorrect.

In general, this can occur when there is a genuine Cross Site Request Forgery, or when Django's CSRF mechanism has not been used correctly. For POST forms, you need to ensure:

Your browser is accepting cookies.

The view function uses RequestContext for the template, instead of Context.

In the template, there is a {% csrf_token %} template tag inside each POST form that targets an internal URL.

If you are not using CsrfViewMiddleware, then you must use csrf_protect on any views that use the csrf_token template tag, as well as those that accept the POST data.

You're seeing the help section of this page because you have DEBUG = True in your Django settings file. Change that to False, and only the initial error message will be displayed.

You can customize this page using the CSRF_FAILURE_VIEW setting.
解决方法:
- 在视图函数里用RequestContext类代替Context。RequestContext是Context的子类,具体可自行google。
- 在模版表单中插入 {% csrf_token%}
(本例子采用以上方法,可查看views.py 中blog_form()函数,和blog_form.html模版页面)
另外也可以注释掉settings.py
#'django.middleware.csrf.CsrfViewMiddleware', #csrf防御,post提交跨站请求伪造
2,还有个问题,就是在修改的时候怎么把对应id传入模版blog_form.html页面。暂未解决..
python Django 学习笔记(六)—— 写一个简单blog做增删改练手的更多相关文章
- Django 学习笔记之六 建立一个简单的博客应用程序
最近在学习django时建立了一个简单的博客应用程序,现在把简单的步骤说一下.本人的用的版本是python 2.7.3和django 1.10.3,Windows10系统 1.首先通过命令建立项目和a ...
- Django学习笔记--数据库中的单表操作----增删改查
1.Django数据库中的增删改查 1.添加表和字段 # 创建的表的名字为app的名称拼接类名 class User(models.Model): # id字段 自增 是主键 id = models. ...
- DuiLib学习笔记2——写一个简单的程序
我们要独立出来自己创建一个项目,在我们自己的项目上加皮肤这才是初衷.我的新建项目名为:duilibTest 在duilib根目录下面有个 Duilib入门文档.doc 我们就按这个教程开始入门 首先新 ...
- DuiLib学习笔记2.写一个简单的程序
我们要独立出来自己创建一个项目,在我们自己的项目上加皮肤这才是初衷.我的新建项目名为:duilibTest 在duilib根目录下面有个 Duilib入门文档.doc 我们就按这个教程开始入门 首先新 ...
- Mysql学习笔记(三)对表数据的增删改查。
正文内容. 这一部分是最简单的,也是最麻烦的.简单是因为其实只包括增删该插四个部分.大体上看,增加数据.删除数据.修改数据.查询数据都不麻烦啊,我们日常都是常用的.这个谁不会呢?以前在培训机构学mys ...
- Linux系统学习笔记之 1 一个简单的shell程序
不看笔记,长时间不用自己都忘了,还是得经常看看笔记啊. 一个简单的shell程序 shell结构 1.#!指定执行脚本的shell 2.#注释行 3.命令和控制结构 创建shell程序的步骤 第一步: ...
- laravel学习:php写一个简单的ioc服务管理容器
php写一个简单的ioc服务管理容器 原创: 陈晨 CoderStory 2018-01-14 最近学习laravel框架,了解到laravel核心是一个大容器,这个容器负责几乎所有服务组件的实例化以 ...
- Django 学习笔记(七)数据库基本操作(增查改删)
一.前期准备工作,创建数据库以及数据表,详情点击<Django 学习笔记(六)MySQL配置> 1.创建一个项目 2.创建一个应用 3.更改settings.py 4.更改models.p ...
- Django学习笔记(20)——BBS+Blog项目开发(4)Django如何使用Bootstrap
本文学习如何通过Django使用Bootstrap.其实在之前好几个Django项目中已经尝试使用过了Bootstrap,而且都留有学习记录,我已经大概有了一个大的框架,那么本文就从头再走一遍流程,其 ...
随机推荐
- MFC学习 标签页与属性页及各常用控件使用
参考 http://blog.csdn.net/anye3000/article/details/6700023 CTabCtrl: BOOL CTabTestDlg::OnInitDialog() ...
- Modifiers
Sometimes it is useful for a function to modify the objects it gets as parameters. In that case, the ...
- multi2sim,booksim简介
booksim是周期精确互连网络仿真器,设计用来配合"Principles and Practices of Interconnection Networks"课程教学,仿真器采用 ...
- sublime Text及package control的安装
1.下载并安装sublime Text2http://www.baidu.com/s?wd=sublime&rsv_spt=1&issp=1&f=8&rsv_bp=0& ...
- SQL 实现,如果存在就更新,如果不存在就添加
alter proc proc_DataSummary as begin begin try begin tran --PV --统计的信息存入临时表 ), CreateDate, ) ), Crea ...
- ASPXGridView用法
一.ASPXGridView外观显示 属性: Caption----列的标题( KeyFieldName----数据库字段 SEOFriendly 是否启用搜索引擎优化 Summary 指定分页汇总信 ...
- file not found while xcode archive
今天碰到一个问题,就是我像在我的ios app中添加支付宝功能,按照文档我添加好了测试也成功,但是在archive的时候就是出问题,很奇怪.最后网上查了文档,最后在stackoverflow上面找到了 ...
- ios开发错误笔记
今天的奇葩错误,最后解决方式是删除了手机上面的快捷方式,然后再clean,然后再重启了xcode.无语了,xcode也经常出些奇葩问题,真无语啊. ios技术交流群:378501081..期待你加入. ...
- 见怪不怪的typedef
typedef是C++中的一个十分重要的关键字,它有强大的功能和方法的用途.但是有时候,碰到一些用到typedef的地方却感到很奇怪了. 给个栗子尝尝: typedef void(*pFun)(voi ...
- js 全选全不选
checkAll: function () { //全选 if ($("#chk_SelectAll").is(":checked")) { ...