Android(java)学习笔记146:Bundle和Intent类使用和交互
1. Bundle 和 Intent:
Bundle只是一个信息的载体 将内部的内容以键值对组织 ,Intent负责Activity之间的交互自己是带有一个Bundle的。Intent.putExtras(Bundle bundle)直接将Intent的内部Bundle设置为参数里的bundle,Intent.getExtras()直接可以获取Intent带有的Bundle.
Intent携带了Bundle数据,Bundle是一种数据包裹(打包数据),利用Intent机制通过Bundle数据进行不同Activity通信。
两个activity之间的通讯可以通过bundle类来实现,做法就是:
(1)新建一个bundle类
Bundle mBundle = new Bundle();
(2)bundle类中加入数据(key -value的形式,另一个activity里面取数据的时候,就要用到key,找出对应的value)
mBundle.putString("Data", "data from TestBundle");
(3)新建一个intent对象,并将该bundle加入这个intent对象
Intent intent = new Intent();

intent.setClass(TestBundle.this, Target.class);

intent.putExtras(mBundle);
完整代码如下:
AndroidManifest.xml如下:
<?xml version="1.0" encoding="utf-8"?>

<manifest xmlns:android="http://schemas.android.com/apk/res/android"

      package="com.tencent.test"

      android:versionCode="1"

      android:versionName="1.0">

    <application android:icon="@drawable/icon" android:label="@string/app_name">

        <activity android:name=".TestBundle"

                  android:label="@string/app_name">

            <intent-filter>

                <action android:name="android.intent.action.MAIN" />

                <category android:name="android.intent.category.LAUNCHER" />

            </intent-filter>

        </activity>

    <activity android:name=".Target"></activity>

    </application>

    <uses-sdk android:minSdkVersion="7" />

</manifest>
两个类如下:intent从TestBundle类发起,到Target类。
类1:TestBundle类:
import android.app.Activity;

import android.content.Intent;

import android.os.Bundle;

import android.view.View;

import android.view.View.OnClickListener;

import android.widget.Button;

public class TestBundle extends Activity {

    private Button button1;

    private OnClickListener cl;

    public void onCreate(Bundle savedInstanceState) {

        super.onCreate(savedInstanceState);

        setContentView(R.layout.main);

        button1 = (Button) findViewById(R.id.button1);

        cl = new OnClickListener(){

            @Override

            public void onClick(View arg0) {

                // TODO Auto-generated method stub

                Intent intent = new Intent();

                intent.setClass(TestBundle.this, Target.class);

                Bundle mBundle = new Bundle();

                mBundle.putString("Data", "data from TestBundle");//压入数据

                intent.putExtras(mBundle);

                startActivity(intent);

            }

        };

        button1.setOnClickListener(cl);

    }

}
类2: Target
import android.app.Activity;

import android.os.Bundle;

public class Target extends Activity{

    public void onCreate(Bundle savedInstanceState) {

        super.onCreate(savedInstanceState);

        setContentView(R.layout.target);

        <span style="color:#ff6600;">Bundle bundle = getIntent().getExtras();   </span> //得到传过来的bundle

        String data = bundle.getString("Data");//读出数据

        setTitle(data);

    }

}
布局文件main.xml:
<?xml version="1.0" encoding="utf-8"?>

<LinearLayout xmlns:android="http://schemas.android.com/apk/res/android"

    android:orientation="vertical"

    android:layout_width="fill_parent"

    android:layout_height="fill_parent"

    >

<TextView

    android:layout_width="fill_parent"

    android:layout_height="wrap_content"

    android:text="@string/hello"

    />

<Button

    android:layout_width="fill_parent"

    android:layout_height="wrap_content"

    android:text="@string/button"

    android:id = "@+id/button1"

    />

</LinearLayout>
target.xml:
<?xml version="1.0" encoding="utf-8"?>

<LinearLayout xmlns:android="http://schemas.android.com/apk/res/android"

    android:orientation="vertical"

    android:layout_width="fill_parent"

    android:layout_height="fill_parent"

    >

<TextView

    android:layout_width="fill_parent"

    android:layout_height="wrap_content"

    android:text="@string/target"

    />

</LinearLayout>
String.xml:
<?xml version="1.0" encoding="utf-8"?>
<resources>
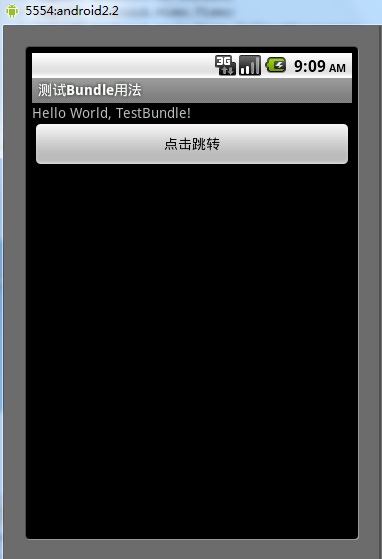
<string name="hello">Hello World, TestBundle!</string>
<string name="app_name">测试Bundle用法</string>
<string name="button">点击跳转</string>
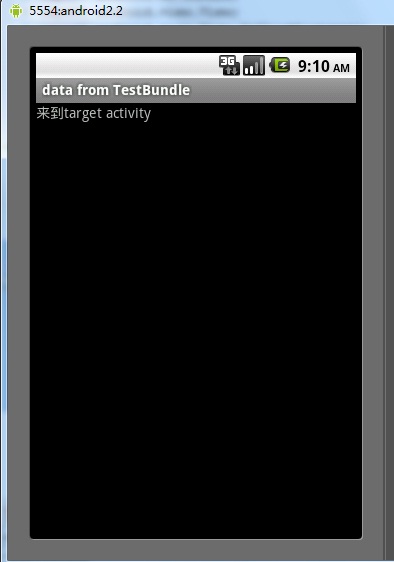
<string name="target">来到target activity</string>
</resources>
结果:
跳转结果:
Android(java)学习笔记146:Bundle和Intent类使用和交互的更多相关文章
- Android(java)学习笔记89:Bundle和Intent类使用和交互
1. Bundle 和 Intent: Bundle只是一个信息的载体 将内部的内容以键值对组织 ,Intent负责Activity之间的交互自己是带有一个Bundle的.Intent.putE ...
- 疯狂java学习笔记之面向对象(一) - 定义类、方法、构造器
Java面向对象 1.定义类 2.创建对象.调用方法 类和对象: 某一类对象的概念定义. 比如:人类 - 抽象出来的概念(不特指某个人) 对象 - 在类的概念下产生的一个实例,它就是一个对象了. ja ...
- java学习笔记(三):类和对象
创建对象 构造器 每一个类都有一个构造器. 如果我们不单独为一个类编写构造器那么 Java 的编译器将会给这个类建立一个默认的构造器. 每当一个新的对象被创建,至少一个构造器将会被调用. 构造器的一 ...
- Java学习笔记(七)——获取类中方法的信息,java的LinkedList
[前面的话] 在实际项目中学习知识总是最快和最有效的,既能够较好的掌握知识,又能够做出点东西,还是简单的知识总结,最近一直在总结笔记,写的东西还是比较水,希望慢慢可以写出一些干货. 学习过程中的小知识 ...
- java学习笔记37(sql工具类:JDBCUtils)
在之前的内容中,我们发现,当我们执行一条语句时,每新建一个方法,就要重新连接一次数据库,代码重复率很高,那么能不能把这些重复代码封装成一个类呢,我们学习方法时,就学习到方法就是为了提高代码的利用率,所 ...
- java学习笔记(五):公共类
什么是公共类,公共类就是和源文件名同名的类,举例来说:类的名称是 public class aaa{},那么源文件就应该是 aaa.java. 每个源文件中只能有一个公共类. 每个源文件可以有很多非公 ...
- Java学习笔记49(DBUtils工具类二)
上一篇文章是我们自己模拟的DBUtils工具类,其实有开发好的工具类 这里使用commons-dbutils-1.6.jar 事务的简单介绍: 在数据库中应用事务处理案例:转账案例 张三和李四都有有自 ...
- Java学习笔记48(DBUtils工具类一)
上一篇的例子可以明显看出,在增删改查的时候,很多的代码都是重复的, 那么,是否可以将增删改查封装成一个类,方便使用者 package demo; /* * 实现JDBC的工具类 * 定义方法,直接返回 ...
- Java学习笔记_22_Set接口的实现类
22.Set接口的实现类: Set接口存放的元素是无序的且不包括反复元素. 1>实现类HashSet: HashSet类依据元素的哈希码进行存放,取出时也能够依据哈希码高速找到.HashSet不 ...
随机推荐
- Binary to Text (ASCII) Conversion
Binary to Text (ASCII) Conversion Description: Write a function that takes in a binary string and re ...
- BZOJ_1013_[JSOI2008]_球形空间产生器_(高斯消元)
描述 http://www.lydsy.com/JudgeOnline/problem.php?id=1013 n维空间,给出球上n+1个点的n维坐标,求球心坐标. 提示:给出两个定义:1. 球心:到 ...
- activemq-5.13 在windows下部署应用
一.下载windows压缩包 解压并双击F:\server\activemq-5.13.2\bin\win64\activemq.bat 启动,32位的系统为F:\server\activemq-5. ...
- ruby编程语言-学习笔记2(第4章 表达式和操作符)
对属性和数组元素的赋值 o.m + = 1 ===>o.m = (o.m()+ 1) # 对 o.m()这个方法的结果+1 对数组元素的赋值也是通过 方法调用来完成. 0.[] = 1 == ...
- 使用Flashbuilder/Flashbuilder-plugins搭建Flex工程每日构建(自动化构建)的方法
前段时间研究flex工程自动编译的时候,遇到了阻碍,就放下了,直到今天每日构建的问题又一次给项目组带来了麻烦,于是我彻底愤怒了. 最后,我的怒火没有白费,写出来以发泄情绪. [基本原理]: adobe ...
- 【CSS3】Advanced10:Gradient
1.background:linear-gradient(20deg/(to) bottom right,orange,red,hsl(60,100%,50%)); 2.-webkit-chrome/ ...
- 【CSS3】Advanced5:At Rules:@import, @media, and @font-face
1.@import bolt another stylesheet onto your existing one. @import url(**.css); must be placed at the ...
- 如何在Azure上动态配置IP地址
微软最近对 Windows Azure 网站进行了升级,并启用了IIS8的动态 IP 限制模块.现在,开发人员可以为其网站启用并配置动态 IP 限制功能(或简称 DIPR). 可以通过以下链接查看此 ...
- PHP邮箱验证是否有效
今天一开电脑发现有人在我的主页给我乱留言,所以加了一个邮箱验证. 网上发现一个很巧妙的算法,分享一下: function checkmail($email){ $exp = "^[a-z'0 ...
- HUD-4602 Partition 排列
题目链接:http://acm.hdu.edu.cn/showproblem.php?pid=4602 把n等效为排成一列的n个点,然后就是取出其中连续的k个点.分两种情况,一种是不包含两端,2^( ...