Spring4学习回顾之路05—自动装配,Bean的继承,依赖和作用域
自动装配
xml配置里的Bean的自动装配,Spring IOC容器可以自动装配Bean,仅仅需要做的是在<bean>标签里的autowire属性里指定自动装配的模式。
①byType(根据类型自动装配):若IOC容器中有多个与目标Bean类型一致的Bean,在这种情况下,Spring无法判断哪个Bean与之匹配,所以不能执行自动装配。
②byName(根据名称自动装配):必须将目标Bean的名称和属性名设置的完全相同。
③constructor(通过构造器自动装配, 不推荐):当Bean中存在多个构造器时,此种自动装配方式会很复杂。
建立三个类测试,Person.java,Address.java,Car.java
Person.java
package com.lql.spring02;

/**

 * @author: lql

 * @date: 2019.10.12

 * Description:

 * Created with IntelliJ IDEA

 */

public class Person {

    private String name;

    private Address address;

    private Car car;

    @Override

    public String toString() {

        return "Person{" +

                "name='" + name + '\'' +

                ", address=" + address +

                ", car=" + car +

                '}';

    }

    public String getName() {

        return name;

    }

    public void setName(String name) {

        this.name = name;

    }

    public Address getAddress() {

        return address;

    }

    public void setAddress(Address address) {

        this.address = address;

    }

    public Car getCar() {

        return car;

    }

    public void setCar(Car car) {

        this.car = car;

    }

}
Address.java
package com.lql.spring02;

/**

 * @author: lql

 * @date: 2019.10.12

 * Description:

 * Created with IntelliJ IDEA

 */

public class Address {

    private String city;

    private String street;

    @Override

    public String toString() {

        return "Address{" +

                "city='" + city + '\'' +

                ", street='" + street + '\'' +

                '}';

    }

    public String getCity() {

        return city;

    }

    public void setCity(String city) {

        this.city = city;

    }

    public String getStreet() {

        return street;

    }

    public void setStreet(String street) {

        this.street = street;

    }

}
Car.java
package com.lql.spring02;

/**

 * @author: lql

 * @date: 2019.10.12

 * Description:

 * Created with IntelliJ IDEA

 */

public class Car {

    private String brand;

    private double price;

    @Override

    public String toString() {

        return "Car{" +

                "brand='" + brand + '\'' +

                ", price=" + price +

                '}';

    }

    public String getBrand() {

        return brand;

    }

    public void setBrand(String brand) {

        this.brand = brand;

    }

    public double getPrice() {

        return price;

    }

    public void setPrice(double price) {

        this.price = price;

    }

}
重新建立配置文件autowire.xml,先看看原始的配置如下。
<?xml version="1.0" encoding="UTF-8"?>

<beans xmlns="http://www.springframework.org/schema/beans"

       xmlns:xsi="http://www.w3.org/2001/XMLSchema-instance"

       xmlns:P="http://www.springframework.org/schema/p"

       xsi:schemaLocation="http://www.springframework.org/schema/beans http://www.springframework.org/schema/beans/spring-beans.xsd">

    <bean id="address" class="com.lql.spring02.Address" P:city="海淀" P:street="中关村大街"></bean>

    <bean id="car" class="com.lql.spring02.Car" P:brand="凯迪拉克" P:price="9999.99"></bean>

    <bean id="person" class="com.lql.spring02.Person" P:name="lql" P:address-ref="address" P:car-ref="car"></bean>

</beans>
测试类:
package com.lql.spring02;

import org.springframework.context.ApplicationContext;

import org.springframework.context.support.ClassPathXmlApplicationContext;

/**

 * @author: lql

 * @date: 2019.10.12

 * Description:

 */

public class Test {

    public static void main(String[] args) {

        ApplicationContext app = new ClassPathXmlApplicationContext("autowire.xml");

        Person person = app.getBean("person", Person.class);

        System.out.println(person);//Person{name='lql', address=Address{city='海淀', street='中关村大街'}, car=Car{brand='凯迪拉克', price=9999.99}}

    }

}
而自动装配则需要修改配置,如下:
<?xml version="1.0" encoding="UTF-8"?>
<beans xmlns="http://www.springframework.org/schema/beans"
xmlns:xsi="http://www.w3.org/2001/XMLSchema-instance"
xmlns:P="http://www.springframework.org/schema/p"
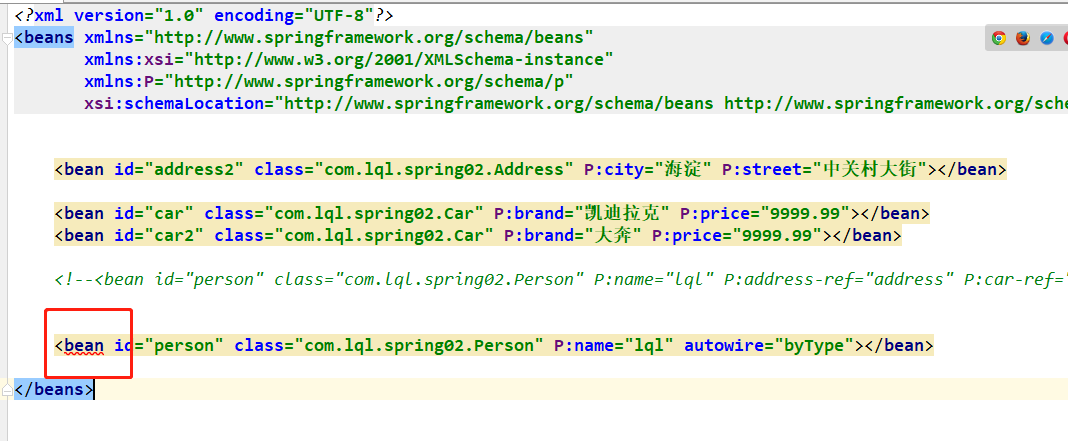
xsi:schemaLocation="http://www.springframework.org/schema/beans http://www.springframework.org/schema/beans/spring-beans.xsd"> <bean id="address" class="com.lql.spring02.Address" P:city="海淀" P:street="中关村大街"></bean> <bean id="car" class="com.lql.spring02.Car" P:brand="凯迪拉克" P:price="9999.99"></bean> <!--<bean id="person" class="com.lql.spring02.Person" P:name="lql" P:address-ref="address" P:car-ref="car"></bean>--> <bean id="person" class="com.lql.spring02.Person" P:name="lql" autowire="byName"></bean> </beans>
结果也是一样的,那么autowire=byName是指什么呢?看图

图中箭头必须保持一致,这就是ByName,如果更改了id,比如把car改成了car2,那么讲不会装配,测试则输出car=null;换一句话说,byName就是根据Bean的名字和当前Bean的setter方法的属性名进行自动装配。
但是我就想把原来的id=car叫id=car2,又不想改setter(),怎么办呢,那这时候就有了byType:根据Bean的类型和当前bean属性的类型进行自动在装配;
<?xml version="1.0" encoding="UTF-8"?>

<beans xmlns="http://www.springframework.org/schema/beans"

       xmlns:xsi="http://www.w3.org/2001/XMLSchema-instance"

       xmlns:P="http://www.springframework.org/schema/p"

       xsi:schemaLocation="http://www.springframework.org/schema/beans http://www.springframework.org/schema/beans/spring-beans.xsd">

    <bean id="address" class="com.lql.spring02.Address" P:city="海淀" P:street="中关村大街"></bean>

    <bean id="car2" class="com.lql.spring02.Car" P:brand="凯迪拉克" P:price="9999.99"></bean>

    <!--<bean id="person" class="com.lql.spring02.Person" P:name="lql" P:address-ref="address" P:car-ref="car"></bean>-->

    <bean id="person" class="com.lql.spring02.Person" P:name="lql" autowire="byType"></bean>

</beans>
结果也是没问题的,但是byType有个问题,就是如果有多个同类型的Bean,那么就会报错。“expected single matching bean but found 2”,新版的idea直接报语法错误。
XML自动装配的缺点:
首先不够灵活,要么是byName,要么是byType,两者不能同时使用,缺少灵活性。其次autowire是定义在bean里的,意味着要用就全部自动装配,没有一半装配另一半不装配这样的局限性。
Bean的继承
Spring允许继承bean的配置,子Bean从父Bean中继承配置,包括Bean的属性配置,子Bean也可以覆盖继承过来的配置。并不是所有的属性都会被继承,比如autowire,abstract等,也可以忽略父Bean的class属性,让子Bean指定自己的Bean,而共享相同的属性配置,但此时的abstract必须为true,父Bean若设置abstract属性为true,则Spring不会实例化这个Bean.
简单的演示配置如下:
<?xml version="1.0" encoding="UTF-8"?>

<beans xmlns="http://www.springframework.org/schema/beans"

       xmlns:xsi="http://www.w3.org/2001/XMLSchema-instance"

       xmlns:P="http://www.springframework.org/schema/p"

       xsi:schemaLocation="http://www.springframework.org/schema/beans http://www.springframework.org/schema/beans/spring-beans.xsd">

    <bean id="car" class="com.lql.spring02.Car" P:brand="凯迪拉克" P:price="9999.99"></bean>

    <bean id="car2"  P:brand="宝马" parent="car"></bean>

</bean>
如果想要继承Bean,则只需要在子Bean中使用parent属性指定即可,测试输入如下:
package com.lql.spring02;

import org.springframework.context.ApplicationContext;

import org.springframework.context.support.ClassPathXmlApplicationContext;

/**

 * @author: lql

 * @date: 2019.10.12

 * Description:

 */

public class Test {

    public static void main(String[] args) {

        ApplicationContext app = new ClassPathXmlApplicationContext("autowire.xml");

        Car car = app.getBean("car", Car.class);

        System.out.println(car);

        Car car2 = app.getBean("car2", Car.class);

        System.out.println(car2);

//Car{brand='凯迪拉克', price=9999.99}

//Car{brand='宝马', price=9999.99}

    }

}
Bean的依赖
Spring允许用户通过depends-on属性设定Bean前置依赖的Bean,前置依赖的Bean会在本Bean实例化之前创建好,如果前置依赖多个Bean,则可以通过逗号,空格方式配置Bean的名称。配置如下:
<?xml version="1.0" encoding="UTF-8"?>

<beans xmlns="http://www.springframework.org/schema/beans"

       xmlns:xsi="http://www.w3.org/2001/XMLSchema-instance"

       xmlns:P="http://www.springframework.org/schema/p"

       xsi:schemaLocation="http://www.springframework.org/schema/beans http://www.springframework.org/schema/beans/spring-beans.xsd">

    <bean id="address2" class="com.lql.spring02.Address" P:city="海淀" P:street="中关村大街"></bean>

    <bean id="car" class="com.lql.spring02.Car" P:brand="凯迪拉克" P:price="9999.99"></bean>

    <!--<bean id="person" class="com.lql.spring02.Person" P:name="lql" P:address-ref="address" P:car-ref="car"></bean>-->

    <bean id="person" class="com.lql.spring02.Person" P:name="lql" depends-on="address2"></bean>

</beans>
Bean的作用域
singleton(单例)、prototype(多例)、request(HTTP请求)、session(会话)、global-session(全局会话)。
singleton和prototype作用域是Spring中经常用到的,简单来说,singleton作用域的Bean,IOC容器每次都返回同一个实例,而prototype作用域的Bean,IOC容器会每次产生一个新的实例。(Spring默认的作用域是singleton)
新建Student.java
package com.lql.spring03;

/**

 * @author: lql

 * @date: 2019.10.12

 * Description:

 * Created with IntelliJ IDEA

 */

public class Student {

    private String name;

    private int age;

    public String getName() {

        return name;

    }

    public void setName(String name) {

        this.name = name;

    }

    public int getAge() {

        return age;

    }

    public void setAge(int age) {

        this.age = age;

    }

}
配置文件如下:此时的<bean>中的scope的值是prototype.
<?xml version="1.0" encoding="UTF-8"?>

<beans xmlns="http://www.springframework.org/schema/beans"

       xmlns:xsi="http://www.w3.org/2001/XMLSchema-instance"

       xmlns:p="http://www.springframework.org/schema/p"

       xsi:schemaLocation="http://www.springframework.org/schema/beans http://www.springframework.org/schema/beans/spring-beans.xsd">

    <bean id="student" class="com.lql.spring03.Student" p:name="lql" p:age="17" scope="prototype"></bean>

</beans>
测试类:
package com.lql.spring03;

import org.springframework.context.ApplicationContext;

import org.springframework.context.support.ClassPathXmlApplicationContext;

/**

 * @author: lql

 * @date: 2019.10.12

 * Description:

 * Created with IntelliJ IDEA

 */

public class Test {

    public static void main(String[] args) {

        ApplicationContext app = new ClassPathXmlApplicationContext("scope.xml");

        Student student = app.getBean("student", Student.class);

        Student student1 = app.getBean("student", Student.class);

        System.out.println(student==student1);     //false

    }

}
内存地址不一样,所以是两个对象。当换掉scope="singleton"或直接不写就是true
<?xml version="1.0" encoding="UTF-8"?>

<beans xmlns="http://www.springframework.org/schema/beans"

       xmlns:xsi="http://www.w3.org/2001/XMLSchema-instance"

       xmlns:p="http://www.springframework.org/schema/p"

       xsi:schemaLocation="http://www.springframework.org/schema/beans http://www.springframework.org/schema/beans/spring-beans.xsd">

    <bean id="student" class="com.lql.spring03.Student" p:name="lql" p:age="17" scope="singleton"></bean>

</beans>
Spring4学习回顾之路05—自动装配,Bean的继承,依赖和作用域的更多相关文章
- Spring4学习回顾之路03—XML配置Bean ,依赖注入的方式
配置Bean的形式可以基于XML文件的方式,也可以基于注解的方式,而Bean的配置方式可以通过全类名(反射),通过工厂方式和FactoryBean. XML形式 <?xml version=&q ...
- Spring4学习回顾之路10-Spring4.x新特性:泛型依赖注入
泛型依赖注入:Spring 4.x中可以为子类注入子类对应的泛型类型的成员变量的引用. 话语太过抽象,直接看代码案例,依次建立如下代码: User.java package com.lql.sprin ...
- Spring4学习回顾之路06- IOC容器中Bean的生命周期方法
SpringIOC容器可以管理Bean的生命周期,Spring允许在Bean生命周期的特定点执行特定的任务! Spring IOC容器对Bean的生命周期进行管理的过程: -通过构造器或者工厂方法创建 ...
- Spring4学习回顾之路04—引用其他Bean,集合数据注入,内部Bean
引用其他Bean 组件应用程序的Bean经常需要相互协作以完成应用程序的功能,所以要求Bean能够相互访问,就必须在Bean配置文件中指定Bean的引用.在Bean的配置文件中可以用过<ref& ...
- Spring4学习回顾之路09-基于注解的方式配置bean
一:基于注解配置Bean 首先介绍下组件扫描(component scanning): Spring能够从classpath下自动扫描,侦测和实例化具有特定注解的组件. 包括: -@Component ...
- 峰Spring4学习(4)spring自动装配
一.自动装配: Model类: People.java: package com.cy.entity; public class People { private int id; private St ...
- Spring4学习回顾之路11-AOP
Srping的核心除了之前讲到的IOC/DI之外,还有一个AOP(Aspect Oriented Programming:面向切面编程):通过预编译方式和运行期动态代理实现程序功能的统一维护的一种技术 ...
- Spring4学习回顾之路01—HelloWorld
以前公司一直使用的是spring3.0,最近一段时间开始用了4.0,官网上都已经有了5.0,但是很多知识点已经忘了差不多了,趁现在项目不忙写写随笔,一来回顾自己的知识点,二来如果能帮助比我还小白的小白 ...
- Spring4学习回顾之路12-事务
事务:事务就是一系列的动作,它们被当做一个单独的工作单元,这些动作要么全部完成,要么全部不起作用:事务管理是企业级应用程序开发中必不可少的技术,用来确保数据的完整性和一致性.事务的四个关键属性(ACI ...
随机推荐
- Django基础之CBV和FBV
我们之前写过的是基于函数的view,就叫FBV.还可以把view写成基于类的. 1. FBV版 def add_class(request): if request.method == "P ...
- 【转】HDU 6194 string string string (2017沈阳网赛-后缀数组)
转自:http://blog.csdn.net/aozil_yang/article/details/77929216 题意: 告诉你一个字符串和k , 求这个字符串中有多少不同的子串恰好出现了k 次 ...
- C++11正则表达式初探
C++正则表达式 在此之前都没有了解过C++的正则,不过现在大多数赛事都支持C++11了,因此有必要学习一下,用于快速A签到题. 所在头文件 #include<regex> 正则表达式语法 ...
- Spring Cloud Eureka(三):认识Eureka Server 与 Eureka Client
Spring Cloud Netflix 是什么 This project provides Netflix OSS integrations for Spring Boot apps through ...
- 苹果系统OSX中Automator批量重命名
Automator,看字面意思就无比强大,[自动机器].有什么能比自动还让人着魔? 答案是没有✔ 如果你用的是mac,如果你有一堆文件要重新整理命名,如果你还在Goole什么"批量重命名软件 ...
- java.util.Date和java.sql.Date的区别和相互转化 (转)
java.util.Date和java.sql.Date的区别及应用 java.util.Date 就是在除了SQL语句的情况下面使用 java.sql.Date 是针对SQL语句使用的,它只包含 ...
- CISCO实验记录五:静态路由与RIP动态路由
一.实验要求 1.创建设备间静态路由 2.检查三层连通性 3.清空路由,使用RIP创建动态路由 4.检查路由表 二.实验操作 1.创建设备静态路由 #iip route 192.168.1.0 255 ...
- 20191121-5 Scrum立会报告+燃尽图 01
此作业要求参见https://edu.cnblogs.com/campus/nenu/2019fall/homework/10065 一.小组情况 组长:贺敬文组员:彭思雨 王志文 位军营 徐丽君队名 ...
- flutter常用内置动画组件
文章目录 AnimatedContainer AnimatedCrossFade Hero AnimatedBuilder DecoratedBoxTransition FadeTransition ...
- [Tex学习笔记]章节用罗马字母编号
微信扫描如上二维码关注跟锦数学微信公众账号. 详情请见那里.